

Pizza is one of our favorite meals to prepare. Most of the time we make thin crust pizza from a recipe John found in the Pizza Bible. We bake it on our pizza stone in the oven after preheating it for nearly an hour, and at the highest temperature possible in a standard oven, which is usually 550 degrees (and the pizza is excellent). I found this cast iron pan pizza recipe at King Arthur’s Baking site and I thought I would give it a try for something different. Wow! The rave reviews on their website were spot on. The delightful airy, yet slightly chewy crust is superb. I love everything about this pizza. If you have a cast iron pan, make this pizza. You will love it.

The crust is divine, soft, airy, with the perfect texture.

Use your favorite toppings but keep it simple. You don’t want to weigh the dough down with too many ingredients.

Look at this beautiful puffy dough.

We added the recommended amount of cheese plus a bit of pepperoni, which I have to admit, I can’t resist.

For this pizza, the sauce is added on top of the cheese. This ensures that the crust bakes up beautifully without being soggy.


The last topping is a bit more cheese. The pizza is then baked into a gorgeous pie.


- 2 cups (240g) King Arthur unbleached all-purpose flour
- ¾ teaspoon salt (7g)
- ½ teaspoon instant yeast
- ¾ c (170g) water
- 2 tablespoons olive oil, equally divided (13g each)
- 6 ounces (170g) mozzarella, grated
- ½ cup (113g) pizza sauce
- 25 small slices of pepperoni (I render my pepperoni in the toaster oven for 3 minutes before adding to the pizza)
- freshly grated Parmesan cheese, fresh julienned basil, fresh or dried oregano, red pepper flakes for sprinkling on the top after baking, optional
- Special Equipment: 9" - 10" cast iron pan
- Weigh your flour; or measure it by gently spooning it into a cup, then sweeping off any excess. Place flour, salt, yeast, water, and 1 tablespoon of the olive oil in a bowl of a stand mixer or other medium-large bowl. Stir everything together to make a shaggy, sticky mass of dough with no dry patches of flour. This should take 30-45 seconds in a mixer using the beater paddle or about 1 minute by hand, using a spoon or spatula. Scrape down the sides of the bowl to gather the dough into a rough ball; cover the bowl.
- After 5 minutes, uncover the bowl and reach a bowl scraper or wet hand down between the side of the bowl and dough, as though you were going to lift the dough out of the bowl. Instead of lifting, stretch the bottom of the dough up and over its top. Repeat three more times, turning the bowl 90 degrees each time. This process of four stretches, which takes the place of kneading, is called "stretch and fold."
- Re-cover the bowl and after 5 minutes do another fold. Wait 5 minutes and repeat; then another 5 minutes, and do a fourth and final fold. Cover the bowl and let the dough rest for 40 minutes. Then refrigerate it for a minimum of 12 hours, or up to 72 hours. It will rise slowly as it chills, developing flavor.
- About 3 hours before you want to serve your pizza, prepare your pan. Pour the remaining 1 tablespoon of olive oil into a well-seasoned cast iron skillet that is 10" - 11" diameter across the top, and about 9" across the bottom. Heavy, dark cast iron will give you a superb crust; but if you don't have it, use another oven-safe heavy bottom skillet similar in size. You can use a 10" round cake pan or 9" square pan. Tilt the pan to spread the oil across the bottom, and use your fingers to spread some oil up the edges of the pan.
- Transfer the dough to the pan and turn it once to coat both sides with the oil. After coating the dough in oil, press the dough to the edges of the pan, dimpling it using the tips of your fingers in the process. The dough may start to resist and shrink back; that's OK, just cover it and let it rest for 10-15 minutes, then repeat the dimpling/pressing. At this point, the dough should reach the edges of the pan. If it doesn't, give it one more 10-15 minute rest before dimpling/pressing a third and final time. Cover the crust and let it rise for 2 hours at room temperature. The fully risen dough will look soft and pillowy and will jiggle when you gently shake the pan. Don't let the dough rise much longer or it may spill over the pan's edge when baking.
- About 30 minutes before baking, place one rack at the bottom of the oven and one toward the top (about 4" - 5" from the top heating element). If you have a pizza stone, place it on the bottom rack. Preheat the oven to 450 degrees.
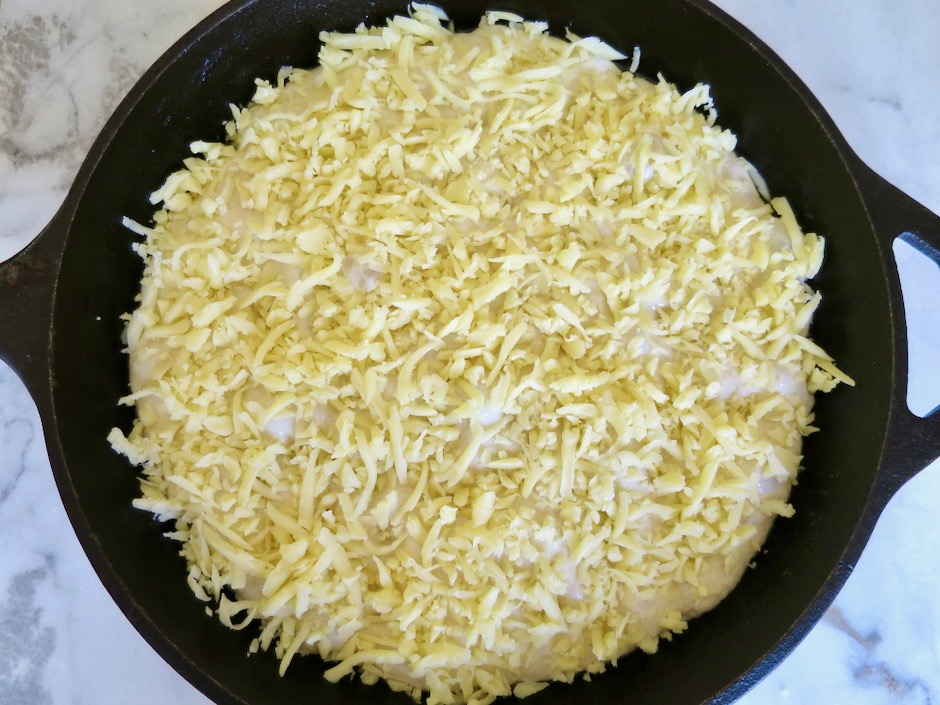
- When you are ready to bake the pizza, sprinkle about three-quarters of the mozzarella evenly over the crust, making sure to cover the entire crust leaving no bare dough showing. This will yield caramelized edges that are delicious. Dollop small spoonfuls of the sauce over the cheese. You may choose to use less than the ½ cup of sauce, using ⅓ cup instead. Scatter pepperoni slices evenly over the pizza. Sprinkle the remaining cheese over the top.
- Place the cast iron pan on your pizza stone if using, otherwise bake the pizza on the bottom rack of the oven for 18 - 20 minutes, until the cheese is bubbling and the bottom and edges of the crust are a rich golden brown (use a spatula to check the bottom). If the bottom is brown but the top needs more time, transfer the pizza to the top rack and bake for 2 to 4 minutes. On the other hand, if the top seems fine but the bottom needs a few more minutes, leave the pizza on the bottom rack for another 2 to 4 minutes. Home ovens can vary a lot, so use visual cues and your own preferences to gauge when you have achieved the perfect bake.
- Remove pizza from the oven and place on a heatproof surface. Carefully run a table knife or spatula between the edge of the pizza and side of the pan to prevent the cheese from sticking as it cools. Let the pizza cool briefly, transfer to a cooling rack or cutting surface. This will prevent the crust from becoming soggy.
- Slice the pizza into thick wedges and serve the pizza anywhere from medium-hot to warm. Pass around the Parmesan, julienned basil, dried oregano and red pepper flakes.