Browsing Category

Vegan

Dinner, Japanese, Lactose Free, Pasta, Pickles, Recipes, Tofu, Vegan, Vegetarian

Tofu Ramen with Cucumbers & Chili Crisp

February 26, 2022

Tofu Ramen with Cucumbers and Chili Crisp

This ramen dish is one of our new favorites.  It has tons of umami flavor that makes this dish a real stand out.  The chili crisp adds a nice hint of heat and is used in the sauce and later spooned over the noodles before serving.  This happens to be a vegan recipe which means that everyone can try it out.  Surprise!  The tofu is not bland, watery or tasteless in this dish.  Even non-vegans will find it delicious.

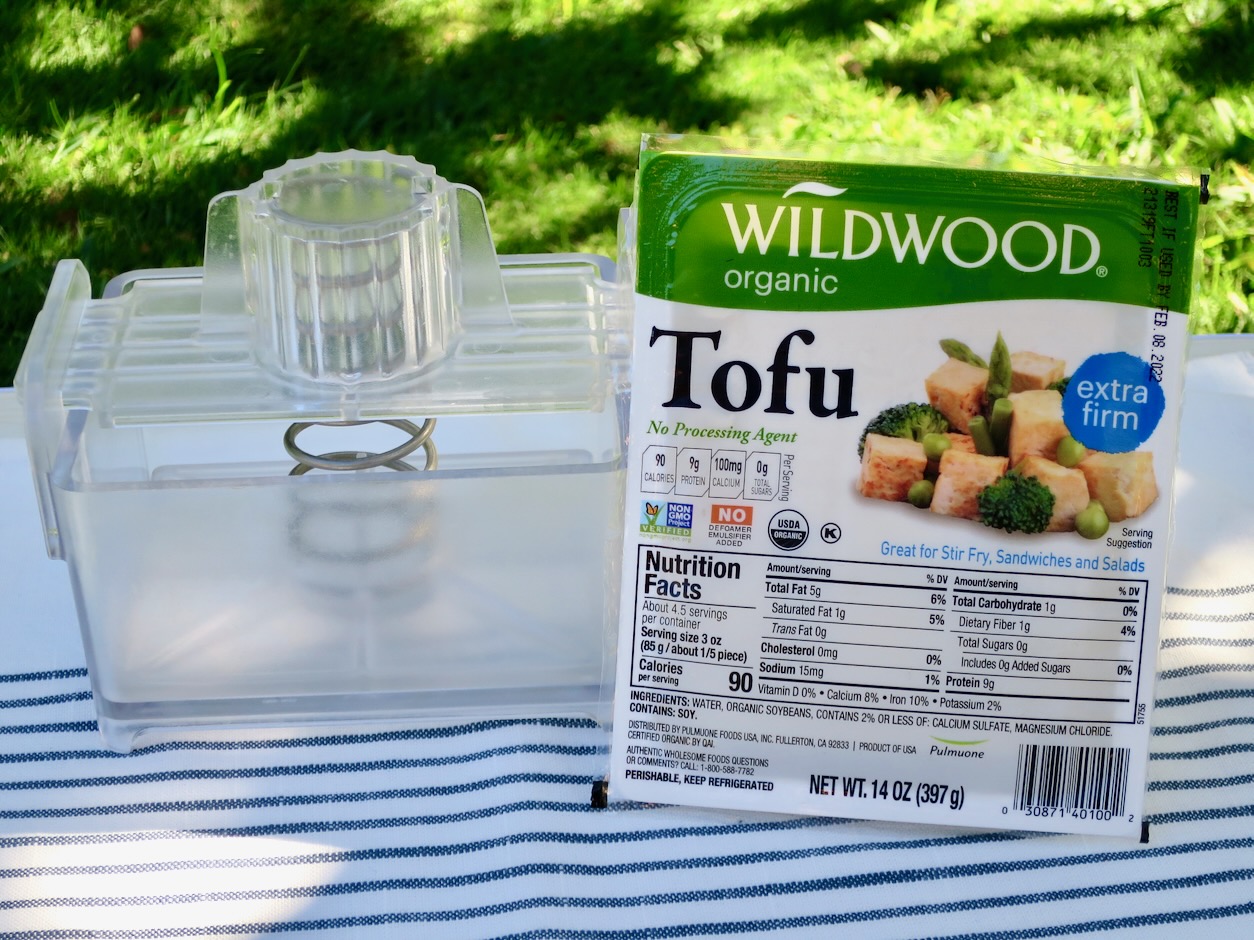
Wildwood Tofu and TofuXpress

I highly recommend the TofuXpress tofu press for those of you who eat and cook tofu often.  In fact even if you cook with tofu occasionally, this handy kitchen gadget is a dream come true.  You may shy away from buying it because of the price (online from $42.95) but just go for it.  I have had mine for more than 10 years and never regret purchasing it.  The water is pressed out of the tofu quickly so that your tofu is ready to use in 15-30 minutes.  For this dish I suggest using extra firm tofu such as WildWood Organic.

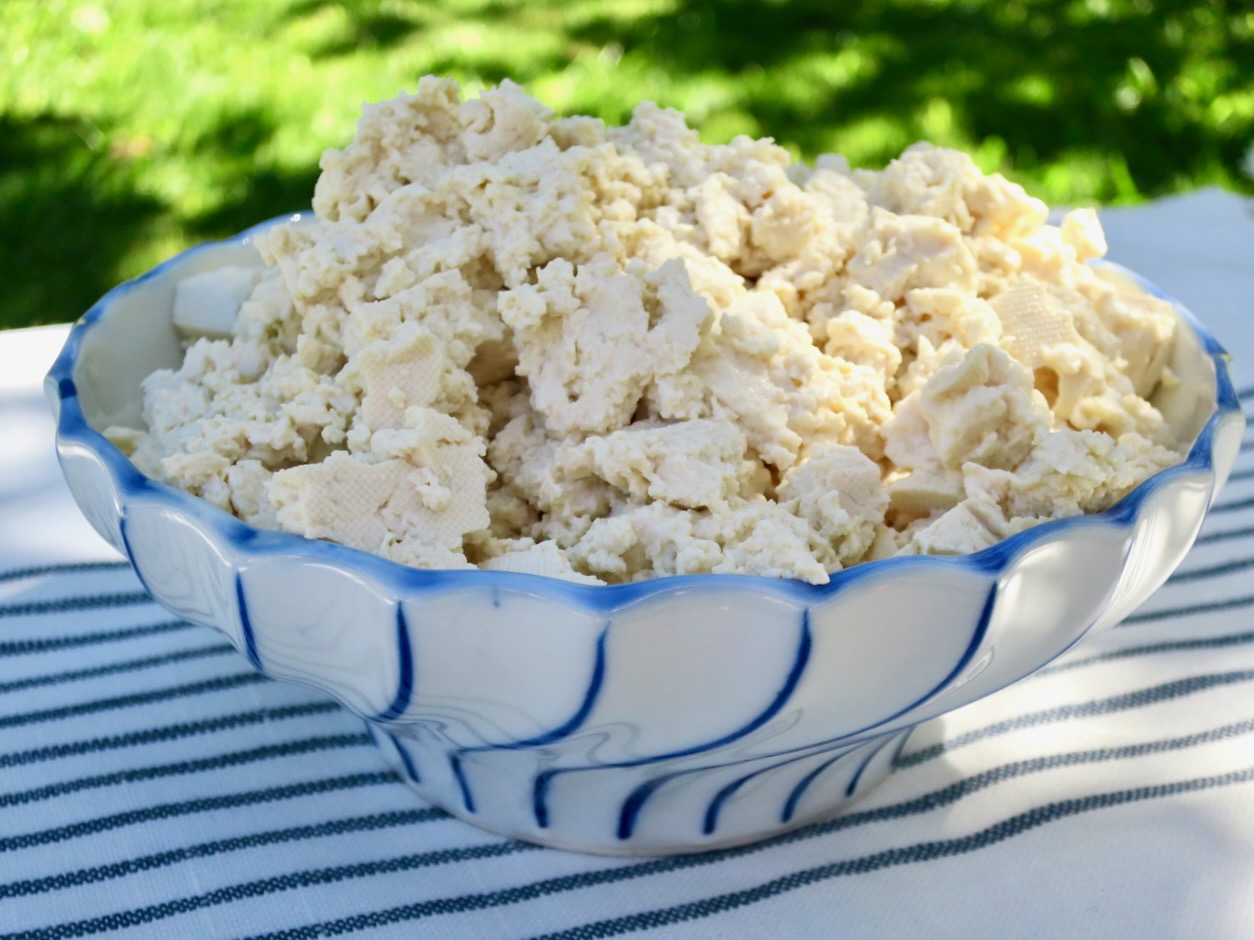
Crumbled Tofu

Once the water is pressed out, the tofu is crumbled into small pieces before pan frying until crisp.

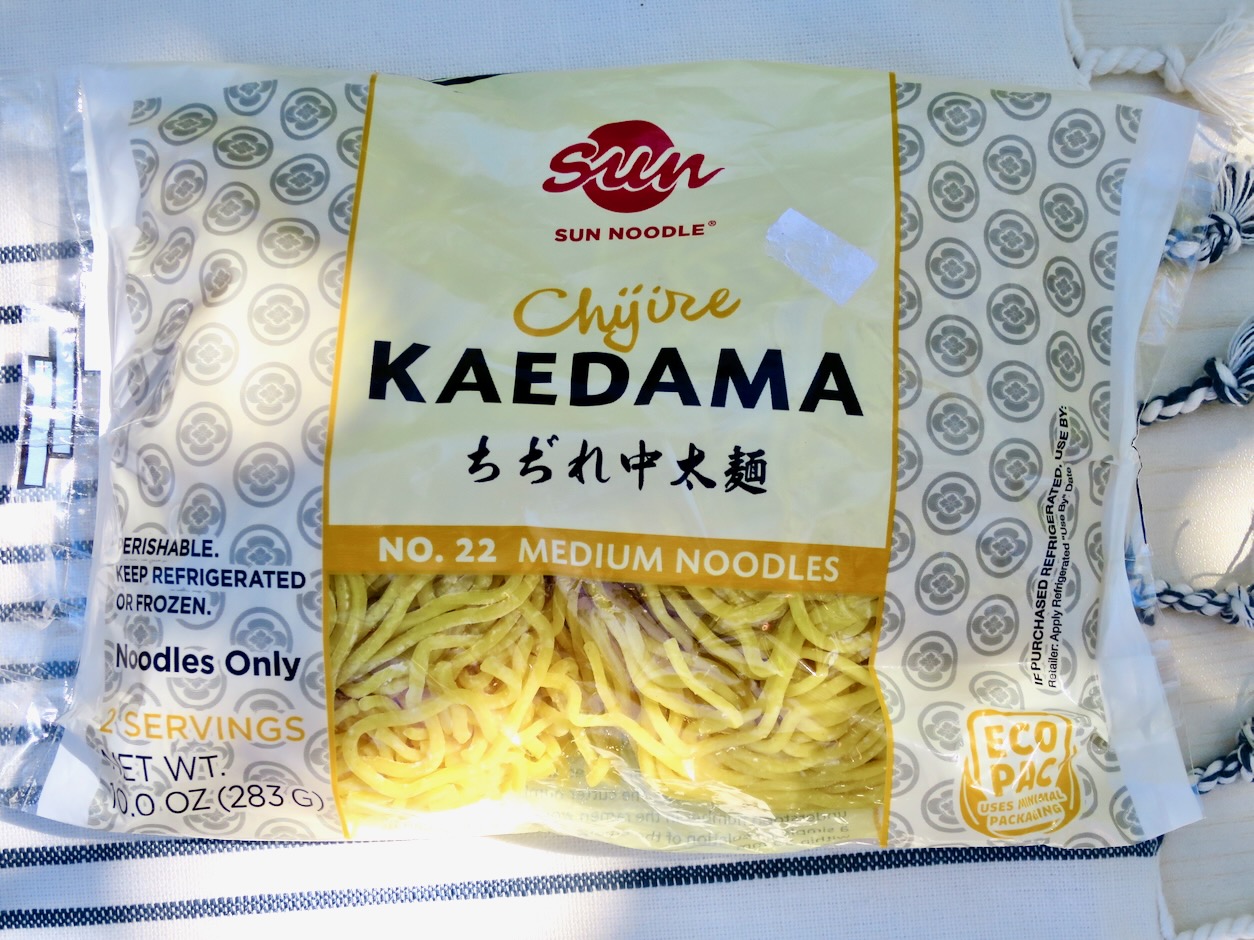
Fresh Ramen

I prefer to use fresh ramen noodles, however, I use dried ramen when fresh is not available.  If using the dried version such as Ichiban, be sure to undercook the noodles until just al dente since they are quite a bit thinner than fresh noodles.

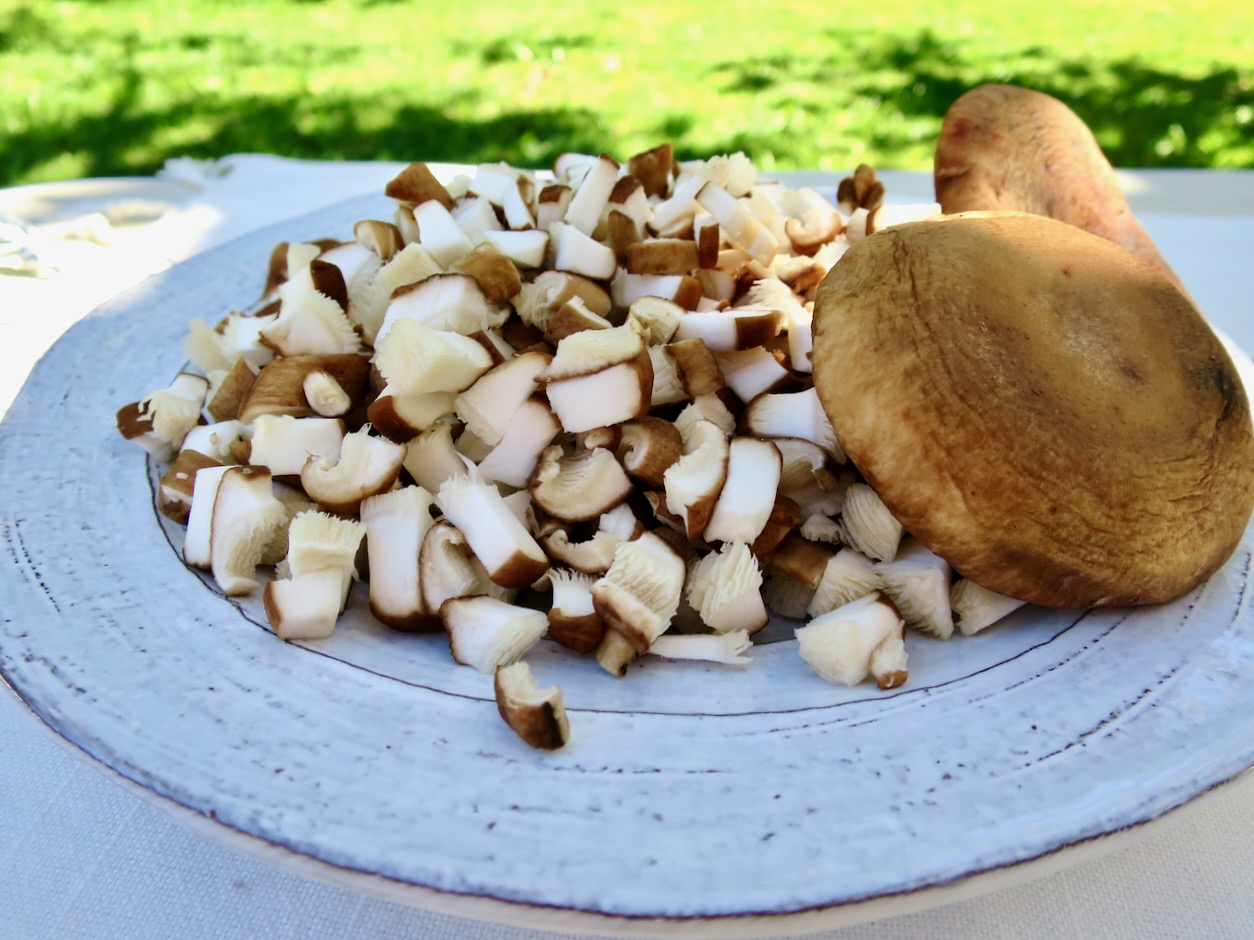
Shiitake Mushrooms

Shiitake mushrooms are a big star in this recipe.  They are chopped finely and pan fried with the diced shallots until nicely browned before being added to the fried tofu.

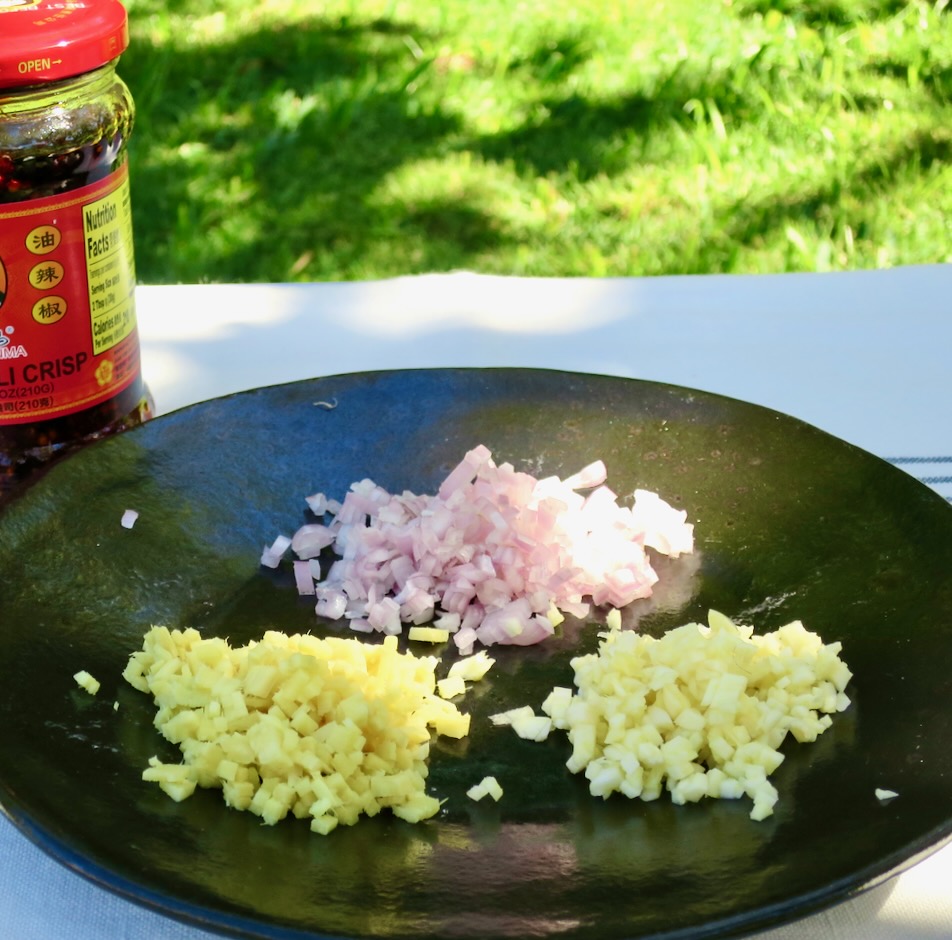
Diced Shallots, Garlic & Ginger

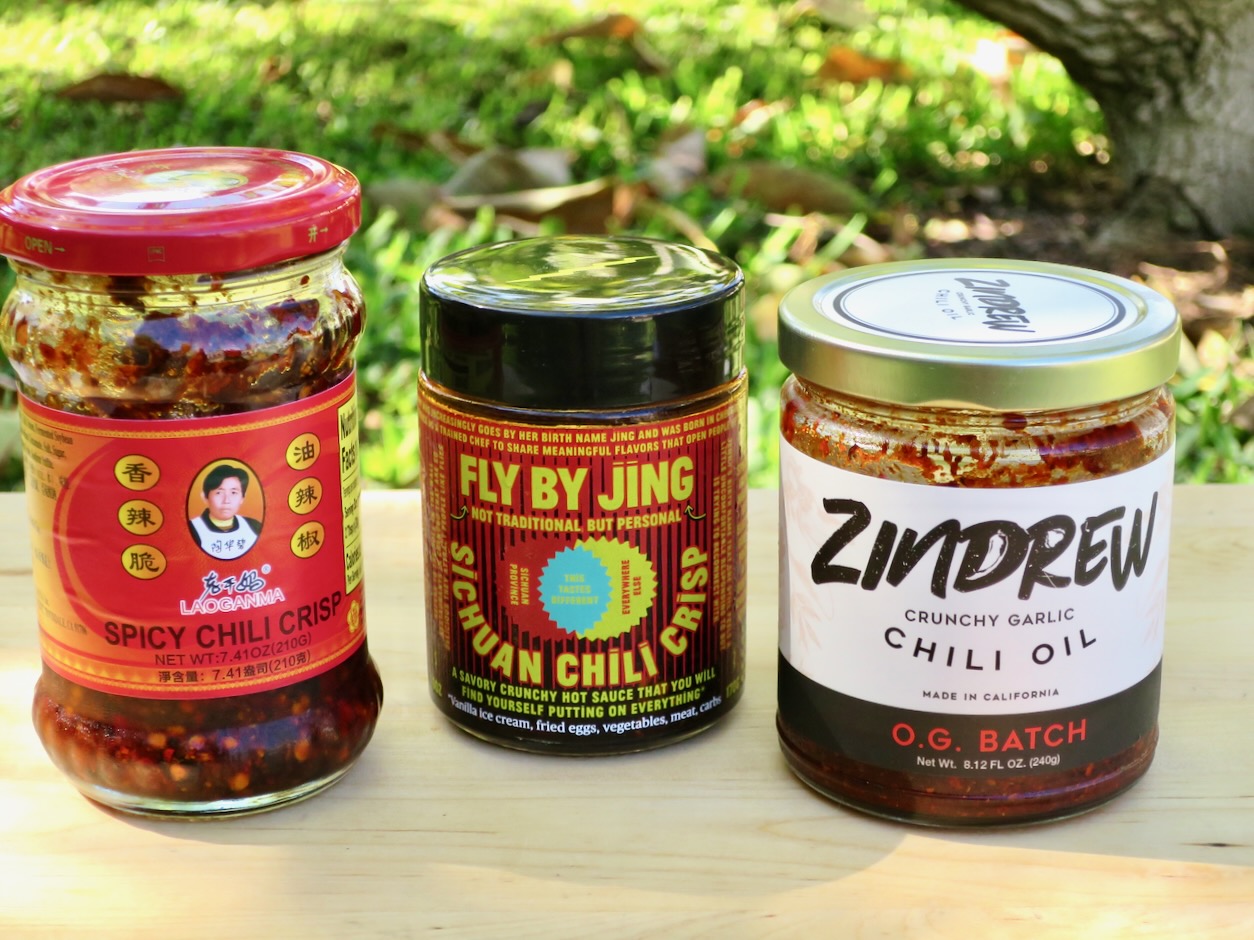
Assorted Chili Crisps

I purchased three different brands of chili crisp to see which one I liked best. There are hundreds of versions available. Of the three I purchased, my favorite is Zindrew.  It’s on the mild heat side, but it has lots of flavor, is very crunchy, and is the least oily. There’s just a tablespoon of it left in the jar!

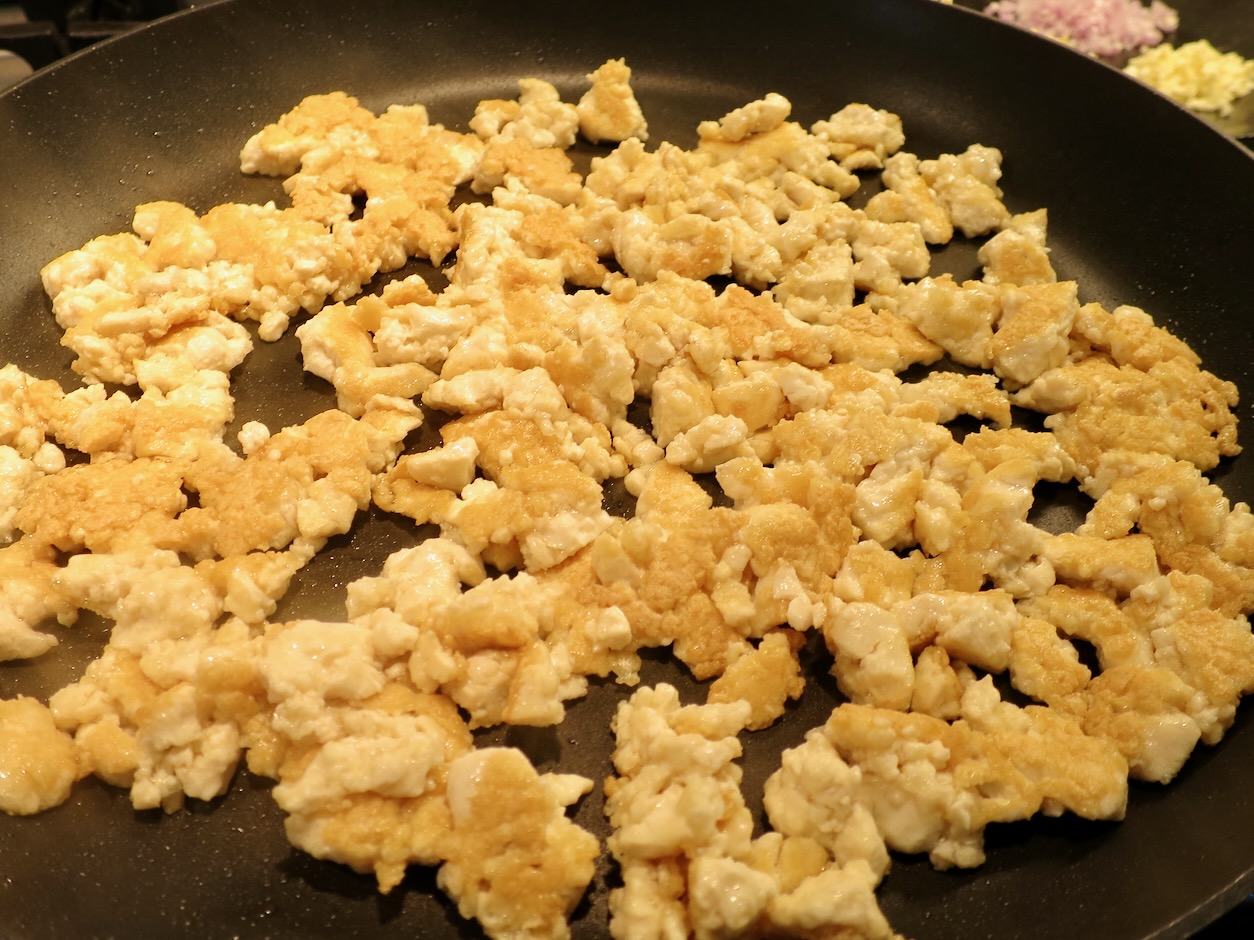
Fried Tofu

The crumbled tofu is pan fried until crisp on both sides.  The texture of the fried tofu is pleasantly firm with a bit of chew to it. 

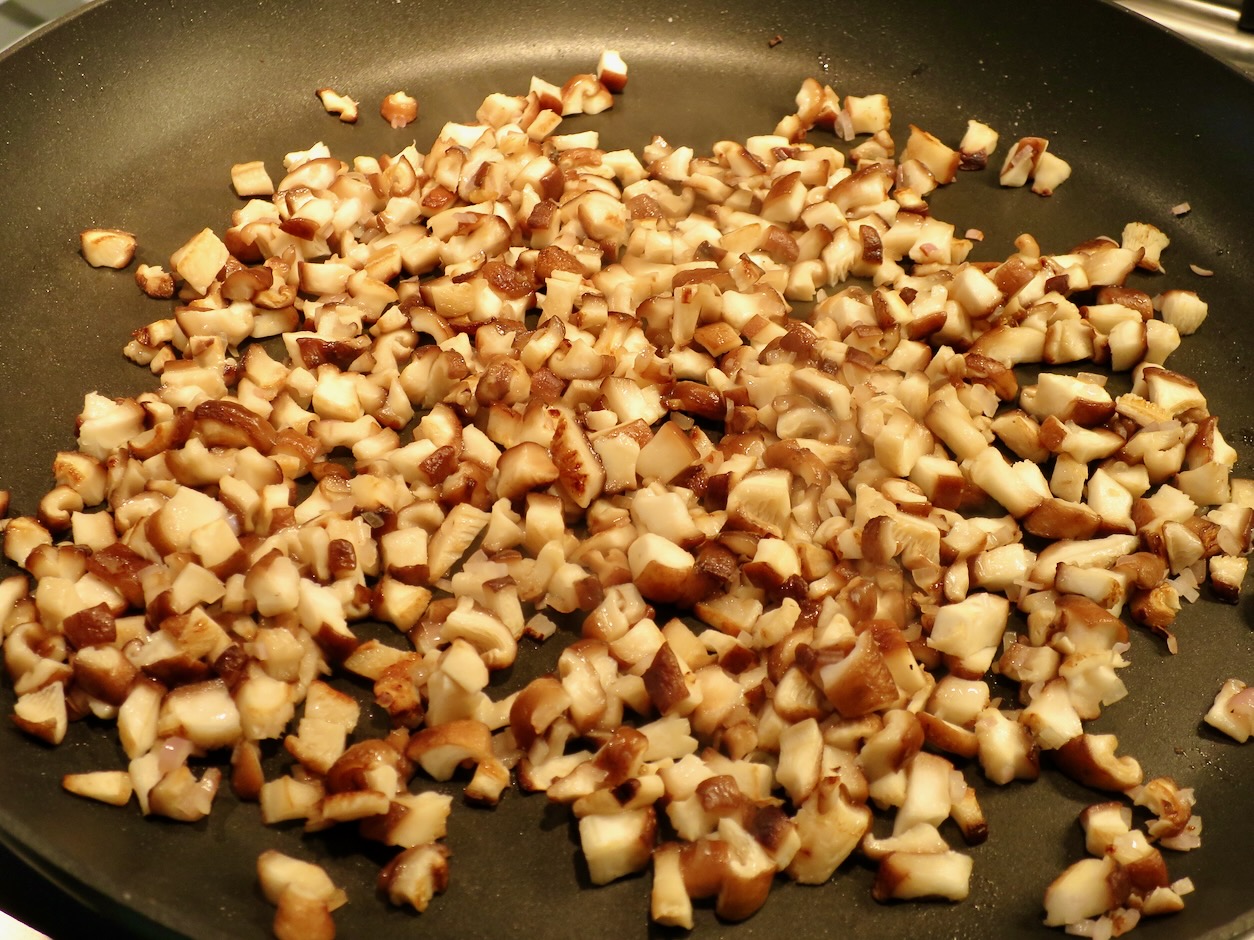
Fried Shiitakes Mushrooms & Diced Shallots

Shiitake mushrooms are fried with diced shallots until nicely browned.  These mushrooms works so well with this dish because they have a meaty texture and do not have as much water as other types of mushrooms.

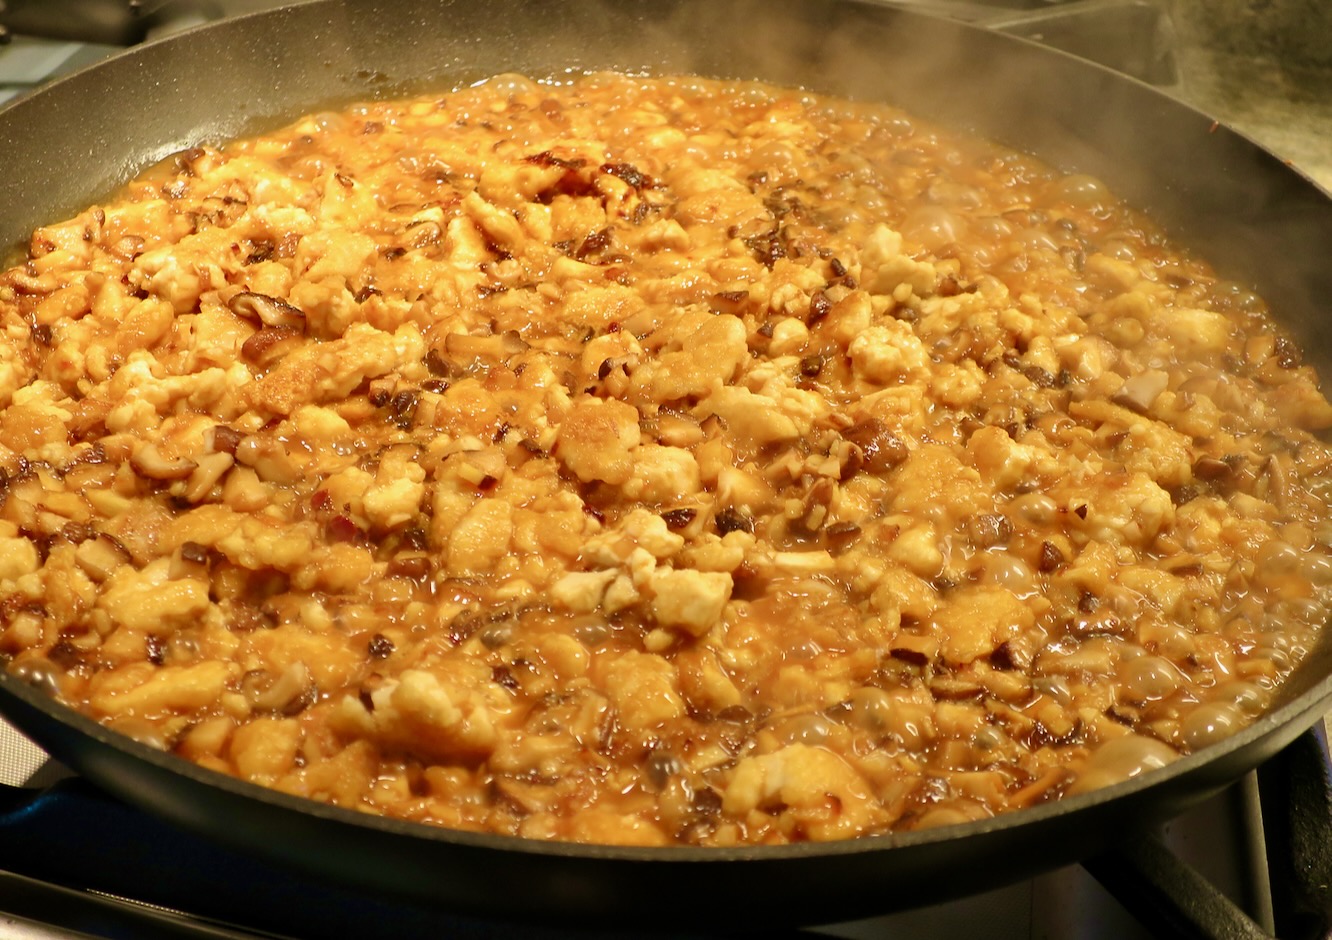
Tofu, Shiitakes & Sauce

The sauce is added to the tofu and mushroom mixture and quickly heated before serving.  The original recipe from Bon Appetit calls this dish Saucy Tofu Noodles with Cucumbers and Chili Crisp.  I found that in order to keep this “saucy” the sauce should be heated separately otherwise the tofu and mushroom mixture absorbs the sauce very quickly.  Either way, it’s just delicious.

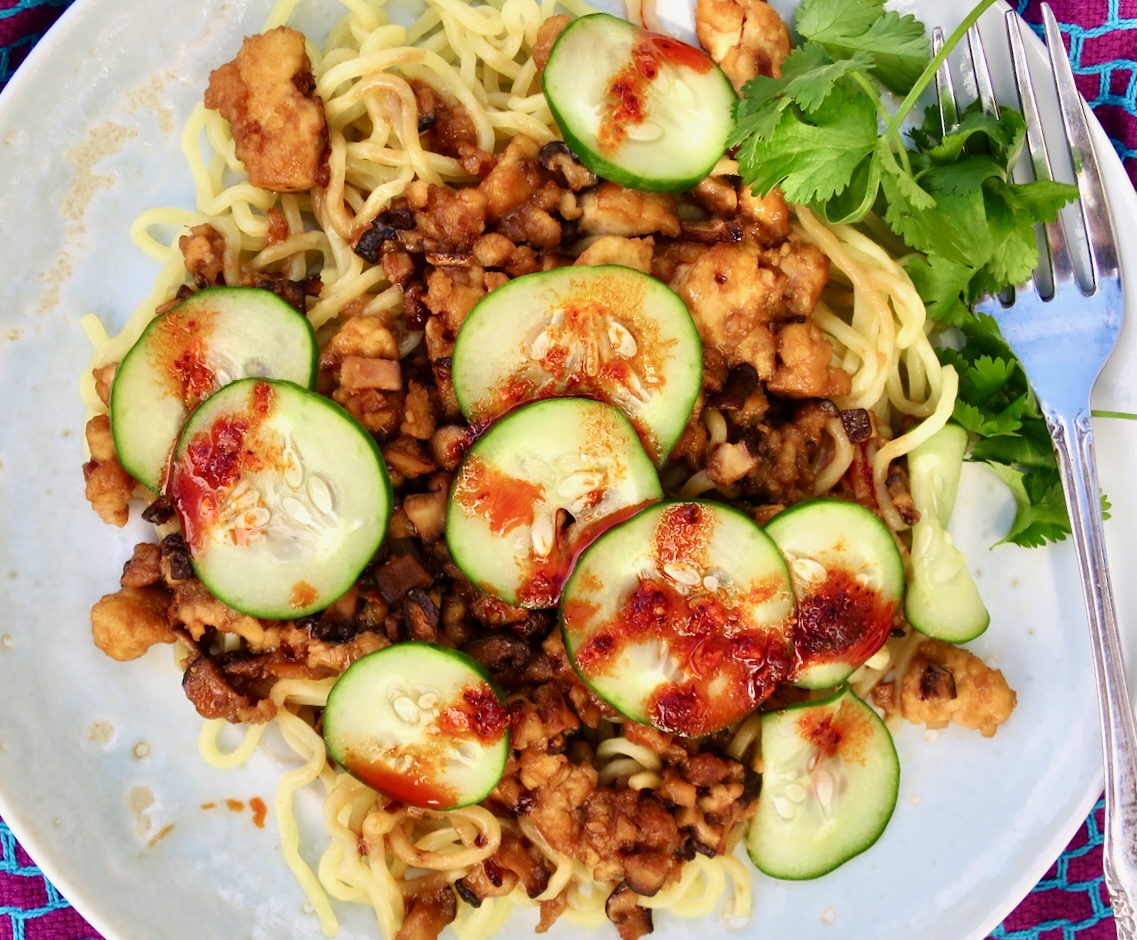
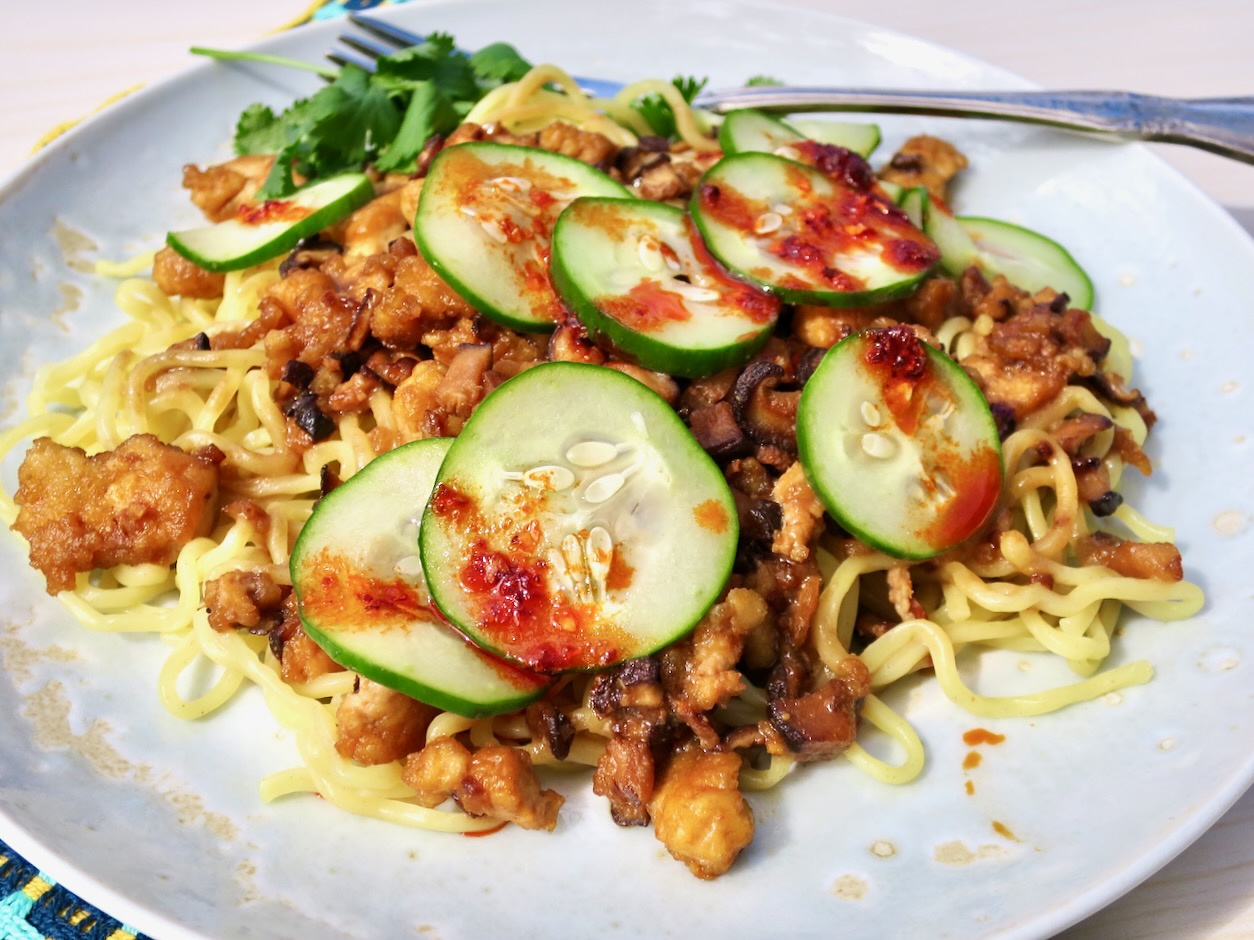
Tofu Ramen with Cucumbers and Chili Crisp

Thinly sliced quick cucumber pickles are the topping for this ramen dish.  Their tartness and crisp texture are a perfect accompaniment to the savory tofu ramen.

Tofu Ramen with Cucumbers and Chili Crisp

Tofu Ramen with Cucumbers & Chili Crisp
 
Adapted from Bon Appetit
Author:
Serves: 2-4
Ingredients
  • ¼ cup less sodium soy sauce
  • 1 tablespoon light or dark brown sugar
  • 1 tablespoon tahini
  • 1 tablespoon toasted sesame oil
  • 2 teaspoons Chinkiang (black vinegar) or balsamic vinegar
  • 1 tablespoon chili crisp + more for serving
  • 2 very small Keiki cucumbers or Persian cucumbers, thinly sliced into rounds
  • ½ cup unseasoned rice vinegar
  • 2 teaspoons Diamond Crystal or 1¼ teaspoon Morton kosher salt, divided
  • 1 14-ounce block extra-firm tofu, water pressed out
  • 2 tablespoons cornstarch
  • 4 tablespoons vegetable oil, divided
  • 6 ounces shiitake mushrooms, stems removed and finely chopped
  • 1 shallot (2 tablespoons) finely chopped
  • 1 1-inch piece ginger, peeled and finely chopped
  • 2 medium or 1 large garlic clove, finely chopped
  • 10 ounces fresh ramen (12 ounces for 4 servings)
Preparation
  1. Whisk soy sauce, brown sugar, tahini, sesame oil, black vinegar, 1 tablespoon chili crisp, and ½ cup water in a small bowl until sugar is dissolved. Set aside.
  2. Toss cucumbers with rice vinegar and 1 teaspoon Diamond Crystal or ¾ teaspoon Morton salt in a medium bowl. Let sit, stirring occasionally until cucumbers have slightly softened, about 30 minutes. Drain and set aside in a small bowl.
  3. Meanwhile, press water from tofu using TofuXpress or wrap in a clean kitchen towel (gather ends together) and squeeze with your hands over the sink to extract as much liquid as possible. Crumble drained tofu into a medium bowl (it should resemble cooked ground meat with some larger pieces). Sprinkle with cornstarch and 1 teaspoon Diamond Crystal or ½ Morton salt. Toss with your hands to evenly coat tofu.
  4. Heat 2 tablespoons oil in a large (12-inch) non-stick skillet over medium high heat. Arrange tofu crumbles in a single layer, reserve bowl. Cook tofu undisturbed until golden brown underneath, about 4 minutes. Toss and continue cooking until tofu is golden brown and crisp all over, about 3-4 minutes more. Transfer tofu back to reserved bowl.
  5. Add remaining 2 tablespoons oil to same skillet and heat to medium high. Add mushrooms and shallot, and cook, stirring occasionally until mushrooms are browned and shallot is translucent, about 4 minutes. Add ginger and garlic and cook, stirring often, until fragrant, about 1 minute. Reduce heat to medium and return tofu to the pan. Add reserved sauce and heat for about 30-60 seconds. Remove from heat. For saucier version, heat sauce in a separate skillet over medium until just slightly reduced.
  6. Cook noodles in a large pot of boiling water according to package directions. Drain and divide among bowls. Ladle tofu over noodles and top with reserved pickled cucumbers and more chili crisp. If sauce has been heated separately, pour sauce over tofu right before serving.


Beans, Dinner, Italian, Lactose Free, Recipes, Vegan, Vegetarian, Veggies

Cauliflower Piccata

December 9, 2021

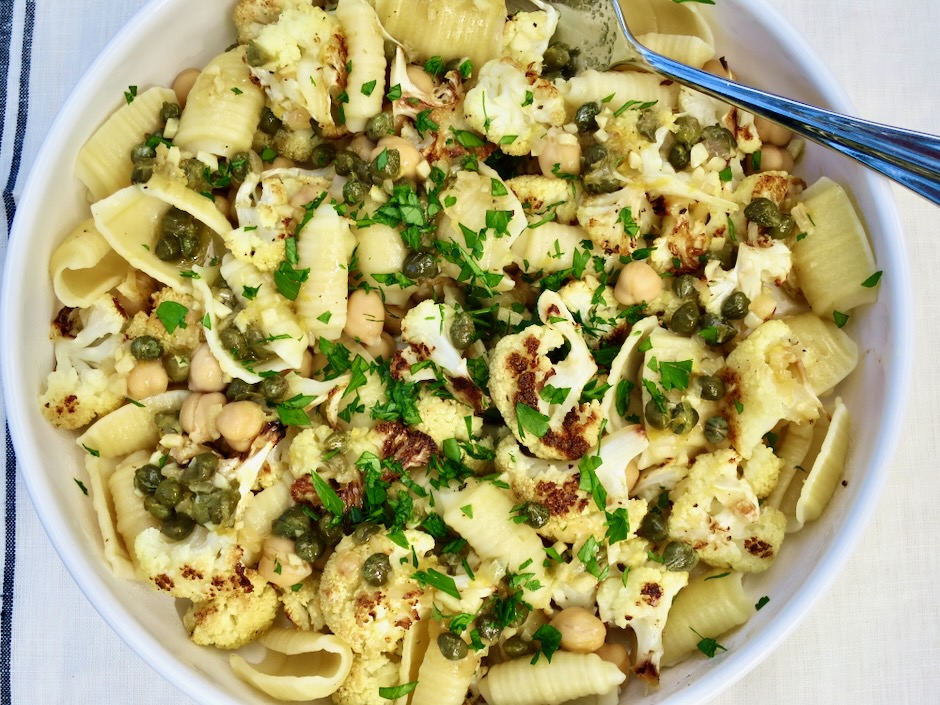
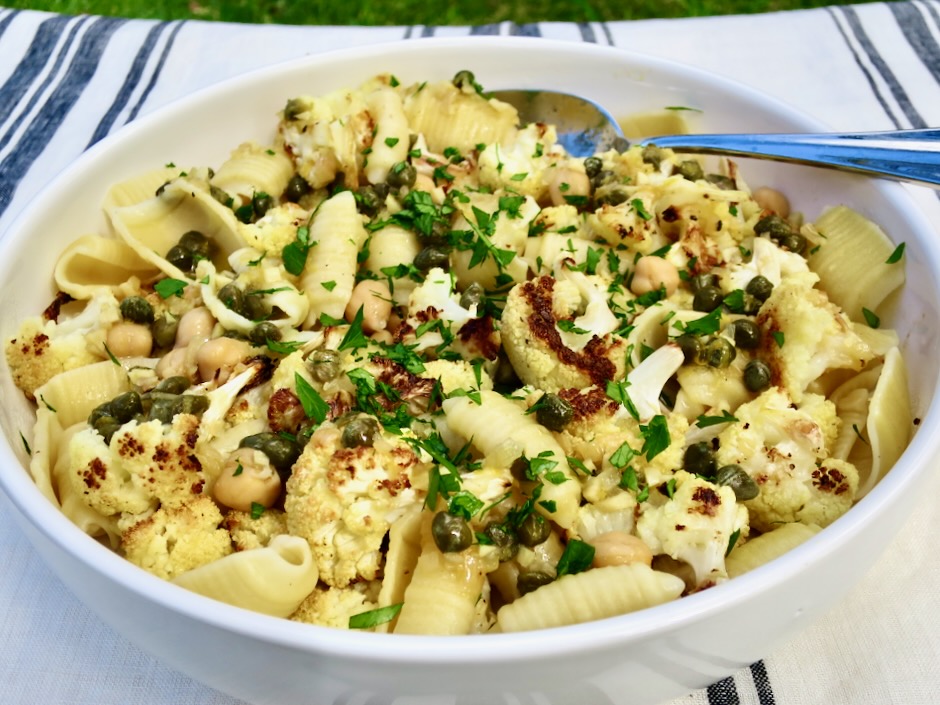
Cauliflower Piccata

We all need to take an occasional break from all of the rich holiday meals that begin in November with Thanksgiving, and continue through the New Year.  This cauliflower piccata from NYT Cooking fills the bill for a satisfying meal that also happens to be vegetarian.  There is no skimping on flavor thanks to the roasted cauliflower, fresh lemon juice, lemon rind and briny capers.  It’s a recipe that can be made with or without several ingredients to fit your taste.  The chickpeas can be left out if you don’t fancy them, or you can substitute another type of bean in its place.  The pasta is also optional if you prefer a lighter dish.  

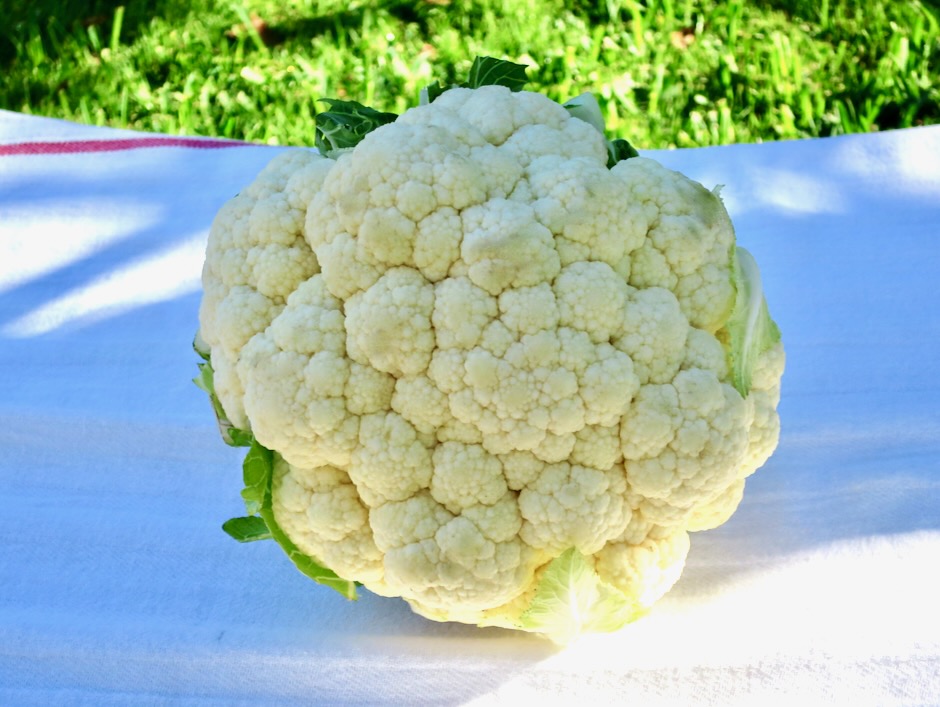
Cauliflower

It all starts out with a humble head of cauliflower that gets roasted in the oven until nicely browned and full of flavor.  

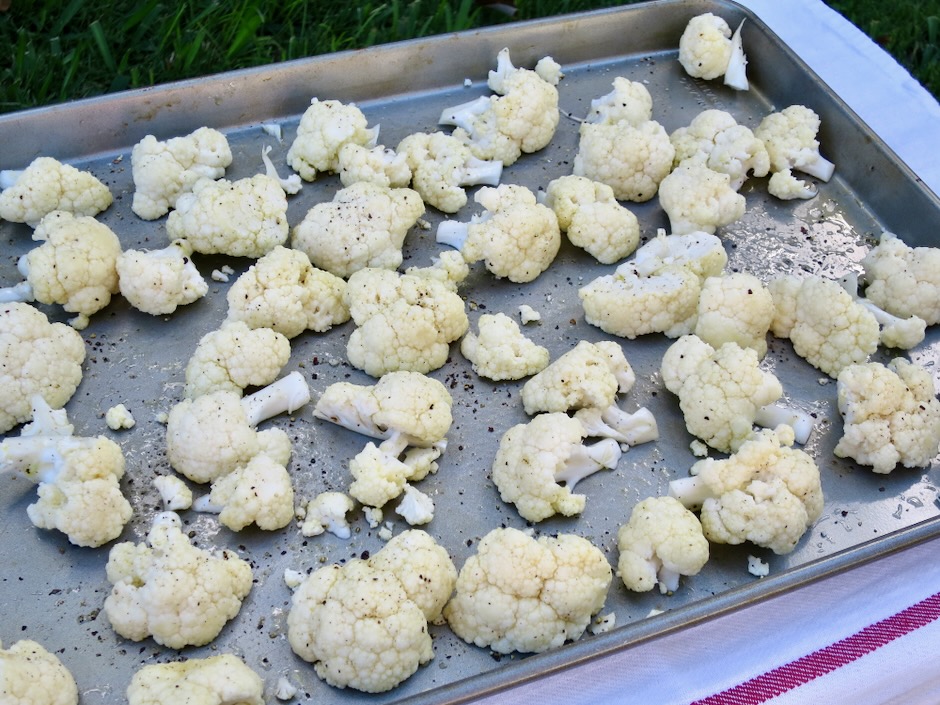
Cauliflower with Olive Oil, Kosher Salt, Pepper

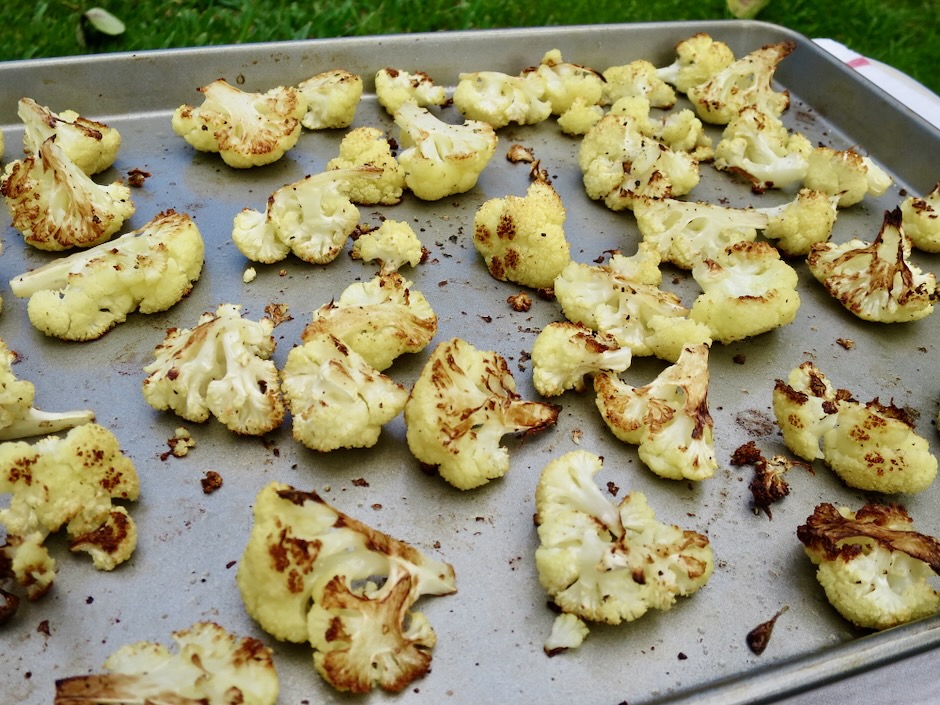
Roasted Cauliflower

The cauliflower takes on a beautiful color and flavor when roasted on a fairly high heat.  It’s seasoned with olive oil, kosher salt and freshly ground black pepper before going into the oven.

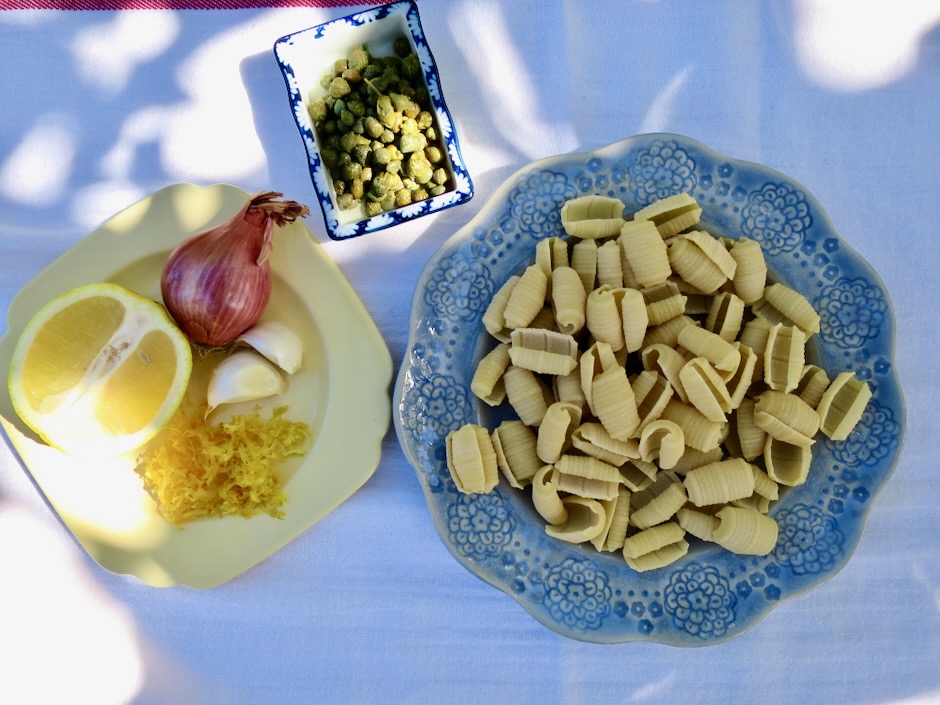
Lemon, Shallot, Garlic, Lemon Zest, Capers & Barilotti Pasta

I have used spaghetti and this short pasta named barilotti.  I tend to favor the short pasta as it holds up well when you have leftovers and the nooks and crannies trap the delicious sauce.  I found this pasta shape at our local Mana Foods.  Another good option and more readily available would be orecchiette.

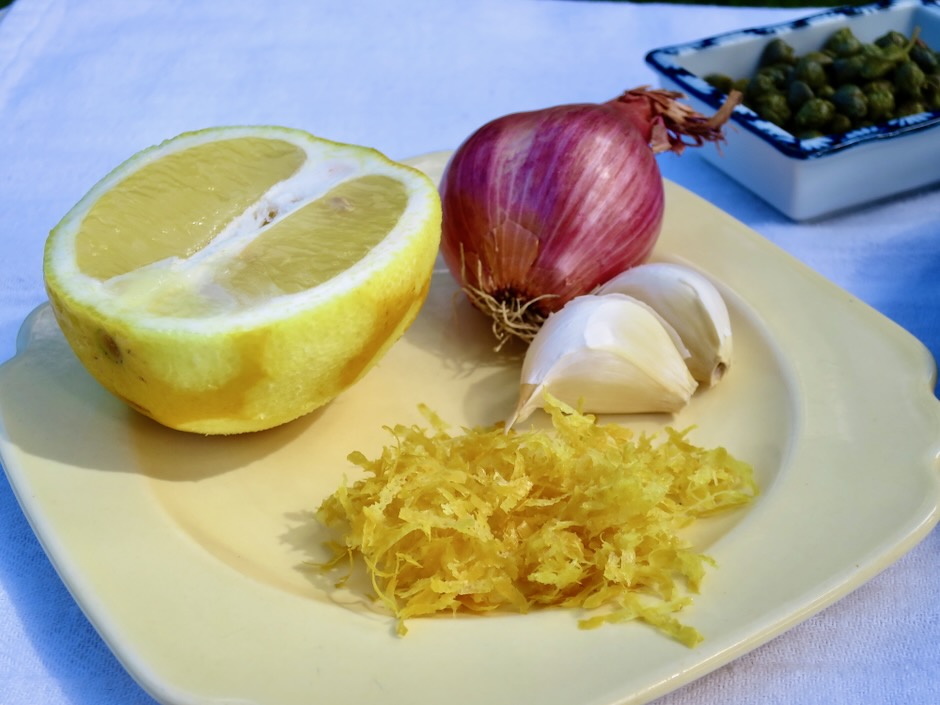
Lemon, Shallot, Garlic, Lemon Zest

Fresh lemon juice and zest can’t be beat.  It really adds a zing to this dish.

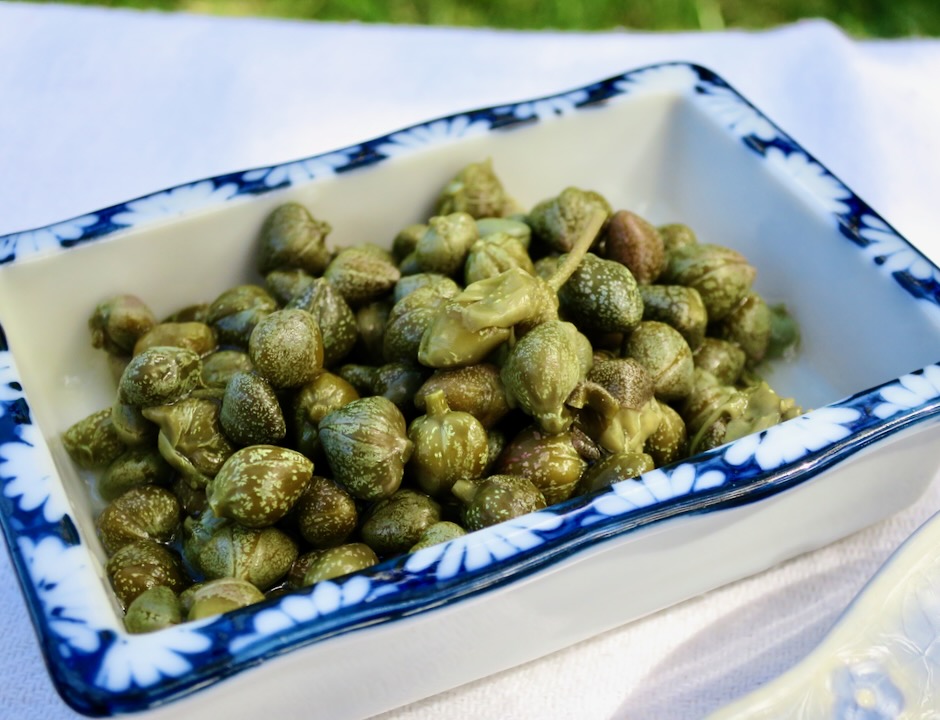
Capers

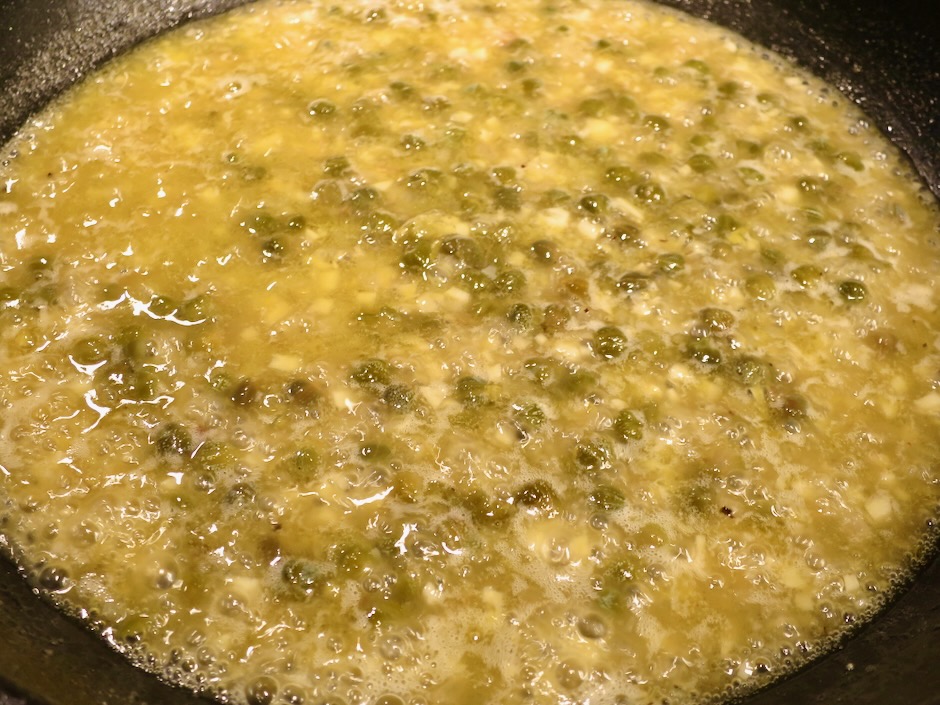
Cauliflower Piccata Sauce

The sauce is divine.  It’s tangy from the lemon juice, zest, and capers and velvety rich from the butter.

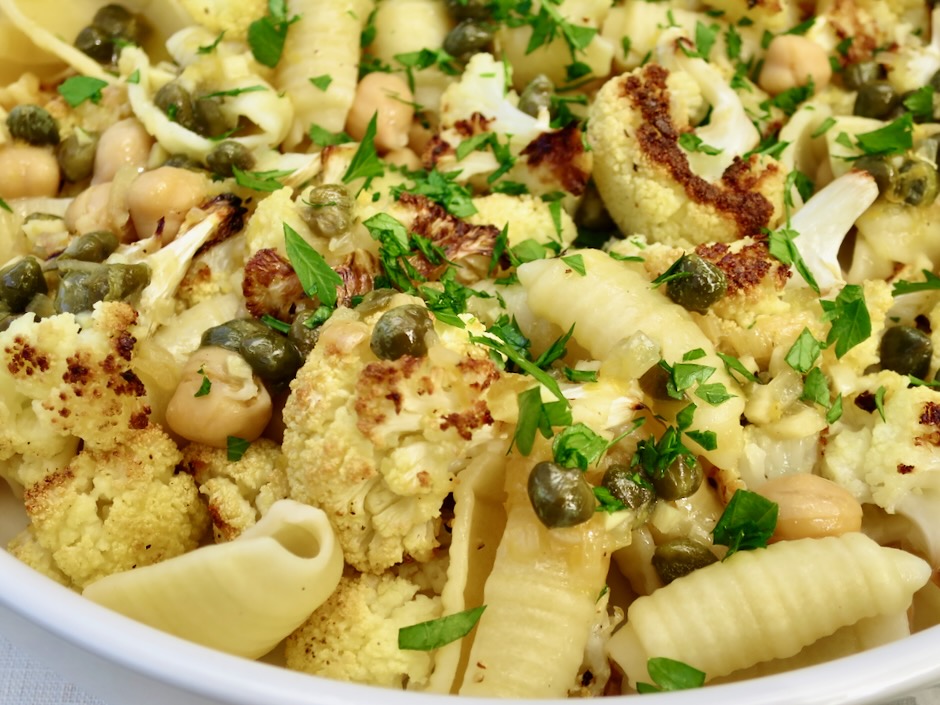
Cauliflower Piccata

The cauliflower piccata is delicious on its own, however, good sourdough bread with a drizzle of olive oil or a pat of butter is a tasty accompaniment. If you prefer to serve it with more vegetables on the side, grilled asparagus, or charred broccolini are good options.

Cauliflower Piccata

Cauliflower Piccata
 
Adapted from NYT Cooking
Author:
Serves: 4
Ingredients
  • 1 cauliflower (about 1½ pounds) cut into large 2-inch florets
  • extra virgin olive oil
  • kosher salt and freshly ground black pepper
  • 6 ounces pasta of your choice (optional)
  • 1 cup chickpeas, drained and rinsed (optional)
  • 1 medium shallot, finely diced
  • 2 medium garlic cloves, finely chopped
  • 1 cup vegetable or chicken stock or broth
  • 4 tablespoons Earth Balance Buttery Sticks or regular unsalted butter
  • 2 heaping tablespoons capers, drained
  • zest of 1 lemon
  • 2 tablespoons fresh lemon juice
  • parsley, chopped for garnish
Preparation
  1. Heat oven to 425 degrees. Place cauliflower florets on a sheet pan and drizzle with a few tablespoons of olive oil. Season with kosher salt and pepper. Toss well. Roast for 20 - 25 minutes until the cauliflower is golden and tender. (I sometimes flip the cauliflower florets towards the end of the baking time). Remove the pan from the oven, add chickpeas if using, and toss to combine. Transfer to a bowl and set aside.
  2. Meanwhile, cook pasta as directed on package if using. Drain and add to the bowl of cauliflower and chickpeas.
  3. Heat a medium skillet over medium heat. Add 1 tablespoon of olive oil and the shallot and sauté until soft and fragrant, about 2 minutes. Add the garlic and cook for 1 minute longer. Pour stock into the pan and simmer until reduced by half, about 5 minutes. Reduce heat to low, then stir in the butter, capers, lemon zest and juice. Season with ¼ - ½ teaspoon kosher salt and freshly ground black pepper. Taste and adjust seasoning as needed.
  4. To serve, reheat the bowl of cauliflower in the microwave until warm. Transfer to a serving platter or wide, low-sided bowl. Top with the lemon caper sauce. Sprinkle parsley over the top before serving.
 

Appetizers, Dinner, Kimchi, Korean, Lactose Free, Recipes, Side Dishes, Vegan, Vegetarian, Veggies

Homemade Kimchi

November 26, 2021

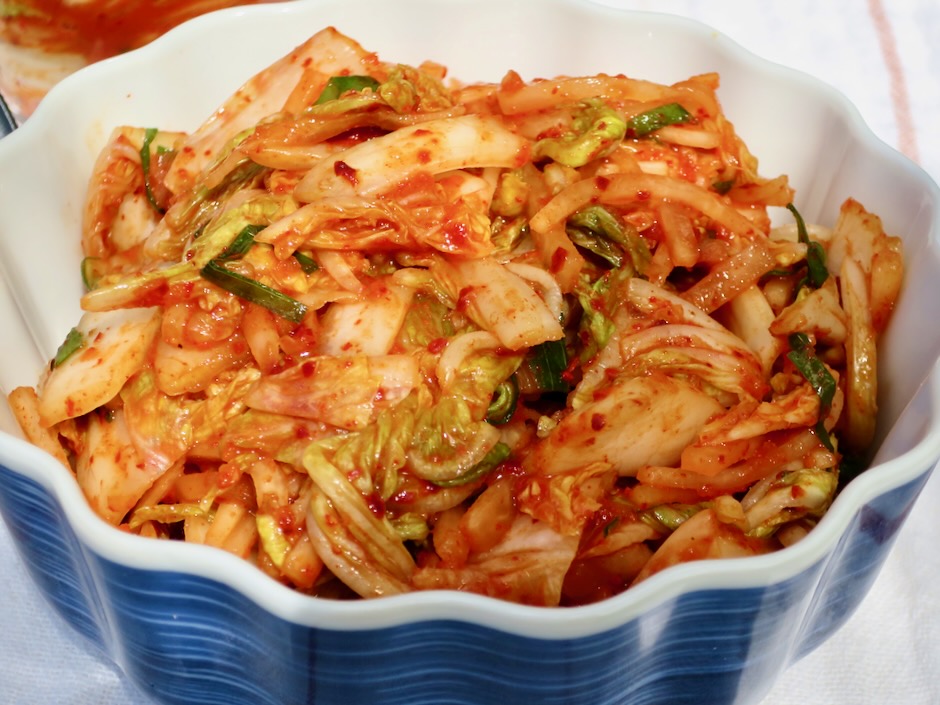
Homemade Kimchi

I’ve had a keen interest in homemade kimchi for sometime now.  I attempted to make it before with ingredients that varied slightly, but they weren’t keepers.  I finally tried again, and this time the kimchi was delicious.  There are so many variations of kimchi, yet the main ingredients never change: Won bok cabbage, salt, garlic and gochugaru.  Additional ingredients such as thin strips of daikon radish and carrots, grated ginger, green onions, and a bit of sugar can be added to the mix.  With so many options, the kimchi you make will be your own unique recipe.  

Homemade Kimchi

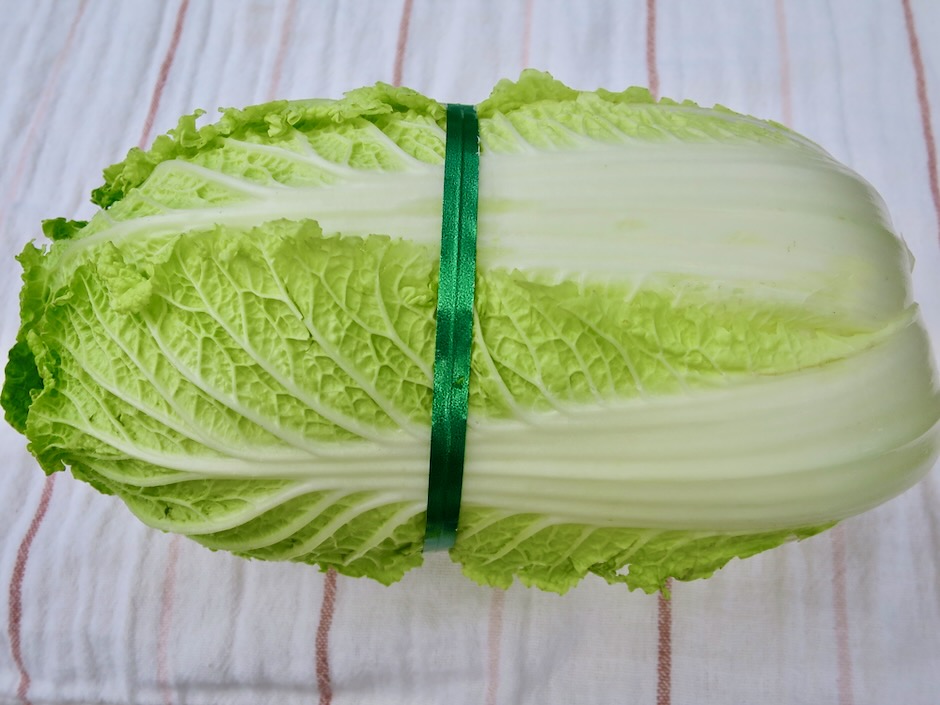
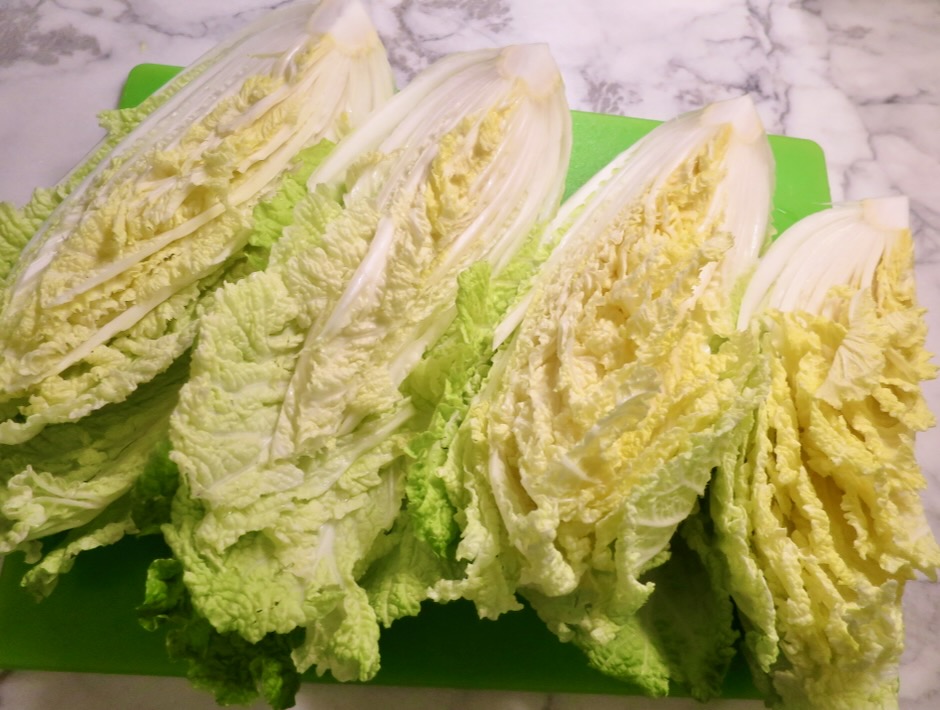
Won Bok Cabbage (Napa Cabbage, Chinese Cabbage, Celery Cabbage)

Start off with head of crispy won bok cabbage.  The outer leaves should be rinsed well, or removed if damaged.

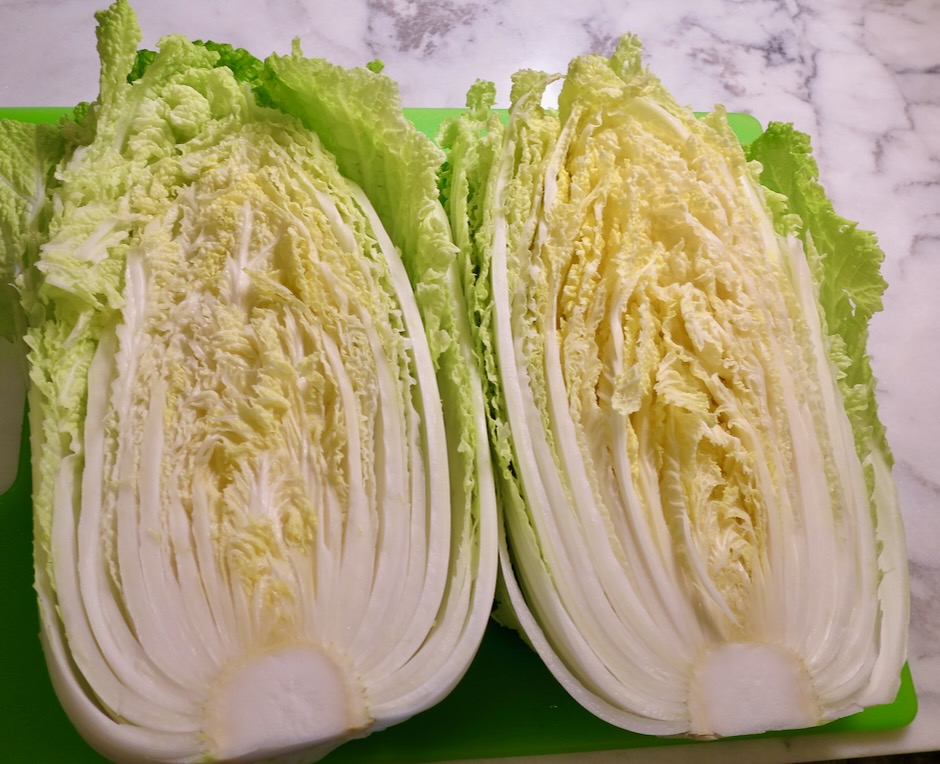
Won Bok Cabbage (Napa Cabbage, Chinese Cabbage, Celery Cabbage)

Slice the won bok into quarters and remove the core.

Won Bok Cabbage (Napa Cabbage, Chinese Cabbage, Celery Cabbage)

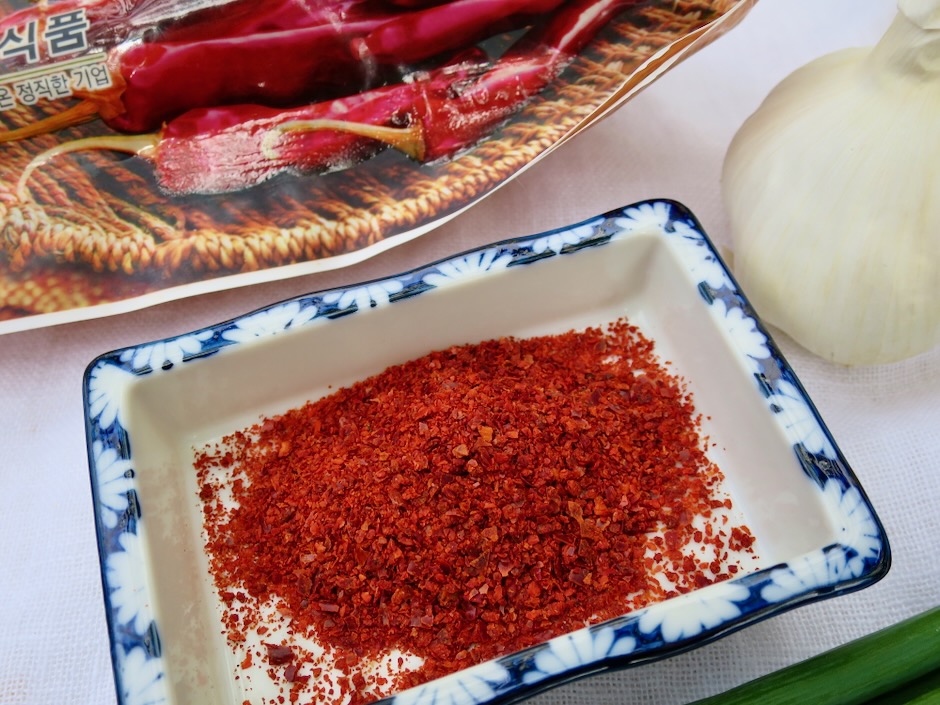
Gochugaru (Korean Red Pepper)

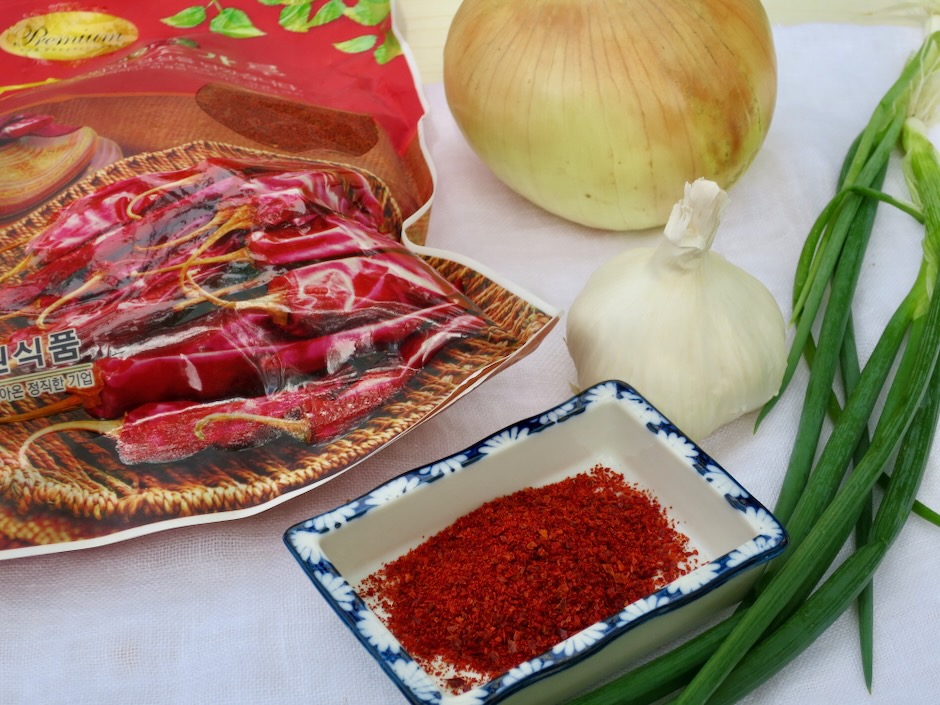
I bought a large bag of gochugaru from H Mart on Oahu.  You can easily purchase this online.  Gochugaru has a gorgeous deep red color and gives the kimchi its beautiful red hue.

Gochugaru (Korean Red Pepper)

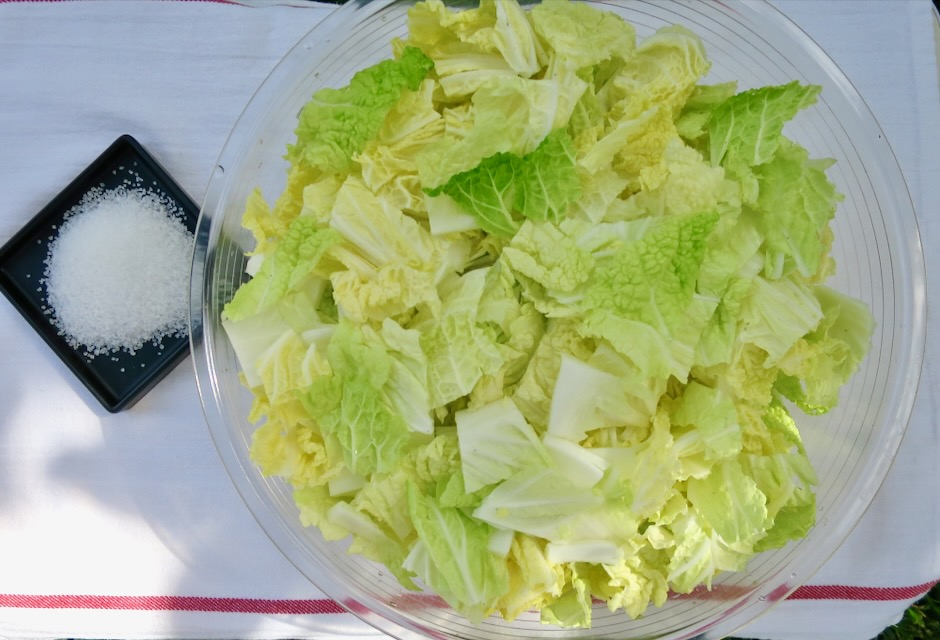
Chopped Won Bok with Coarse Grained Salt

The chopped cabbage is tossed with water and coarse salt.  It will shrink dramatically by the end of this step.

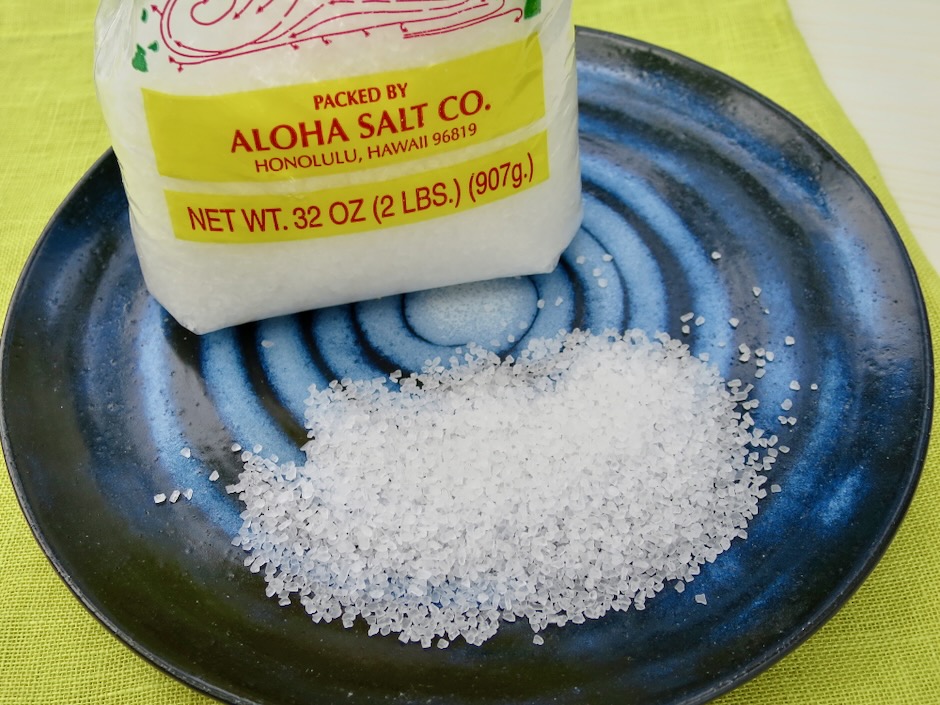
Coarse Salt for Kimchi

I’ve had this bag of salt for years.  I prefer to use this medium grain salt.  I read that there is a Korean version of this so I will look out for it the next time I’m at H Mart.

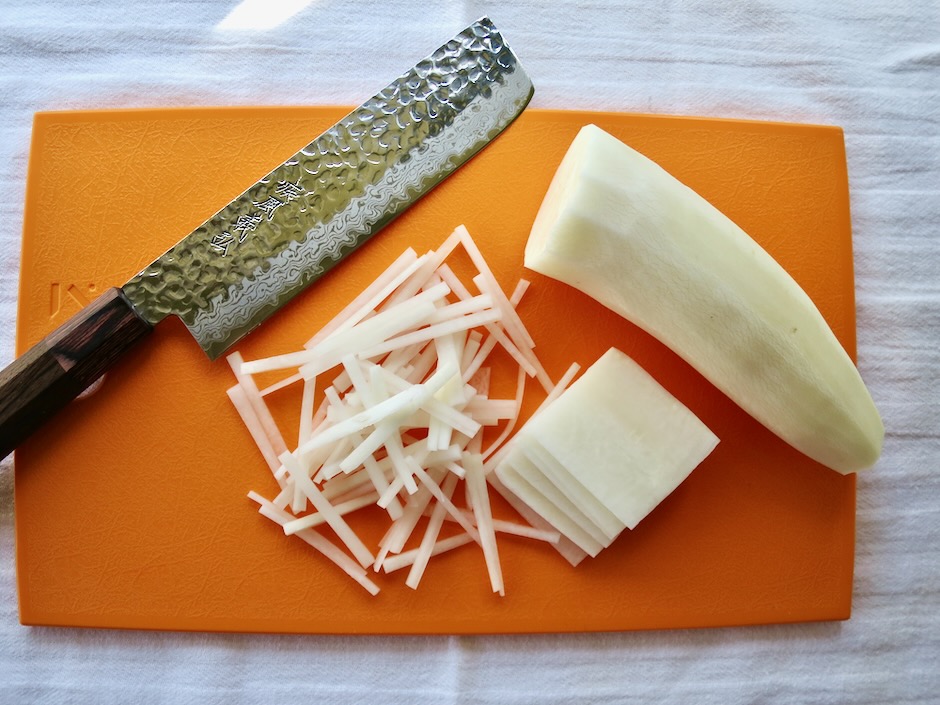
Daikon Radish

Thin strips of daikon are a nice addition to the won bok.  It has its own unique flavor and adds a bit of crunch to the kimchi.

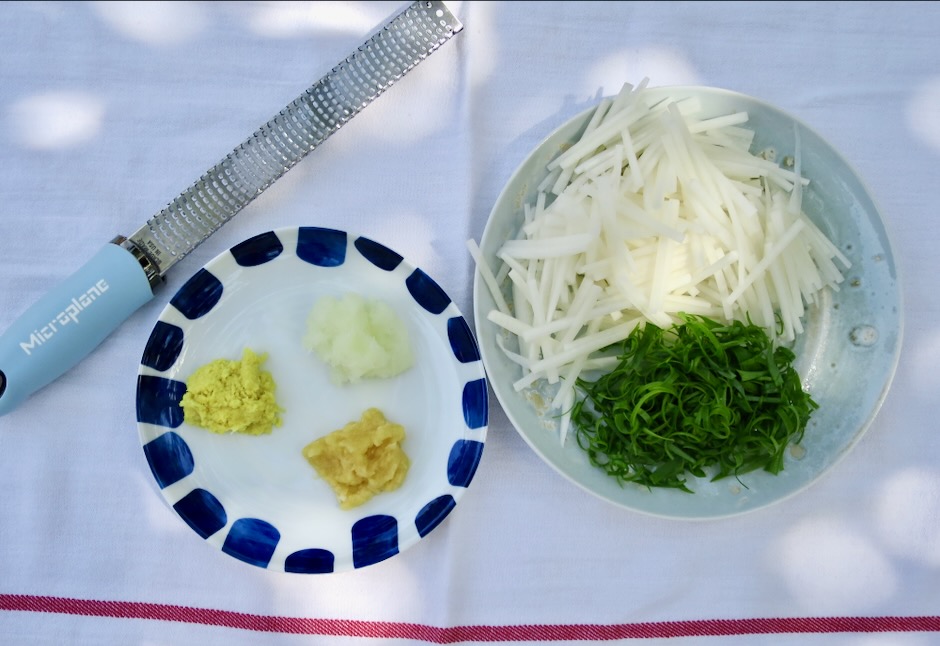
Ginger, Onion, Garlic, Daikon, Green Onions

The garlic, ginger and onion are grated very finely.  I highly recommend the Microplane to grate the garlic and ginger.  I use a fine grater for the onion as the Microplane is too fine (you’ll end up with onion water!).

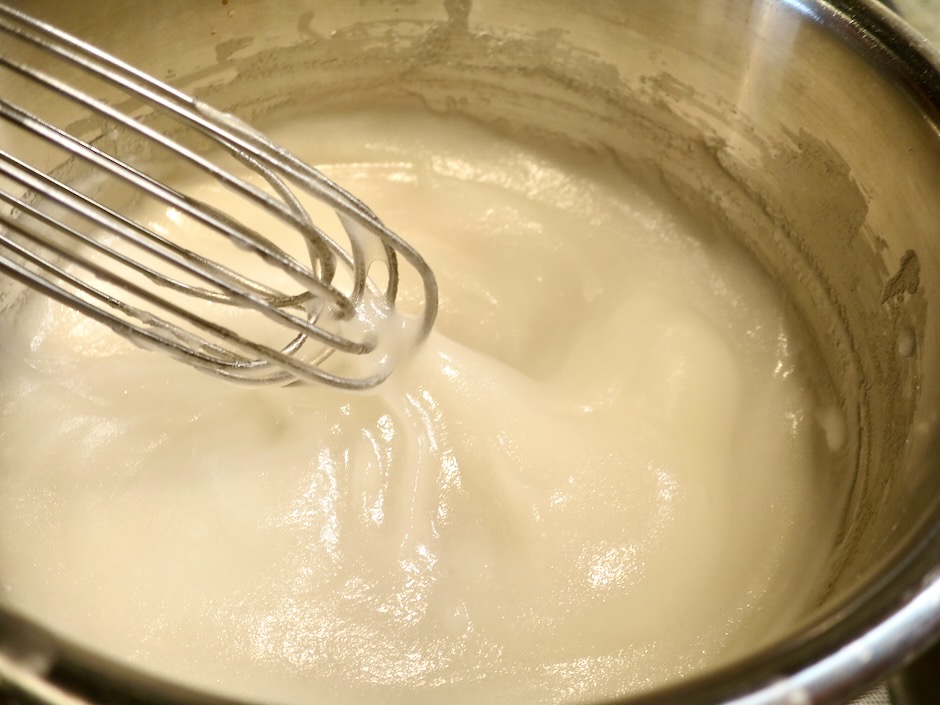
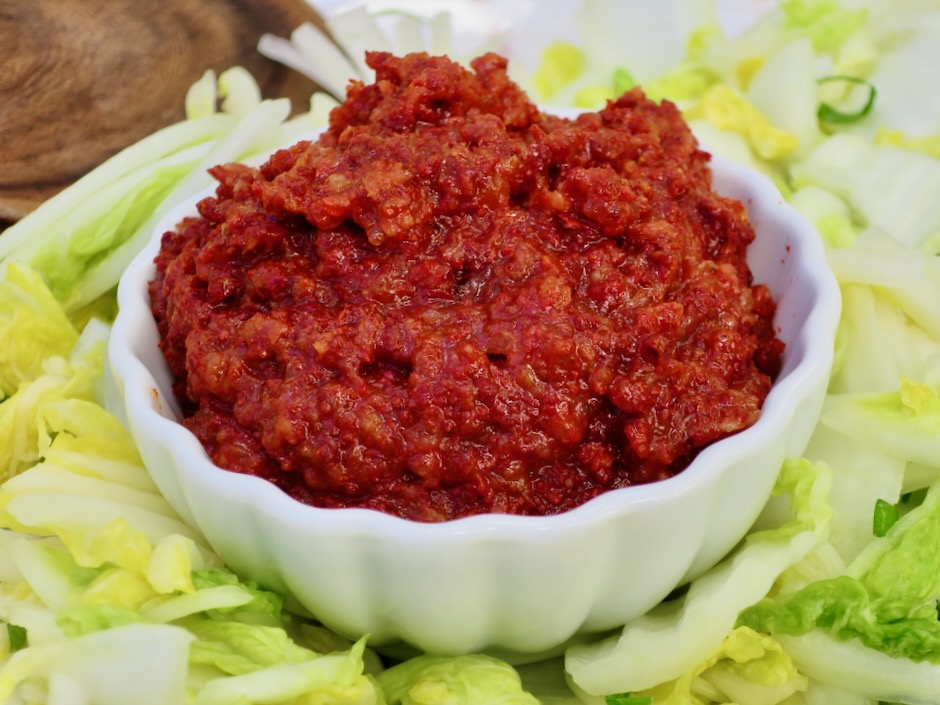
Sweet Rice Paste/Porridge

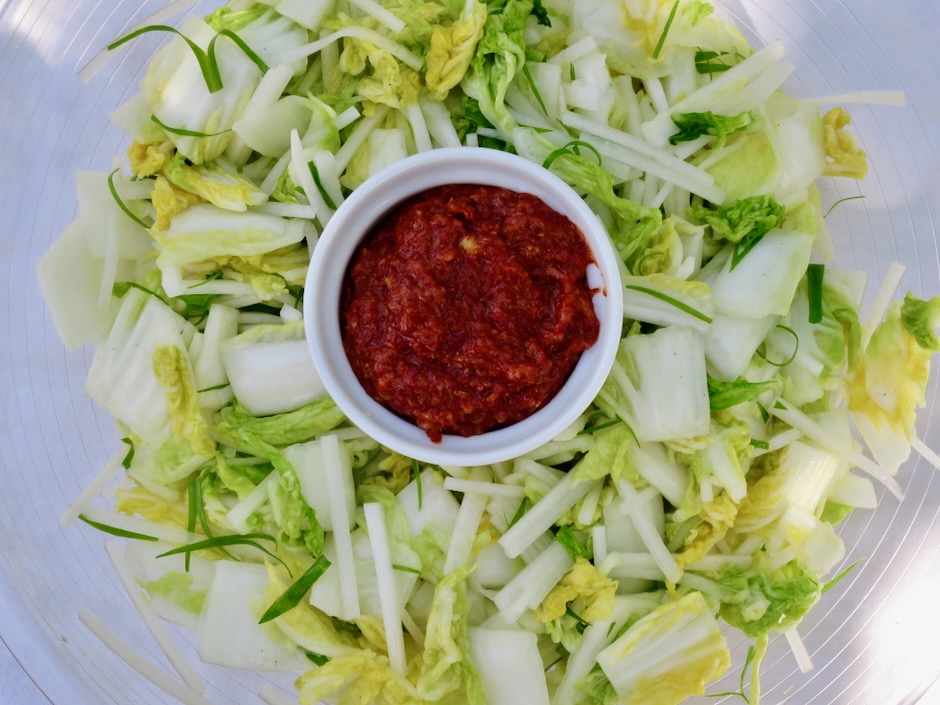
After studying different preparations for kimchi, I noticed that some recipes make a kimchi paste as they refer to it, by heating mochiko flour (sweet rice flour) with water, then adding a bit of sugar.  The mixture is cooled completely before the seasonings are mixed in.  This method is a winner and I will always use it when making kimchi.  The grated onion, garlic, ginger and gochugaru are mixed into the paste.  Once the cabbage has been rinsed and drained, the kimchi seasoning paste is mixed in along with the daikon and green onions.  The paste coats the vegetables thoroughly ensuring that they are all well seasoned.  It is a brilliant idea.

Salted Cabbage with Kimchi Seasoning Paste

Kimchi Seasoning Paste

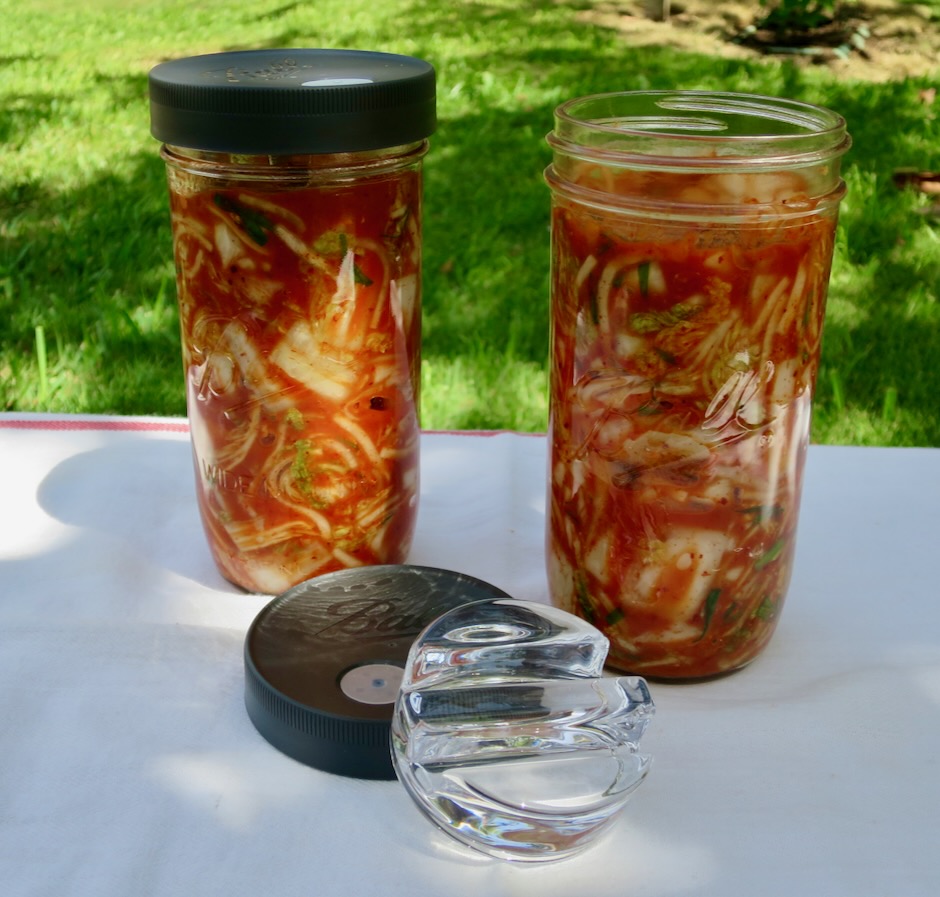
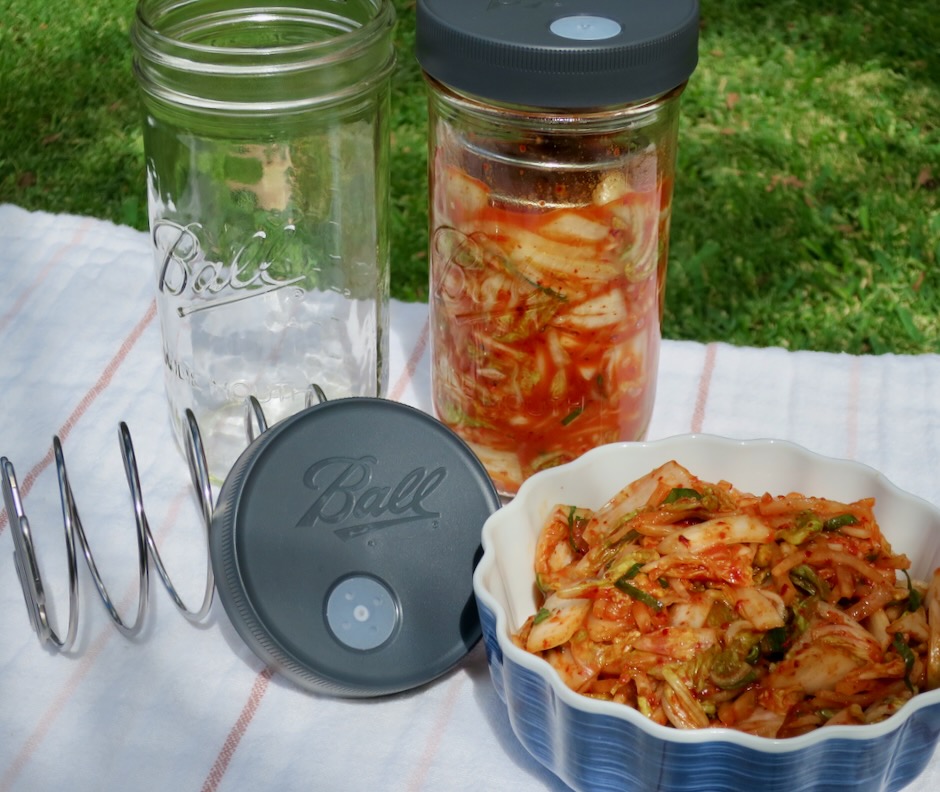
If you have fermenting weights or springs it helps to keep the cabbage submerged under the liquid.  Otherwise, press the cabbage down firmly with a spoon. 

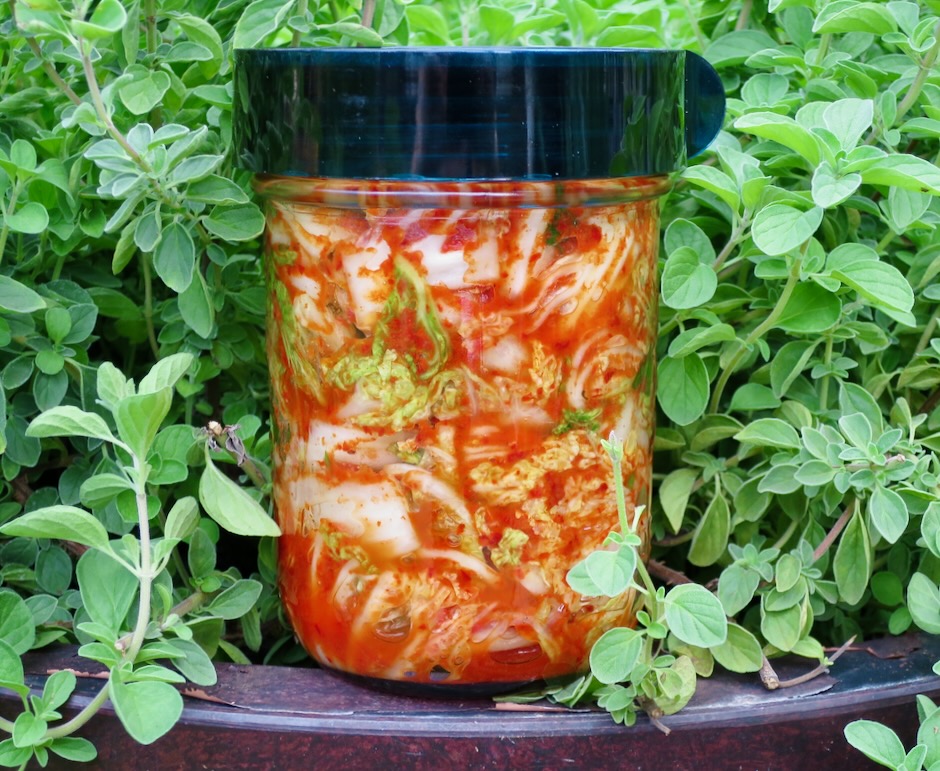
Homemade Kimchi

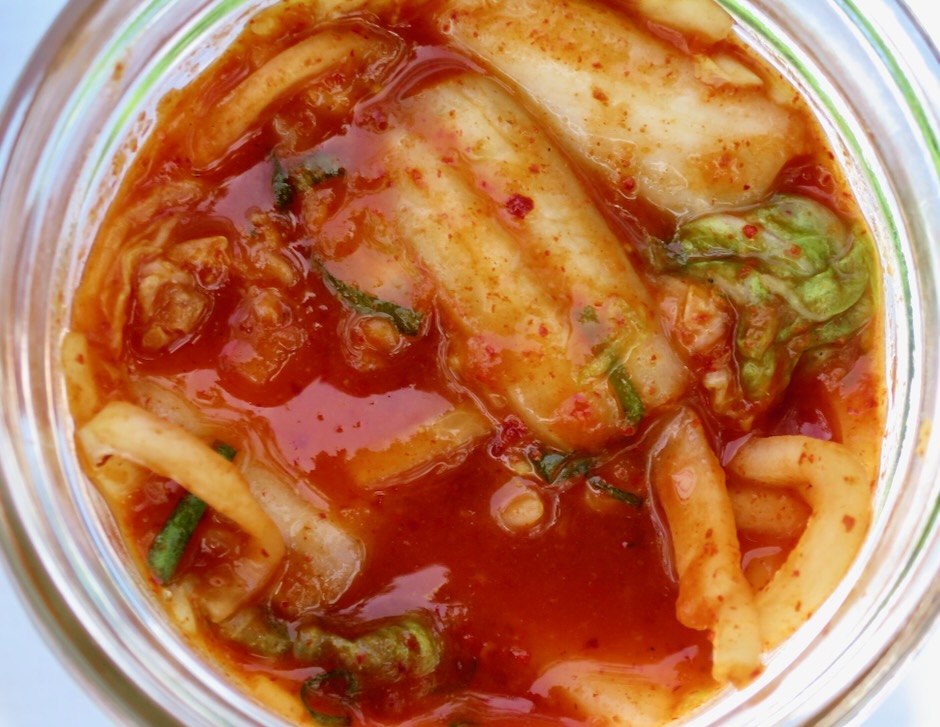
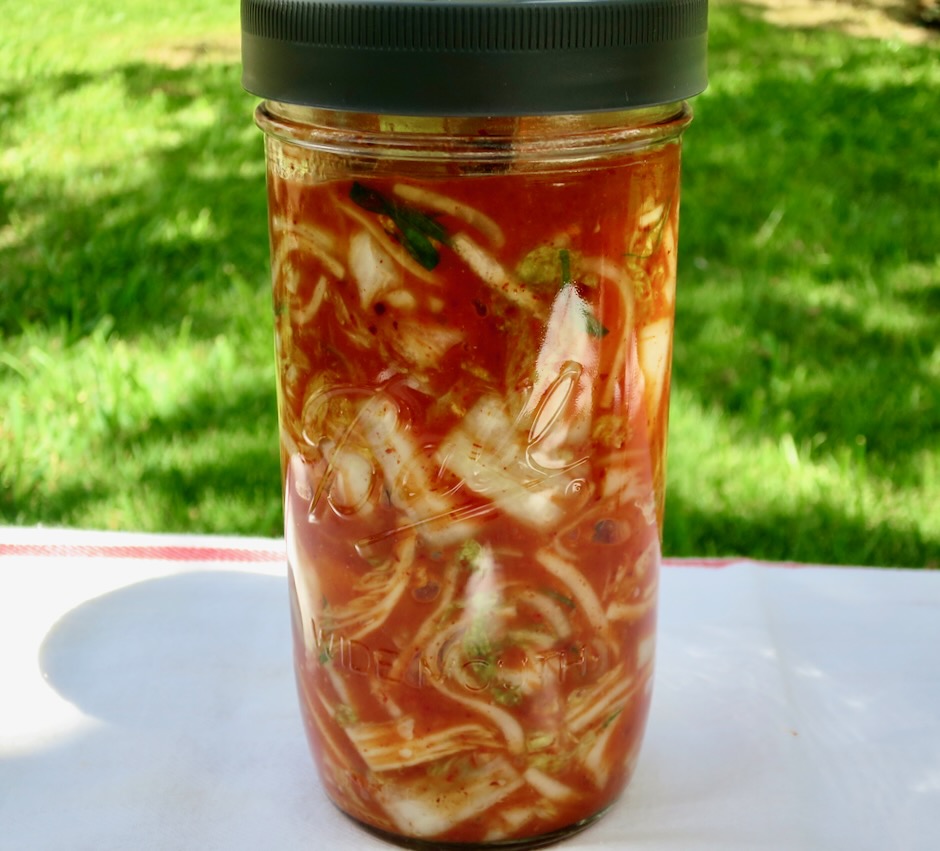
I never thought I would say that kimchi is beautiful but if you make your own, it truly is.  There is no kimchi like this available at stores where I live.  It’s fresh, spicy, and delicious.

Homemade Kimchi

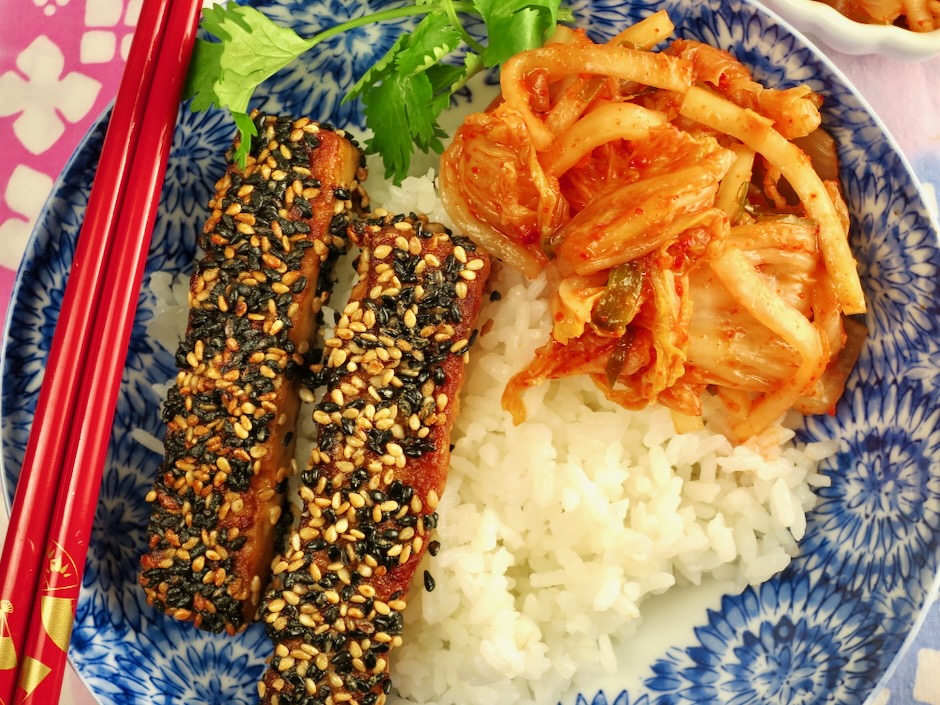
Kimchi is delicious served with rice and sesame tofu.

Homemade Kimchi with Sesame Tofu & Rice

Homemade Kimchi
 
Author:
Serves: 2 quart jars
Ingredients
  • 1 head Napa cabbage (about 2½ pounds) bottom trimmed, quartered, core removed, leaves cut into 2-inch pieces
  • ¼ cup medium grain salt (I use Pacific Brand by Aloha Salt Co.)
  • 1 cup distilled or purified water
  • Kimchi paste: ½ cup distilled or purified water
  • 1 tablespoon mochiko rice flour
  • 1 tablespoon granulated sugar
  • Vegetables: ½ small bundle green onions, julienned
  • ¾ cup daikon radish cut into 2-inch long matchsticks (optional)
  • ¼ medium sweet onion finely grated
  • 4 cloves garlic (medium size) peeled and finely grated
  • 1 2-inch piece ginger, peeled and finely grated
  • ¼ cup gochugaru (Korean red pepper)
Preparation
  1. Place cut cabbage in a large, wide bowl. Mix salt with 1 cup water (distilled or filtered). Pour salt water over the cabbage and toss well (I use food-safe disposable gloves). Not all of the salt will have dissolved but that's OK, just mix the salt in with the cabbage and water. Cover the bowl and set aside for 1½ hours, tossing a few times.
  2. Meanwhile, whisk ½ cup water with mochiko flour in a small saucepan over medium heat, stirring constantly. Once the mixture begins to thicken and bubble (pudding consistency) add the sugar and whisk until combined. Remove from the burner, transfer kimchi paste to a bowl and let cool completely. Once kimchi paste has cooled, measure out 4 tablespoons and mix in grated onion, garlic, and ginger. Add gochugaru and mix thoroughly, adding more paste as needed.
  3. Drain cabbage in a colander and rinse under cool water to remove some of the salt. I give mine a fairly quick rinse making sure not to remove all of the salt. Drain and add back to the large bowl. Toss in daikon if using, and green onions. With food-safe gloves or clean hands, mix in kimchi seasoning paste and toss to coat the vegetables well. Transfer to clean quart jars leaving at least 2-inch headspace. Use fermenting springs or glass weights and lids if you have them. Otherwise press down on the kimchi firmly with a spoon so it is packed tightly. Cover with a lid and set aside away from the sun for 24 hours before refrigerating. This will allow enough time for fermentation to begin. You may leave the kimchi out at room temperature for another day if you prefer a more sour flavor. Taste the kimchi to see if the flavor is just right for you. The kimchi will continue to ferment very slowly when kept in the refrigerator. Kimchi will keep well in the refrigerator for months, if you can make it last that long.
Beans, Dinner, Lactose Free, Mexican, Recipes, Vegan, Vegetarian

Tlacoyos

August 15, 2021

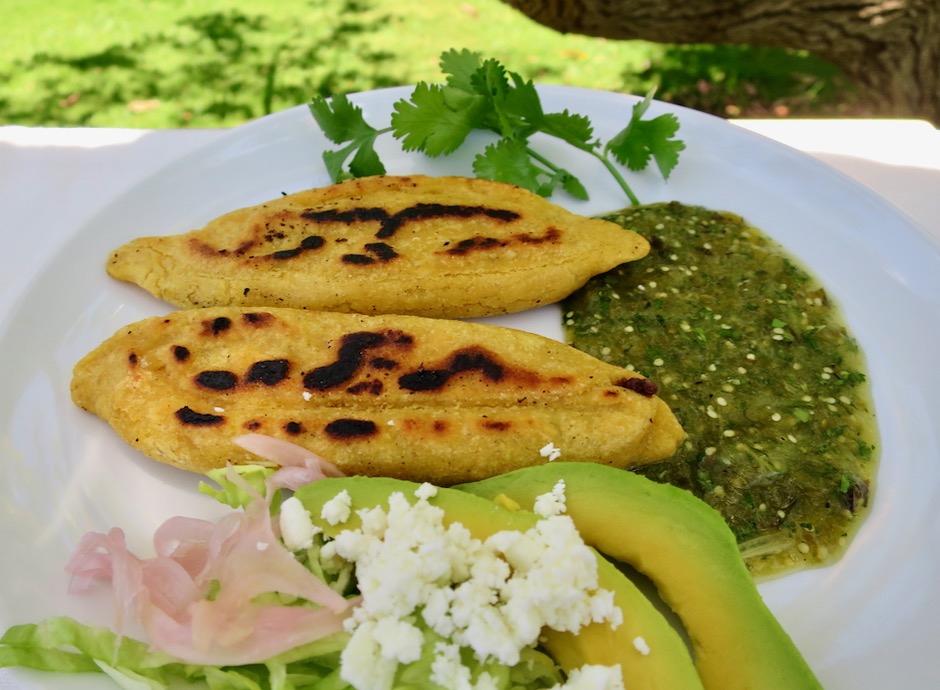
Tlacoyos with Roasted Salsa Verde

Our chance event started out with a neighbor who came by at sunset one afternoon, asking if he could have a few avocado leaves from our tree.  It was the first time we met Nestor, a local chef, and as it turns out, it was our good fortune.  Nestor explained he uses avocado leaves in some of his Mexican recipes.  Of course we agreed to give him some avocado leaves as well as a handful of ripe avocados.  Several days later, Nestor delivered some of his homemade tlacoyos, a rustic Mexican street food dish made with masa dough and beans. They were so delicious I couldn’t stop thinking about them.  I was determined to make my own and with just a few ingredients, this dish became one of our favorite Mexican meals.

Tlacoyos

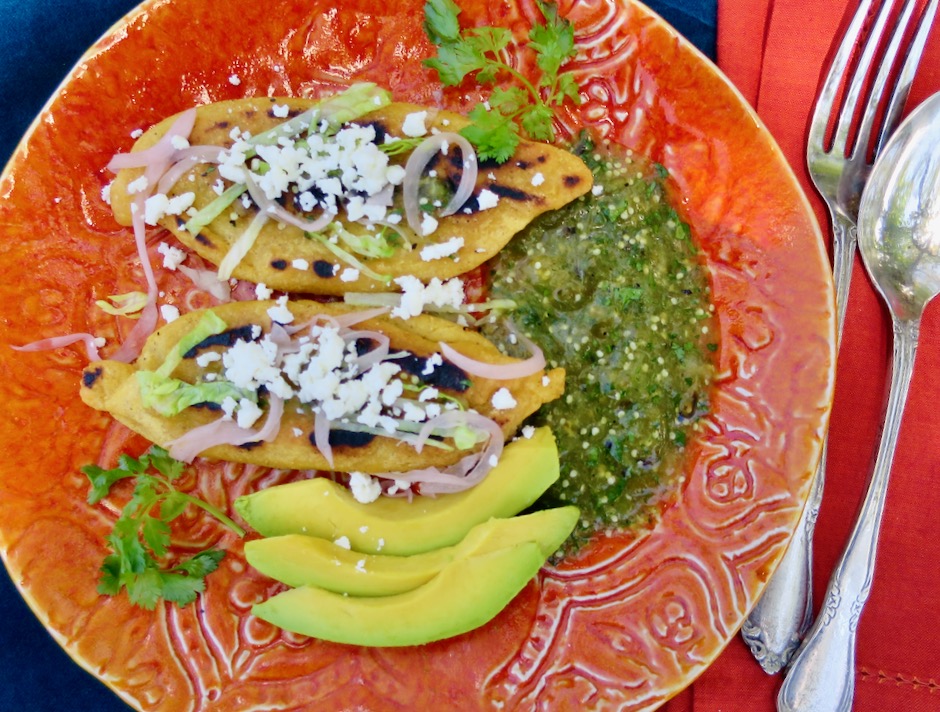
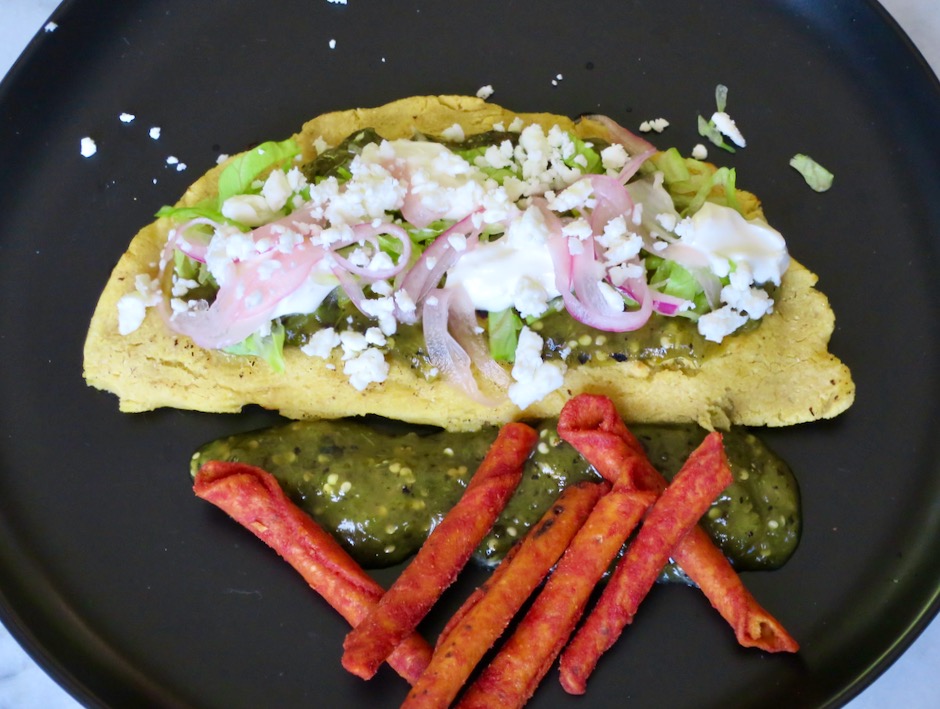
If you’re a fan of masa harina in all of its various forms (tortillas, tamales etc.) you’ll want to add this to the Mexican section of your recipe files.  The toppings and roasted salsa verde served with the tlacoyos bring this humble dish together making it a stellar meal.  

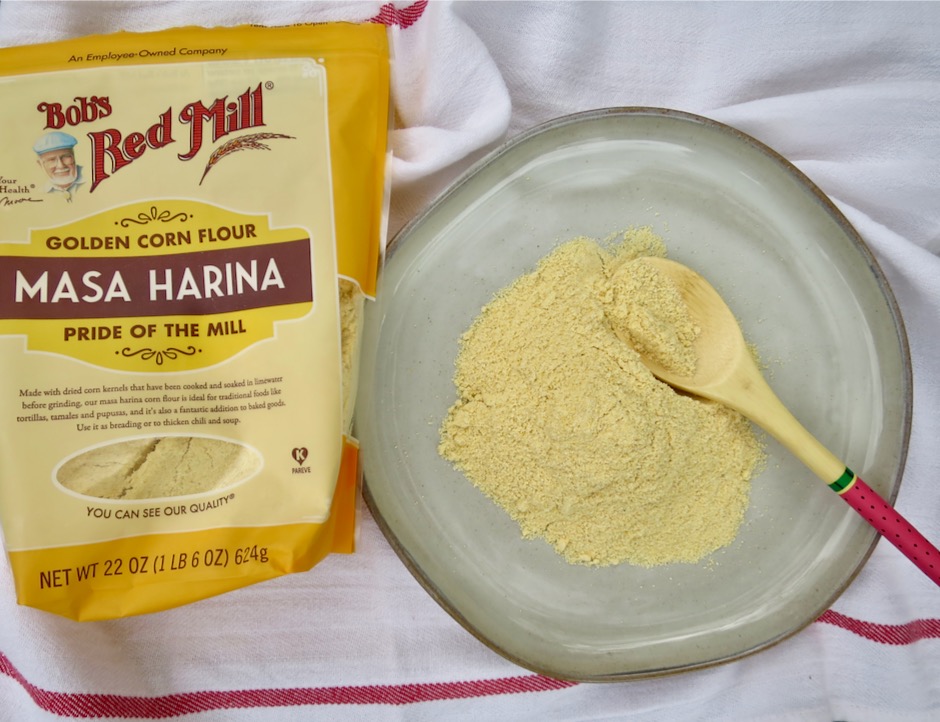
Masa Harina

Bob’s Red Mill masa harina is a good choice if you can find it.  It has a wonderful flavor and comes in small 22 ounce bags.  If you want a larger quantity consider a big bag of Maseca brand which is just over four pounds.  Keep in mind they have two types of masa.  You will want the one labeled “Tamal.”

Masa Harina

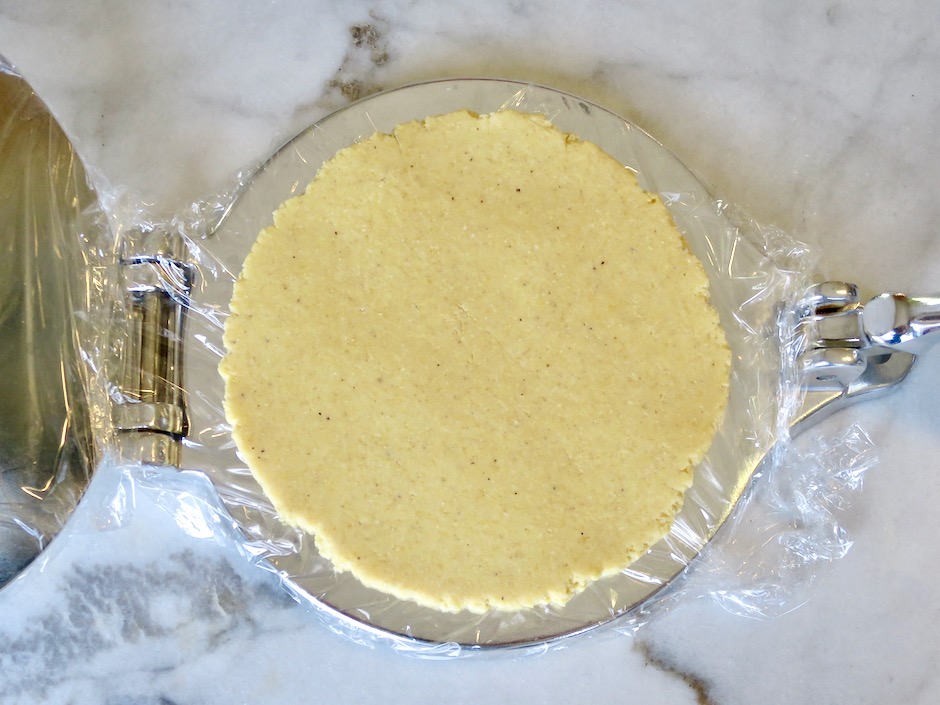
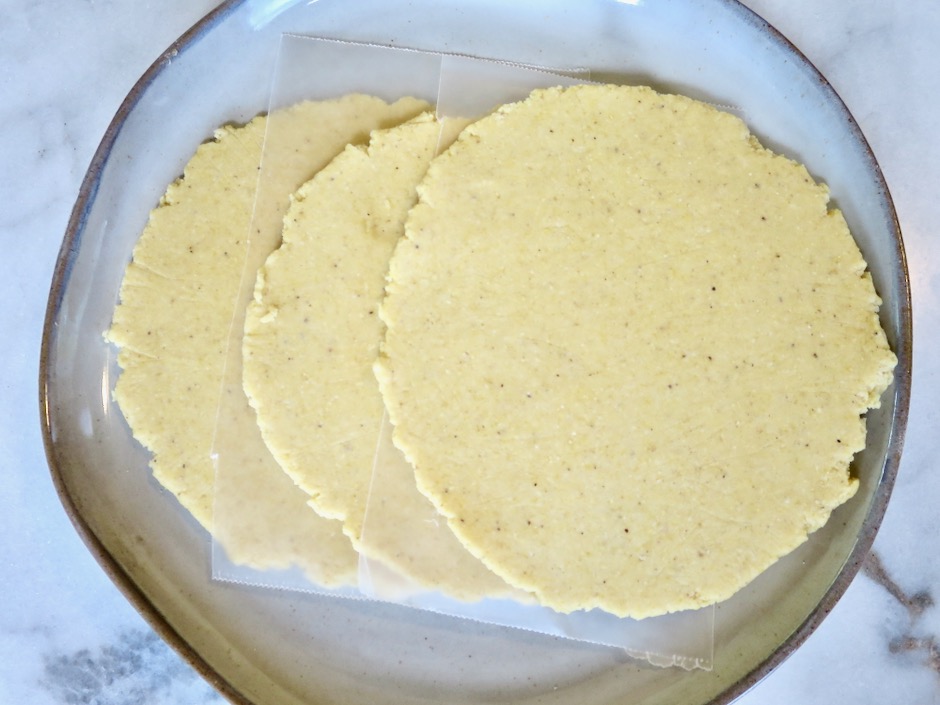
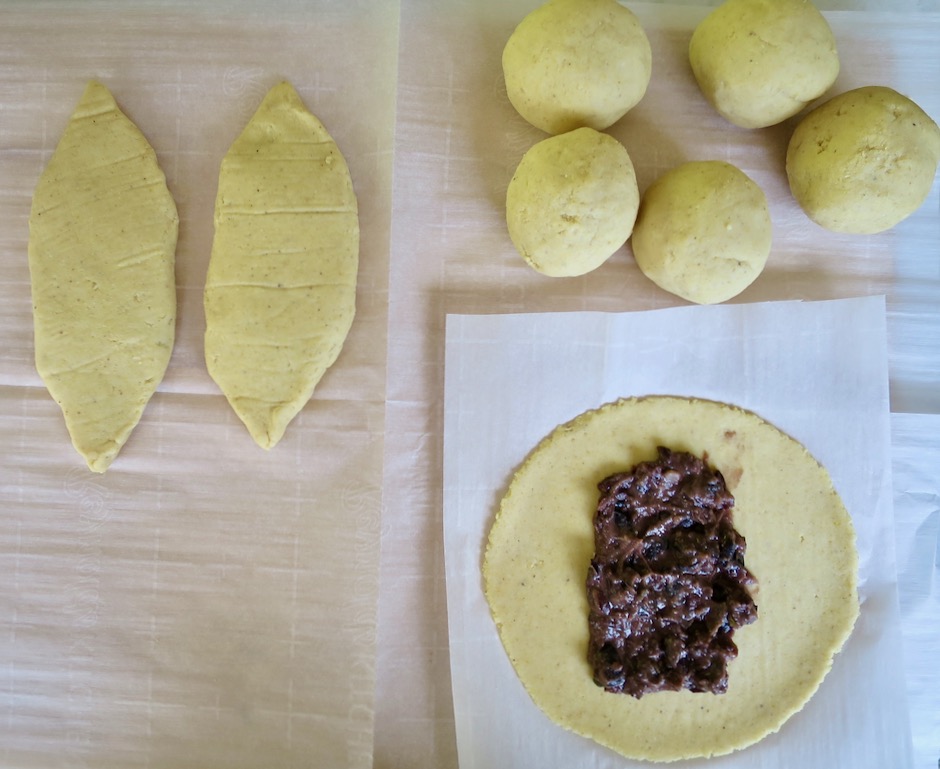
I used a tortilla press to flatten the masa however flattening the masa harina balls with your hands is easy to do.  

Masa Harina Rounds

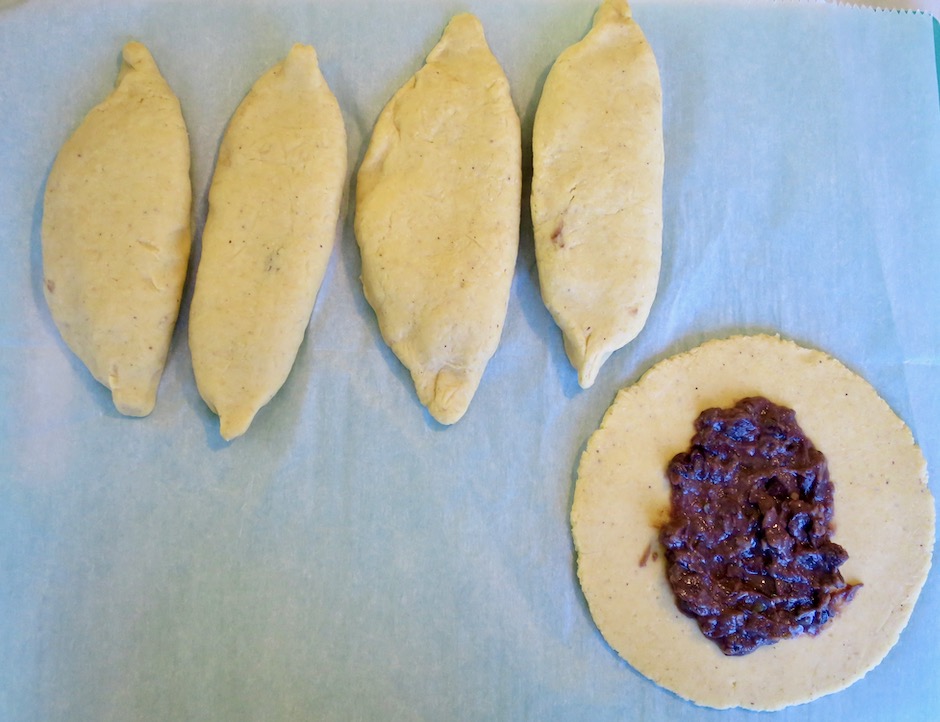
Shaping Tlacoyos

Black beans are one of the most common fillings for tlacoyos.  They have the perfect consistency as a filling and very flavorful.

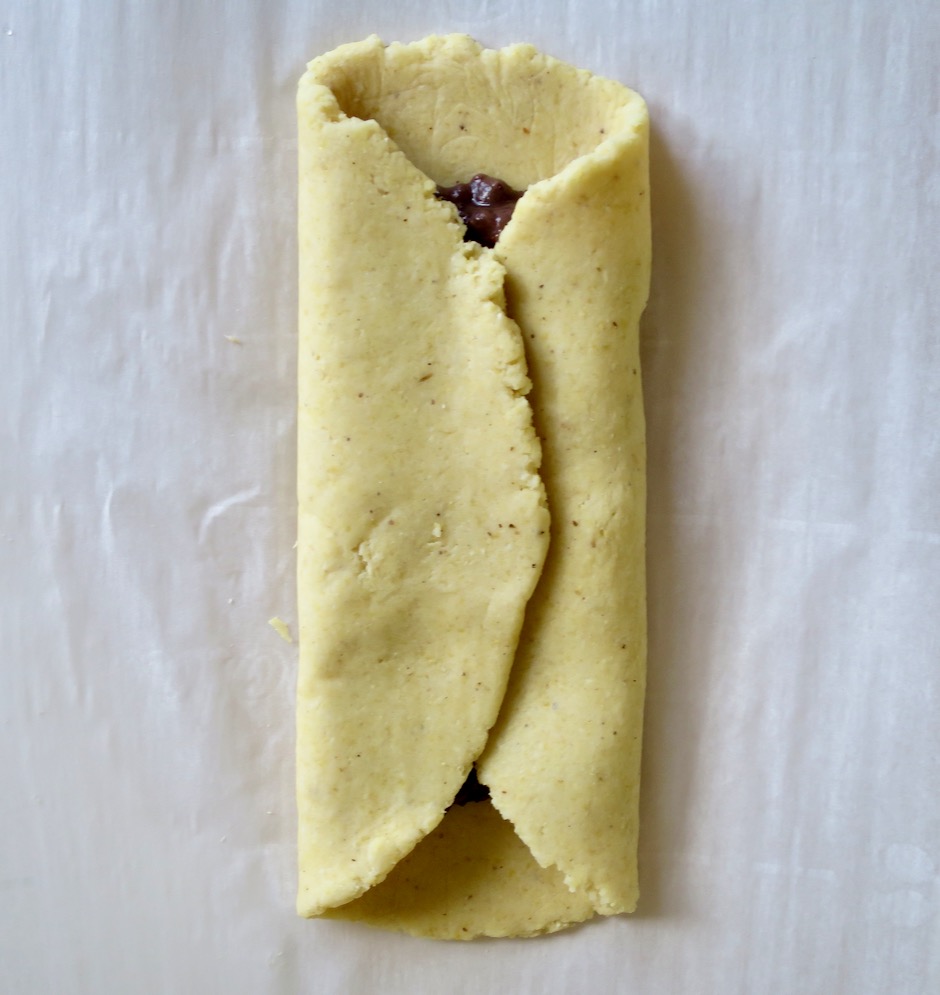
Shaping Tlacoyos

Once the filling is placed in the center of the masa round, the sides are brought to the center then gently pinched together to form a tight seal.  The ends are pinched together into an oval shape.

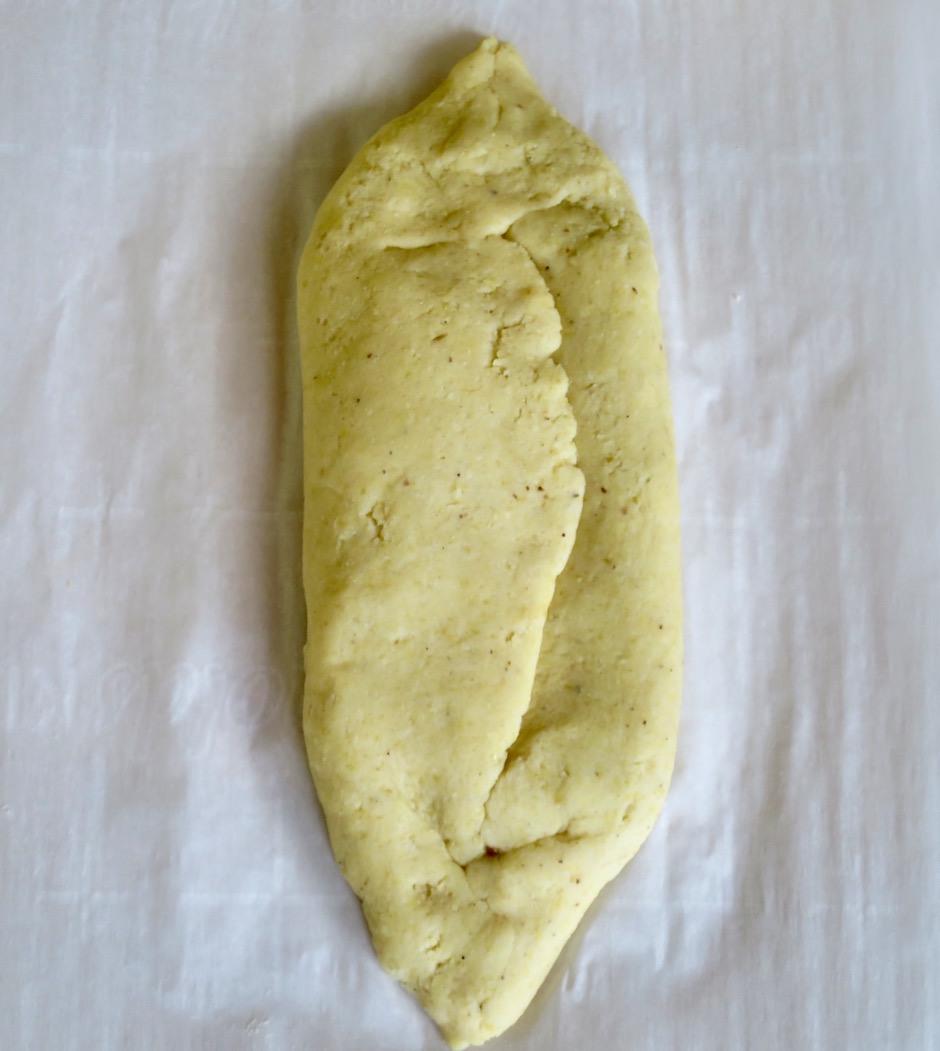
Shaping Tlacoyos

The seams are gently pressed together so the filling will not leak when frying.  Pinch together any cracks that appear.
Shaping Tlacoyos

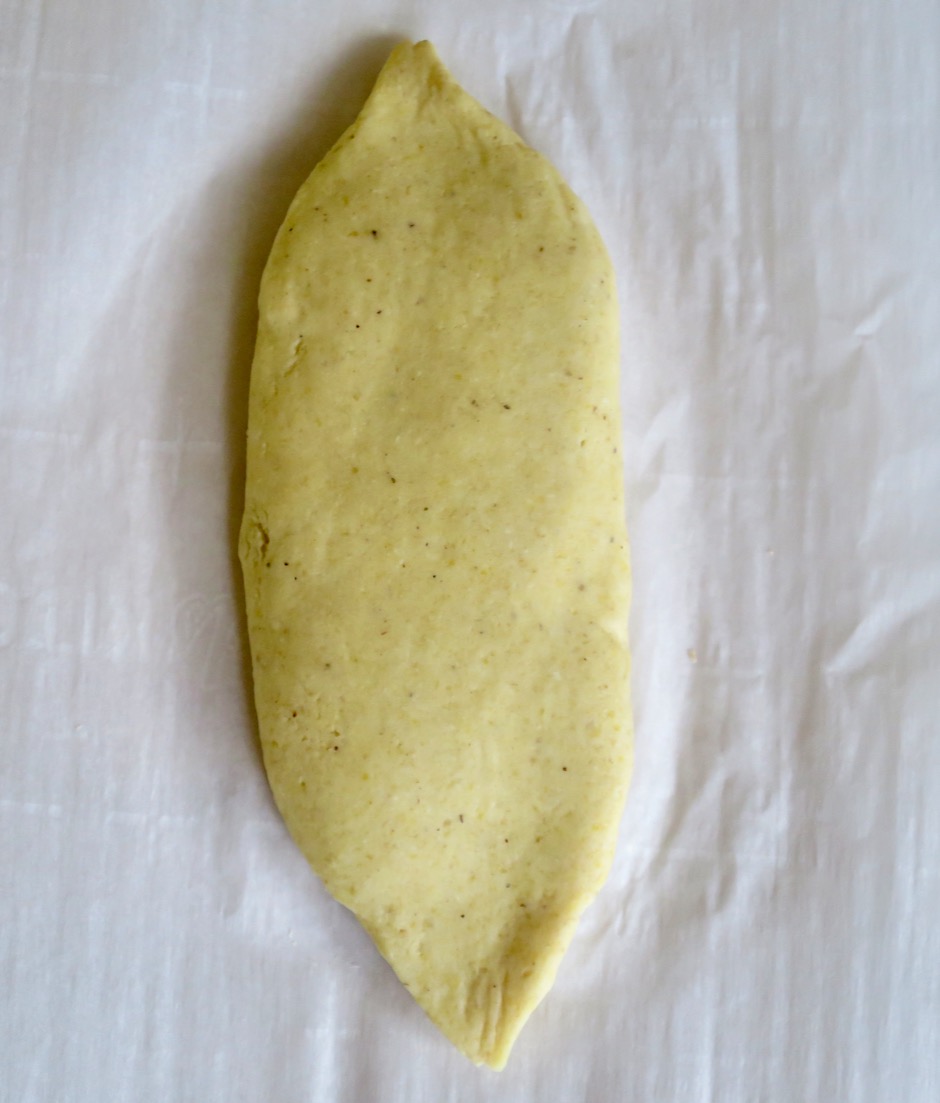
Shaping Tlacoyos

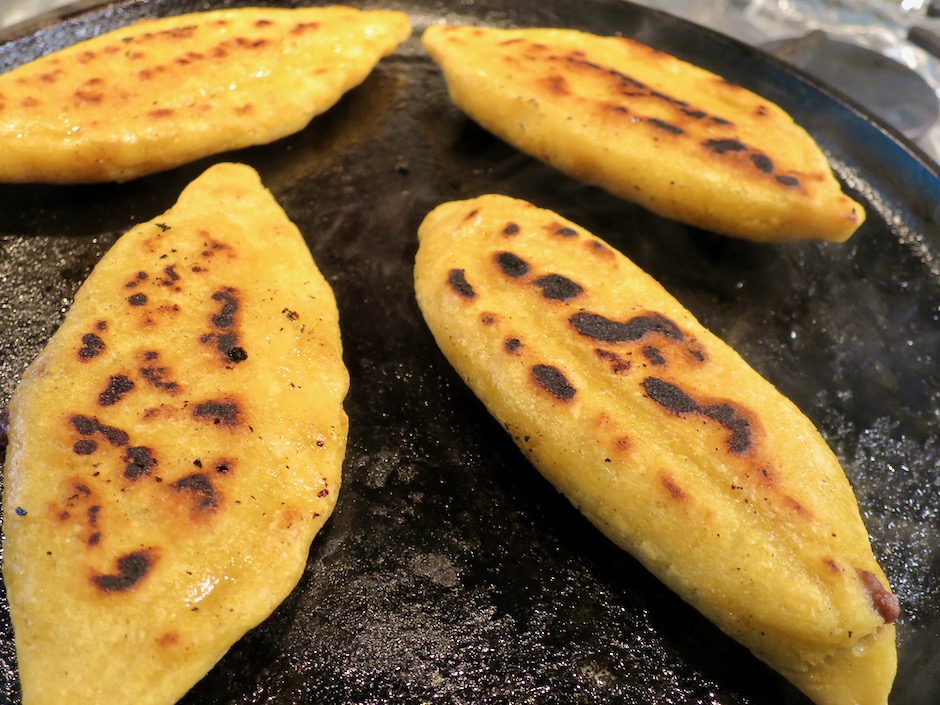
Typically the tlacoyos are oval shaped however I have seen round ones as well.  The tlacoyos that Nestor brought to us were shaped into little triangles.  No mater how you shape them, be sure to get a nice char on both sides.  This brings out the delicious flavor of the masa.

Black Bean Tlacoyos

Tlacoyos

Tlacoyos
 
Author:
Serves: 2 servings
Ingredients
  • 1½ cups masa harina (Bob's Red Mill recommended)
  • ½ teaspoon salt
  • 1¼ cups warm water
  • Filling of your choice such as refried black beans, potatoes and cheese. I have made these with beef barbacoa and they were delicious. Just be sure the filling is not too wet or it will leak out when frying.
  • Canola oil for frying
Preparation
  1. In a medium bowl, mix together masa, salt, and water. Add additional water by the teaspoon if dough seems dry. You want the dough to be quite moist for this recipe so that it doesn't crack when shaping and frying. Divide dough into 6 equal portions (8 for mini tlacoyos) and shape into balls.
  2. Using your hands or a tortilla press, flatten each ball into a fairly thick circle. Spread 1 tablespoon and up to 1½ tablespoons refried beans (if making 6) down the center of the dough making sure to leave a 1-inch border. Bring both edges of the dough towards the center and pinch together to form a tight seal. Slightly flatten the tlacoyo into an oval shape making sure not to press too hard so the beans won't leak out. Cover with plastic wrap while you continue with the rest of the dough.
  3. Heat a cast iron skillet (nonstick will work if you don't have a cast iron skillet) over medium heat. Place half of the tlacoyos in the pan and fry until they begin to char. Drizzle in a few teaspoons of oil and continue to fry until both sides are nicely charred. Continue with the remaining tlacoyos. You may serve the tlacoyos with any of these toppings: Salsa verde, shredded lettuce, pickled red onions, queso fresco, sour cream, nopalitos, cilantro, and avocado slices.


Dinner, Lactose Free, Recipes, Salad, Side Dishes, Vegan, Vegetarian, Veggies

Salad-e Shirazi (Persian Cucumber, Tomato and Onion Salad)

July 29, 2021

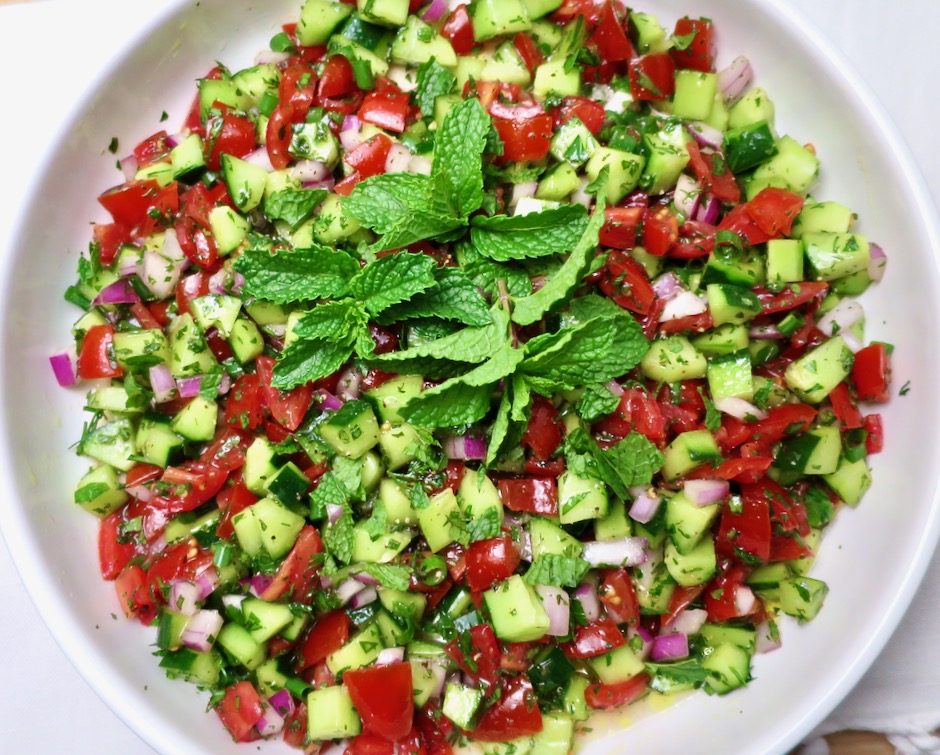
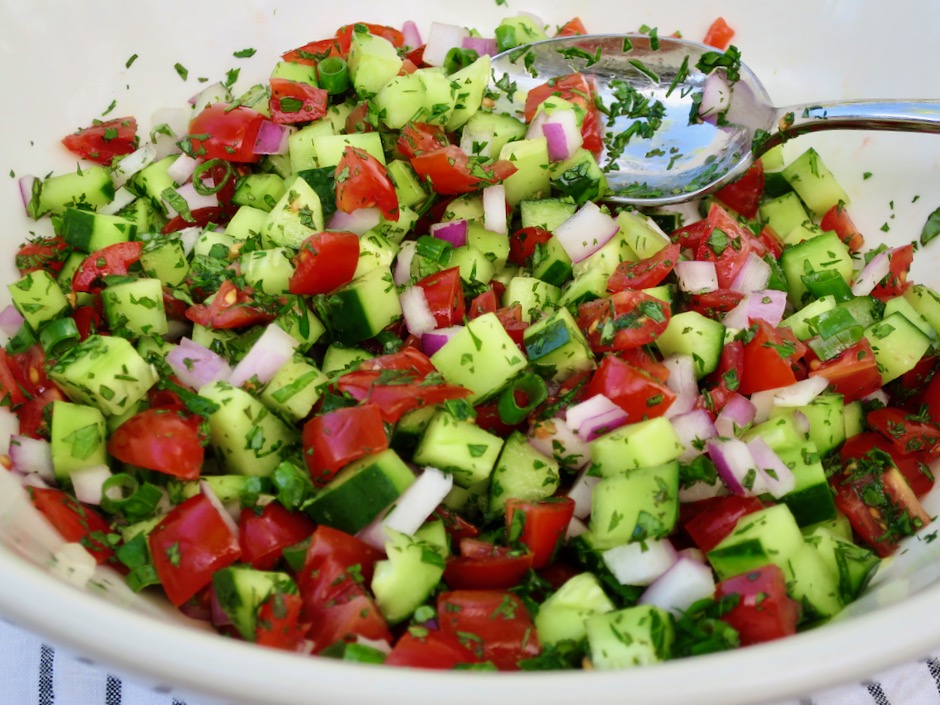
Salad-e Shirazi - Persian Cucumber, Tomato & Onion Salad

This refreshing salad comes from Samin Nosrat, writer of a James Beard award-winning New York Times best selling cookbook, Salt, Fat, Acid, Heat.  We watched a documentary on Netflix featuring Ms. Nosrat a few years ago and really enjoyed it.  I love the simplicity of this recipe.  It has just a few ingredients but it packs loads of flavor.  It’s the perfect summer salad.

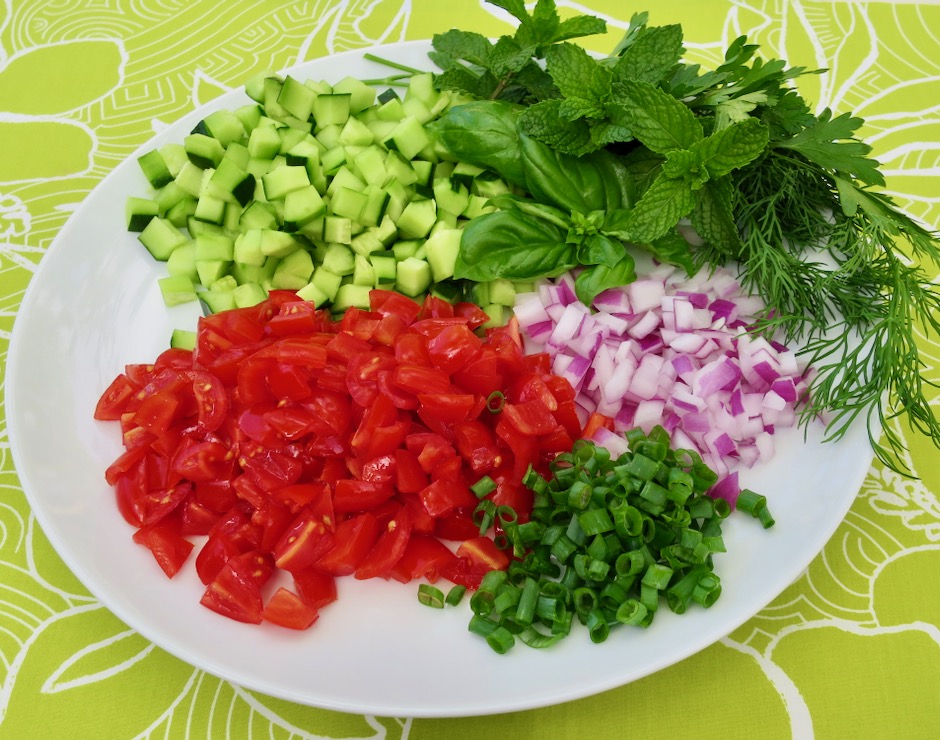
Diced Cucumber, Red Onion, Green Onion, Tomato & Fresh Herbs

The cucumbers and onions are crispy, the tomatoes are sweet, and the fresh herbs add life to this wonderful salad.

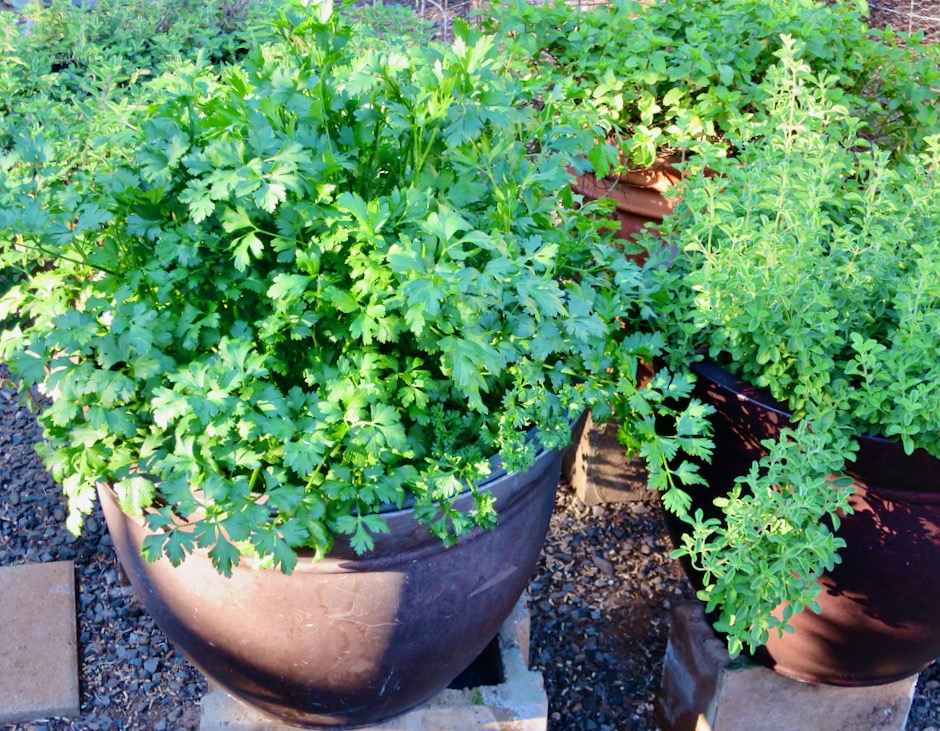
Italian Parsley in the Garden

Our herbs do quite well in our hot climate.  Italian parsley is an herb that we always have in our garden.

Salad-e Shirazi - Persian Cucumber, Tomato & Onion Salad

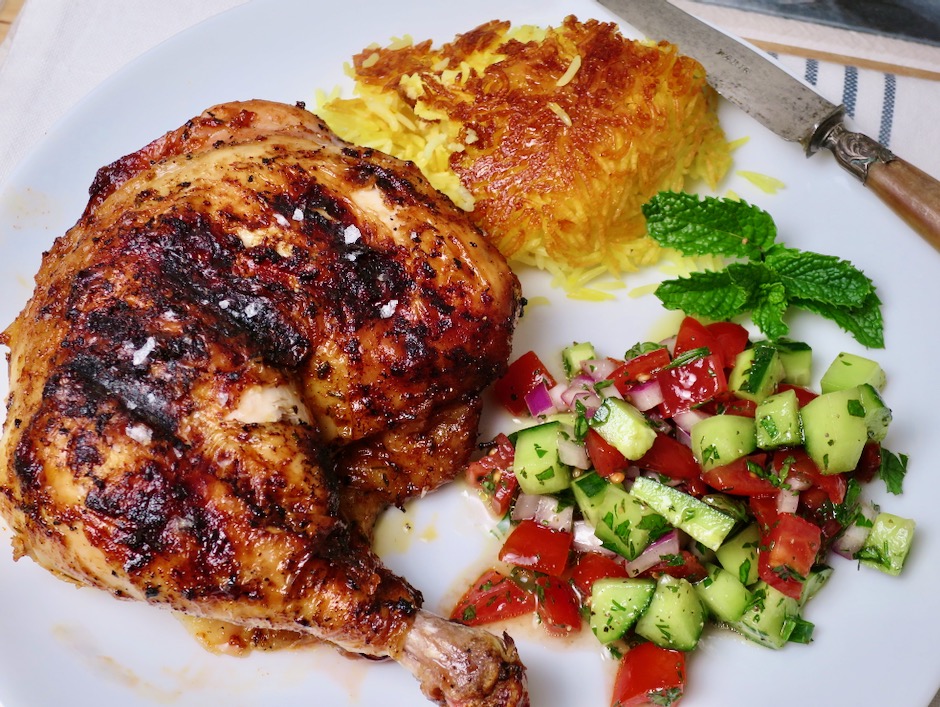
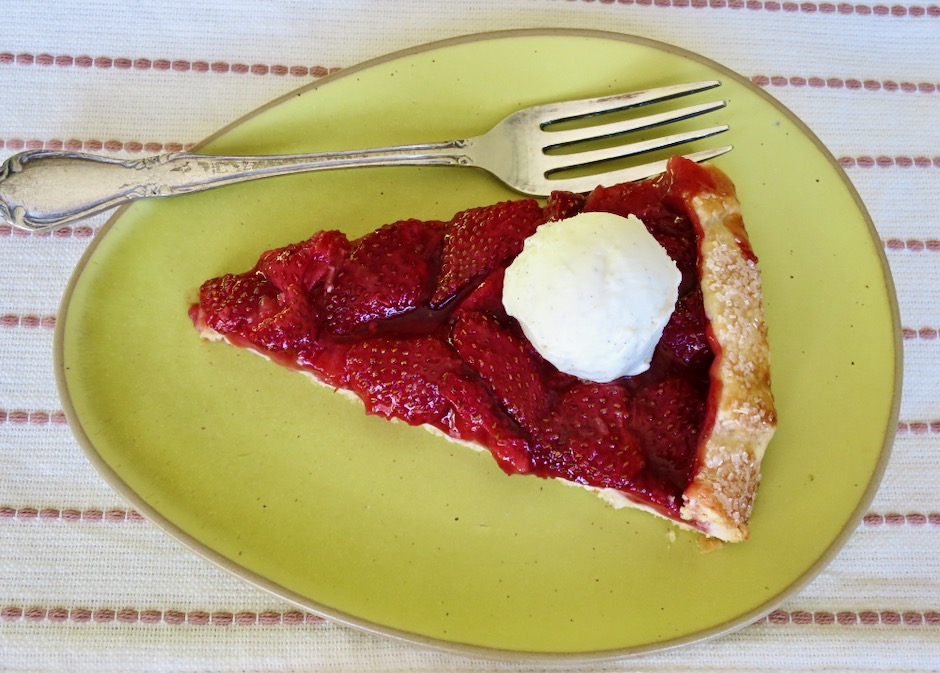
This salad is delightful on its own, but pair it with grilled chicken and tahdig, and you’re in for a real treat.

Salad-e Shirazi - Persian Cucumber, Tomato & Onion Salad with Grilled Chicken and Tahdig

Salad-e Shirazi (Persian Cucumber, Tomato and Onion Salad)
 
Adapted from Samin Nosrat's recipe
Author:
Serves: 4
Ingredients
  • 8 ounces Persian or Japanese cucumber
  • 3 tablespoons diced red onion
  • 2 tablespoons any combination of finely chopped Italian parsley, basil, dill or cilantro
  • 2 teaspoons finely chopped fresh mint
  • 1 tablespoon diced green onion
  • 8 ounces diced grape or cherry tomatoes
  • ¼ cup freshly squeezed lime juice
  • 3 tablespoons extra virgin olive oil
  • Kosher salt and freshly ground black pepper
Preparation
  1. Remove alternating stripes of peel on the cucumbers and trim ends. Dice cucumbers into ¼-inch pieces and place in a large bowl with onion and fresh herbs including mint. Cut grape or cherry tomatoes into quarters, about ¼-inch pieces.
  2. In a small bowl, whisk together ¼ cup lime juice, olive oil, ½ teaspoon kosher salt and ¼ teaspoon pepper. Just before serving, dress vegetables with some of the vinaigrette and stir to combine. Taste and adjust seasoning with salt and pepper and more dressing. Serve slightly chilled with your favorite grilled chicken, tahdig or buttered rice. Leftover salad can be refrigerated for 1 day.


Dessert, French, Fruit, Jams & Jellies, Lactose Free, Recipes, Vegan, Vegetarian

Strawberry Galette

July 21, 2021

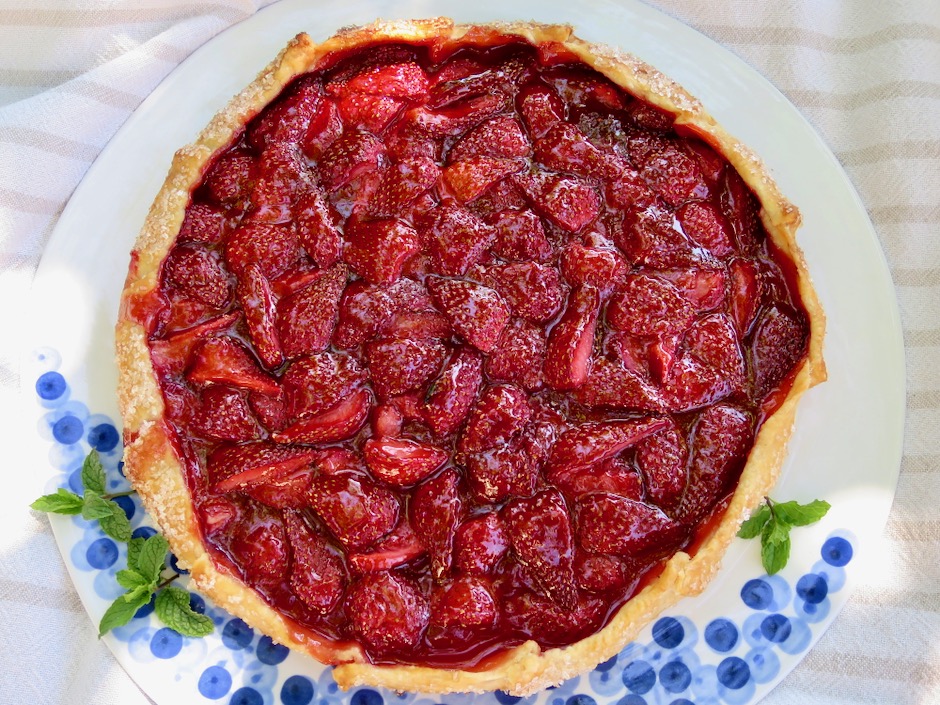
Strawberry Galette

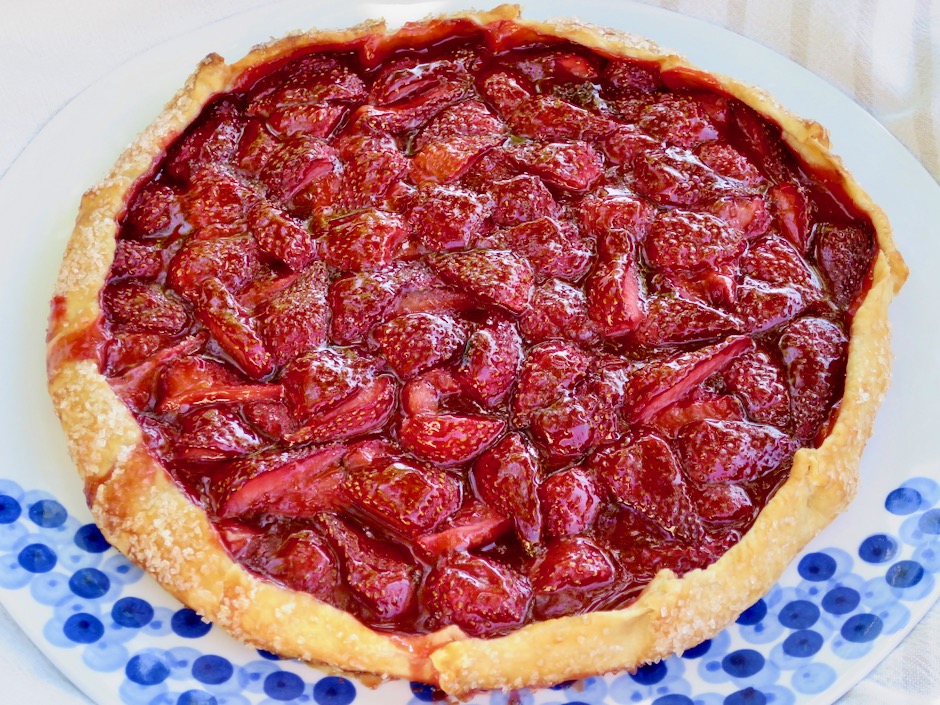
One of my favorite fruits to use in a galette is mango.  During the summer months our two trees produce a good harvest of fruit that we use in all sorts of recipes.  But not everyone has access to mangos so any number of other seasonal fruits or berries are suitable.  I particularly like strawberries.  They make a gorgeous galette that bakes up beautifully.  The crust holds up well and leftovers, if any, are a real treat with coffee the following morning.

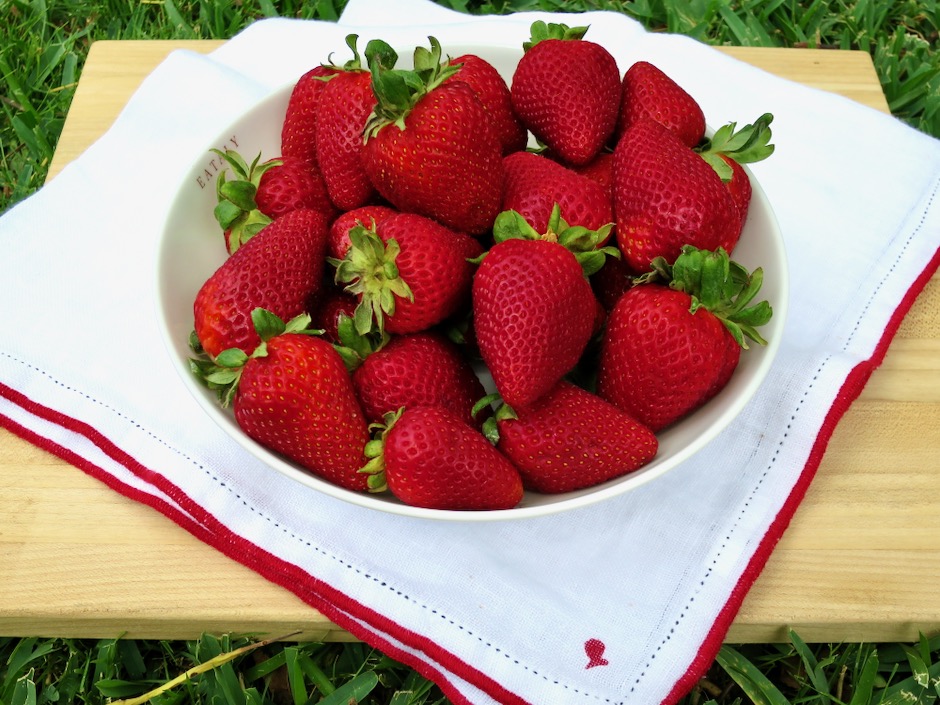
Fresh Strawberries

The strawberries found in the markets can vary in sweetness.  It’s a good idea to buy ones that are ripe and juicy in appearance but not at all soft.  Strawberries are quite perishable so plan on making the galette within a day or two of buying your strawberries.

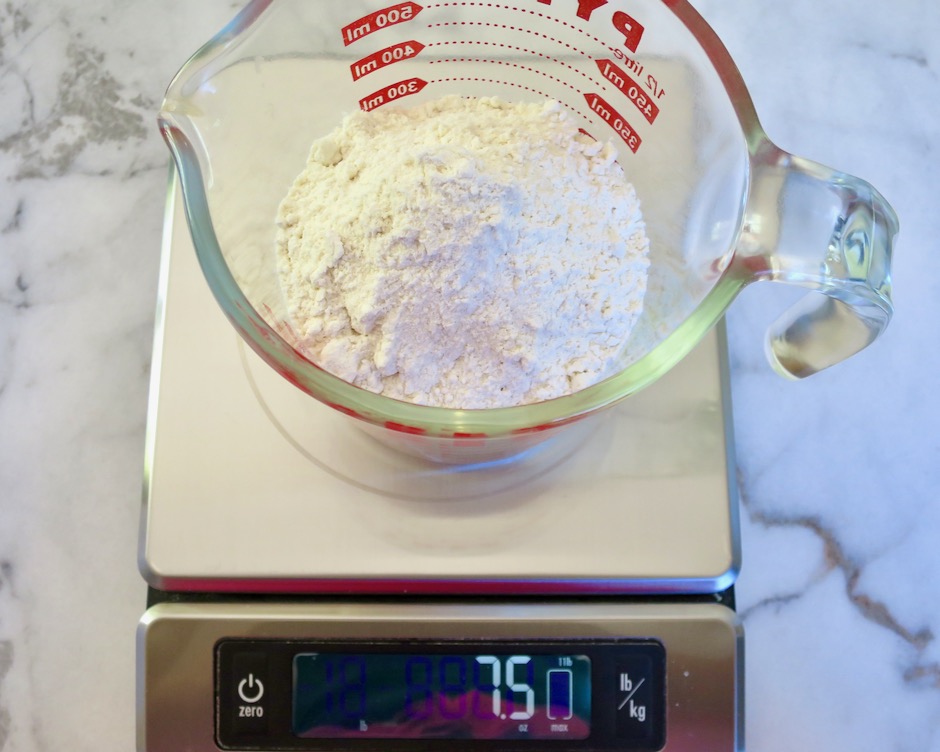
Weighing Flour

The crust for this galette is excellent. It holds up well to the juicy strawberry filling and does not become soggy even if you have leftovers the following day.

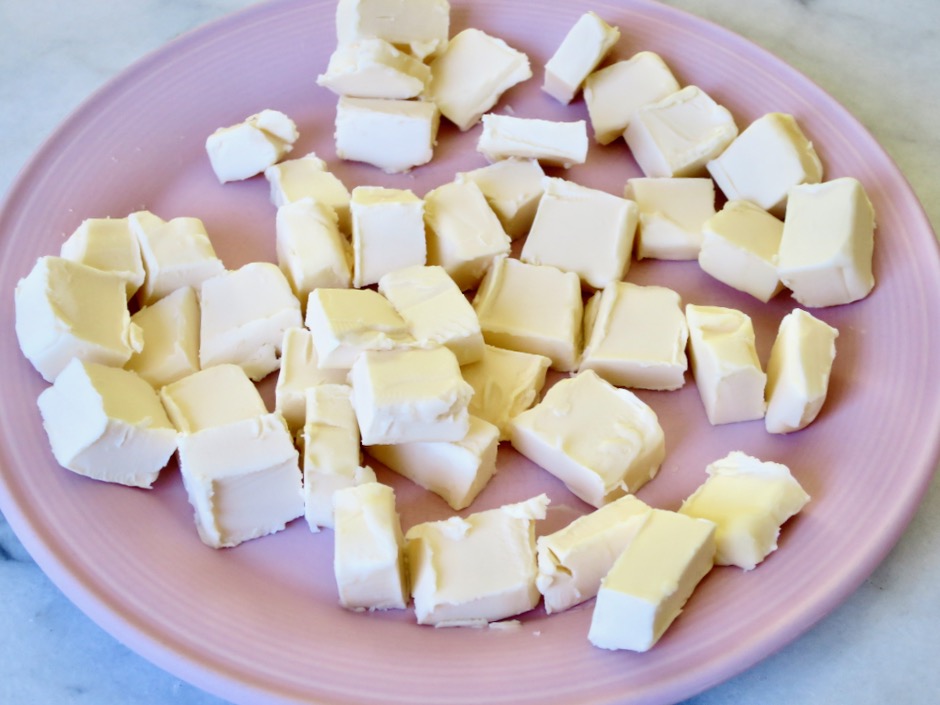
Chilled Earth Balance Buttery Stick Cubes

I used Earth Balance Buttery Sticks (vegan and lactose free) but feel free to use regular unsalted butter as the original recipe calls for.   Whatever you choose to use, make sure it does not sit out on the counter and is well chilled.  Buttery Sticks are not as firm as regular butter so I freeze the cubes for 15-30 minutes before proceeding with the recipe.

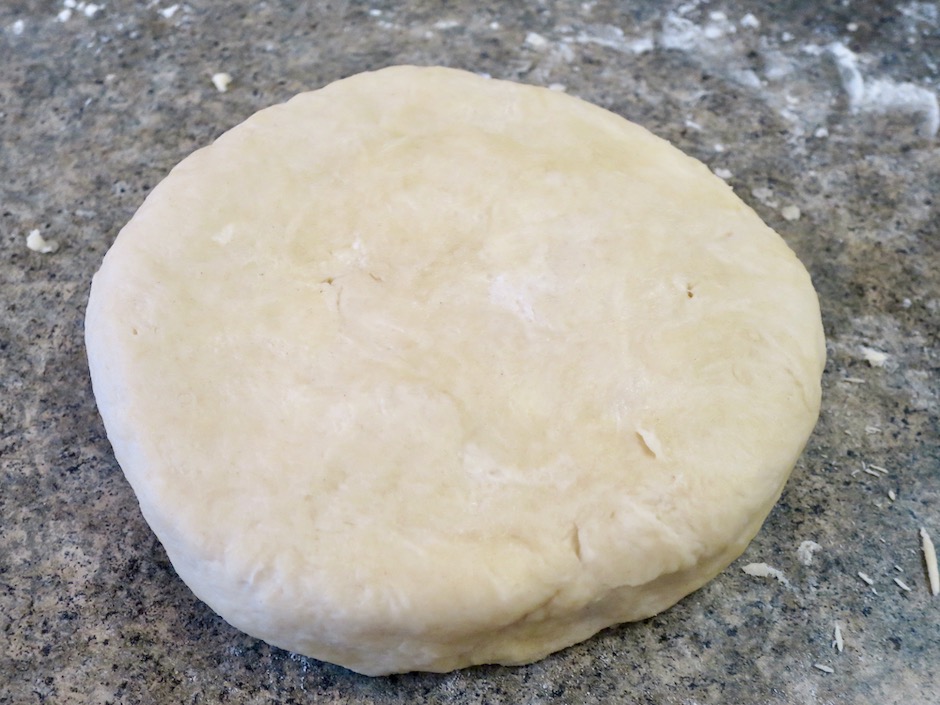
Galette Dough

If I am short on time I freeze the wrapped dough for 30 minutes instead of chilling it in the refrigerator for a few hours.

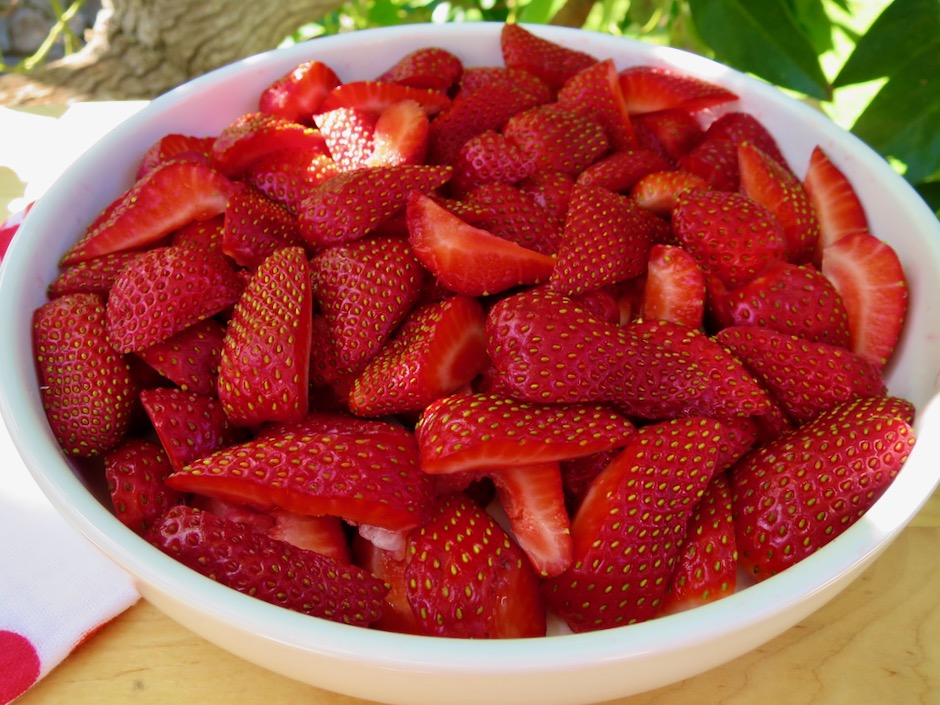
Sliced Strawberries

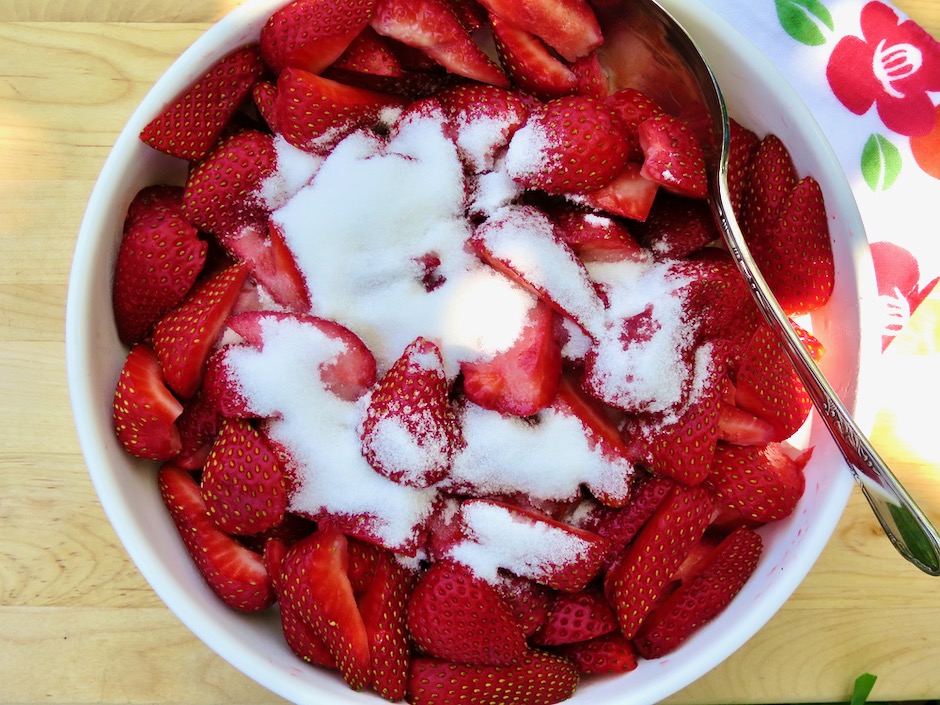
Strawberries & Sugar

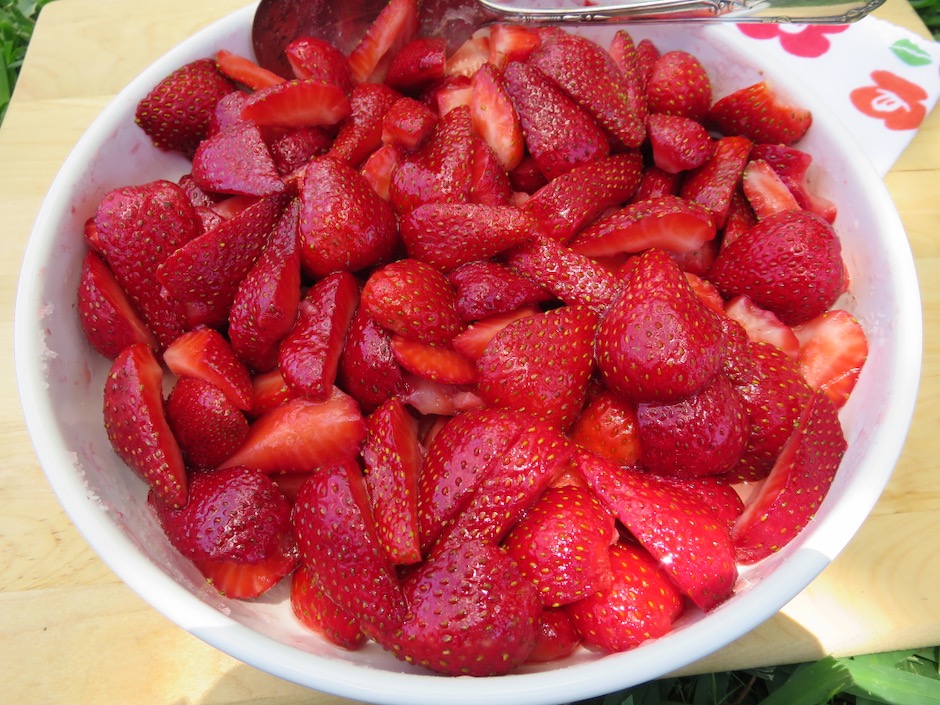
A little sugar is stirred into the berries which will give them a bit of sweetness, but not too much.

Strawberries & Sugar

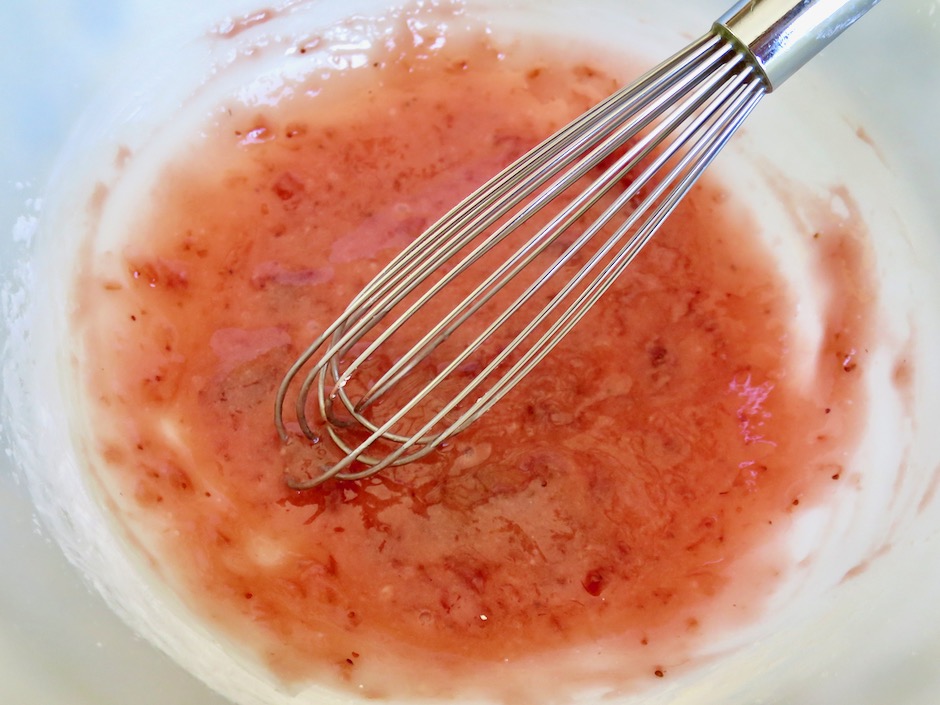
Strawberry Jam & Cornstarch Mixture

The strawberries are gently tossed into a mixture of strawberry jam that is mixed with cornstarch and a pinch of salt.  

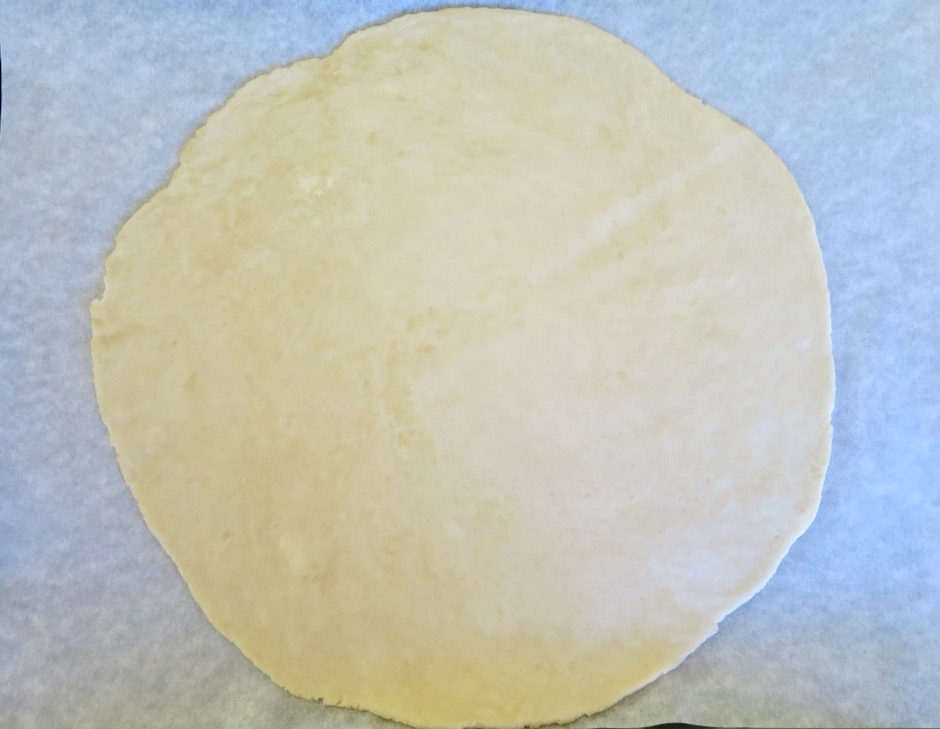
Rolled Out Dough

Roll the dough out on parchment paper.  Transfer the rolled out dough to your rimmed baking sheet and continue with the recipe.  

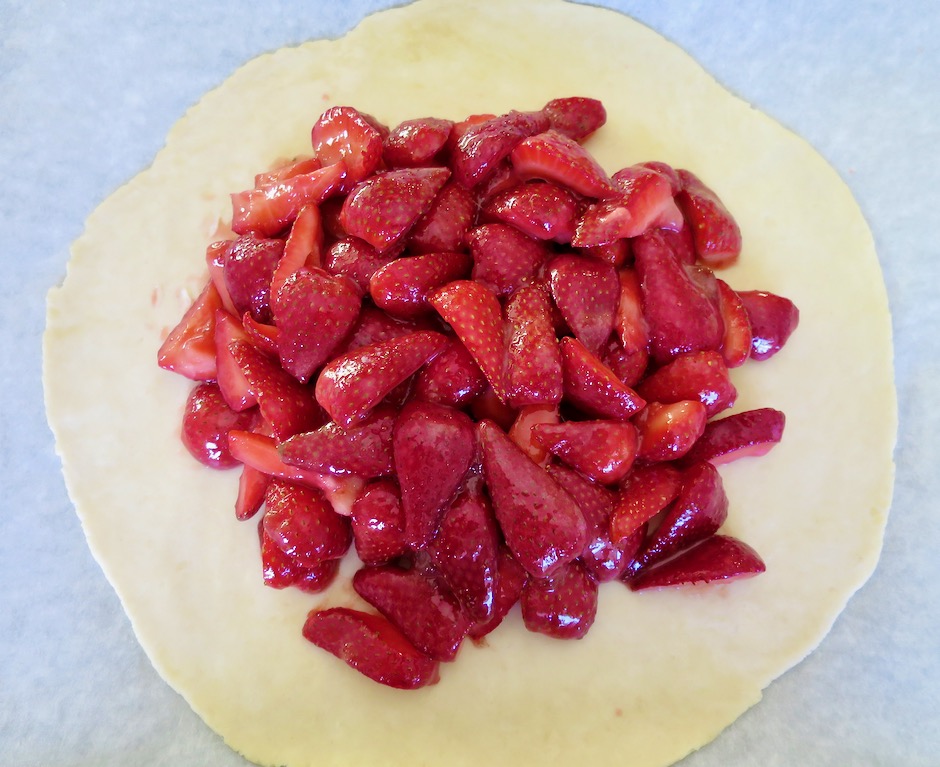
Strawberries on Galette Dough

Leave a 2-inch border (sometimes I end up with 1 1/2-inches!) to fold over the filling.  The original recipe calls for brushing the edges of the galette with some of the reserved strawberry juice and sprinkling sugar over the edges before baking.  Try not to apply too much of the juice as it is quite thin and will drip down the sides of the crust.  You can brush the crust with a bit of lactose free half and half or whole milk instead, then sprinkle with sparkling sugar.  The coarse-grained sugar adds a beautiful sparkle and sweet crunch to each slice of the baked galette.

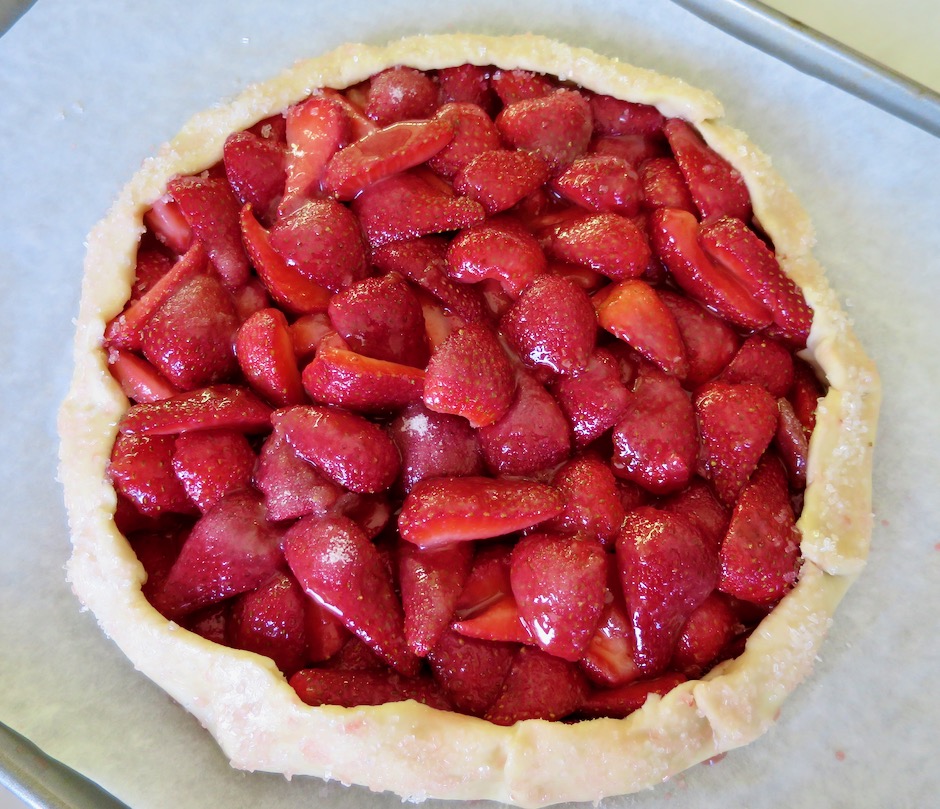
Strawberries in Galette Dough

The dough is pleated every 2 inches to shape the galette and keep the strawberries the center of attention.

Strawberry Galette

I brush a bit of warmed strawberry jam over the strawberries once the galette is done baking. It gives the galette extra flavor and a beautiful sheen.

Strawberry Galette with Ice Cream

Strawberry Galette
 
Adapted from Cook's Country
Author:
Serves: 10
Ingredients
  • Dough:
  • 1½ cups (7½ ounces) all-purpose flour
  • ¼ teaspoon salt (1/2 teaspoon if using unsalted butter)
  • 1 tablespoon granulated sugar
  • 10 tablespoons Earth Balance Buttery Sticks cut into ½-inch cubes and frozen for 15 - 30 minutes (or unsalted butter well chilled)
  • 6 tablespoons ice water
  • Filling:
  • 1½ pounds strawberries, hulled, halved if small or quartered if large (about 5 cups)
  • ¼ cup (1¾ ounces) granulated sugar + 1 tablespoon sugar, divided
  • ⅓ cup strawberry jam + 1 tablespoon, divided
  • 1½ tablespoons cornstarch
  • ⅛ teaspoon fine sea salt
  • 1 tablespoon coarse sparkling sugar
Preparation
  1. For the dough: Process flour, salt, and sugar in a food processor until combined, about 4 pulses. Scatter Buttery Sticks cubes over the top and pulse until mixture resembles coarse sand and butter pieces are the size of small peas, about 10-12 pulses. Add ice water to flour mixture and pulse until dough begins to form small curds and holds together when pinched with your fingers, about 5 pulses.
  2. Transfer mixture to a lightly floured counter. Gather dough into a rough rectangular mound about 8 inches long and 4 inches wide. Starting at the farthest end, use the heel of your hand to smear a small amount of dough against the counter, pushing firmly down and away from you. Continue doing this while turning the dough as you go. Continue until all the dough has been worked, about 8 times. This is a process of working the crumbles of flour, butter, and water together into a dough by smearing them against the counter, making for a sturdy, flaky crust. Form dough into a 6-inch disk, wrap tightly with plastic wrap and refrigerate for 2 hours or freeze (if short on time) for 30 minutes. The dough can be refrigerated for up to 2 days.
  3. For the filling: One hour before rolling out the dough, toss strawberries with ¼ cup sugar in a medium bowl. Set aside for 1 hour. Reserve 1 tablespoon strawberry juice (if using for crust). Drain strawberries in colander while rolling out dough.
  4. Adjust oven rack to lower-middle position and heat oven to 375 degrees. Roll dough into 12-inch circle on parchment paper. Transfer dough on parchment paper to rimmed baking sheet, cover loosely with plastic wrap and refrigerate until firm, about 15 minutes.
  5. Whisk jam, cornstarch, and salt in a large bowl. Add drained strawberries and toss gently to coat. Remove dough from refrigerator (I transfer to dough to a second rimmed baking sheet that hasn't been chilled) and mound fruit in center, leaving a 2-inch border. Grasp one edge of dough and fold up 2-inches over fruit. Repeat around circumference of galette, overlapping dough every 2-inches. Firmly pinch pleated dough to secure. Sprinkle reserved 1 tablespoon of sugar over the strawberries. Brush top edges of dough with reserved strawberry juice, half and half or whole milk and sprinkle with sparkling sugar.
  6. Bake until crust is deep golden brown and fruit is bubbling, about 1 hour 5 minutes. Let galette cool on baking sheet for 5 minutes. Warm reserved tablespoon of jam. Brush jam over the berries. Let cool for 15 minutes. Using parchment, carefully slide galette onto serving plate. Serve warm or at room temperature.


Follow

Get every new post delivered to your Inbox

Join other followers: