Browsing Category

Pork

Appetizers, Breakfast, Dinner, Lactose Free, Pork, Recipes, Rice Dishes

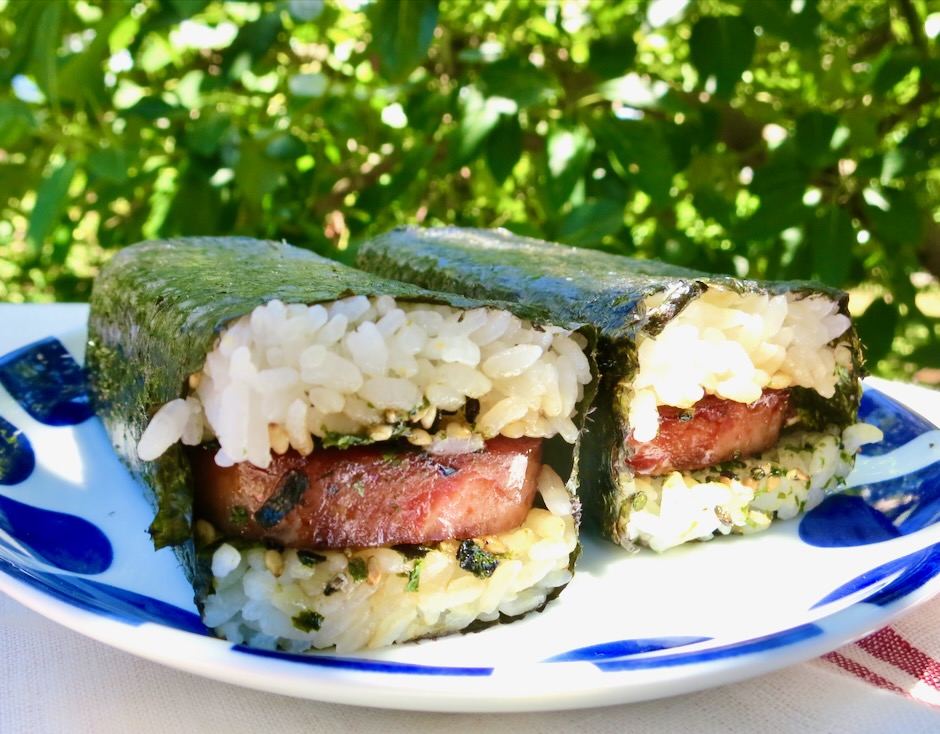
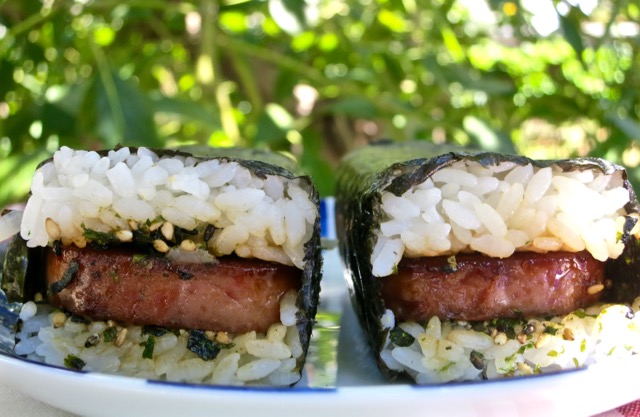
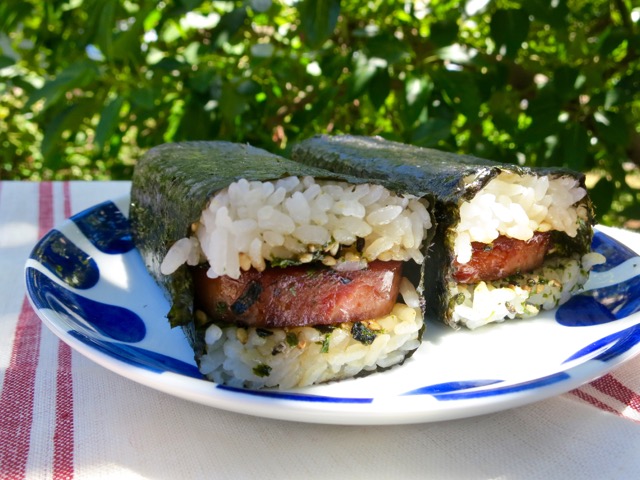
Spam Musubi

August 12, 2015

It’s true.  Every now and then I eat Spam.  Phew!  Now that I got that out-of-the-way, let’s move on to my latest Spam preparation:  The beloved Spam musubi.  Found at local convenience stores, airports, and mom and pop stores, Spam musubi is a tasty snack that travels well in your bag, backpack, and even fits snugly in your pocket.  It’s an island favorite.

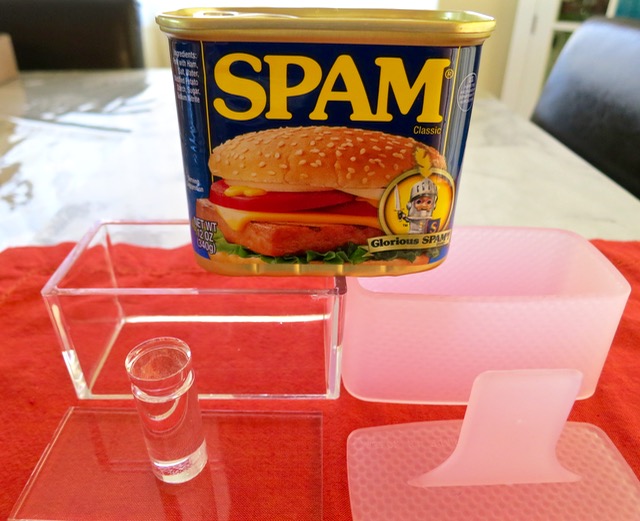
Spam & Musubi Presses

I have a good laugh every time I see the little man on the Spam can announcing “Glorious Spam!”

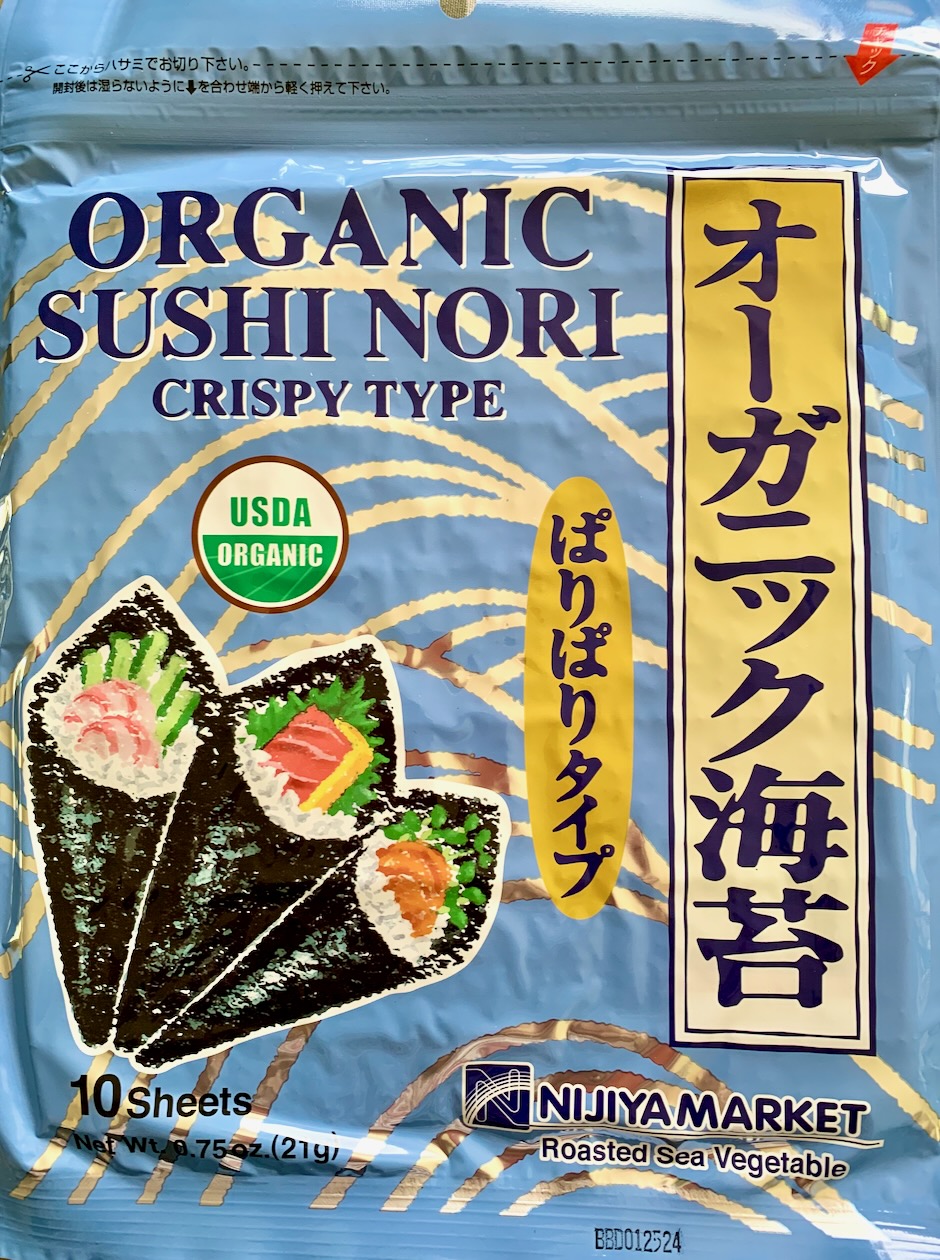
If you live near a Nijiya Japanese market, I recommend buying this nori.  It is not expensive and it’s a good nori for Spam musubi as well as maki sushi rolls.

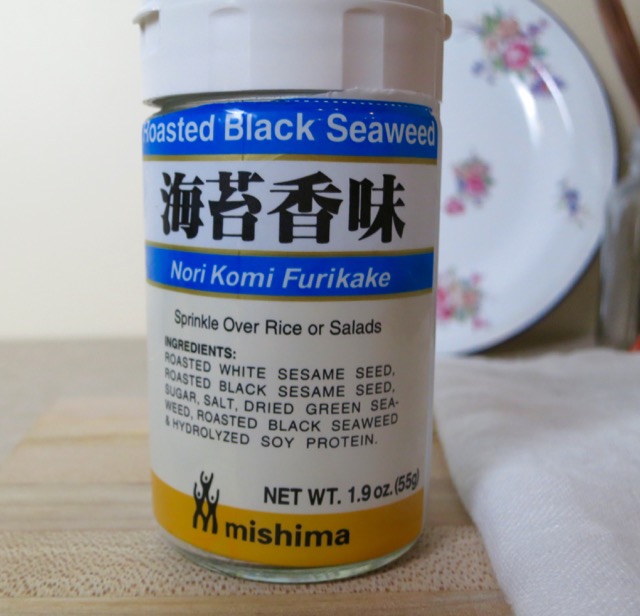
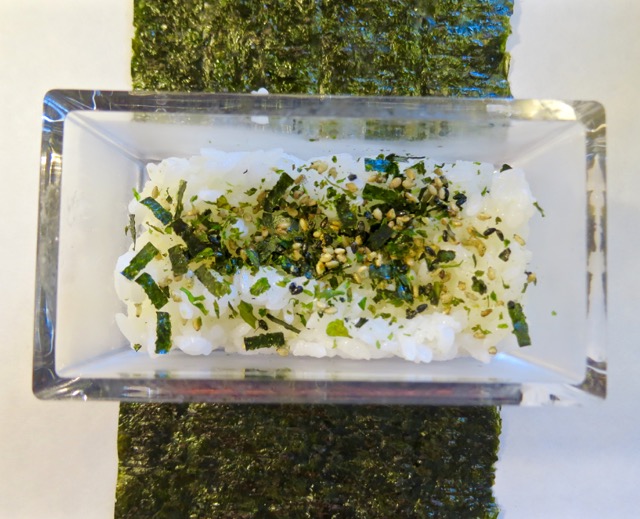
Favorite Furikake

There’s a large variety of furikake at the markets.  Salmon, shiso, wasabi, and more.  I favor the simple combination of nori flakes with black and white roasted sesame seeds.  It’s perfect for Spam musubi.

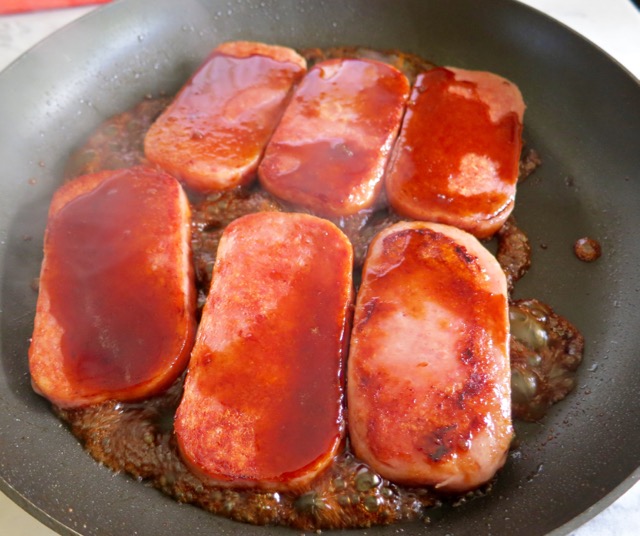
Fried Spam

Slice the Spam into eight pieces.  Fry the Spam for a few minutes on each side until lightly browned.

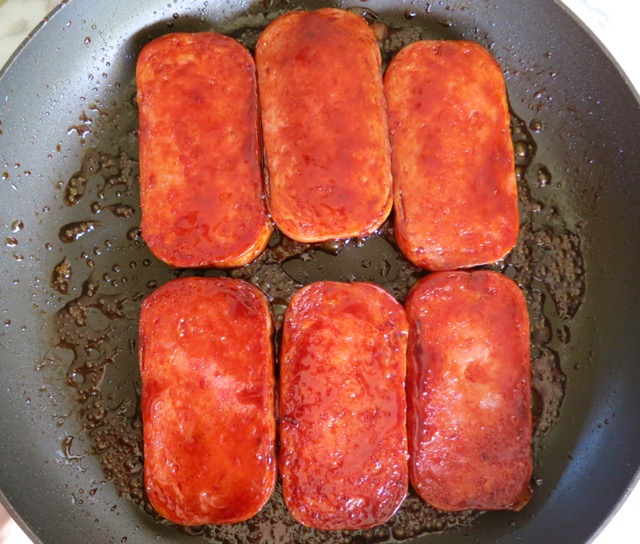
Seasoned Spam

Add your soy sauce mixture and turn the Spam over and over in the sauce to coat well.  This will take just a minute.

Ready for Musubi!

Perfectly cooked Spam and seasoned Spam.

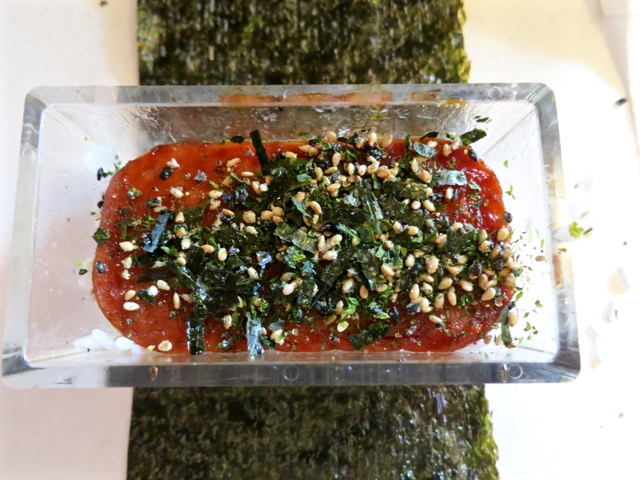
Making Spam Musubi

Making Spam musubi is quick and easy.  Cook the rice, pan fry the Spam, put it all together, press, eat.

Making Spam Musubi

I bookmarked this recipe from Serious Eats  years ago and finally got around to making it.  Not all Spam musubis are alike.  This one is a winner.

Spam Musubi

Recipe updated 7/28/23 to make 8 Spam musubi (originally 6)

Spam Musubi
 
Quick and easy snack that packs and travels well. Adapted from Kathy Chan's recipe/Serious Eats blog.
Author:
Cuisine: Hawaiian-Style
Ingredients
  • 3 cups short grain or medium grain white rice, cooked according to package directions
  • 1 can original or 25% less sodium Spam
  • 3 tablespoons brown sugar
  • 3 tablespoons less sodium soy sauce (Kikkoman recommended)
  • 4 pieces sushi nori, cut in half lengthwise to make 8 pieces
  • furikake
Preparation
  1. Slice Spam into 8 equal sized pieces (slice across the longest portion of Spam)
  2. Mix together brown sugar and soy sauce, set aside.
  3. Fry Spam on medium-high heat for a few minutes on each side, or until lightly browned. Turn heat down to medium-low, add brown sugar and soy sauce mixture and turn Spam over a few times to coat well. If the pan seems too hot, take it off the burner for a few seconds. You want the soy sauce mixture to caramelize a bit and coat the Spam nicely (watch closely so that it doesn't burn). Remove Spam to a plate to cool.
  4. Lay a piece of nori on a clean work surface. Place musubi shaper on top of the nori (in the center). Scoop enough rice into the musubi shaper to make a thin layer. Press the rice firmly with the musubi compressor. Sprinkle furikake over the rice, add a piece of Spam, more furikake, and lastly, more rice. Press firmly using the musubi compressor. You want the musubi to hold together when you eat it. To remove Spam musubi, hold the shaper and lift it up as you continue to press down on the musubi. Gently remove the compressor (if the rice sticks a bit loosen it with a butter knife). Wrap the nori around the musubi tightly.  You may need to trim a bit of the nori if it's too long.
  5. Serve right away or wrap and pack for a mid-morning or afternoon snack.

Dinner, Lactose Free, Pork, Recipes

Herb Roasted Pork Loin

August 25, 2014

Herb Roasted Pork LoinWhen I was growing up my mom used to make delicious pan-fried pork chops and served them with mashed potatoes, gravy, and peas.  These days I tend to favor pork tenderloin or pork loin over pork chops and various roasted potatoes, though I still enjoy mashed potatoes as well.  This simple recipe is just perfect for company. A beautiful dish with its mustard-garlic coating and fresh herbs, we now serve it with “sauce” rather than “gravy!”

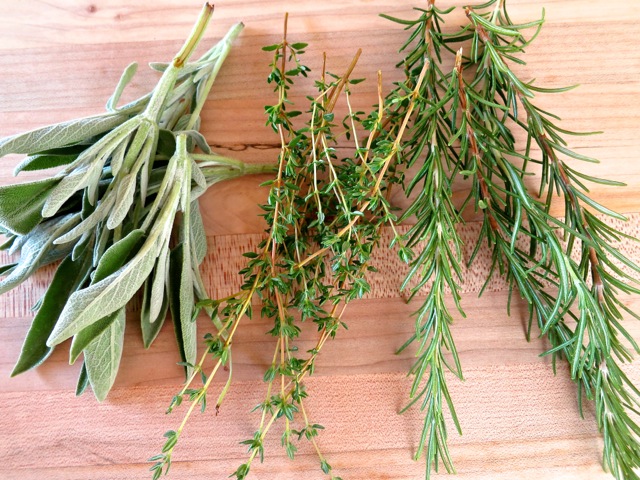
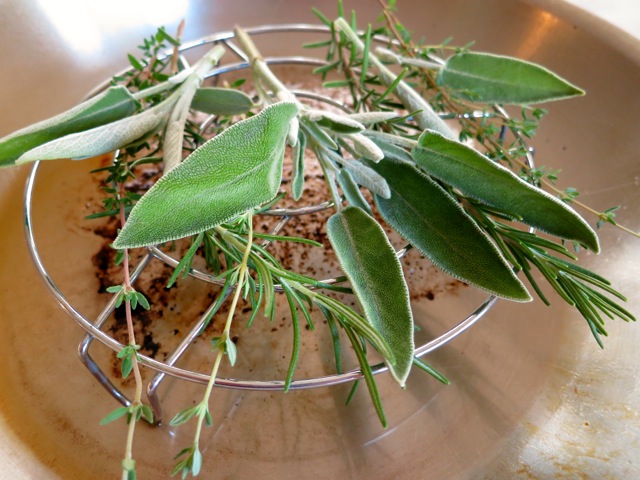
Sage, Thyme & RosemaryA few fresh herbs, Dijon mustard, garlic and shallots = a lovely seasoning for a roasted pork loin dinner.

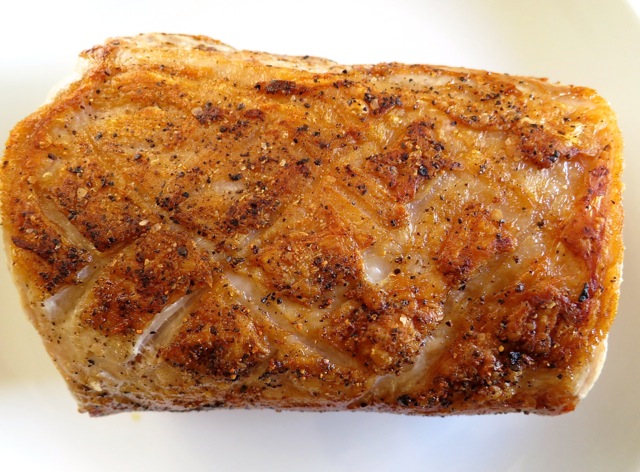
Browned Pork LoinThe pork is browned before heading to the oven. I scored the thin layer of fat on one side of the pork loin, browned it on all sides, then smothered it with the mustard-garlic sauce.

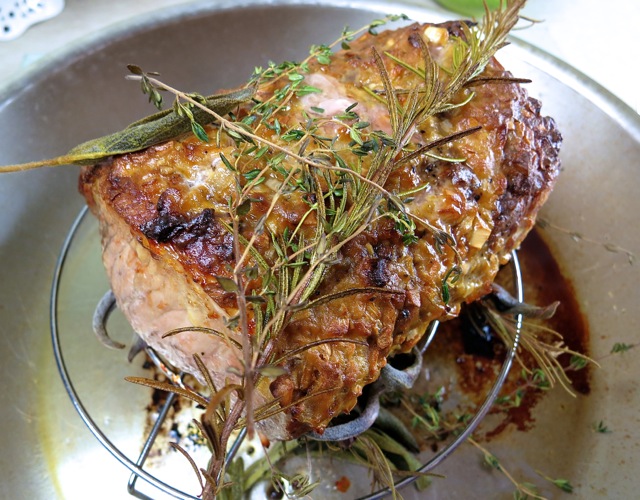
Fresh HerbsHerbs are layered under the browned pork loin and more herbs are placed on top as the pork roasts.

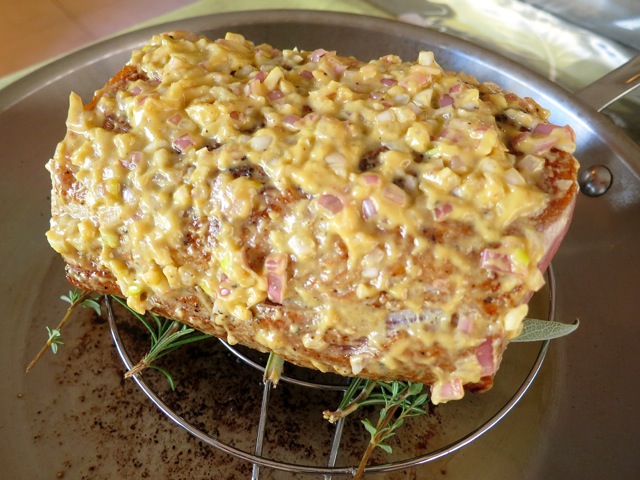
Pork Loin with Mustard CoatingThe coating of mustard, garlic and shallots keeps the meat moist, adding a delicious and flavorful crust to the pork.

Beautiful carrots

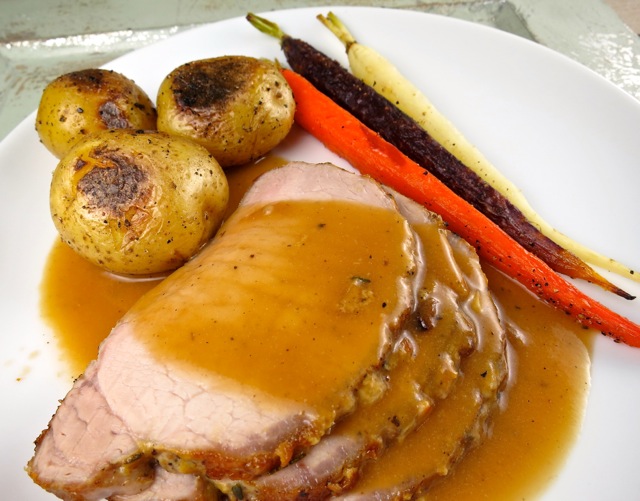
Herb Roasted Pork Loin with Roasted Potatoes, Carrots & Sauce

Herb Roasted Pork Loin

Adapted from Gourmet magazine

Serves 4

Ingredients

1 (2 pound) boneless pork loin roast, trimmed

2 tablespoons plus 1/2 teaspoon olive oil, divided

4 rosemary sprigs, divided

4 large thyme sprigs, divided

4 sage sprigs, divided

1/4 cup finely chopped shallots

1 tablespoon finely chopped garlic

1 1/2 tablespoons Dijon mustard

For Sauce:

1/3 cup dry vermouth

2 teaspoons Dijon mustard

1 3/4 cups reduced-sodium chicken broth

1 1/2 tablespoons Earth Balance buttery spread or unsalted butter

1 1/2 tablespoons all-purpose flour

Preparation

Roast Pork:

Preheat oven to 350°F with rack in middle.

Pat pork dry and score the thin layer of fat (optional).  Season with 1 teaspoon salt and 1/2 teaspoon pepper.  In a stainless steel skillet large enough to accommodate the pork loin, heat 1 tablespoon oil over medium-high heat until it shimmers.  Brown pork on all sides, then transfer to a large plate.  Put a metal rack in skillet and arrange half of the herbs down middle of rack.  Stir together shallots, garlic, mustard, and 1 tablespoon olive oil and smear over top and sides of roast, then put roast, fat side up, on top of herbs.  Roast  about 35 – 40 minutes.  Toss remaining herbs with 1/2 teaspoon oil and arrange on top of roast.  Continue roasting until an instant-read thermometer registers 140 to 145°F, 5 – 15 minutes more.  Transfer pork to a cutting board and let rest 10 – 15 minutes.
Make Sauce:

Remove rack from pan and discard herbs from rack.  Place pan over medium heat.  Add vermouth and mustard and deglaze by boiling, stirring and scraping up brown bits, until reduced by half. Add broth and simmer for 3 minutes.  Strain through a fine-mesh sieve into a 2-cup measure.  If you have more than 1 1/2 cups, boil to reduce; if less, add water.
Melt butter in a heavy medium saucepan over medium heat.  Whisk in flour and cook whisking until pale golden, about 3 minutes.  Whisk in vermouth mixture and simmer until slightly thickened, about 3 minutes.  Serve pork with sauce.

***Leftover herb roasted pork loin makes great sandwiches.  Slice thin and pile on good bread with a little mayonnaise and a generous amount of mustard.  Add a bit of mild cheese, butter each slice of bread and place in a pre-heated pan  over medium heat.  Place a piece of foil over the bread, pressing down on the sandwich with another pan until nicely browned, flip and repeat on the other side.  Serve with a side of pickles.

Dinner, Lactose Free, Pork, Recipes

Pork Schnitzel

July 22, 2014

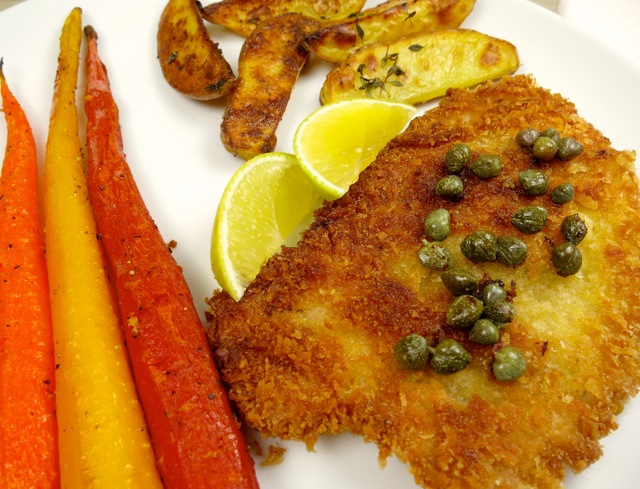
Pork Schnitzel with Roasted Carrots & PotatoesThere is something irresistible about crispy fried food.  This delicious pork cutlet is no exception. It can be made with chicken breast, pork loin, or better yet, pork tenderloin.  Japanese dishes like tonkatsu and chicken katsu are prepared nearly the same way, except this pork schnitzel includes a bit of sour cream mixed in with the egg wash.  After making this version, I will never leave out the sour cream again.  It adds a richness to the egg mixture which contributes to the wonderful crispy exterior. Scrumptious!

Pork TenderloinIf you prefer to use chicken, pound it into thin cutlets and follow the same procedure.

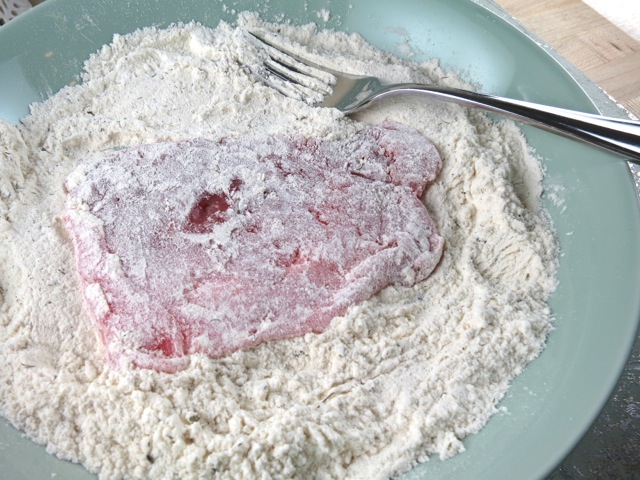
Seasoned flourSeason the pork with kosher salt and freshly ground black pepper, dip into the flour mixture followed by the egg and sour cream mixture.  Lastly, dip into the panko bread crumb mixture.

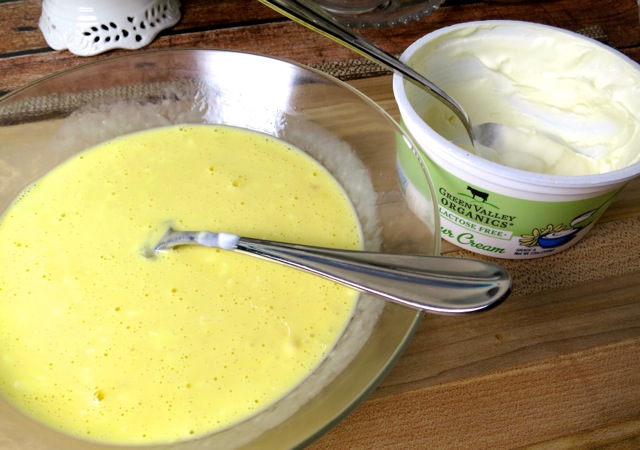
Egg & Sour Cream

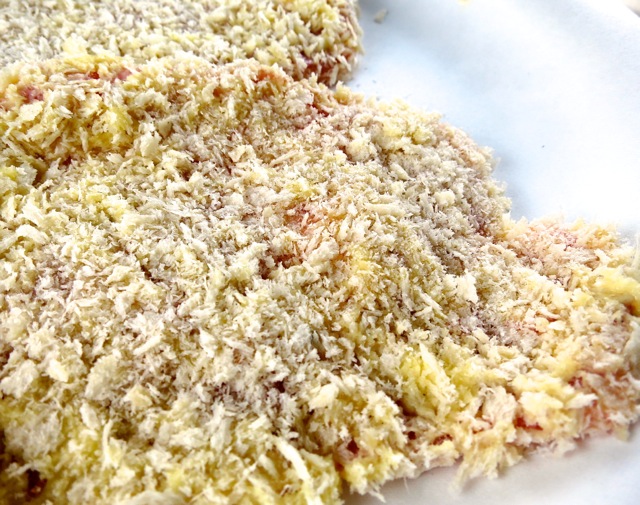
Panko Coated Pork Tenderloin CutletsAh! Beautifully breaded pork cutlets.

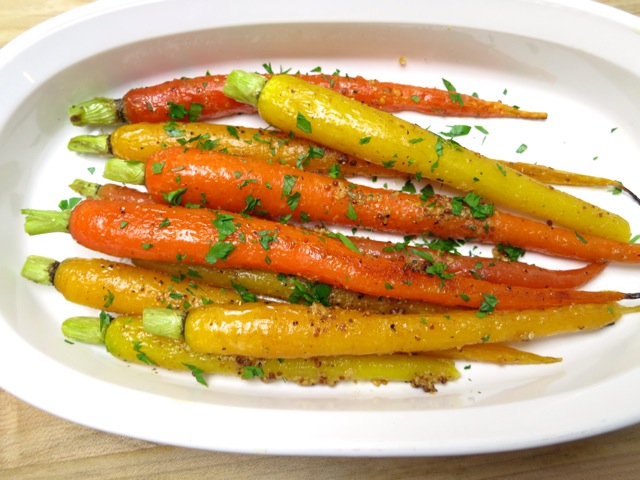
Roasted Rainbow Carrots I found these gorgeous rainbow carrots at Mana Foods in Paia.  A light rub of olive oil, homemade whole grain mustard and salt and pepper, the carrots were ready after quickly being roasted in my toaster oven.

Pork Schnitzel Dinner

Pork Schnitzel

Adapted from Food & Wine Magazine

Serves 4

Ingredients

2 extra-large eggs

1/2 cup sour cream (I used Green Valley lactose free sour cream)

1 cup all-purpose flour

1/2 teaspoon dried dill

1/4 teaspoon garlic powder

1/4 teaspoon onion powder

1/2 teaspoon dried oregano

1/2 teaspoon sweet paprika

1 1/2 cups panko

1 pound pork tenderloin, cut into 4 medallions and pounded 1/4 inch thick

kosher salt and freshly ground black pepper

Preparation

In  a shallow bowl, beat eggs with the sour cream.  In another shallow bowl, whisk the flour, dill, garlic powder, onion powder, oregano and paprika.   Spread the panko in a third shallow bowl.

Season the pork with salt and pepper.  Dredge the cutlets in the flour mixture and dip them in the egg mixture.  Coat with panko; transfer to a baking sheet.

In a very large skillet, heat 1/4 inch of oil.  Add half of the cutlets and fry over moderately high heat, turning once, until just cooked through and nicely browned, about 4 minutes total. Transfer to a paper towel lined plate.  Repeat with the remaining cutlets.

Serve cutlets with capers, fresh lemon wedges and a side of roasted carrots and potatoes.

Dinner, Italian, Pork, Recipes

Rigatoni with Spicy Calabrese-Style Pork Ragu

June 1, 2014

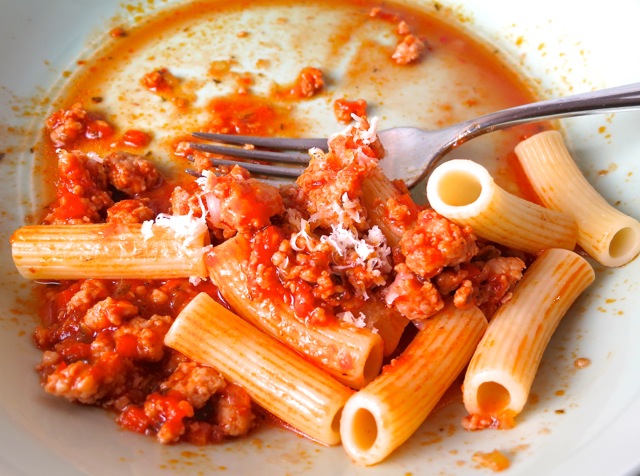
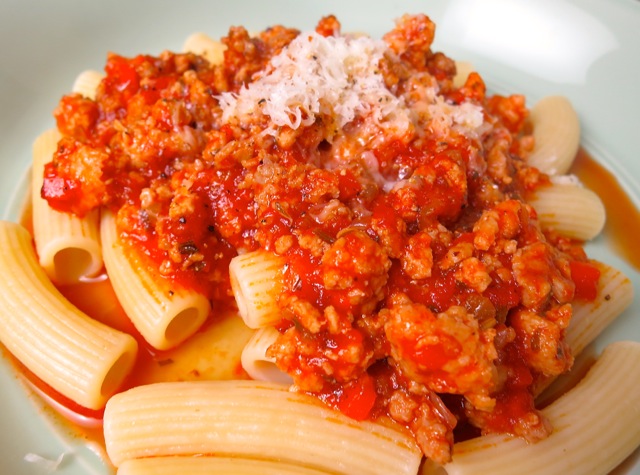
Rigatoni with Pork RaguFor years my hands down favorite Italian meat sauce was beefy Bolognese.  However, I found an intriguing pork ragu recipe in Bon Appétit’s February 2013 issue. Hot and sweet Italian sausage, ground pork and savory tomato sauce, this pork ragu is now on my favorites list.

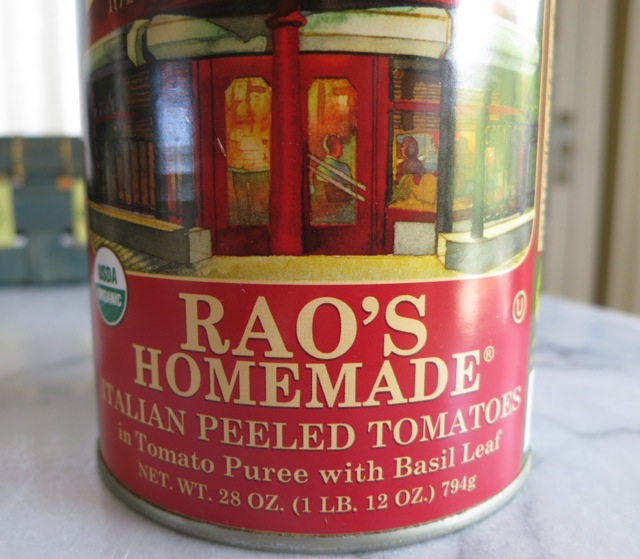
Rao's TomatoesThere are all sorts of canned tomatoes available these days.  My favorite by far is Rao’s Homemade Italian Peeled Tomatoes.  Certified organic, these tomatoes are of high quality and very flavorful. I once found them at Whole Foods but when I checked back again they were not on the shelf.  Not to worry, these days you can find almost anything on-line.  I’ve purchased other brands of whole canned tomatoes and had to peel off skin that was left on by poor handling.  Rao’s tomatoes are always peeled well, the tomatoes and puree are a beautiful deep red, and they taste delicious.  They make a really good homemade pizza sauce too.

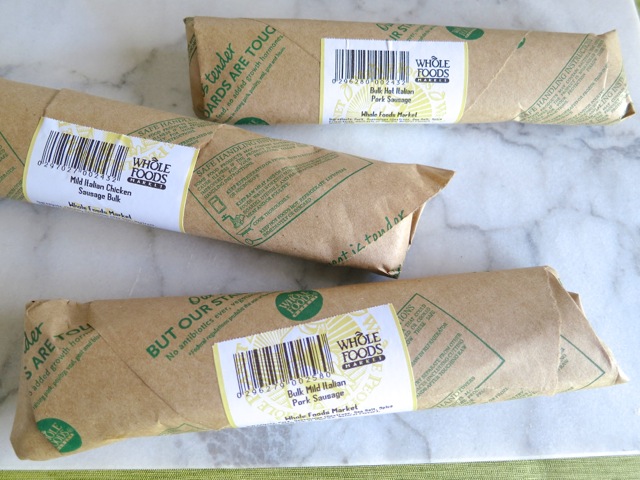
Assorted Italian Sausage The prices at Whole Foods markets can be high, however, I’m willing to spend a bit more for excellent quality meat and fish, unique and sometimes difficult to find (on Maui) pantry ingredients, and fruits and vegetables that are not easy to come by.  At the meat counter I found many choices of fresh Italian-style sausage to use in this recipe so I decided on a couple of different types for the ragu (including chicken as well as pork).

Assorted Italian Sausage Hot chicken, sweet chicken, and hot pork sausage.

Fresh Oregano Sprig

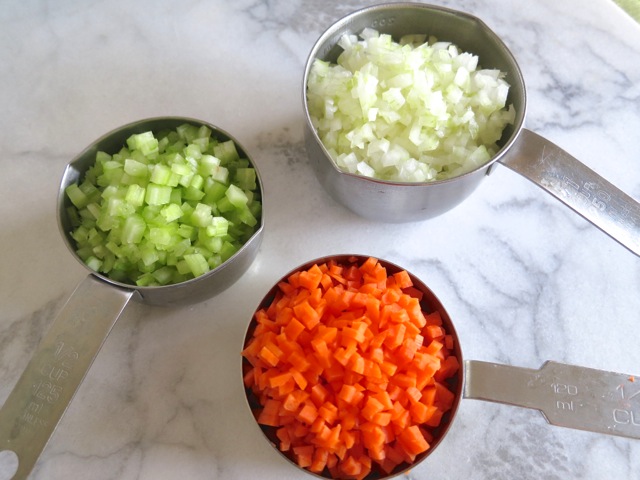
MIrepoix ingredientsYou begin with a mirepoix which is a combination of finely diced celery, onion, and carrot, the foundation of many meat dishes and sauces.

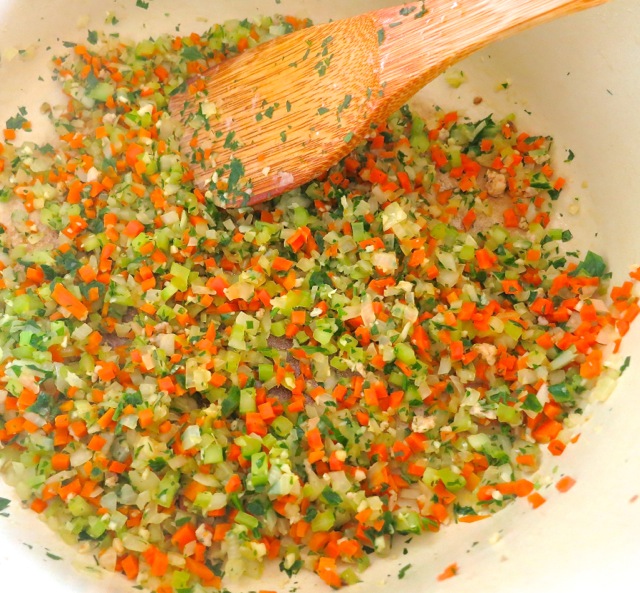
Mirepoix for Ragu

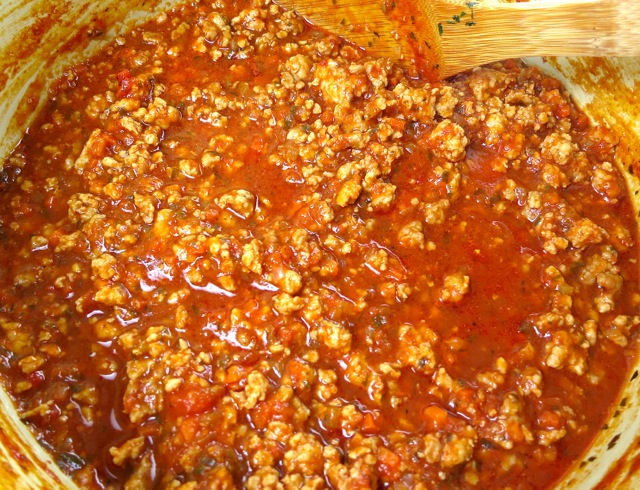
Simmering Pork Ragu

Rigatoni with Spicy Calabrese-Style Pork Ragu

Rigatoni with Spicy Calabrese-Style Pork Ragu

Adapted from Bon Appétit 

Serves 6 – 8

Ingredients

1 medium onion, quartered

1 medium carrot, peeled, cut into 1″ pieces

1 large celery stalk, cut into 1″ pieces

4 medium garlic cloves

2 teaspoons fresh oregano leaves

1/4 teaspoon crushed red pepper flakes

1/4 cup + 2 tablespoons coarsely chopped flat-leaf parsley, divided

1 28-ounce can whole peeled tomatoes

2 tablespoons olive oil

1 pound hot and/or sweet Italian sausage, casings removed (I used both chicken and pork sausage)

1 pound ground pork

1/2 teaspoon fennel seeds

1  teaspoon kosher salt

1/4 teaspoon freshly ground black pepper

1/4 cup white wine

1 tablespoon tomato paste

1 pound rigatoni or penne pasta

3/4 cup finely grated Parmesan or Grana Padano

Preparation

Pulse onion, carrot, celery, garlic, oregano, red pepper flakes, and 1/4 cup parsley in a food processor until finely chopped ; transfer to a small bowl and set aside.

Puree tomatoes with juices in processor, set aside.

Heat oil in a large heavy pot over medium heat; add sausage and cook, breaking up with a spoon, until browned, about 4 minutes.  Add ground pork, fennel seeds, and season with 1 teaspoon kosher salt and 1/4 teaspoon pepper, and cook, breaking up pork with a wooden spoon until no longer pink.  Add wine, and stir until wine has evaporated, about 1 minute. Using a slotted spoon, transfer to a plate.
Increase heat to medium-high.  Add reserved vegetable mixture to pan, season with salt, and cook, stirring often, until golden 8 – 10 minutes.

Stir tomato paste and 1 cup water in a small bowl; add to pot.  Cook, scraping up any  browned bits from bottom of pot.  Bring to a boil, reduce heat, and simmer until the liquid has almost evaporated, 6 – 8 minutes.

Add reserved meat and tomato puree and 1 cup water.  Bring to a boil. Reduce heat and simmer, until meat is tender, about 3 hours. Bon Appétit’s recipe mentions adding more water as needed to keep the meat submerged however I found this was not necessary.  Stir in remaining 1/4 cup parsley. Adjust seasoning, adding salt if needed.

Meanwhile, cook the pasta in a large pot of boiling, salted water just before you are ready to serve dinner.  The original recipe calls for reserving 1/2 cup pasta cooking liquid then adding it to the sauce along with the pasta and 3/4 cups parmesan and remaining 1/4 cup parsley.  I did not add any additional liquid and plated the ragu in  individual bowls, spooned the sauce over the pasta and sprinkled with parmesan before serving.

*Leftover ragu freezes well in airtight plastic containers.


Appetizers, Dinner, Korean, Pork, Recipes

Pork-Kimchi Dumpling Pancakes

May 22, 2014

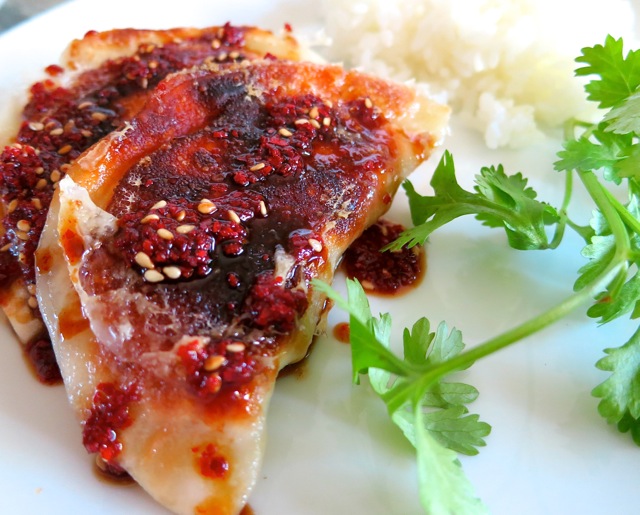
Pork-Kimchi DumplingI can hardly wait to return to the Bay Area this summer.  I get excited just thinking of  all my favorite dishes at all my favorite restaurants such as Redd’s duck confit served on a bed of lentils with a poached egg or the best beef filet I’ve ever tasted at Alexander’s Steak House (where they give each table cotton candy on  a stick after dinner).  Speaking of my favorite vacation city, Corey Lee, owner of Benu restaurant in San Francisco was featured in the January issue of Food & Wine magazine.  This particular issue contains a slew of recipes I want to try, however, it was Corey Lee’s Pork-Kimchi Dumpling Pancakes that really caught my eye.

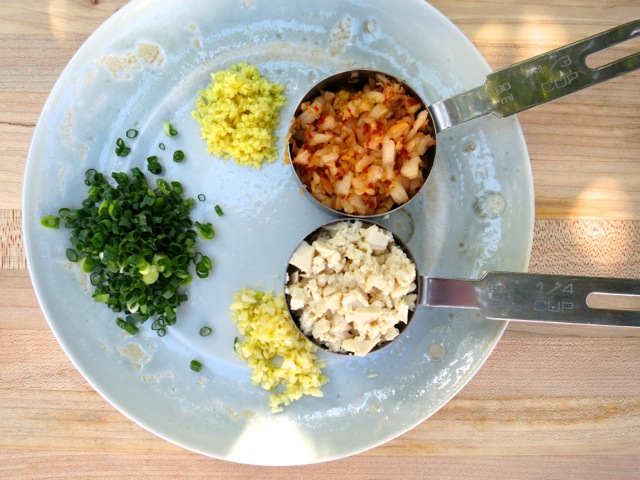
Scallions, Ginger, Kimchi, Tofu, GarlicThese savory dumplings are very easy to put together once your mise en place  is done.

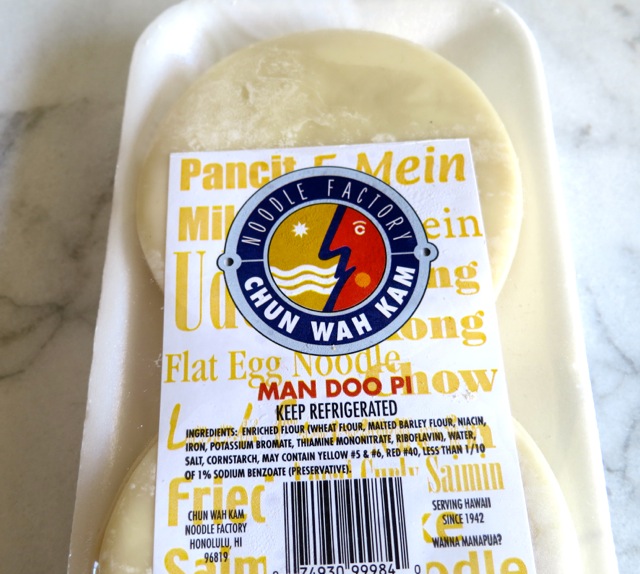
Wonton Wrappers

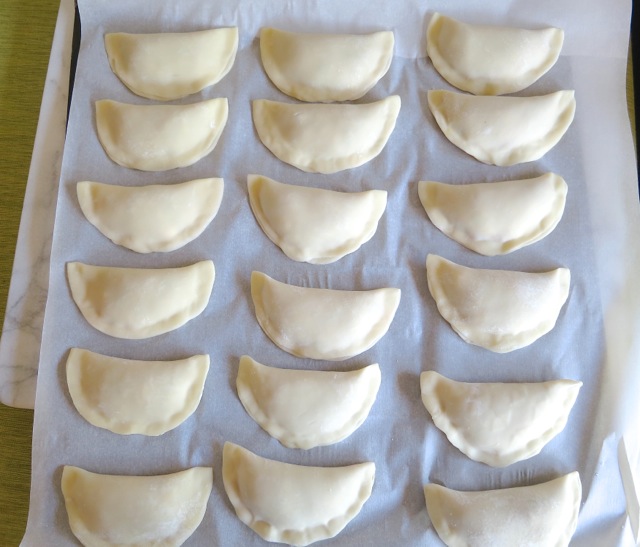
Filling DumplingsA dollop of filling on the wonton wrapper, fold and press the edges together.

Filled Dumplings

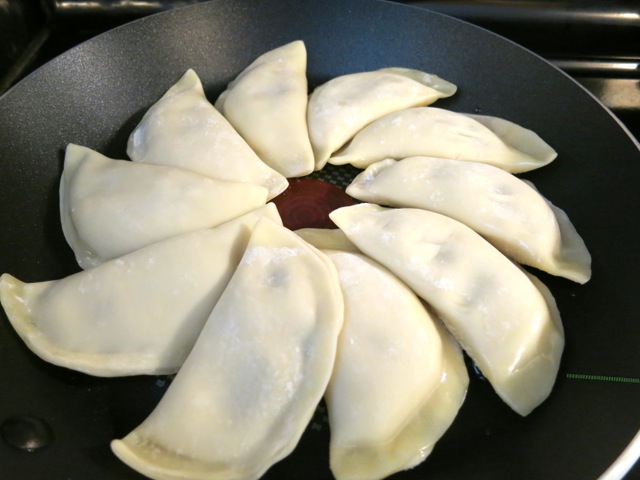
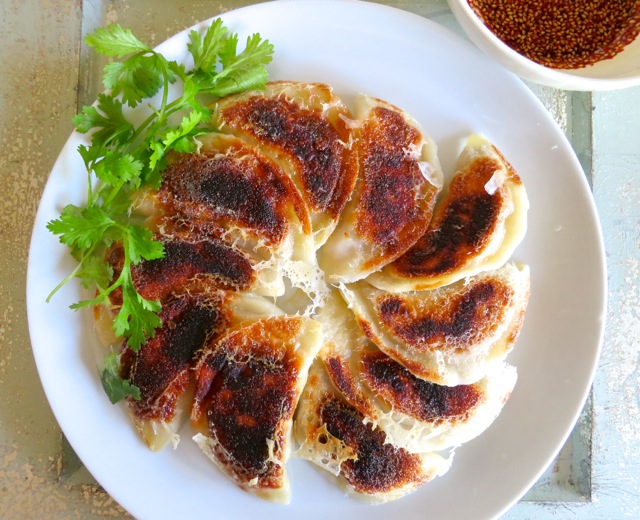
Dumpling Pancake Ready to FryTen dumplings are arranged around the edge of an 8″ skillet, overlapping slightly.  After quickly frying the dumplings for 4 minutes, a slurry of cornstarch and water is added to the pan.  This creates crispy, lacy, edges and adheres the 10 dumplings together making one impressive pancake that you invert on a platter and serve with dipping sauce.

Pork-Kimchi Dumpling Pancake

Pork-Kimchi Dumpling Pancakes

Adapted from Corey Lee’s recipe ~ Food & Wine Magazine

6 – 8 servings

Ingredients

Dipping Sauce:

1/4 cup soy sauce

1 tablespoon white vinegar

1/2 tablespoon Korean chili flakes or 1/2 tablespoon crushed red pepper

1 tablespoon roasted sesame seeds

1 tablespoon sugar

Dumplings:

14 ounces ground pork

2 tablespoons minced scallions

1/2 cup finely chopped and drained kimchi

2 garlic cloves, minced

1 tablespoon minced peeled ginger

1 large egg, lightly beaten

1 tablespoon soy sauce

1 teaspoon kosher salt

1/4 cup firm tofu, finely chopped

30 round wonton wrappers

1 1/2 tablespoons cornstarch mixed with 1 cup + 2 tablespoons water

3 tablespoons canola oil

Preparation:

Mix all of the sauce ingredients until the sugar dissolves.  Set aside.

In a bowl, mix all of the dumpling ingredients except the wrappers, cornstarch and oil.  Arrange 4 wrappers on a work surface (keep the rest covered with a damp paper towel).  Brush the edges of the wrappers with water and drop 1 tablespoon of the filling in the centers of each wrapper.  Fold over one side of the wrapper to form a half-moon, pressing the edges together.  Transfer to a parchment-lined baking sheet and cover with plastic wrap; assemble the remaining dumplings.

In a bowl, stir the cornstarch with 1 cup plus 2 tablespoons of water to make a slurry.

Heat 1 tablespoon of the oil in an 8-inch non-stick skillet over moderate heat.  Arrange 10 dumplings around the edge of the skillet overlapping slightly (there should be almost no empty space).  Cook over moderate heat until golden on the bottom, about 4 minutes.  Drizzle one-third of the slurry over and around the dumplings, cover the skillet and cook for 1 minute.  Uncover and cook until the dumplings are cooked through and the slurry forms a thin crust, about 4 minutes.  Carefully invert the dumpling pancake onto a plate.  Repeat to make 2 more pancakes. Serve with dipping sauce.

Mexican, Pork, Pressure Cooker, Recipes

Pressure Cooker Carnitas

October 28, 2013

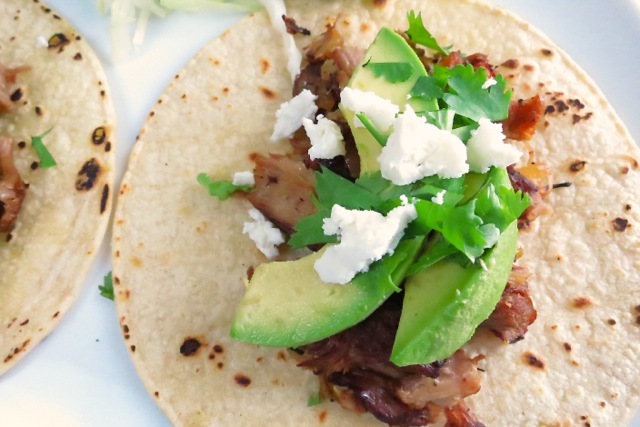
Carnitas with Avocado & CheeseEver since we bought a pressure cooker we’ve been having so much fun trying out new recipes. We also experiment with old braising recipes that once took hours to cook but now cook in a short time but taste every bit as delicious. If you don’t have a pressure cooker, consider buying one. You won’t regret it.

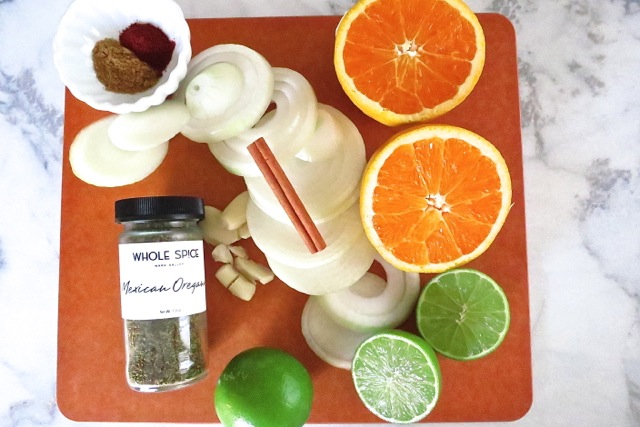
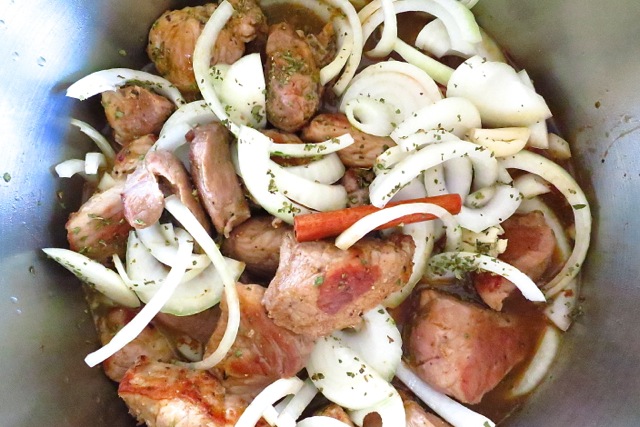
Carnitas Seasoning IngredientsMexican cuisine is notable for its variety as well as its bold, zesty flavors.  These carnitas are no exception. We came across this recipe in an article on pressure cookers in Cuisine At Home magazine.  I found it interesting that the liquid consisted entirely of citrus juice. I was very hesitant to try the recipe but with a bit of coaxing off I went to the market to pick up all the ingredients.

Carnitas in Pressure Cooker Once the pork has browned, all the ingredients get thrown into the pressure cooker and  in no time at all,  you’ll be feasting on some of the best carnitas imaginable.

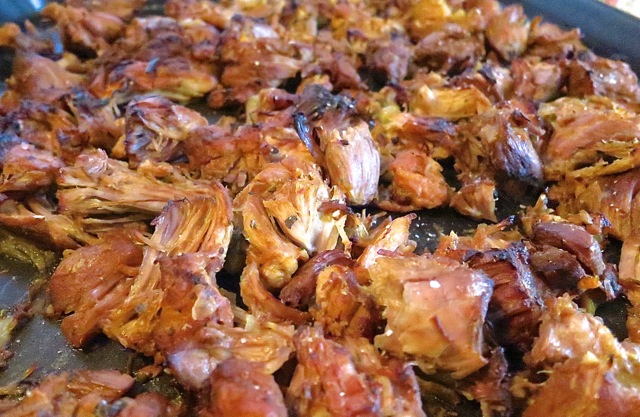
Carnitas with Crispy EdgesThe cooked pork is then finished in the oven until it begins to crisp around the edges.

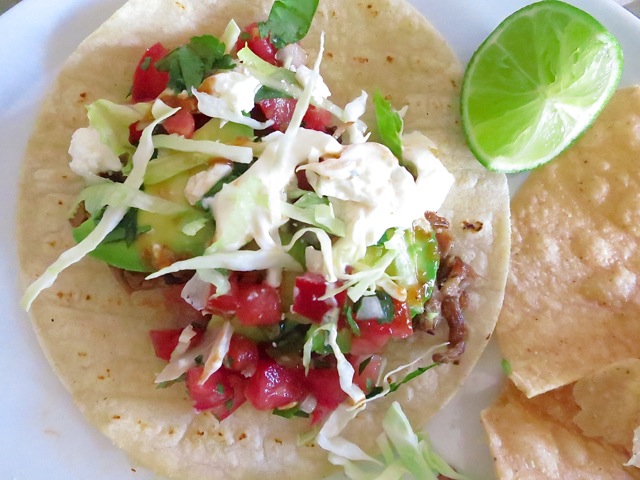
Carnitas with Avocado, Salsa, Cabbage & Sour CreamAccompaniments include avocado, sour cream, salsa fresca, shredded cabbage, cilantro a bit of feta cheese and a dash of hot sauce all wrapped in corn tortillas warmed on a cast iron skillet.

Carnitas with Avocado & Feta

Pressure Cooker Carnitas

Adapted from Cuisine At Home

Ingredients

2 tablespoons olive oil

3 teaspoons kosher salt

1 1/2 teaspoons cumin

1 1/4 teaspoons chile powder (I use Hatch pure mild chile powder and 1/4 teaspoon chipotle chile powder)

1/2 teaspoon black pepper

3 pounds boneless pork shoulder (pork butt) cut into 2 inch chunks (I buy at least 4 pounds and trim the pork very well, ending up with about 3 pounds)

1 onion, sliced

3 cloves garlic, crushed

2 teaspoons dried oregano

1 cinnamon stick (3-inch)

1 1/2 cups strained fresh orange juice (about 4 – 5 large oranges)

1/2 cup strained fresh lime juice (about 4 – 5 juicy limes)

Preparation

Whisk together oil, salt, cumin, chile powder, and pepper.

Toss the pork in the oil-spice mixture.  Brown the pork in the pressure cooker in two separate batches over medium-high heat. Return first batch of pork to the pressure cooker.

Stir in the onion, garlic, oregano, and cinnamon stick.  Add the orange and lime juices.

Cover the pressure cooker, lock on the lid, and bring to high pressure over medium-high heat.  Once the pressure cooker comes up to pressure, lower the heat to a low burner setting so that it maintains pressure without exceeding it. Cook pork for 25 minutes.  Remove cooker from the heat and allow pressure to release naturally.  Remove the lid and transfer pork to a baking sheet (I use my jelly roll pan).

Preheat the broiler to high with the rack 6 inches from the element.

Degrease liquids from the cooker in a fat separator and discard fat (I trimmed my pork really well and was able to skip this step).  Shred pork with two forks on baking sheet.  Pour 1 cup strained cooking liquid over the pork.

Broil until the pork starts to crisp, about 7 minutes.  Stir and broil another 5 minutes more, watching carefully so the pork doesn’t burn.  Serve with warm corn tortillas and your favorite accompaniments.

***I froze the leftovers but it wasn’t long before we pulled it out from the freezer and devoured the rest of the carnitas.


Follow

Get every new post delivered to your Inbox

Join other followers: