Search results for

musubi

Dinner, Eggs, Japanese, Kimchi, Korean, Lactose Free, Pork, Recipes, Rice Dishes, Side Dishes

Kimchi Spam Musubi

March 17, 2024

I’ve been on a kimchi kick for a while now. It’s fun to incorporate this Korean staple into all sorts of dishes that not long ago I would have never considered. One of the best accompaniments for kimchi is rice. The soft and chewy grains of white rice show off the spicy and garlicky kimchi perfectly. Add some Spam and you’ve got yourself the best snack ever.

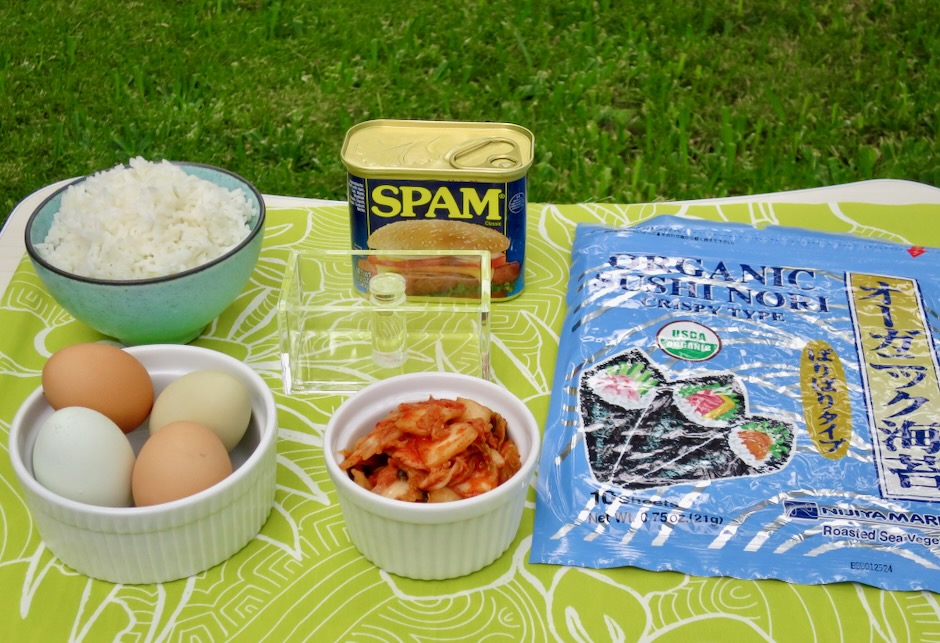
If you don’t make your own kimchi, pick up your favorite brand at the market. I always have a couple of cans of Spam tucked away in the cupboard. Sometimes I use it for Spam musubi, other times I fry pieces until super crispy and eat it with fried eggs and rice. Ono!

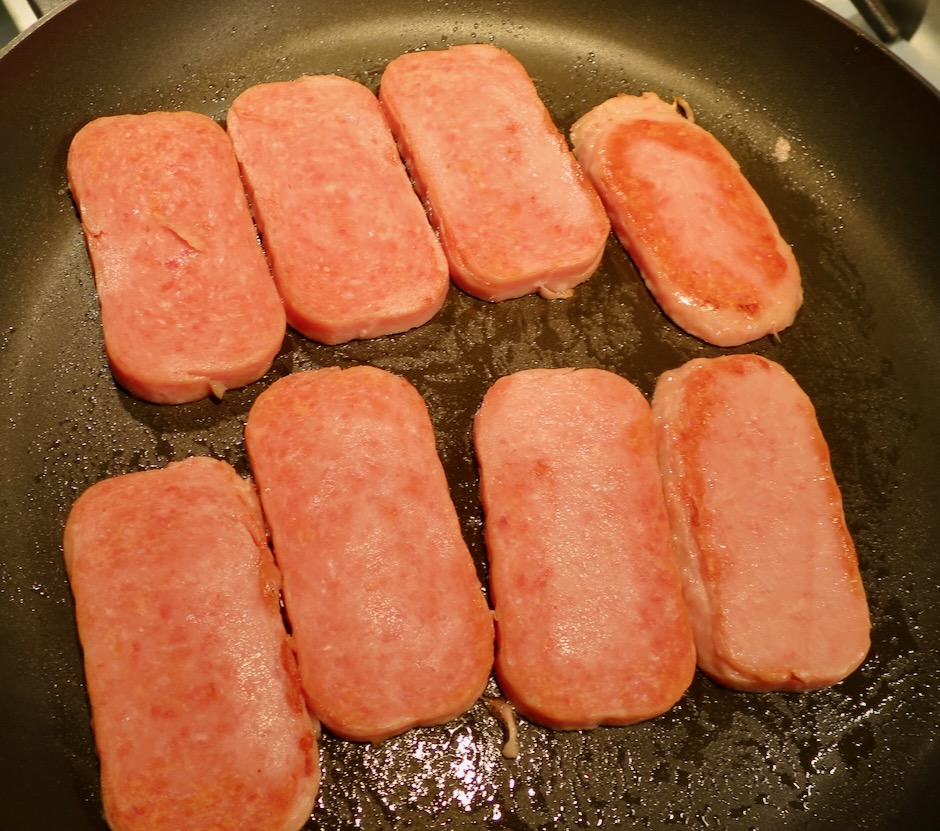
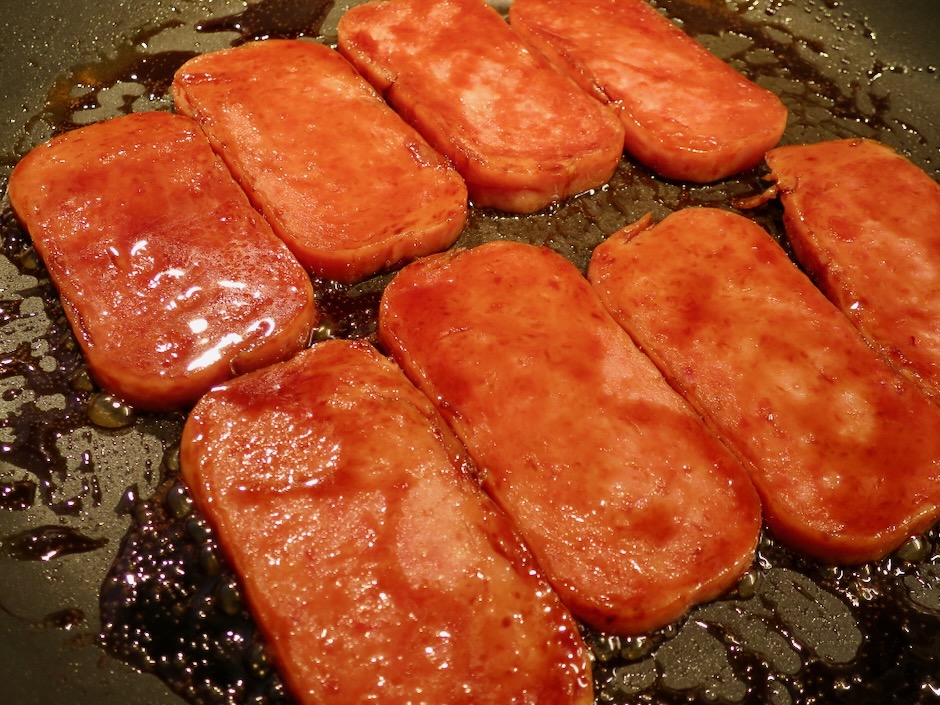
Spam straight out of the can is not exactly appetizing. A quick crisping up in a frying pan remedies that. For this recipe the Spam is fried then coated with a mixture of soy sauce and brown sugar. It’s the perfect seasoning for the salty Spam and works great for making kimchi musubi.

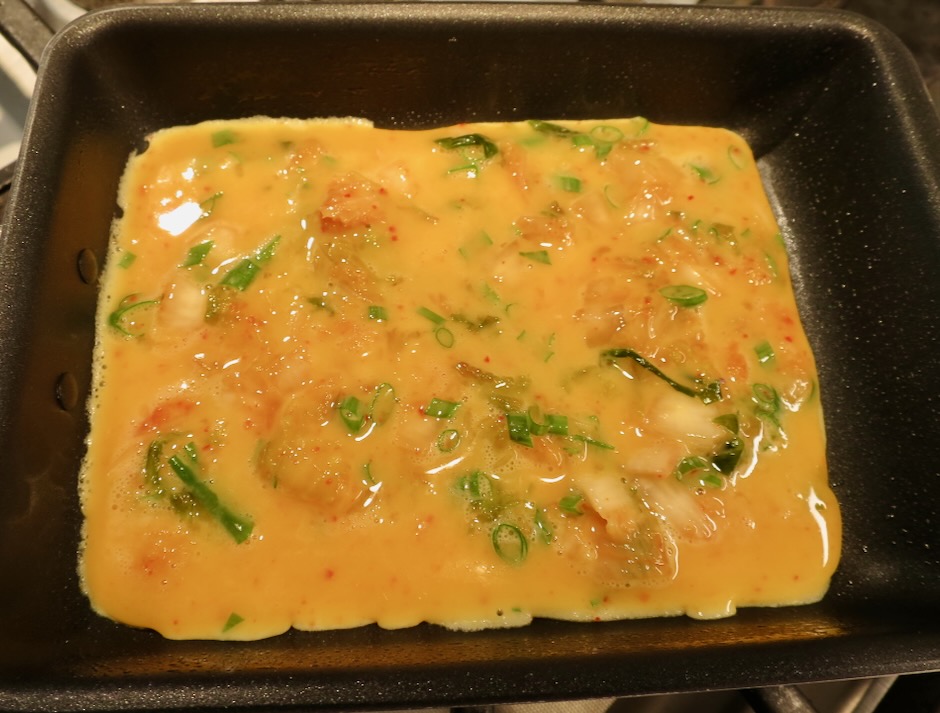
The kimchi is cooked with eggs and green onions then cut into pieces to fit the musubi mold.

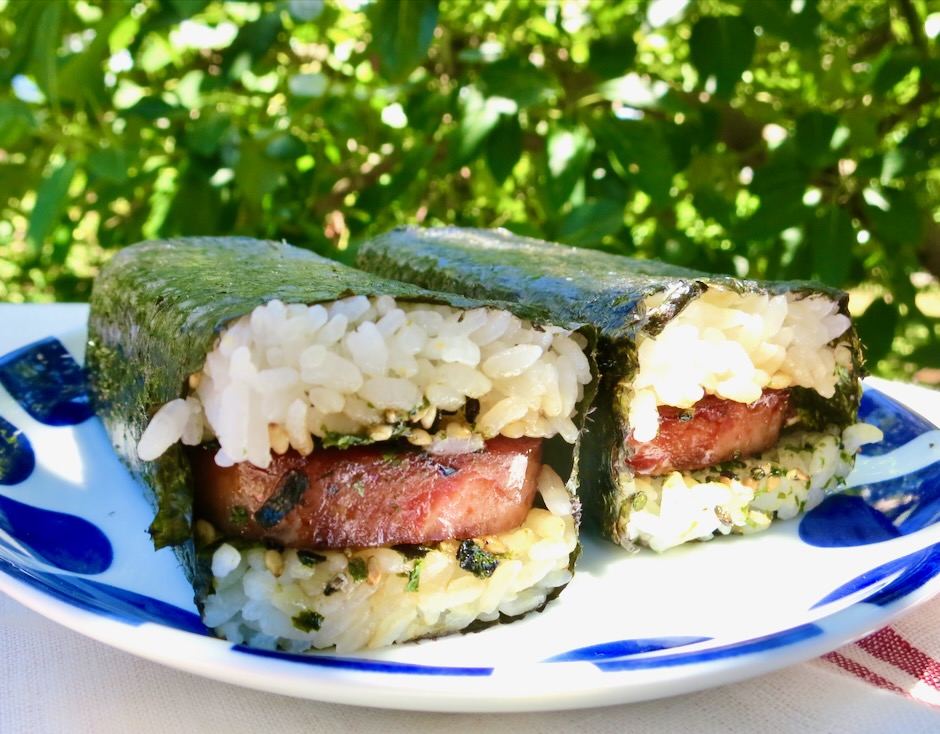
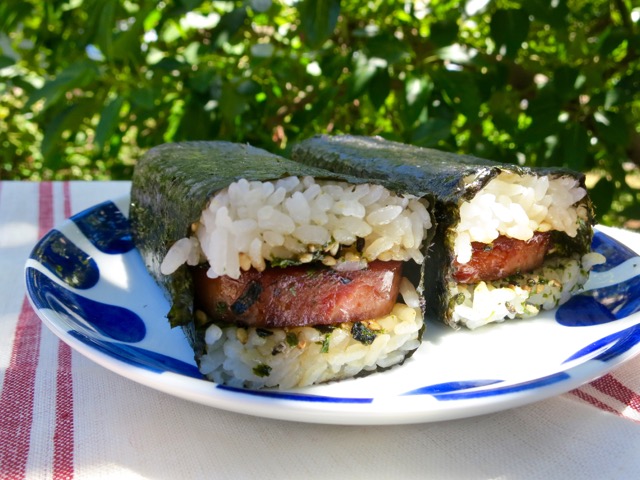
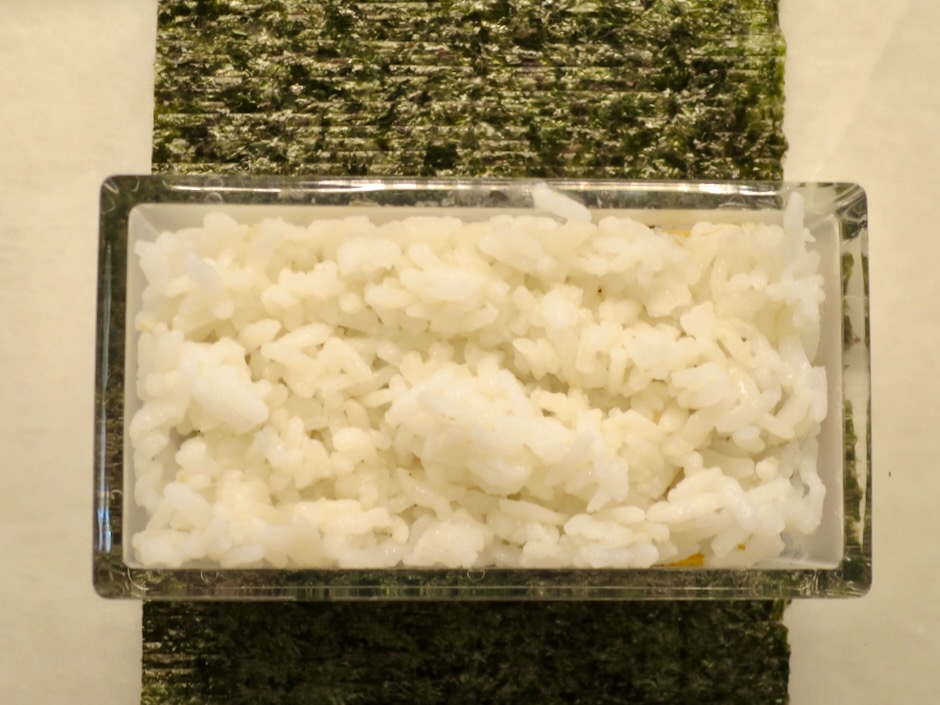
The first layer is rice and a sprinkling of furikake.

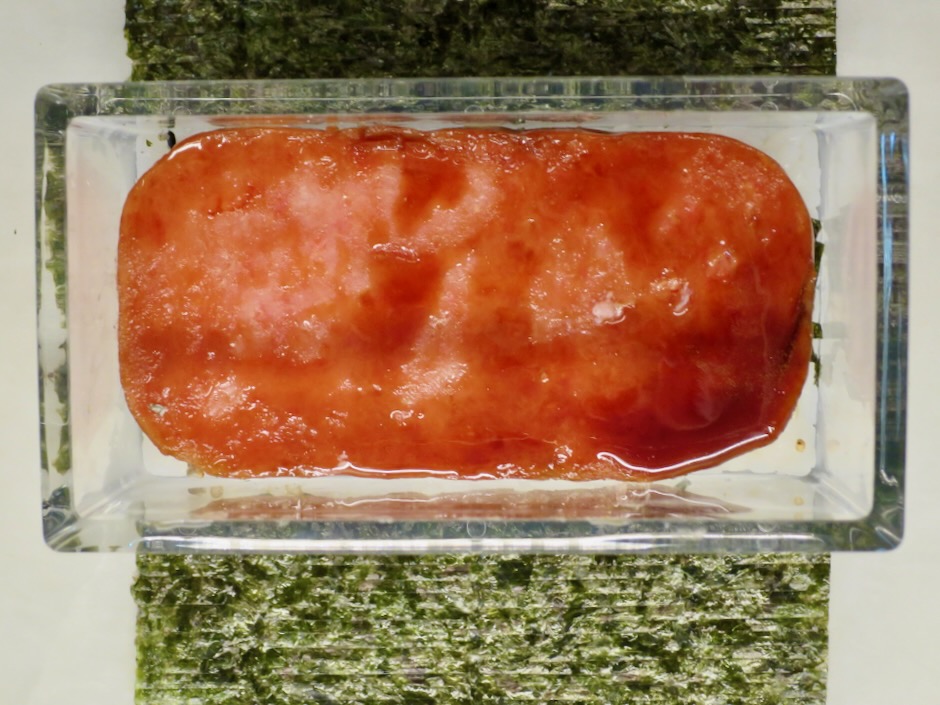
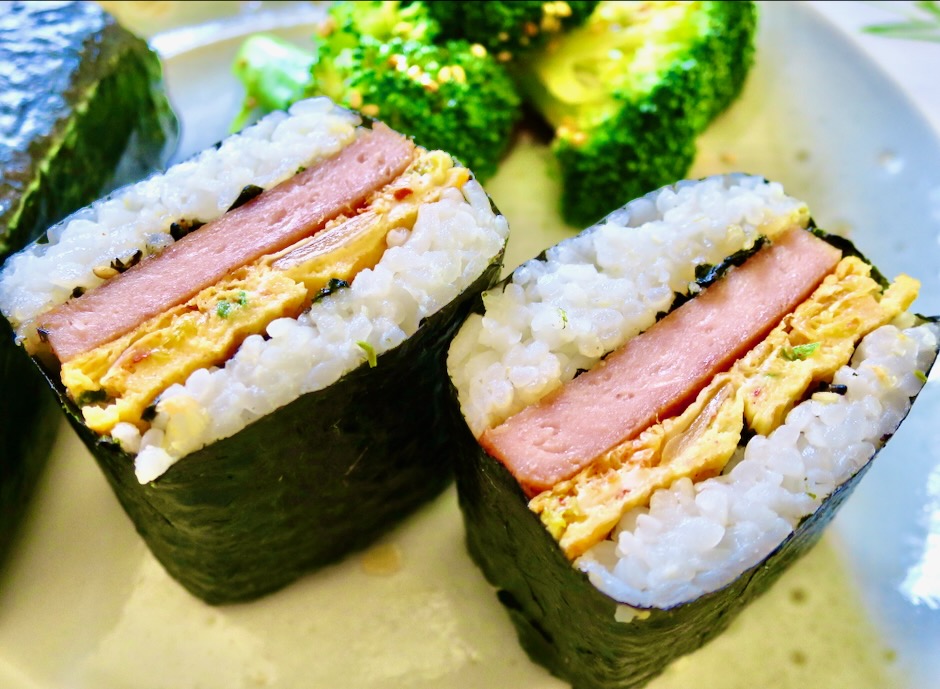
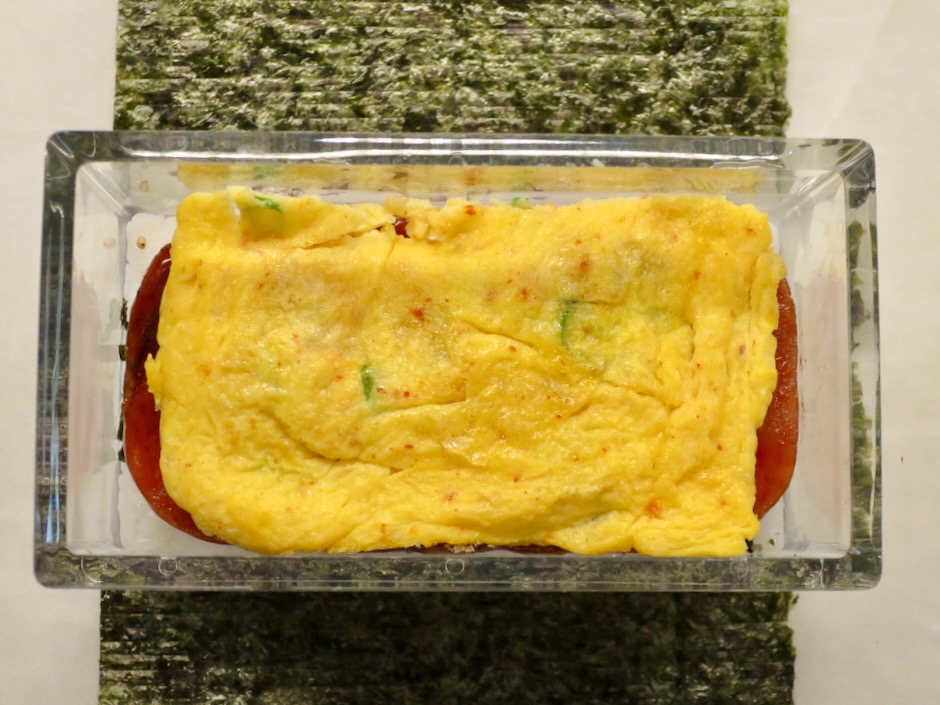
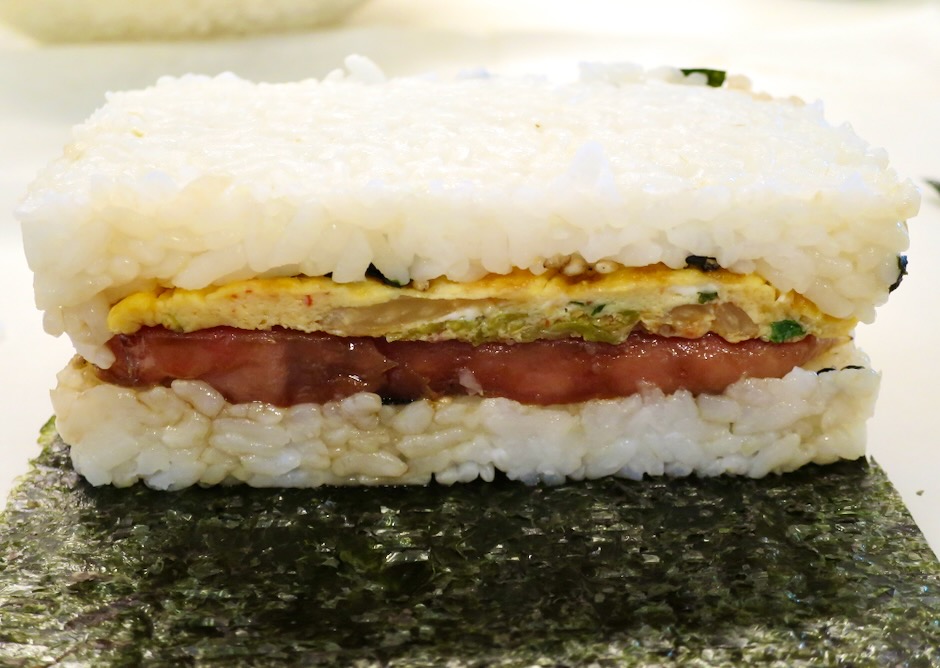
The Spam goes on next, followed by the kimchi omelet.

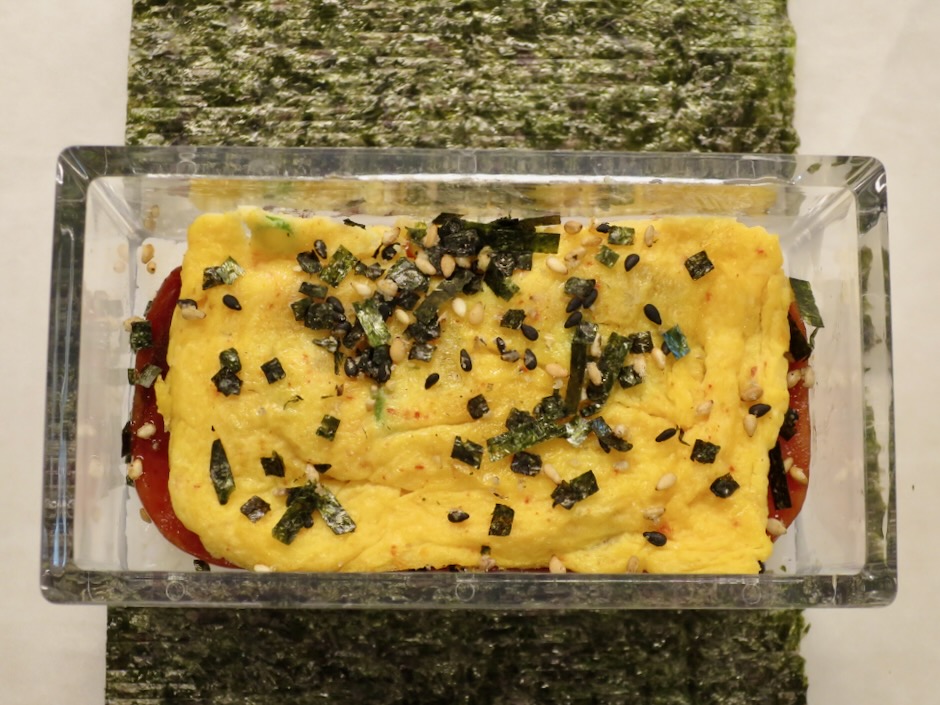
One more shake of furikake over the kimchi omelet.

A little more rice on the kimchi omelet before pressing together and folding with the nori.

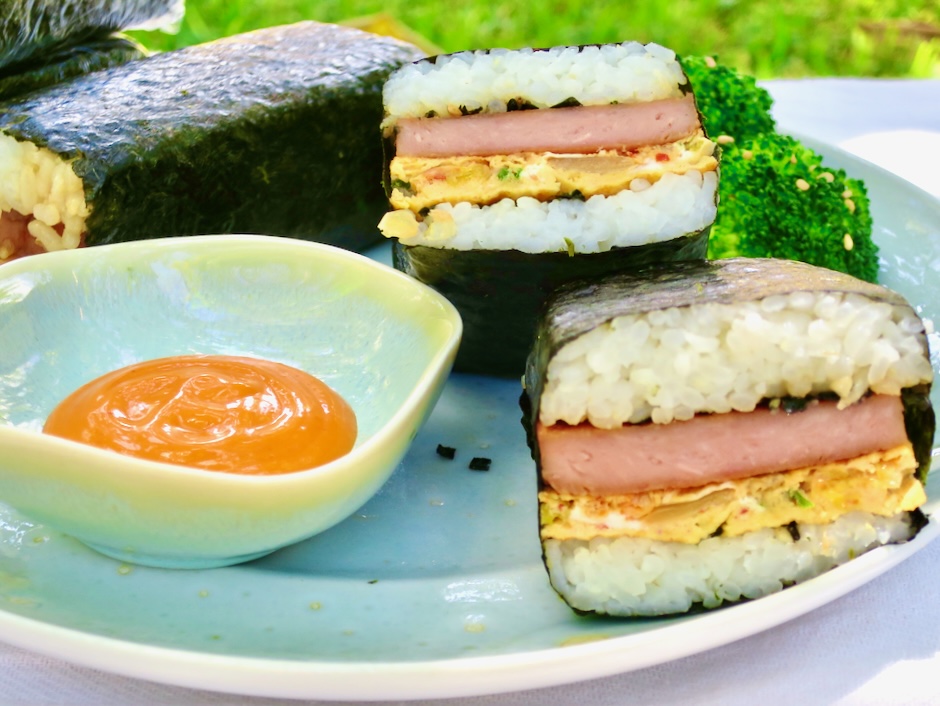
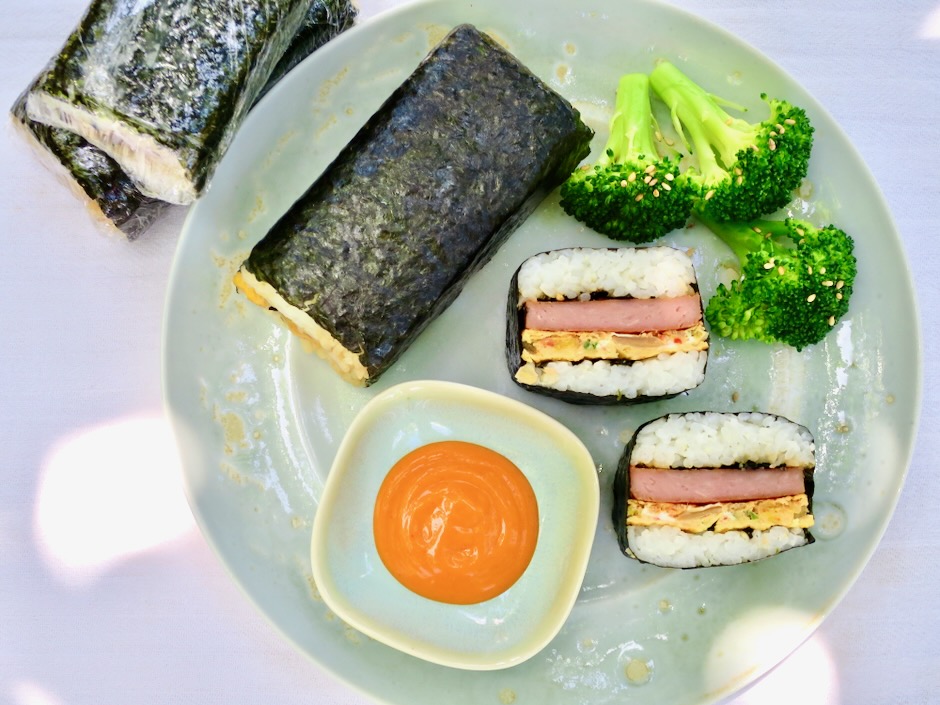
Sriracha mayo is the perfect dip for this snack.

This is one of the best snacks I know of. I made Spam musubi for my grandson to take on the plane when he traveled back to the mainland. He adores Spam musubi and said to his mom “I just want to hug it!”

Kimchi Spam Musubi

Recipe by Kiyo
Servings

8

servings

Special equipment: Spam musubi mold

Ingredients

  • 3 rice cooker cups short or medium grain white rice, cooked according to rice cooker directions

  • 1 can original Spam, sliced into 8 pieces

  • 3 tablespoons light brown sugar

  • 3 tablespoons low sodium soy sauce

  • 4 large eggs, whisked

  • 1/2 cup chopped kimchi, drained and roughly chopped

  • 2 green onions, thinly sliced

  • 4 sheets sushi nori cut in half (on the long side) to make 8 pieces

  • nori-sesame furikake

  • Sriracha mayo (optional)

Directions

  • Once rice is done cooking remove to a bowl, cover and cool to room temperature.
  • Mix together the brown sugar and soy sauce. Set aside.
  • Fry Spam slices over medium heat until lightly browned. Turn heat down to low, add brown sugar and soy sauce mixture. Turn Spam pieces over to coat well. Let sauce thicken a bit (turn heat up if needed) before transferring Spam to a plate to cool.
  • Combine whisked eggs, kimchi and green onions in a small bowl. Place tamagoyaki (Japanese omelet pan) or small fry pan over low heat. Coat the pan well with canola or vegetable oil. Pour egg mixture in the pan and cook on low heat, flipping once to cook both sides evenly, trying not to let the egg brown (adjust heat if needed). Transfer to a cutting board. Cut into 8 rectangular pieces.
  • To assemble musubi, place musubi mold over center of nori (shiny side face down). Spoon a little rice in the mold then press firmly with the musubi mold press. Sprinkle furikake over rice. Place 1 piece of Spam over the rice followed by a piece of kimchi egg. Sprinkle a little furikake over the egg. Add more rice then press firmly. Remove musubi mold and wrap nori around rice tightly (be careful not to tear nori). Trim excess nori. Continue making the rest of the musubi. Serve with sriracha mayo.

Notes

  • I use a small piece of plastic wrap to cover the top portion (the press) of the musubi mold so the rice doesn’t stick to it when pressing down.
  • Musubi is best eaten right away or within a few hours. If you have leftovers, wrap each one in plastic wrap and store them in a freezer ziplock bag in the refrigerator for up to a day. To refresh musubi, remove plastic wrap and place musubi on a microwavable plate. Microwave for 15 seconds, flip over and microwave for another 10 seconds or until just warm.
Appetizers, Breakfast, Dinner, Lactose Free, Pork, Recipes, Rice Dishes

Spam Musubi

August 12, 2015

It’s true.  Every now and then I eat Spam.  Phew!  Now that I got that out-of-the-way, let’s move on to my latest Spam preparation:  The beloved Spam musubi.  Found at local convenience stores, airports, and mom and pop stores, Spam musubi is a tasty snack that travels well in your bag, backpack, and even fits snugly in your pocket.  It’s an island favorite.

Spam & Musubi Presses

I have a good laugh every time I see the little man on the Spam can announcing “Glorious Spam!”

If you live near a Nijiya Japanese market, I recommend buying this nori.  It is not expensive and it’s a good nori for Spam musubi as well as maki sushi rolls.

Favorite Furikake

There’s a large variety of furikake at the markets.  Salmon, shiso, wasabi, and more.  I favor the simple combination of nori flakes with black and white roasted sesame seeds.  It’s perfect for Spam musubi.

Fried Spam

Slice the Spam into eight pieces.  Fry the Spam for a few minutes on each side until lightly browned.

Seasoned Spam

Add your soy sauce mixture and turn the Spam over and over in the sauce to coat well.  This will take just a minute.

Ready for Musubi!

Perfectly cooked Spam and seasoned Spam.

Making Spam Musubi

Making Spam musubi is quick and easy.  Cook the rice, pan fry the Spam, put it all together, press, eat.

Making Spam Musubi

I bookmarked this recipe from Serious Eats  years ago and finally got around to making it.  Not all Spam musubis are alike.  This one is a winner.

Spam Musubi

Recipe updated 7/28/23 to make 8 Spam musubi (originally 6)

Spam Musubi
 
Quick and easy snack that packs and travels well. Adapted from Kathy Chan's recipe/Serious Eats blog.
Author:
Cuisine: Hawaiian-Style
Ingredients
  • 3 cups short grain or medium grain white rice, cooked according to package directions
  • 1 can original or 25% less sodium Spam
  • 3 tablespoons brown sugar
  • 3 tablespoons less sodium soy sauce (Kikkoman recommended)
  • 4 pieces sushi nori, cut in half lengthwise to make 8 pieces
  • furikake
Preparation
  1. Slice Spam into 8 equal sized pieces (slice across the longest portion of Spam)
  2. Mix together brown sugar and soy sauce, set aside.
  3. Fry Spam on medium-high heat for a few minutes on each side, or until lightly browned. Turn heat down to medium-low, add brown sugar and soy sauce mixture and turn Spam over a few times to coat well. If the pan seems too hot, take it off the burner for a few seconds. You want the soy sauce mixture to caramelize a bit and coat the Spam nicely (watch closely so that it doesn't burn). Remove Spam to a plate to cool.
  4. Lay a piece of nori on a clean work surface. Place musubi shaper on top of the nori (in the center). Scoop enough rice into the musubi shaper to make a thin layer. Press the rice firmly with the musubi compressor. Sprinkle furikake over the rice, add a piece of Spam, more furikake, and lastly, more rice. Press firmly using the musubi compressor. You want the musubi to hold together when you eat it. To remove Spam musubi, hold the shaper and lift it up as you continue to press down on the musubi. Gently remove the compressor (if the rice sticks a bit loosen it with a butter knife). Wrap the nori around the musubi tightly.  You may need to trim a bit of the nori if it's too long.
  5. Serve right away or wrap and pack for a mid-morning or afternoon snack.

Appetizers, Dinner, Japanese, Lactose Free, Recipes, Side Dishes, Vegan, Vegetarian, Veggies

Kinpira Gobo

September 27, 2022

Kinpira gobo is a traditional Japanese side dish that will enhance any Japanese-style meal. Serve it for breakfast with a bowl of steaming Japanese rice, pack it in a bento box with musubi for lunch, or serve it for dinner along with tofu for a delicious vegetarian meal.

If you’re not familiar with gobo (burdock root) you might not even take notice of it. Gobo is rather homely looking, however, don’t let that stop you from picking up a few pieces to take home. Once it has been cleaned and sliced thinly, its potential is revealed and you are on your way to a truly delicious meal.

Here on Maui gobo can be found at Foodland Kahului, Island Grocery Kahului, TJ’s Wailuku, and Times market in Kihei. Look for slender roots about 1-inch in diameter. These will be less fibrous and tough than the thicker pieces. Sometimes it can be hit or miss. Check the condition of the gobo. It should be firm like a carrot. If it’s not, then try again the following week or ask your grocer when they expect a new delivery.

Have a bowl of cool water ready when slicing the gobo. Burdock oxidizes quickly and the water helps to keep it from turning gray. The water also reduces some of the pungent flavor of the gobo. Change the water once or twice as it becomes darker. When all of the gobo has been sliced, drain in a colander and transfer to a clean dish towel or paper towels and pat dry. You want to avoid water hitting the hot oil when you begin to fry the gobo.

A short list of sauce ingredients makes this an easy dish to prepare. The Shichimi Togarashi is optional. I use it to add a bit of kick to the finished dish. I used instant dashi but using water is fine since you only need a small amount.

Start by cooking the gobo for a few minutes before adding the julienned carrots. Taste a few pieces to see if the texture is right. It should be firm yet cooked enough so that it isn’t tough and difficult to chew. Keep in mind that it will continue to cook a few more minutes when the carrots are added.

Once the gobo and carrots are the right texture, add the sauce and cook until the liquid is nearly gone.

Transfer kinpira gobo to a serving bowl, sprinkle with roasted sesame seeds and shichimi togarashi for a spicy kick.

Though kinpira gobo is considered a side dish, it can become a main dish simply served with a bowl of rice. The flavor is so delicious and the crunchy texture is delightful.

Kinpira Gobo

Recipe by Kiyo

Adapted from Japanese Cooking 101

Ingredients

  • 9 ounces gobo (burdock root)

  • 4 1/2 ounces carrot

  • 1 tablespoon canola oil

  • 1/4 cup prepared instant dashi or water (vegetarian version)

  • 2 tablespoons + 1 teaspoon soy sauce

  • 1 tablespoon + 1 teaspoon granulated sugar

  • 1 tablespoon sake

  • 1 tablespoon mirin

  • roasted sesame seeds

  • shichimi togarashi (optional)

Directions

  • Rinse the gobo and remove a light layer of the skin with the back of a knife. Avoid using a peeler as this will remove too much of the edible part of the root.
  • Thinly slice gobo on a sharp diagonal (if cut too thick the gobo will be difficult to chew). Stack a few pieces together and slice thinly into 2-inch strips. Place strips in water as you slice them. Change water once or twice as it darkens.
  • Julienne carrot into similar size as the gobo. Set aside.
  • In a medium bowl, mix together the dashi or water, soy sauce, sugar, sake and mirin. Set aside.
  • Heat a scant tablespoon of canola oil over medium heat. Once the oil is hot, add the gobo (be sure it is dry so the oil does not splatter). Stir fry for a few 2-3 minutes adjusting the heat to medium-high if needed. Gobo is very fibrous and should be stir fried until it is just tender and crispy but not tough. Taste a few pieces to ensure you have the correct texture. Add julienned carrots to the pan and stir fry with the gobo until al dente, about 2 minutes.
  • Turn heat down to medium if using a higher heat to stir fry the vegetables. Pour in sauce and continue to stir until the liquid is nearly gone (the pan should not be dry).
  • Transfer kinpira gobo to a serving bowl. Sprinkle roasted sesame seeds over the top. Serve with shichimi togarashi for a spicy kick.
Lactose Free, Pasta, Recipes, Side Dishes, Summertime Meal

Tuna Macaroni Salad

April 21, 2022

Tuna Macaroni Salad

This tuna macaroni salad is delicious and quick to make with ingredients you already have in your pantry.  It makes the perfect side dish for sandwiches, grilled chicken, tofu, pork or any of your favorite grilled foods.  Include it as part of your bento lunch along with a spam musubi or katsu sando.

Tuna Macaroni Salad Ingredients

I love crispy bits of celery in my salads though you can leave it out if it’s not your thing.  That goes for the onion as well.  When using them raw, I go for sweet onions that have a more subtle flavor than their yellow or red counterparts. 

Sweet Onion, Celery, Chopped Bread & Butter Pickles

You may use sweet relish right out of the jar or chop bread and butter pickles for a chunkier, crisper texture.

Tuna Macaroni Salad & Roast Beef Sandwiches

Serve the salad after it has chilled for at least 3 hours.  Everyone will enjoy this summertime side dish. 

Tuna Macaroni Salad

Tuna Macaroni Salad
 
Adapted from NYT Cooking
Author:
Serves: 6
Ingredients
  • 8 ounces elbow macaroni
  • 1 can (5 ounce) tuna in water, drained
  • 1 hard boiled egg, peeled and smashed with a fork
  • ¾ cup mayonnaise
  • ¼ cup chopped bread and butter pickle chips or sweet relish
  • 1 tablespoon Dijon mustard
  • ¼ teaspoon onion powder
  • ¼ teaspoon freshly ground black pepper
  • ½ cup chopped celery
  • 2 tablespoons sweet onion, finely chopped
  • paprika for garnish
Preparation
  1. Bring a large pot of well-salted water to a boil and cook the macaroni according to package instructions. For this salad you don't want the pasta to be al dente, but fully cooked. Drain, rinse with cold water until the pasta is cool. Pour pasta onto a clean kitchen towel or a few stacks of paper towels to dry thoroughly.
  2. Meanwhile, mix the mayonnaise with the chopped pickles or sweet relish, Dijon mustard, onion powder, and pepper. In a large mixing bowl, combine the cooked macaroni with the tuna, egg, celery and onion. Fold in the mayonnaise dressing until macaroni is evenly coated.
  3. Taste and add kosher salt and more mayonnaise as needed. Cover and refrigerate for a least 3 hours until well chilled. Sprinkle with paprika before serving.
  4. Notes: Salad can be made 1 day in advance (keeps well for 3 days). Double the recipe to feed a larger crowd.


Breakfast, Dinner, Eggs, Kimchi, Korean, Lactose Free, Pork, Recipes, Rice Dishes

Kimchi & Spam Fried Rice

June 7, 2016

Kimchi & Spam Fried Rice Kimchi and Spam are staples in many households here in Hawaii.  Crunchy, pungent, spicy, kimchi pairs perfectly with a bowl of steaming rice and Korean hamburger patties.  And Spam?  Well, there are lovers and haters, just as there are for cilantro, Marmite, and anchovies…. Everyone I know loves a bowl of homemade fried rice and most would not turn down this version with kimchi, Spam and a perfectly  fried egg.  Spam may look unappealing straight out of the can, but once fried up into crispy little Spam croutons, it pairs perfectly with rice of any kind.  You ought to give it a try!

KimchiThere is an abundance of kimchi choices at the markets.  Use your favorite brand, but choose one that has a medium heat level rather than mild.

Glorious SPAM!Glorious SPAM!  I always chuckle when I see this little guy on the can.

Crispy Fried SpamFrying the Spam until each piece is perfectly crisp makes all the difference.  You won’t be able to avoid nibbling on them before they make it into the fried rice.

Kimchi & Spam Fried Rice

Kimchi & Spam Fried Rice
 
Adapted from Kenji's Serious Eats recipe.
Author:
Serves: 6
Ingredients
  • 5 cups cooked jasmine rice (I use my rice cooker and the measuring cup that came with it - 2 cups uncooked rice)
  • 1½ cups finely chopped kimchi, about 325g (kimchi drained with 3 tablespoons liquid reserved)
  • canola oil
  • 1 12-ounce can Spam, cut into ½-inch dice
  • 2 cups finely diced onion
  • 2 medium garlic cloves, minced
  • ⅓ cup + 1 tablespoon thinly sliced scallions
  • freshly ground black pepper
  • 1 teaspoon sesame oil
  • 1 teaspoon fish sauce
  • ⅓ cup chopped cilantro (optional)
  • fried eggs, for serving
  • 1 Fresno chili thinly sliced (optional)
  • Sriracha hot sauce, for serving
Preparation
  1. Cook rice and let cool completely. I cook my rice in the morning and store in the refrigerator until ready to use. For this dish it is better to use day old rice.
  2. Place kimchi in a mesh strainer set over a bowl. Squeeze out excess liquid (reserve 3 tablespoons liquid). Finely chop kimchi.
  3. Heat a few teaspoons of canola oil in a wok over medium-high heat. Add Spam cubes and cook, tossing frequently, until well browned and crisp, about 8 minutes. Drain on paper towels. Wipe out wok.
  4. Add 2 teaspoons canola oil over medium heat and sauté onions until slightly softened, about 3 minutes. Add garlic and stir fry for 1 minute.Transfer to a bowl and set aside.
  5. Add ½ tablespoon canola oil to wok. Increase heat to medium high and heat until oil just begins to smoke. Add the rice and cook, stirring and tossing, until rice is warmed. Press rice against the sides of the wok to crisp up (like bibimbap and tag dig). Add onion and garlic mixture, kimchi, Spam, and ⅓ cup scallions tossing with rice to combine. Pour in reserved kimchi juice and season generously with black pepper. Add sesame oil, fish sauce and cilantro. Toss to combine.
  6. Serve fried rice in ceramic bowls, topped with a fried egg, reserved 1 tablespoon scallions, Fresno peppers and sriracha sauce.


Japanese, Pickles, Recipes, Side Dishes, Vegan, Vegetarian, Veggies

Homemade Takuan

May 4, 2014

Takuan BowlMy friend Tomoe always has a treat to give me when I stop by now and then to deliver tomatoes or avocados from our garden.  I never leave her home without a gift of her delicious mango bread, lilikoi jelly or in this case takuan.  I have never thought of making takuan since I only eat it occasionally and it’s readily available in the markets here.  After taking a jar of Tomoe’s homemade takuan home and tasting it, I decided it was about time to make my own.  Her little yellow pickles were so tasty, crunchy, sweet and salty with just a hint of tartness (much superior to the commercial brands)  and, oh so delicious with a bowl of steaming hot rice.

Peeled DaikonDaikon are not the most attractive vegetable.  In fact, with their pale color and gangly shape, they are quite homely.  However once you add a bit of seasoning to daikon, they transform into some of the best pickles you can imagine.  A case in point is Vietnamese pickles (Do Chua).  I adore these pickles piled high in a banh mi. Takuan pickles are delicious served as a side dish with rice and grilled fish, chicken or even tofu.  In fact I enjoy just a bowl of hot rice and takuan.

Sliced Daikon

Daikon WaterAfter mixing the daikon with sugar, let it sit for an hour or two.  You’ll end up with quite a bit of liquid in the bowl.

Japanese ColoringThough these pale radishes don’t need to be tinted a bright yellow, their color is actually part of their identity and what we grew up with.  Tomoe goes to Japan every year and buys powdered coloring.  I have no idea what the box says but it worked.

Yellow Food Color

Hawaiian Salt

Takuan with ColorIt takes about a week for the daikon to absorb the pretty yellow color and flavor of the brine.  After 2 weeks the pickles are ready to eat.

Musubi 2Onigiri goes hand in hand with takuan pickles!

Takuan and Musubi

Homemade Takuan

Adapted from Tomoe’s recipe

Makes 2 quart jars

Ingredients

3 1/2 pounds long daikon

2 cups + 1 tablespoon sugar

1/4 cup Hawaiian sea salt (kosher or other coarse salt if Hawaiian sea salt is not available)

1/4 cup + 3 tablespoons rice vinegar

yellow food coloring

Preparation

Peel daikon and cut into 2 inch length pieces about 1/3 inch thick.  Place in a large bowl and toss with sugar.  Let stand for 1 – 2 hours, tossing occasionally. Do not discard liquid.

Add Hawaiian salt and rice vinegar to the bowl of daikon.  Toss to coat well.  Add yellow food coloring being very careful not to add too much.  You can always add more if the color is not what you expected.  Cover bowl well, and refrigerate for 2 weeks, tossing pickles every few days.   The amount of liquid from the daikon will vary.  Taste and adjust seasoning as needed. Transfer pickles to quart jars and cover tightly.  Takuan pickles will last for months stored in the refrigerator.


Follow

Get every new post delivered to your Inbox

Join other followers: