Browsing Tag

Sesame Seeds

Appetizers, Dinner, Japanese, Lactose Free, Recipes, Side Dishes, Vegan, Vegetarian

Spinach Ohitashi

February 22, 2021

Spinach Ohitashi

This is one of my favorite Japanese side dishes served with rice and cold tofu.  It makes for a very quick and delicious lunch.  It can be prepared well in advance and doesn’t need any attention until you drizzle the sauce over it. It is so refreshing and healthy.  

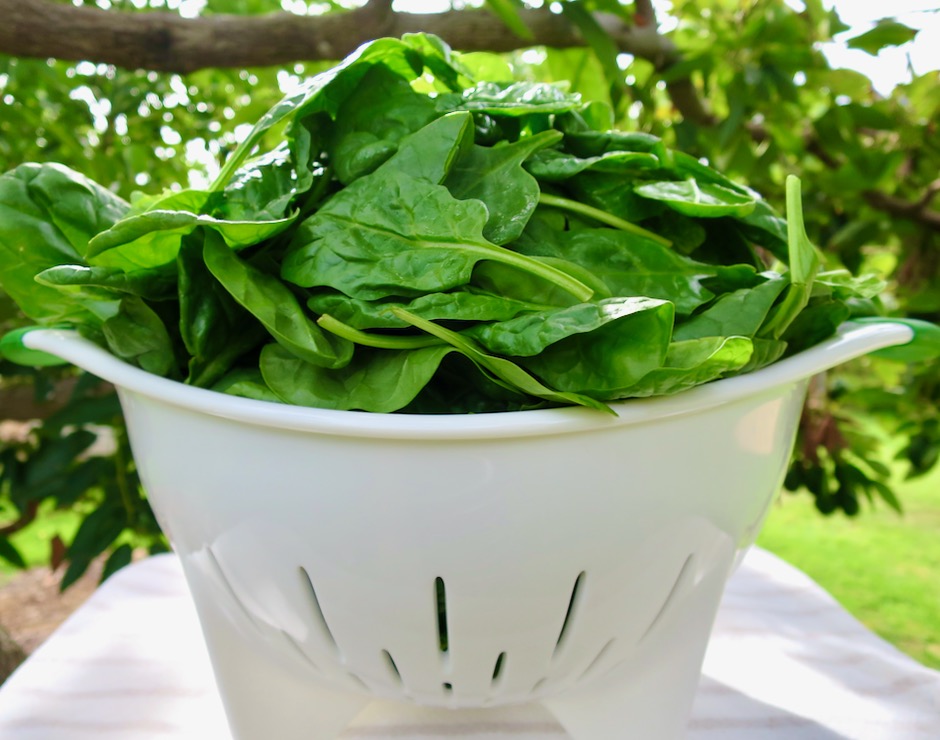
Fresh Baby Spinach Leaves

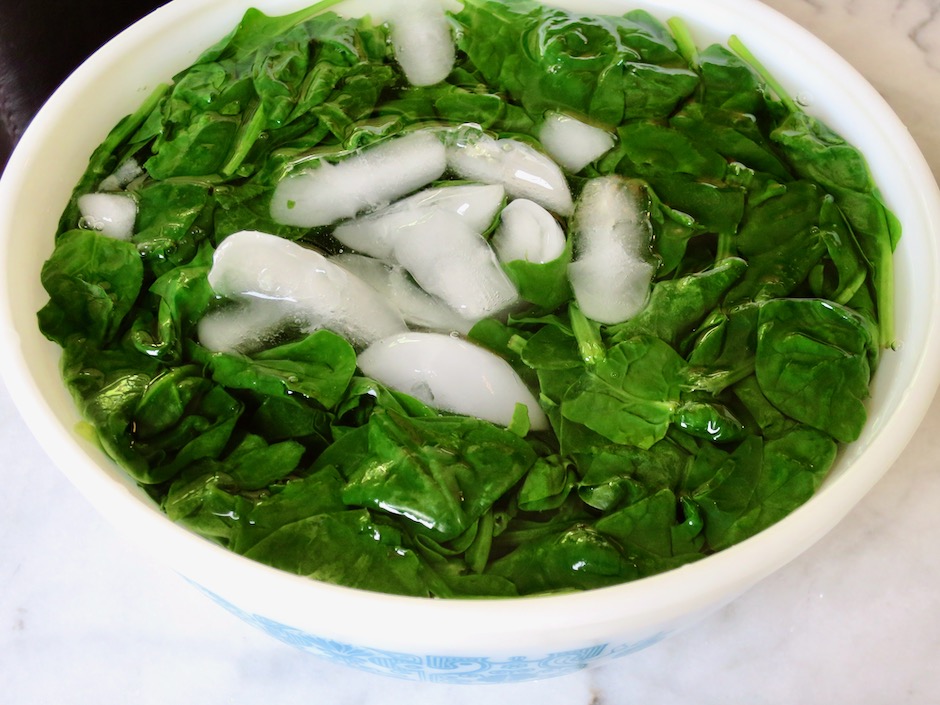
Spinach shrinks drastically when blanched so you’ll need a pound of fresh spinach for two servings.  Once blanched, the spinach goes into an ice bath to stop the cooking quickly.  

Spinach in Ice Bath

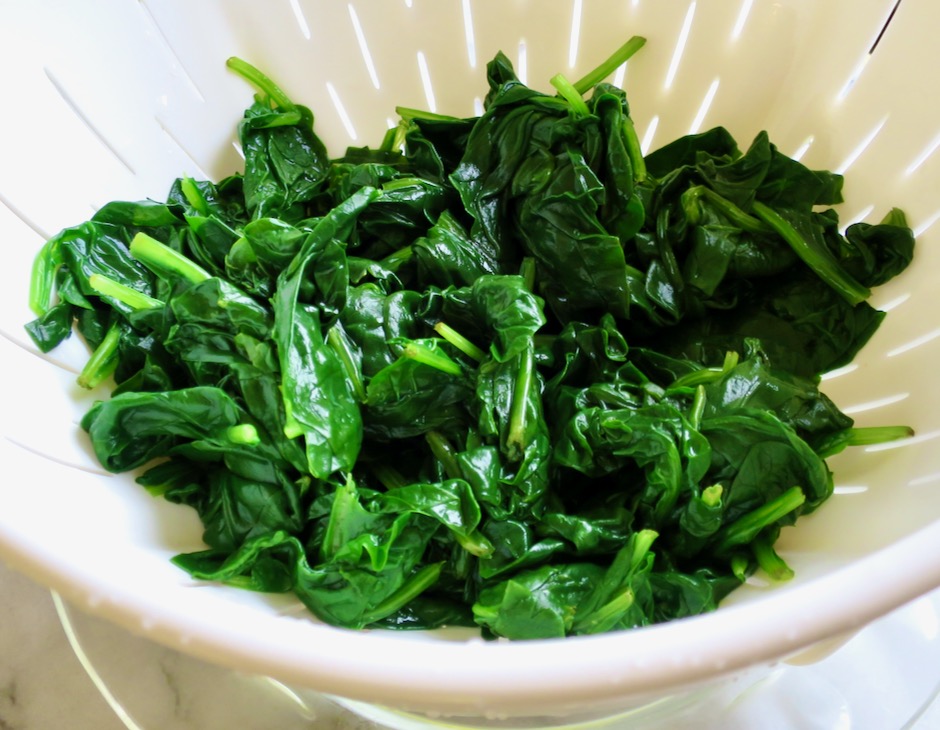
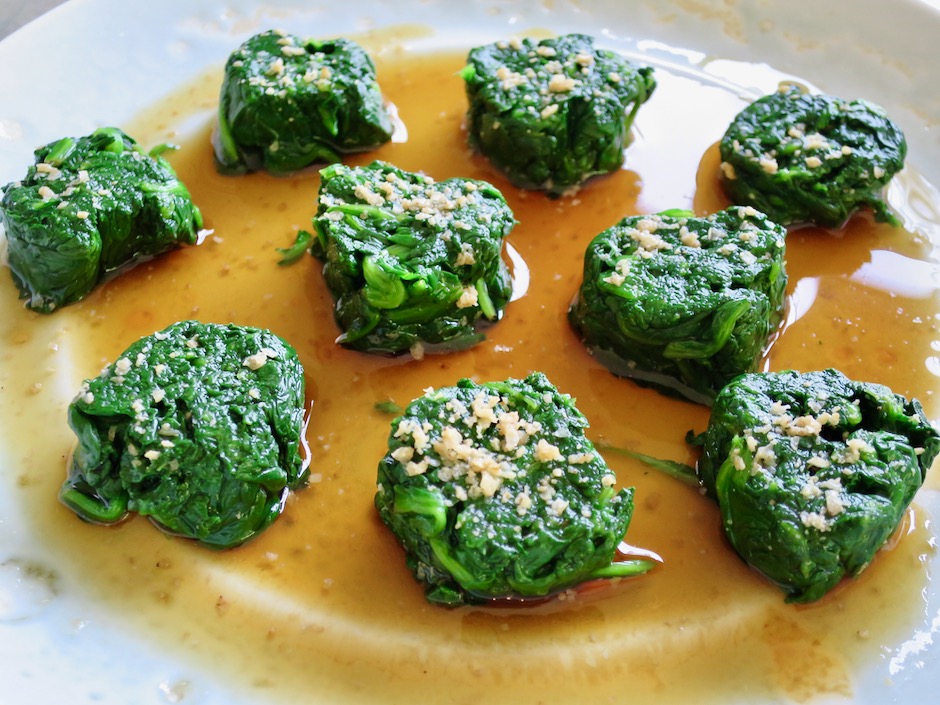
Blanched spinach has a gorgeous bright green color to it.  And with the sauce drizzled over and around the spinach it makes for a beautiful presentation.

Drained Blanched Spinach

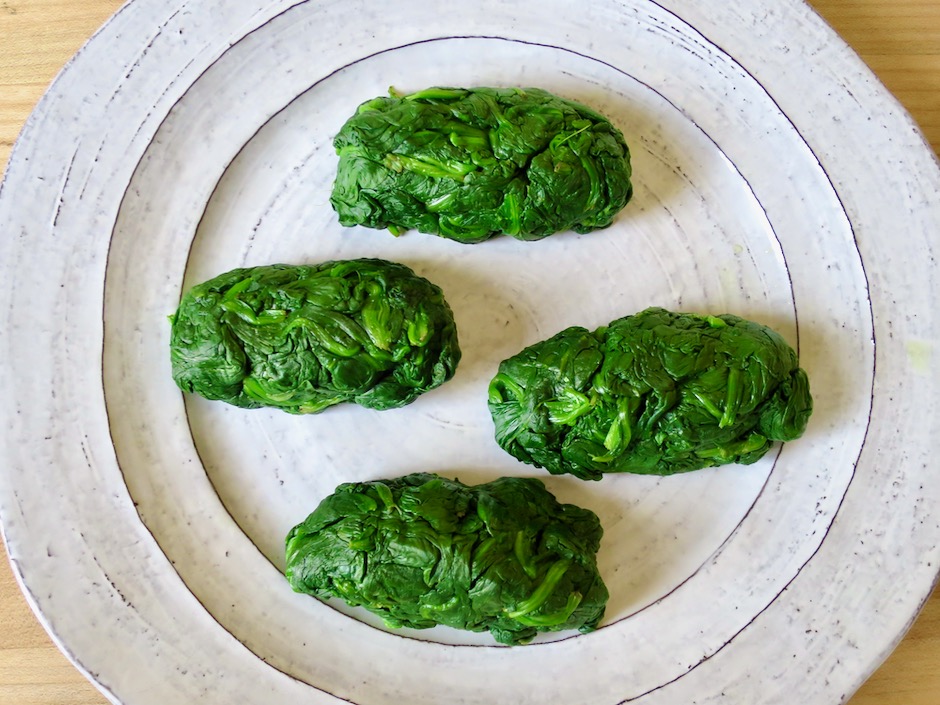
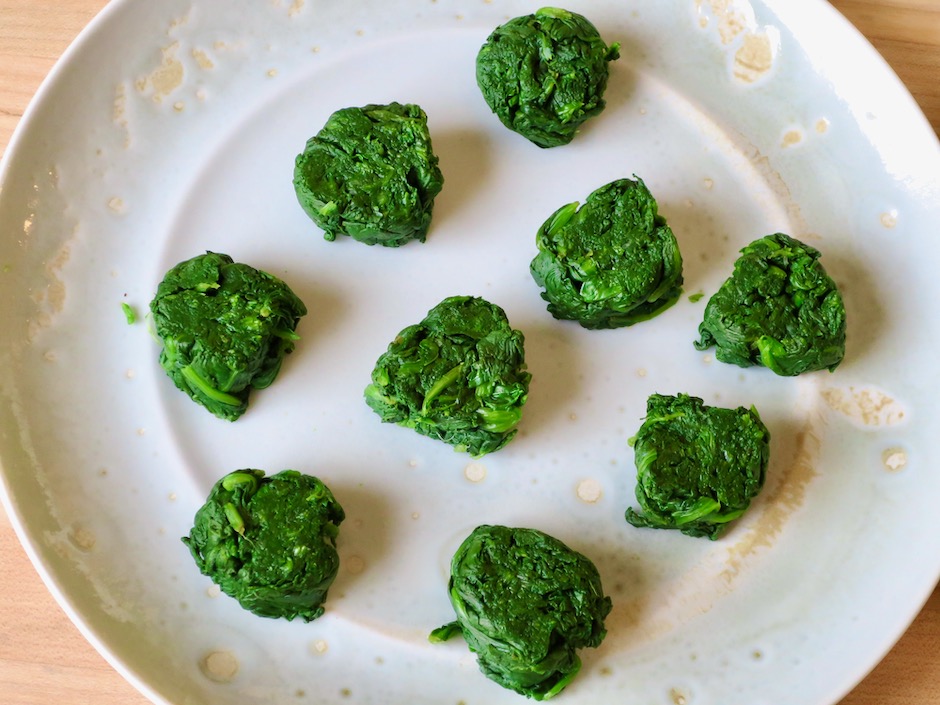
Spinach Rolls

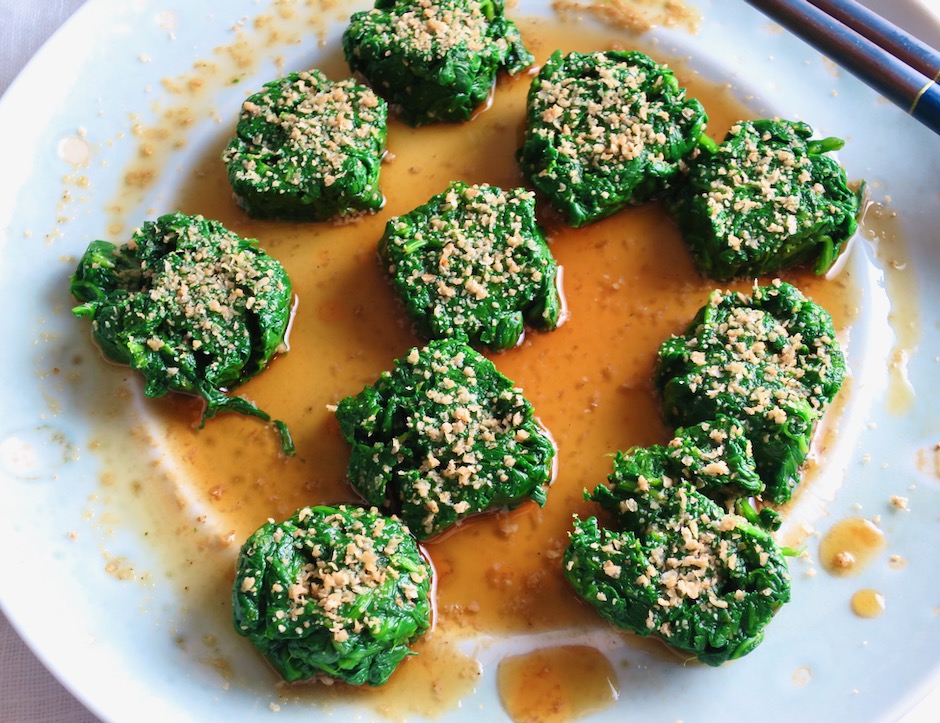
I divided the spinach (squeezed dry) into four equal pieces and shaped them into short rolls, then sliced them into rounds before adding the sauce.  

Sliced Spinach Rounds

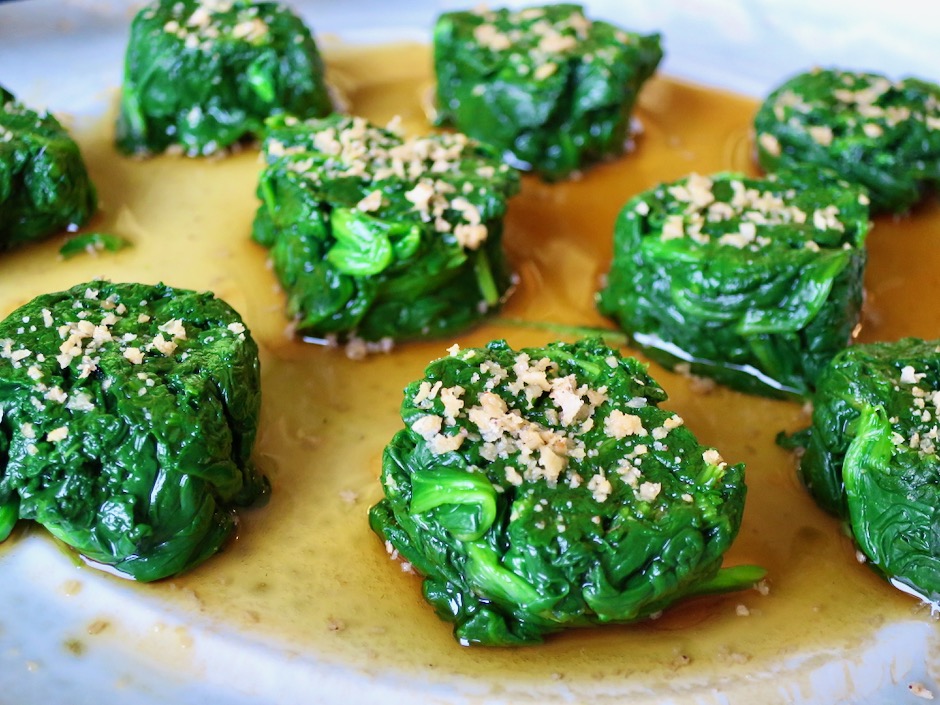
Spinach Ohitashi

Ground roasted sesame seeds are one of my favorite additions to this dish.  Not only does it give the spinach a delicious nutty flavor, it also adds contrast to the bright green rounds and golden sauce.  

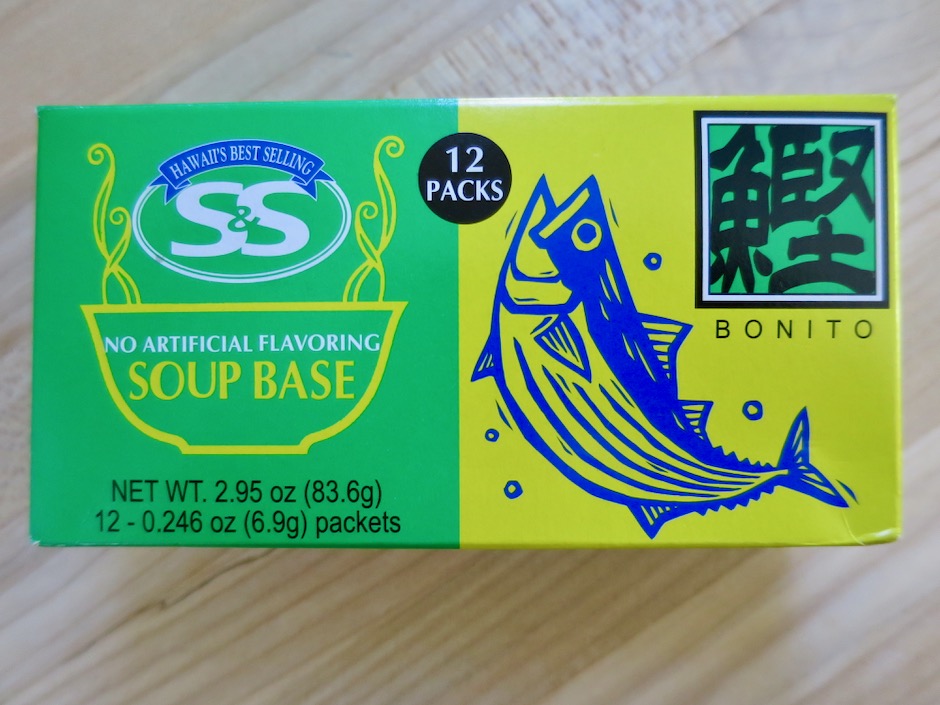
Instant Dashi

I opted to use instant dashi because of the small amount needed for the recipe.  It is convenient and tastes great in this sauce.

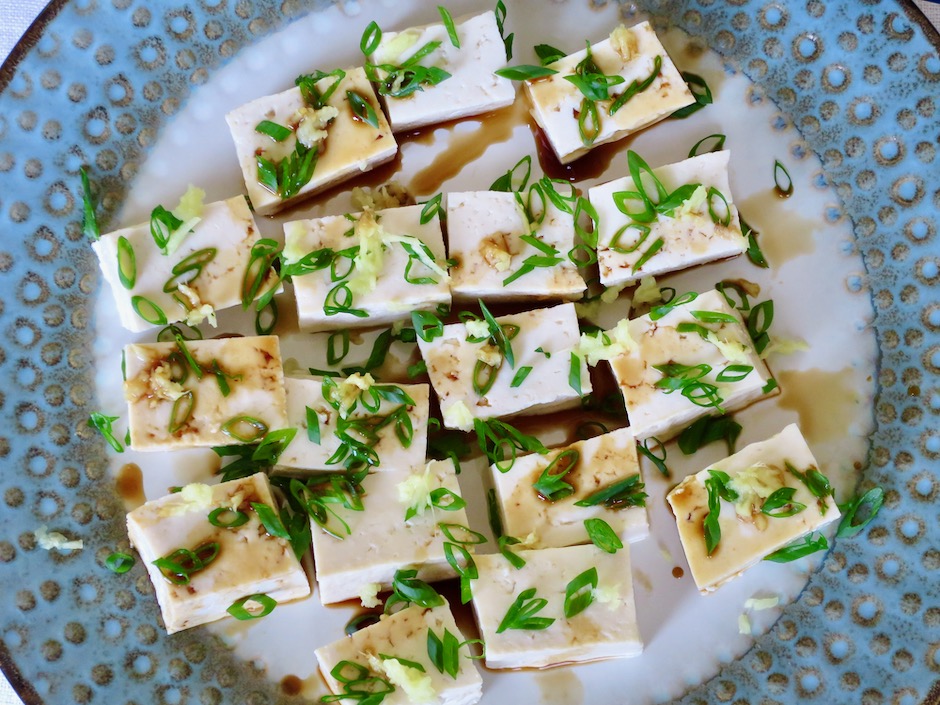
Tofu with Green Onions, Ginger & Soy Sauce

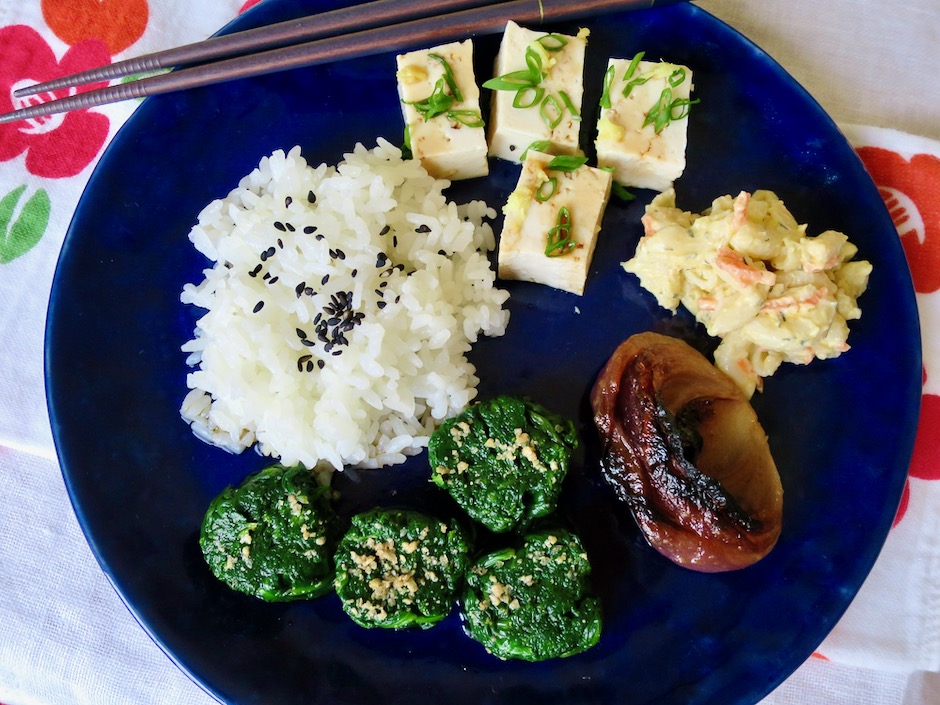
A side of tofu with green onions, ginger and soy sauce (and rice) complete a healthy meal for any day of the year. 

Spinach Ohitashi

Spinach Ohitashi with Rice, Tofu, Mac Salad, Miso Onion

Spinach Ohitashi
 
Author:
Serves: 2
Ingredients
  • 1 pound fresh baby spinach leaves
  • ½ cup dashi (I used instant dashi picture above. ½ cup warm water mixed with 1½ teaspoons dashi powder)
  • 2 tablespoons soy sauce
  • 1 tablespoon mirin
  • roasted ground sesame seeds
Preparation
  1. Bring a large pot of water to a boil. Blanch the spinach just until wilted, about 30-40 seconds. Immediately drain and transfer spinach to an ice bath. Once thoroughly chilled, remove spinach to a colander to drain.
  2. Meanwhile, combine dashi with soy sauce and mirin in a glass measuring cup (can be made in advance and kept refrigerated until ready to use). Set aside.
  3. Divide spinach into four equal portions. Squeeze out as much water as possible from each portion and form into short rolls. Slice each roll into equal sized rounds (serrated knife works best). Place rounds of spinach on serving plate. Drizzle sauce over and around the spinach. Sprinkle tops with ground sesame seeds. Serve at room temperature or slightly chilled.

 

Bread, Breakfast, Lactose Free, Sandwiches, Vegan, Vegetarian

Homemade Almost Everything Bagels

December 1, 2020

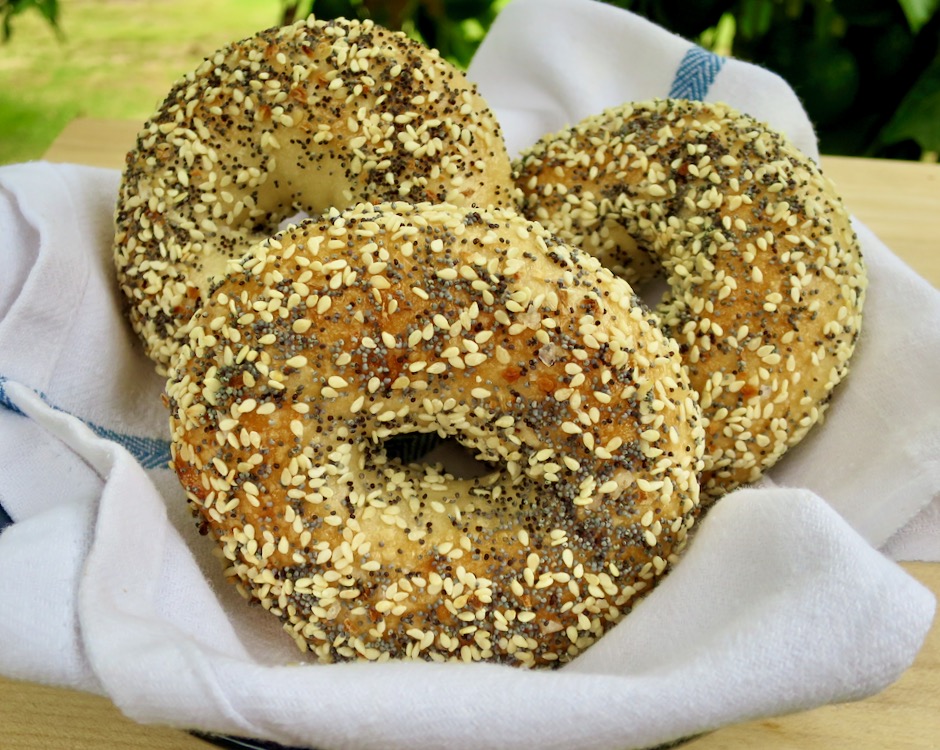
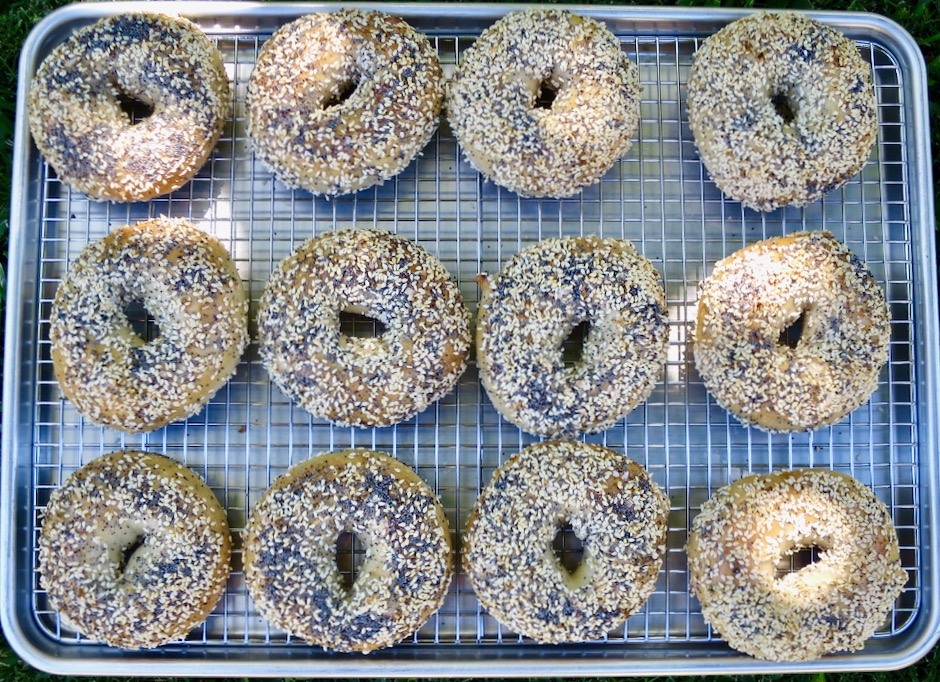
Homemade Almost Everything Bagels

A few years ago I tried my hand at making bagels.  I experimented with several different recipes but none stood out enough to make again.  They were often beautiful bagels and we ate them all but I found some to be generally too chewy.  So I put bagel making aside until a few months ago when I took up the challenge again.  Good bagels are in a class of their own but they are hard to come by in the Islands.  Since there is nothing better than homemade bread which we make with considerable success, why not homemade bagels?

Overnight Bagel Dough

Making the dough is actually quite simple. Bagel dough is very stiff so a heavy duty stand mixer is a must for this recipe.  After shaping the bagels, they go into the refrigerator to proof overnight then are boiled and baked the following day.

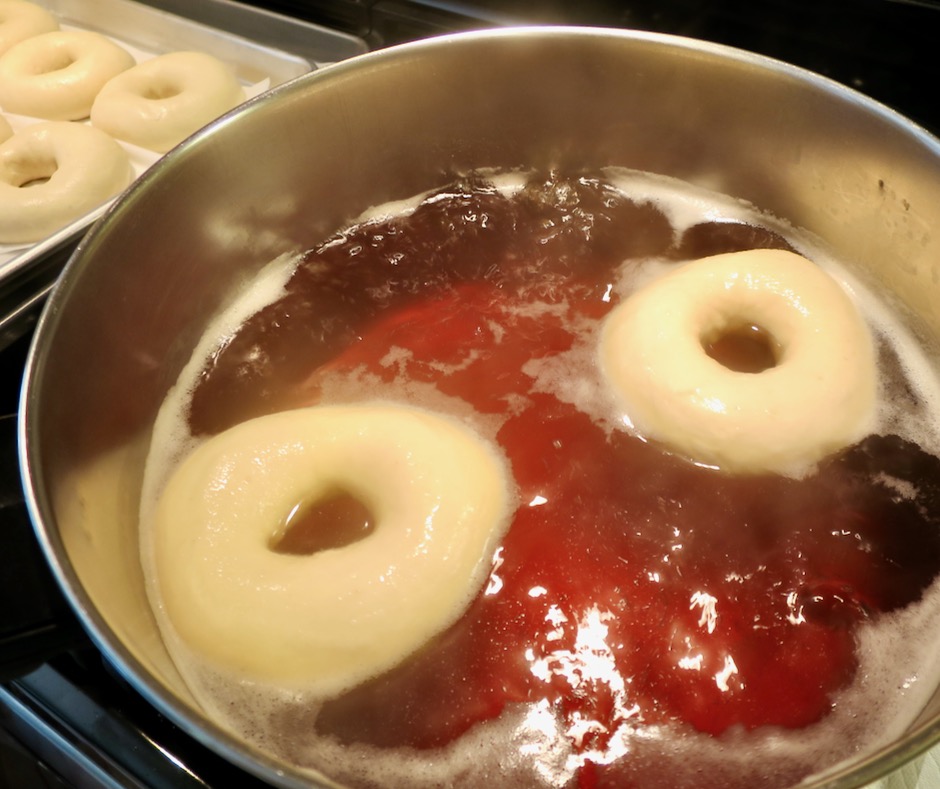
Boiling Bagels

After testing different methods for boiling the bagels I found that the longer you boil them, the chewier they become once they have finished baking.  Many recipes call for boiling bagels for a minute on each side. My preference is to boil bagels for 10-15 seconds per side.  They puff up nicely and you’ll end up with bagels that have a perfectly soft yet chewy texture.

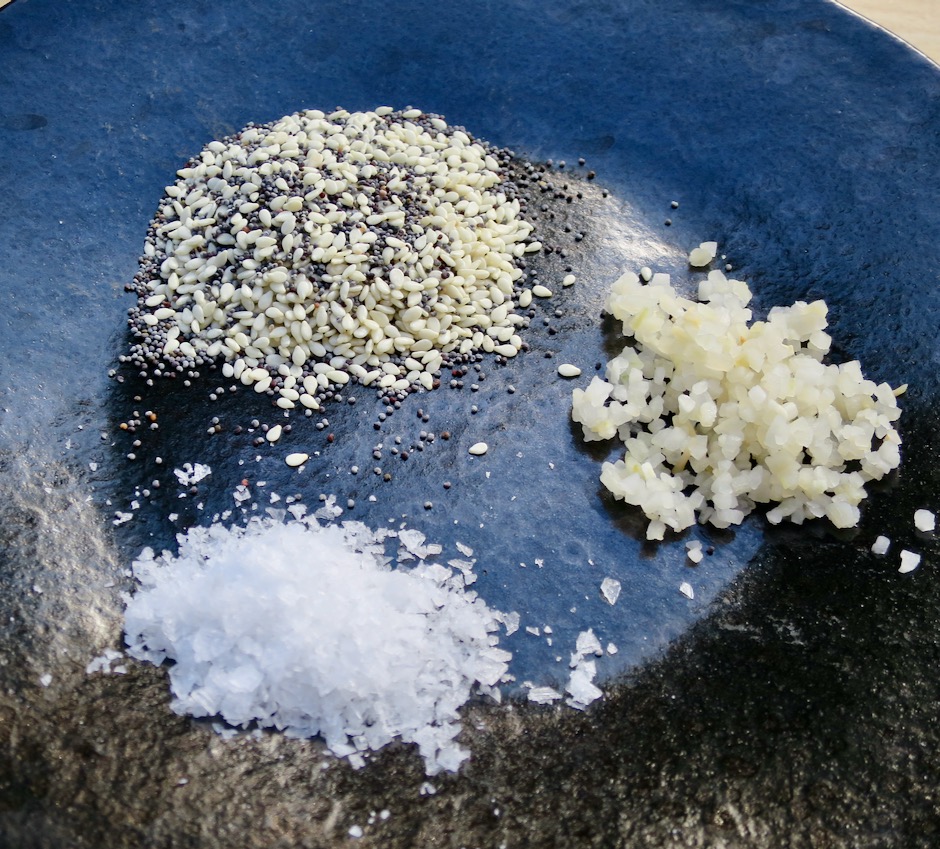
Toppings: Sesame Seeds, Poppy Seeds, Rehydrated Onions, Maldon Sea Salt

My “almost everything bagels” are generously coated on both sides with rehydrated dried minced onion, poppy seeds, sesame seeds and flaky Maldon salt.  Rehydrating the onions in hot water for a half hour keeps the onions from burning when the bagels are baking.

Homemade Almost Everything Bagels

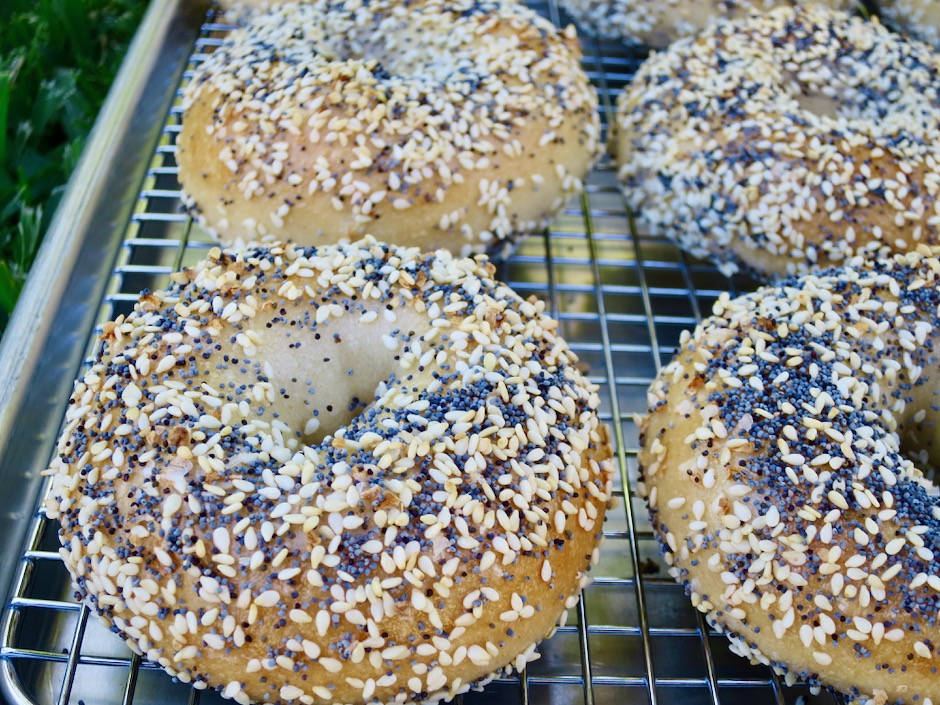
Be generous with your toppings because inevitably, a few of the seeds will fall off when you slice the bagels.

Homemade Almost Everything Bagels

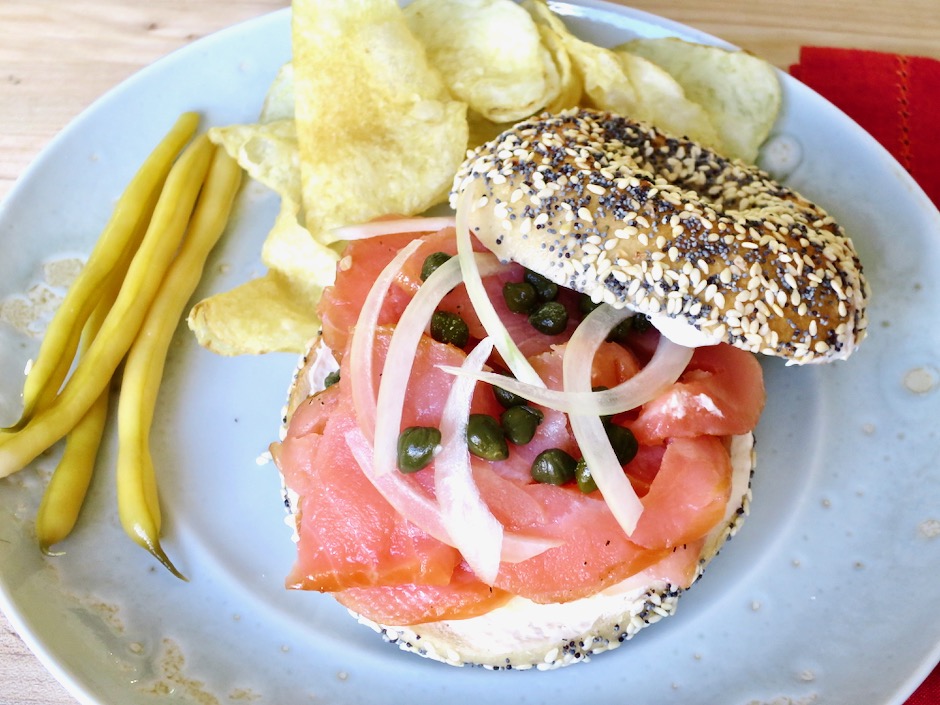
Homemade Almost Everything Bagel with Smoked Salmon

Bagels are superb served with smoked salmon, ham and cheese, avocado, pimento cheese or just butter.  According to bagel purists, toasting a bagel is verboten and that bagels should be eaten warm as they come out of the oven.  They are best eaten the day they are made.  So in my case, I freeze most of the bagels since there’s no way I can eat a dozen in a day.  When I am ready to have one, I take it out of the freezer to defrost, slice, and toast my bagel.  Then it’s ready for whatever toppings I want to add.  Sometimes just a few pats of butter does the trick.

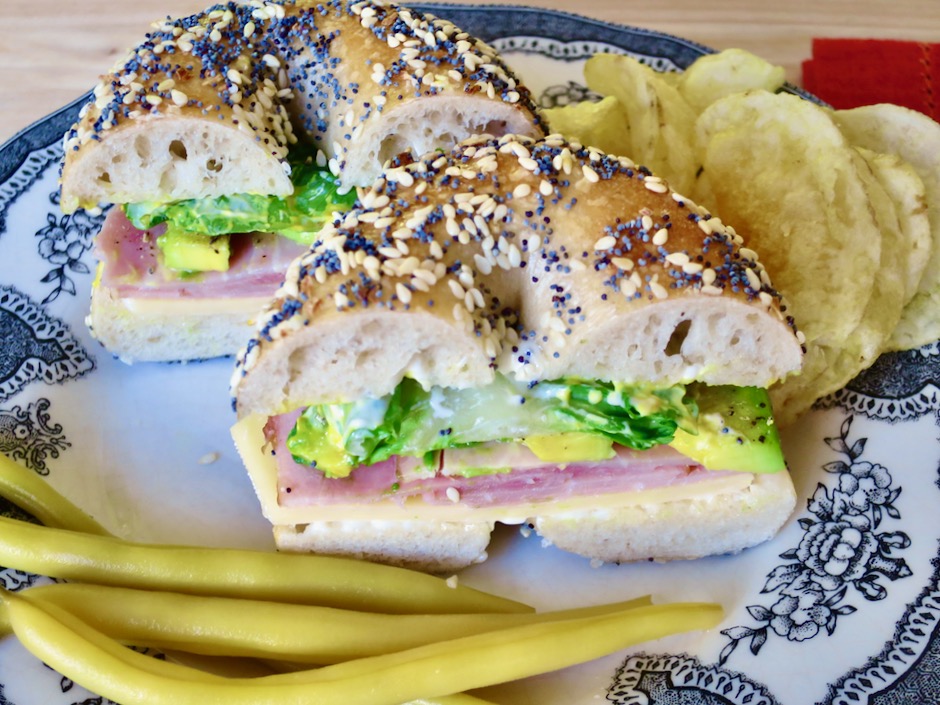
Homemade Almost Everything Bagel with Cheddar, Ham & Avocado

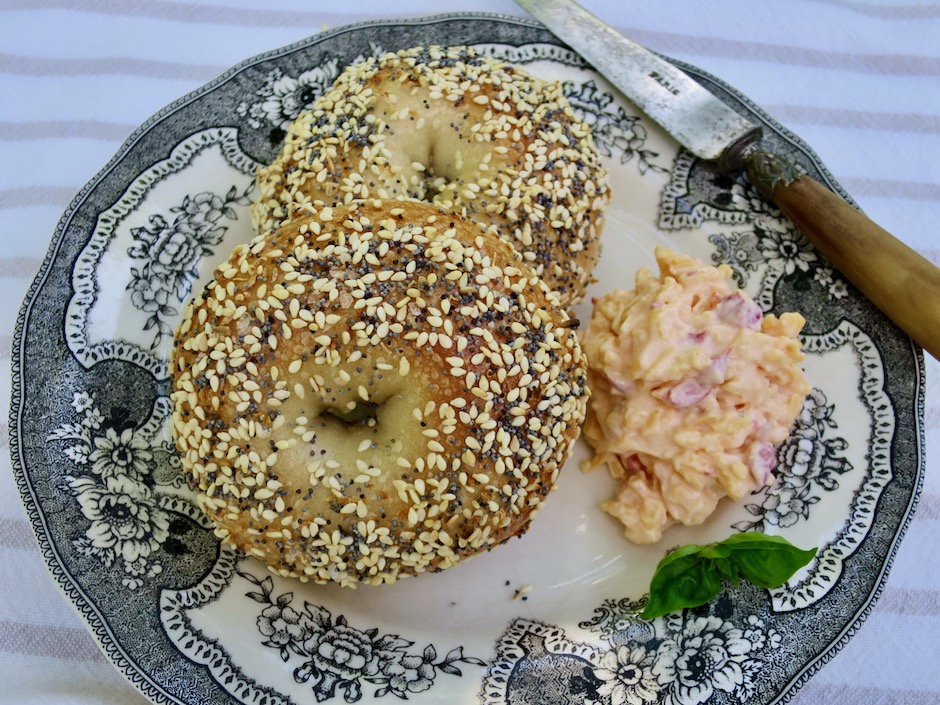
Homemade Almost Everything Bagel with Pimento Cheese

Homemade Bagels
 
Author:
Serves: 1 dozen
Ingredients
  • 4 cups (623g, 22 ounces) King Arthur bread flour
  • 1½ teaspoons instant yeast (recommend SAF Red Instant Yeast, proofing is not necessary)
  • 1 tablespoon granulated sugar
  • 2 teaspoons fine sea salt
  • 2 teaspoons diastatic malt powder (available from Amazon)
  • 1½ cups (12 ounces) water
  • 1 tablespoon barley malt syrup (available from Amazon or local health food stores)
  • 1 tablespoon baking soda
  • egg white wash whisked until frothy
  • toppings of your choice
Preparation
  1. Special equipment: Heavy duty stand mixer, kitchen scale, parchment paper, 2 large sheet pans, diastatic malt powder, barley malt syrup, wide flat slotted spoon, kitchen timer, small pastry brush (silicone works great)
  2. Note: I use a half sheet pan and a quarter sheet pan to bake all 12 bagels at the same time on the center rack. If you use 2 large sheet pans, boil and bake 6 bagels at a time. Then continue with the second batch after the first 6 bagels have baked. It is a good idea to leave space between the bagels and not crowd them so they bake up nice and brown on all sides.
  3. Whisk flour, yeast, sugar, salt, and barley malt powder in the bowl of a stand mixer. Pour in water. With mixer on low speed (#2 on my KitchenAid), mix until dough starts to come together, about 4-5 minutes. Use a spatula to scrape down the sides to ensure all of the flour gets mixed in well. Bagel dough is very stiff, however, if the dough seems too dry, add a teaspoon of water.
  4. Increase the speed (#3 on my KitchenAid) and set a timer for 5 minutes and knead dough until it is cohesive and smooth. Remove dough and weigh it. Then divide it into 12 equal portions for small bagels, 10 for larger bagels. As you work, cover the dough pieces with plastic wrap or a clean kitchen towel to prevent drying. Working with 1 piece at a time, shape the dough into a smooth ball. Pinch the dough together on the bottom of the ball. Again, cover with plastic wrap to prevent drying and continue with the rest of the dough. Let the dough balls rest for 5 minutes, covered.
  5. To shape the dough, place dough round on the counter, push your index finger into the center of each dough round so that it goes all the way through. Twirl the dough between your two index fingers to create a hole about 1½-inches wide. Place shaped bagels on a baking sheet lined with parchment paper that has been lightly oiled. Cover with plastic wrap and refrigerate overnight.
  6. Preheat oven to 500 degrees with rack in center.
  7. Have ready: A thick layer of paper towels on the counter to place the boiled bagels on and a large piece of parchment paper for transferring bagels once dry (they will stick on paper towels if left too long). Have a second sheet pan lined with parchment paper ready and all of your toppings (if using) plus egg wash. Remove bagels from the refrigerator.
  8. Fill a large wide pot or Dutch oven with at least 6-inches of water. Bring water to a boil. Add barley malt syrup and baking soda. Give it a quick stir, skim off most of the foam. Working with 2-3 bagels at a time, gently place bagels in boiling water and set timer for 20 seconds. After 10 seconds have passed, gently flip bagels over for another 10 seconds. Immediately transfer bagels to paper towels using a wide, flat slotted spoon. Then transfer to parchment paper. Continue with the rest of the bagels.
  9. If you are adding toppings to your bagels, brush bottom side of bagel first with egg wash. Sprinkle toppings over the dough, flip bagel and repeat the process. Transfer to the parchment lined baking sheet. Continue with the rest of the bagels. You may choose to leave some of the bagels plain or simply coat with sesame seeds or other toppings of your choice. Place bagels in oven and reduce heat to 450 degrees. Bake bagels (rotate pan halfway through) for about 14 minutes or until bagels are nicely browned. Let bagels cool a bit before slicing.
 

Dinner, Lactose Free, Pork, Recipes, Veggies

Ginger Pork Udon with Baby Bok Choy

April 12, 2018

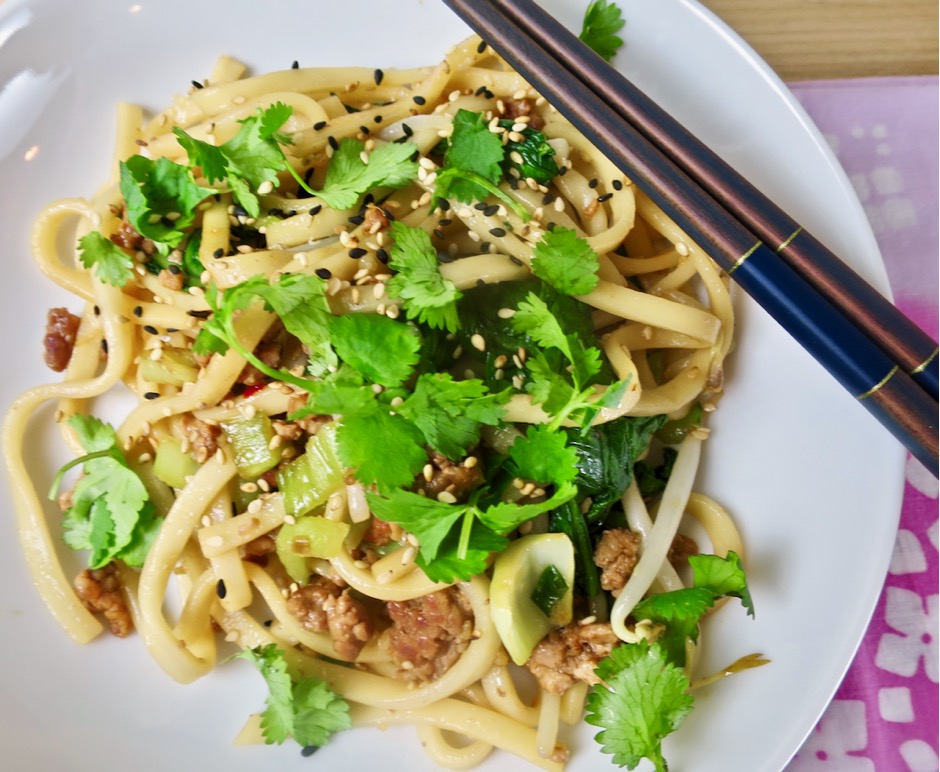
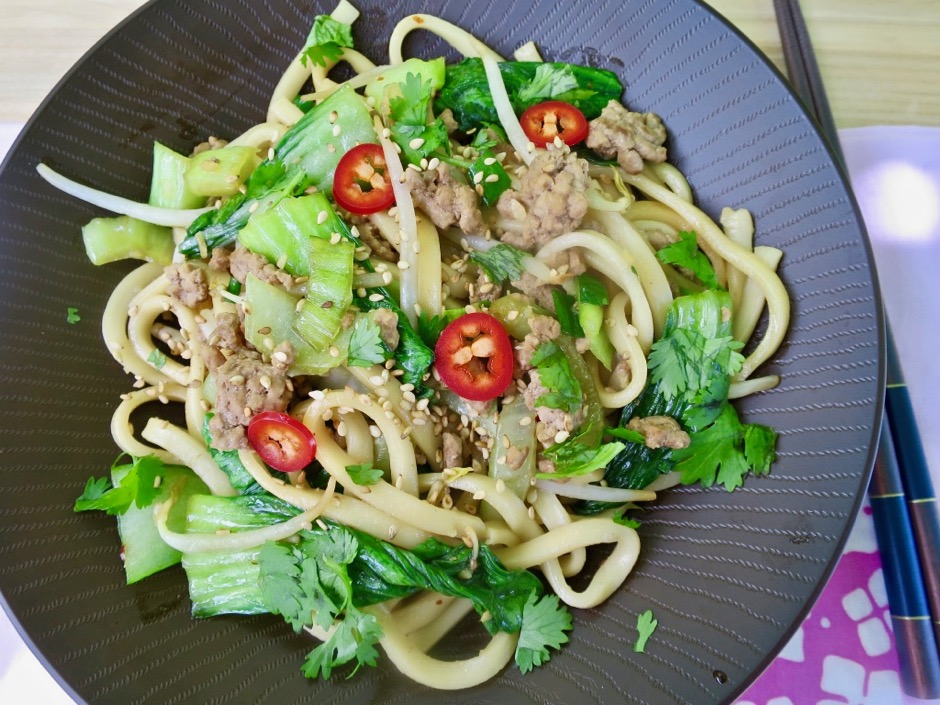
Ginger Pork Udon with Bok Choy

One of the best restaurants here in Maui is Star Noodle.  They feature a superb eclectic Asian menu that we enjoy each time we dine there.  We particularly enjoy one of their noodle dishes: “Lahaina Fried Soup.” The combination of savory ground pork and fresh noodles is irresistible. I was looking for a dish with a similar flavor profile when I discovered this recipe. With perfectly seasoned pork, chewy udon noodles, and crisp baby bok choy, it is a dish I will be making often. The original recipe by Melissa Clark at NYT Cooking calls for rice noodles but I couldn’t resist fresh udon made by Sun Noodles, the renowned artisan noodle producer.

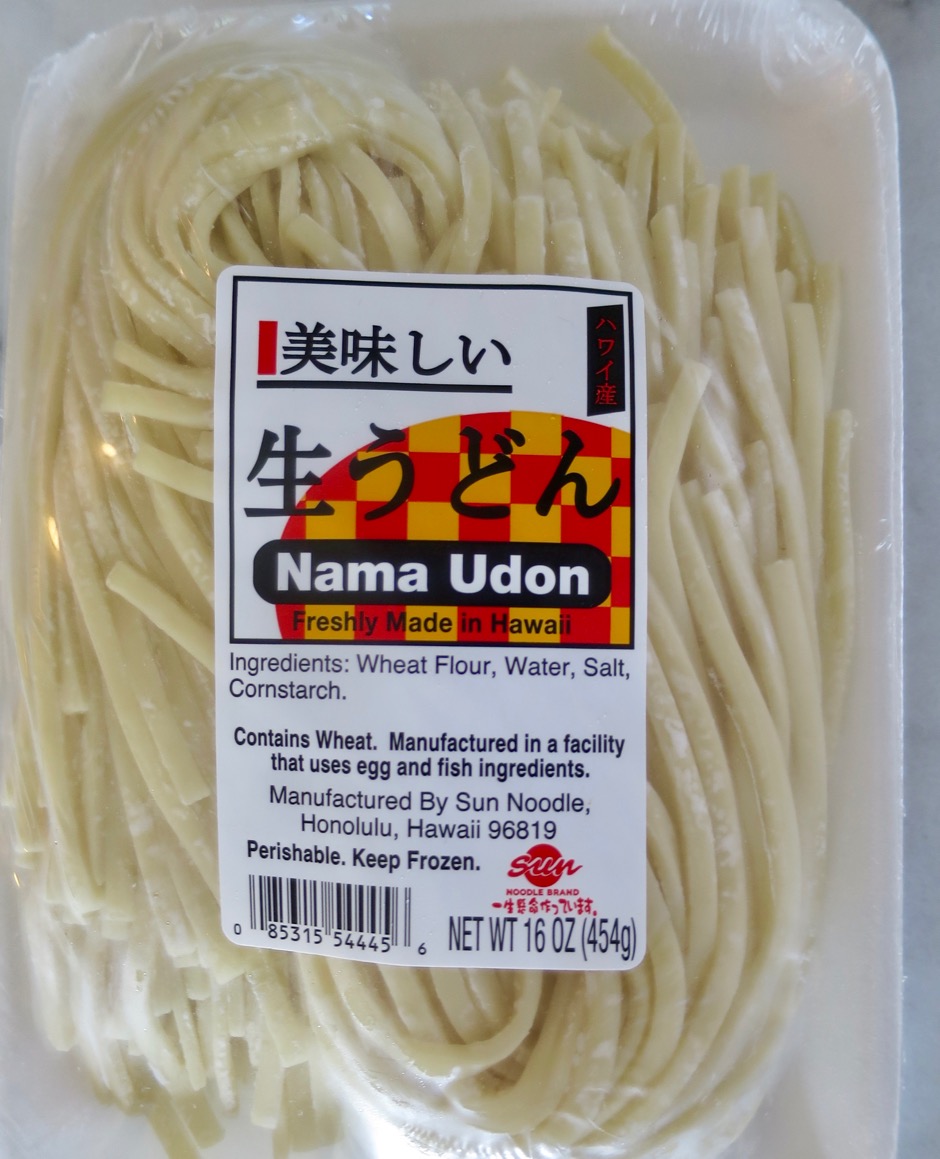
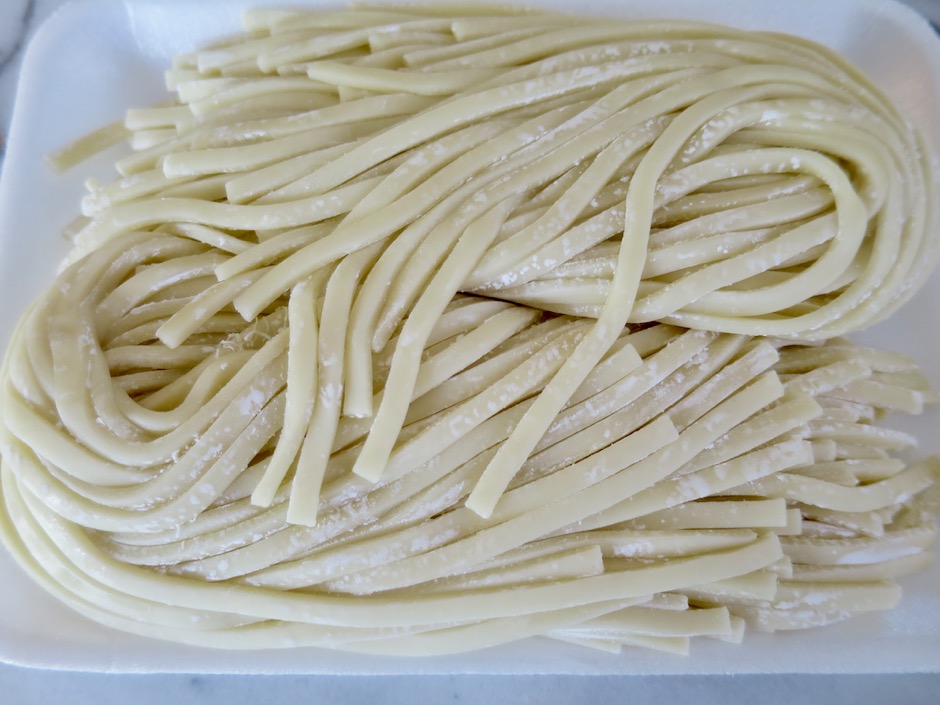
Fresh Udon

Sun Noodles originated in Honolulu in the late 1980’s.  Today, they make more than 600 types of noodles, many of which were created specifically for individual ramen shops and restaurants all over the world.  Luckily, there are a few markets in Hawaii that sell a selection of their noodles for the home cook such as ramen, soba and udon.
Fresh Udon

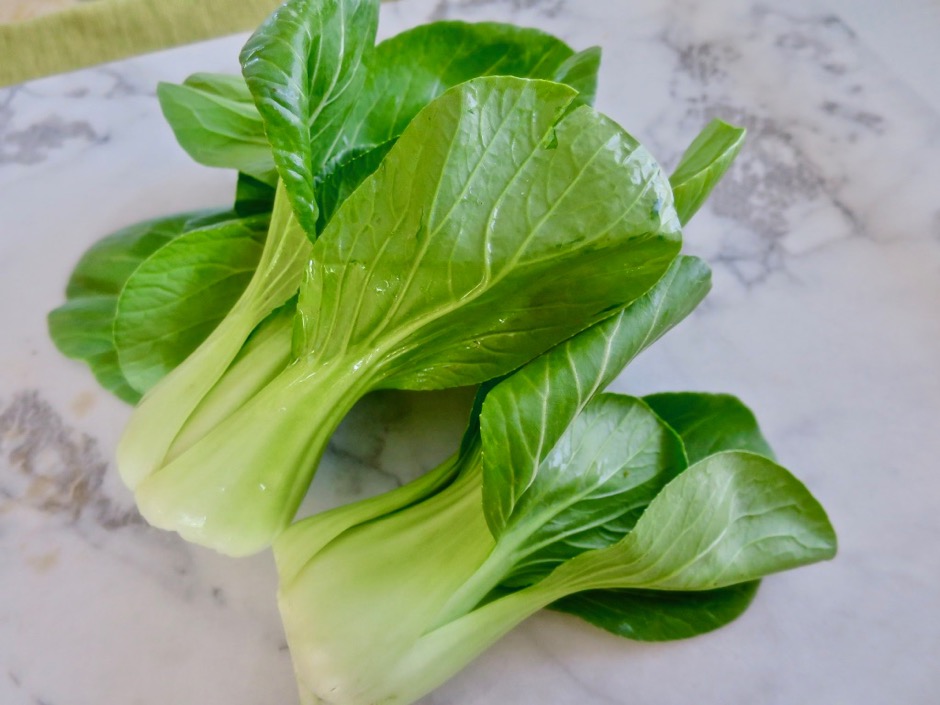
Baby Bok Choy

With their crisp, juicy stems and tender dark green leaves, baby bok choy is a perfect vegetable for stir frying, or simply steamed and drizzled with soy sauce and sesame oil.

Ginger Pork Udon with Bok Choy

Ginger Pork Udon with Bok Choy

Ginger Pork Udon with Bok Choy
 
Adapted from The New York Times
Author:
Serves: 4
Ingredients
  • 1 pound baby bok choy
  • 16 ounces fresh udon (or noodles of your choice)
  • 1 tablespoon + 2 teaspoons neutral oil
  • 1 pound lean ground pork
  • ½ teaspoon kosher salt
  • 4 tablespoons soy sauce, divided
  • 1½ tablespoons rice vinegar, divided (not seasoned)
  • ½ cup sliced scallions, divided
  • 2 teaspoons finely minced ginger
  • 2 medium garlic cloves, finely minced
  • few dashes of red chile flakes
  • 2 cups bean sprouts
  • ½ teaspoon sesame oil
  • 1 tablespoon toasted sesame seeds
  • cilantro for serving
  • 1 Fresno chile or Thai chile
Preparation
  1. Trim bok choy and separate dark green tops from white stems. Leave the smaller tops whole, cut the larger ones in half. Thinly slice the stems about ⅓-inch wide.
  2. Bring a large pot of salted water to a boil. Add noodles and cook according to package directions. The fresh udon took about 4 minutes. Drain and run under cool water; drain again.
  3. Heat 2 teaspoons oil in a large skillet over medium heat. Add pork and cook, breaking up with a wooden spatula, until golden and cooked through, about 10 minutes. Season with ½ teaspoon kosher salt, 1½ tablespoons soy sauce and ½ tablespoon rice vinegar. Use a slotted spoon to transfer meat to a bowl. Wipe the pan of any residual oil from the pork.
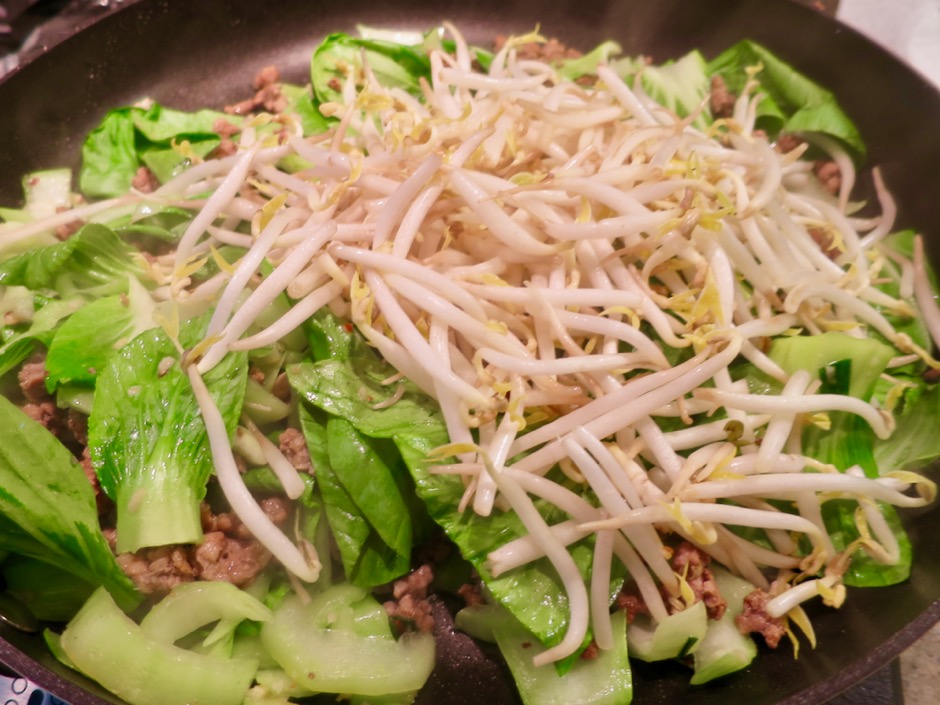
  4. Add remaining 1 tablespoon oil to the pan. Stir in half the scallions, finely chopped ginger, garlic, and chile flakes. Cook until fragrant, about 1 minute. Add bok choy stems and cook until almost tender, about 3 minutes. Toss in leaves and bean sprouts. Cook for another minute or two. Return pork to the skillet.
  5. Toss noodles, remaining 2½ tablespoons soy sauce and 1 tablespoon rice vinegar and sesame oil into the pan. Cook until just warmed through. Taste and adjust seasoning.
  6. Transfer to a large wide bowl and toss with remaining scallions. Sprinkle sesame seeds and cilantro over the top, along with thinly sliced peppers.


Chicken, Dinner, Lactose Free, Recipes

Crispy Chicken Tenders

March 10, 2018

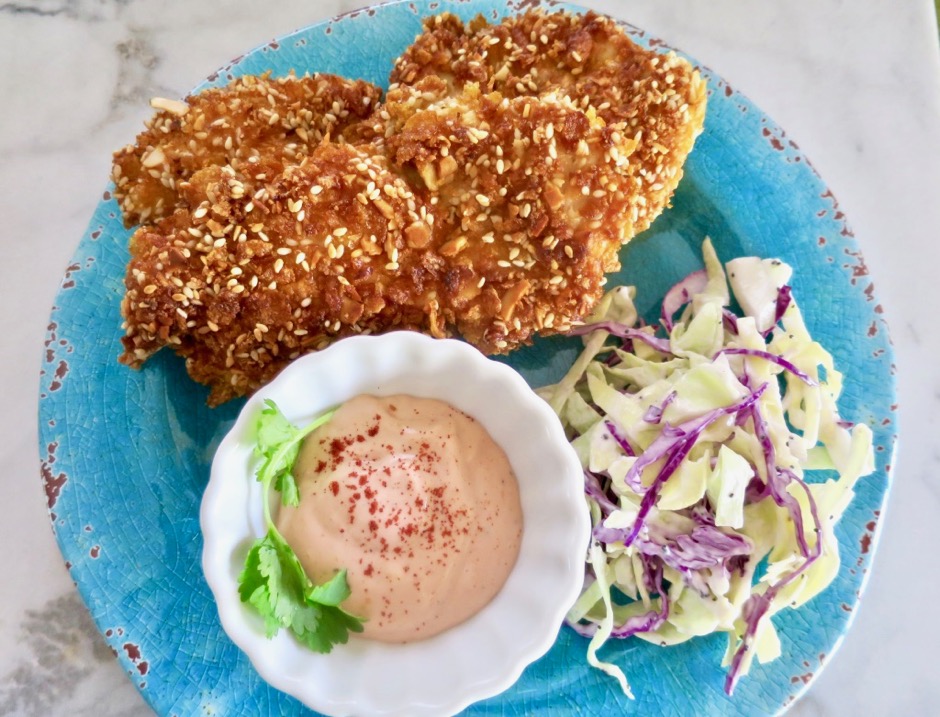
Crispy Chicken Tenders

Chicken is one of the most versatile sources of protein.  Each of its parts, breasts, thighs, legs, and tenders can be prepared in their own unique ways. There was a time that I would never consider eating chicken thighs but that time is long gone and of course we regularly enjoy breasts in many preparations. Tenders are now one of my favorite chicken parts.  As their name implies, they are so tender and moist which makes them hard to resist.  Sesame seeds are one of my favorite ingredients to use whether I’m baking bread, making somen salad, smashed cucumber salad or using them as part of a crispy coating for this chicken recipe.  Many times panko or other types of bread crumbs are used for breading chicken, but this time I’m using crushed corn flakes.  The corn flakes, almonds and sesame seeds make a perfectly crispy coating.

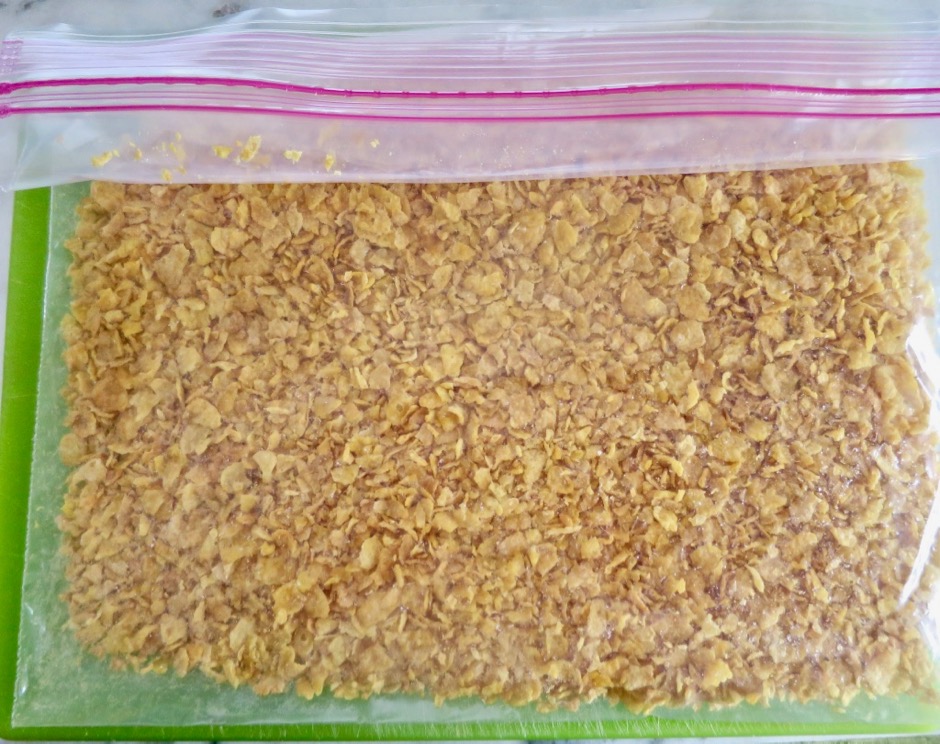
Crushed Cornflakes

Crush the corn flakes and almonds in a Ziploc bag then toss in the raw sesame seeds. I use a smooth meat pounder but you could also use a small heavy pot or skillet and get the same results.

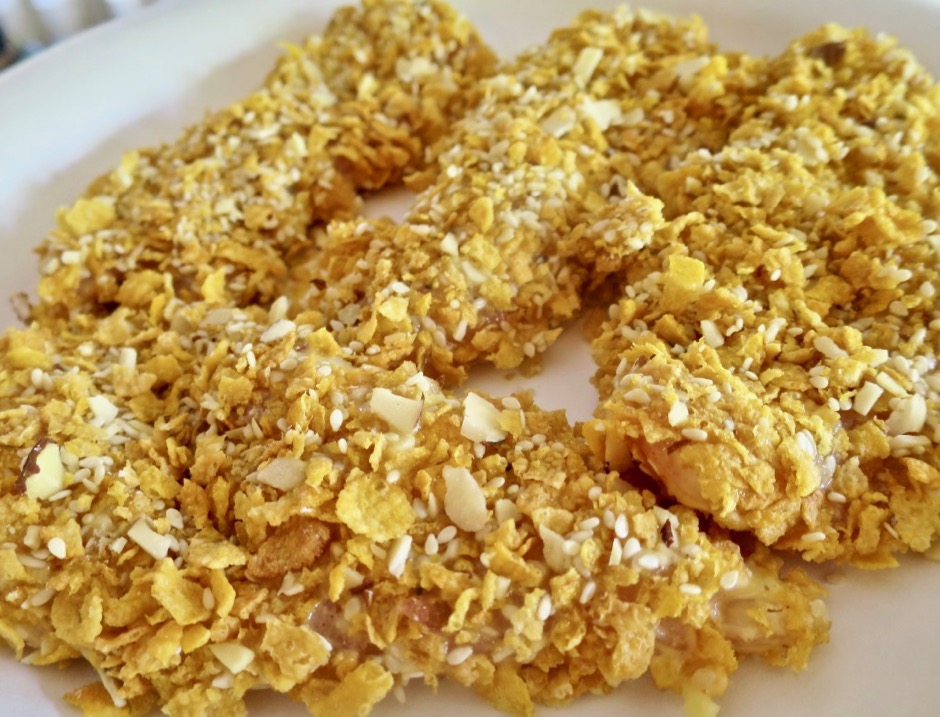
Breaded Tenders

The chicken tenders turn out perfectly crisp.  Serve them with sauce on the side, in a sandwich or with melted cheese over the top alongside spaghetti and red sauce.

Crispy Chicken Tenders

Crispy Chicken Tenders
 
Adapted from Food & Wine magazine
Author:
Serves: 4
Ingredients
  • 8 chicken tenders
  • 1 teaspoon kosher salt
  • ¼ scant teaspoon garlic powder
  • ¼ scant teaspoon onion powder
  • ¼ teaspoon freshly ground black pepper
  • ¼ teaspoon paprika (optional)
  • ⅛ teaspoon cayenne pepper (optional)
  • 2¾ cups corn flakes, crushed
  • ¼ cup sliced almonds, crushed
  • ¼ cup raw sesame seeds
  • all-purpose flour for dredging
  • 2 extra-large eggs
  • 2 tablespoons half and half or 1 tablespoon sour cream (I use Organic Valley and Green Valley lactose free dairy products)
Preparation
  1. Combine the salt, garlic powder, onion powder, pepper, paprika and cayenne pepper in a small dish.
  2. Remove the tendon that runs down the underside of each chicken tender. Place tenders on a plate and season both sides with the salt & spice mixture. (Depending on the size of your tenders you may not need all of the salt mixture).
  3. Place corn flakes and almonds in a Ziploc bag and crush with a meat pounder or small heavy pot. Pour in sesame seeds and transfer mixture to a large paper plate.
  4. Place ½ cup flour on another large paper plate.
  5. Combine egg and half and half or sour cream in a shallow bowl.
  6. Working with two pieces of chicken at a time, dip each in flour, shaking off excess. Dip chicken into egg mixture and allow excess to drip off. Repeat once again with flour and egg. Transfer to corn flake mixture scooping crumbs on top of chicken. Gently press to ensure each piece is nicely coated on both sides. Continue with the rest of the chicken tenders.
  7. Heat ¼-inch of canola oil in a large deep skillet over moderate heat. Once oil is hot, add 4 chicken tenders to the pan. Cook for 2½ minutes until nicely browned, then flip and cook until internal temperature reads 160 degrees, about 2 minutes longer. Transfer chicken to a plate and cook the remaining for pieces.
  8. Serve chicken with your favorite dipping sauce, in a sandwich, or with pasta and red sauce.


Japanese, Recipes, Rice Dishes, Side Dishes

Japanese Sushi Rice

December 30, 2012

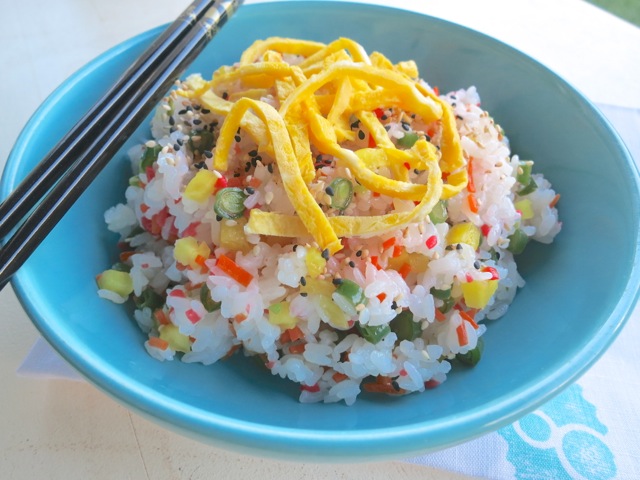
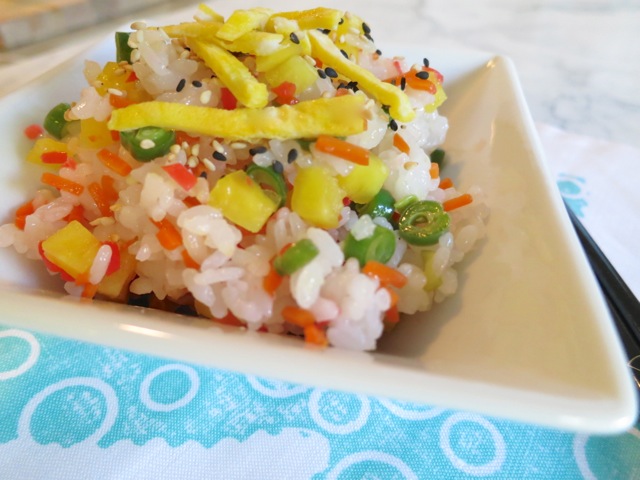
Sushi RiceThis is a simple variation on sushi rice or Chirashi Sushi which means scattered sushi. Hot rice is mixed with a vinegar sauce (sushi meshi) and colorful toppings are added.  It’s an excellent side dish that goes especially well with grilled teriyaki chicken, beef, fish or tofu.  If you want to make it in advance, I suggest making it the same day you plan to serve it since rice tends to dry out and harden the longer you refrigerate it.

Benriner

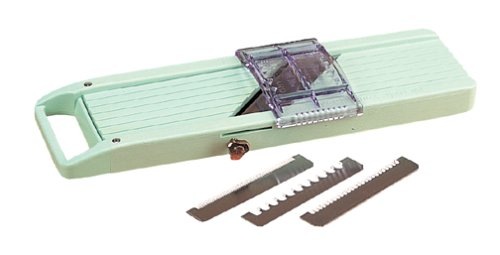
Let me introduce you to the Benriner.  It is made in Japan and comes with assorted blades and a small plastic guide.  I’ve had my Benriner for about 20 years.  It is not fancy and as you can see this model has no container attachment for storing vegetables and I like that because it fits in your drawer without taking up too much space.  You can find this at Amazon.com

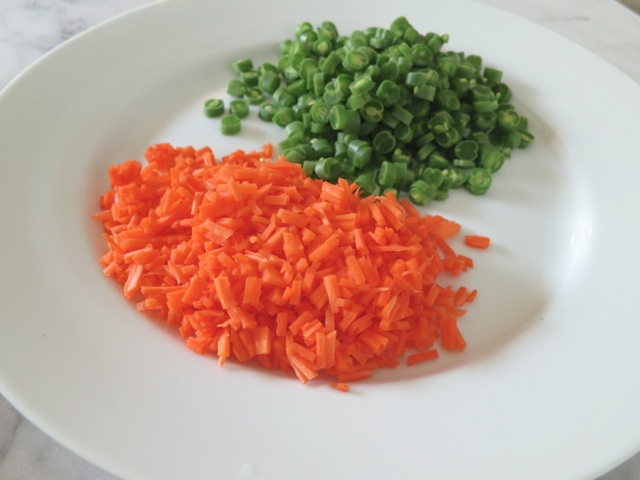
Carrot & Green Beans

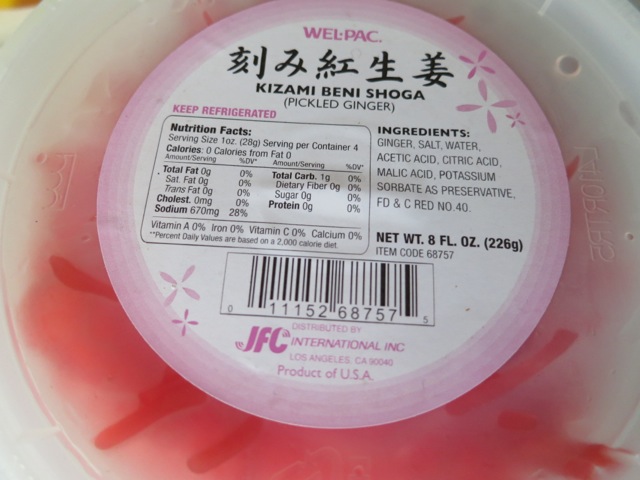
Red GingerPickled Red Ginger.

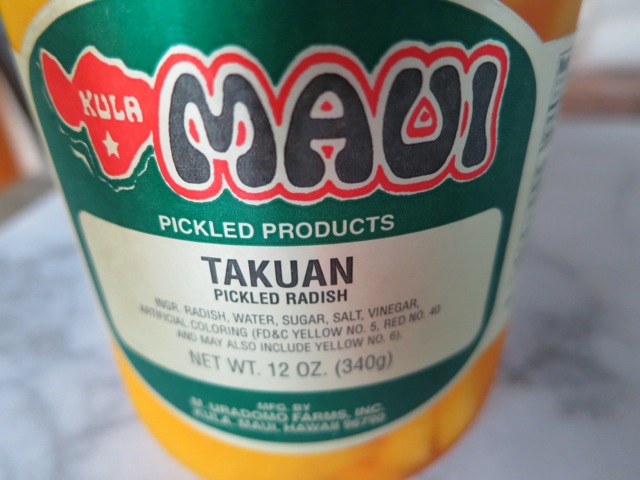
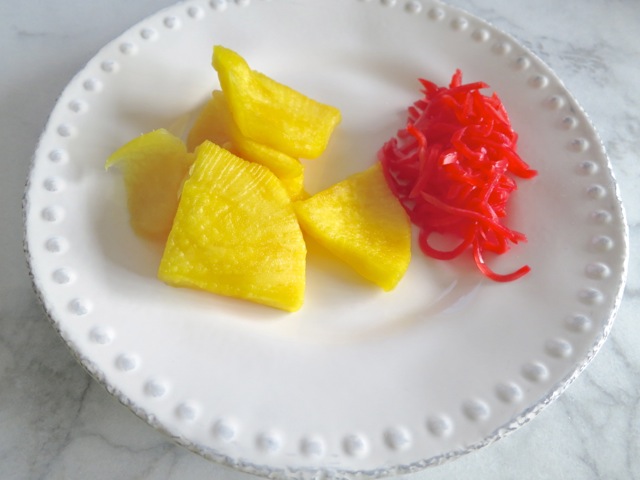
TakuanTakuan (pickled radish).

Takuan & Pickled Red  GingerTakuan and red ginger.

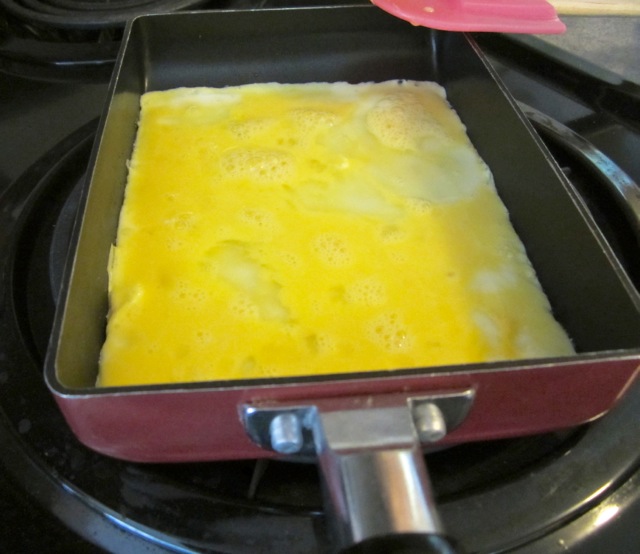
Japanese Egg PanThis little Japanese rectangular egg pan makes it simple to slice the egg into thin slivers once cooked.

Sushi Rice

Sushi Meshi

2 cups short grain white rice (uncooked and rinsed well)

1/3 cup rice vinegar (not seasoned)

3 tablespoons sugar

1 teaspoon salt

Vegetables

12 green beans – sliced thin

1/2 medium carrot, julienned and cut into 1/3 inch lengths

1 1/2 tablespoons soy sauce

1 tablespoon sugar

1 tablespoon sake or dry sherry

1/2 cup water

1 tablespoon red ginger – finely chopped

1/3 cup takuan, finely diced

1 egg scrambled and fried (do not brown) sliced in thin strips (optional)

White and black roasted sesame seeds

Preparation

Cook 2 cups of short grain white rice. When the rice is done have the vinegar sauce ready and do not open the rice cooker until you are ready to add the sauce.  The rice must be hot.

For the vinegar sauce combine rice vinegar, sugar and salt in a small pot and heat on medium heat until sugar has dissolved, stirring occasionally.  Pour sauce into a small measuring cup and set aside.

While the rice is cooking prepare the vegetables.  Rinse out the pot you used to make the vinegar sauce and combine soy sauce, sugar, sake or sherry and water.  Bring to a simmer on medium heat then add the green beans and carrots.  Turn heat up to high and cook for about a minute  then remove from the heat and set aside.  You want to blanch the beans and carrots and not overcook them.  Once cool enough to handle, drain and squeeze out the excess moisture.  Set aside.

You can use as much or little of the red ginger and takuan that suits you.  The ginger has a little kick to it though once you add it to the rice you will barely notice it.  Takuan is pickled radish and has some sweetness to it.  Drain both the ginger and takuan on paper towels before you chop them.  Start with a smaller amount if you are unsure.  You can always add more.

When the rice is done use a rice paddle and lightly toss the rice so that it is not clumped together.  Quickly put the rice into a large baking dish (Pyrex works well) and slowly add the vinegar sauce drizzling it evenly over the rice tossing gently to mix while fanning madly with a paper fan.  Trying to do this all at once by yourself might seem tricky but there is a good reason to this fanning procedure.  It helps the hot rice soak up the vinegar sauce without the rice becoming mushy.  I don’t have a paper fan so I use a small hairdryer and turn it to low/cool and voilà, it works like a charm.  Bribing a family member to help you is even better.

Add the green beans, carrots, ginger and takuan to the rice and toss gently.  Now’s the time to transfer the rice to your serving bowl.  Top with the sliced egg if using, and sprinkle with sesame seeds before serving.

Follow

Get every new post delivered to your Inbox

Join other followers: