Search results for

sriracha

Dinner, Eggs, Lactose Free, Ramen, Recipes, Soups

Perfect Instant Ramen

September 27, 2023

I found this crazy delicious recipe on the NYT Cooking site. Melty cheese and a poached egg on packaged ramen was love at first bite. Kudos to Roy Choi, a Korean-American chef for creating this simple and satisfying bowl of noodles.

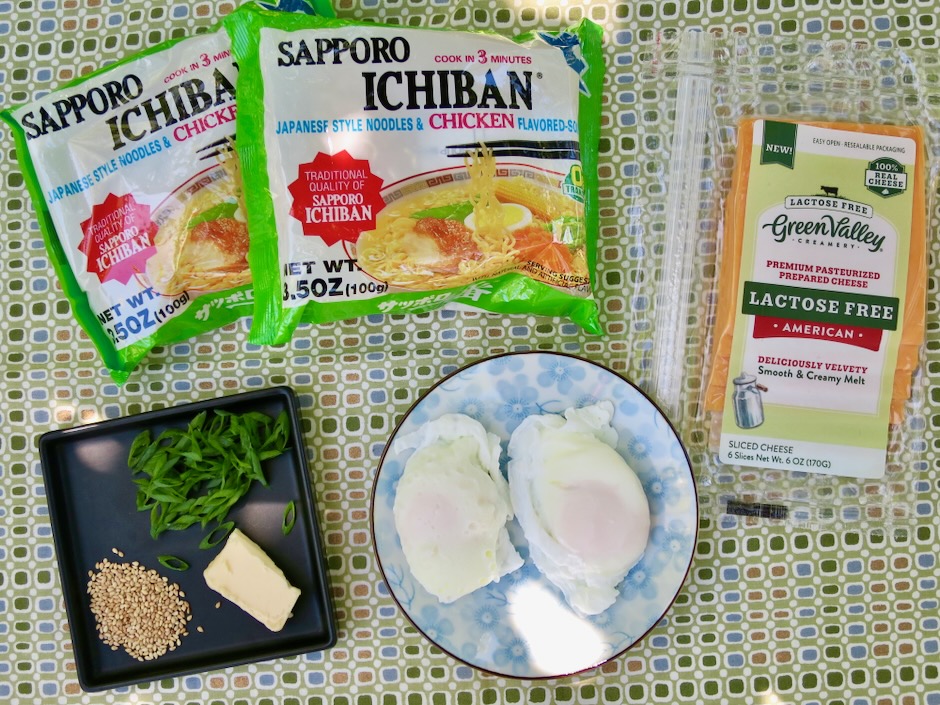
Use your favorite packaged ramen for this easy dish. I was lucky to find lactose free American cheese for my version of the recipe but of course, feel free to use regular American cheese which is easier to find. The original recipe tells you to cook your eggs for 1 minute in the ramen broth once the noodles are transferred to a bowl. A few commenters mentioned the egg wasn’t cooked enough in that short time so I went ahead and poached my eggs prior to adding them to the ramen bowl and they were perfect.

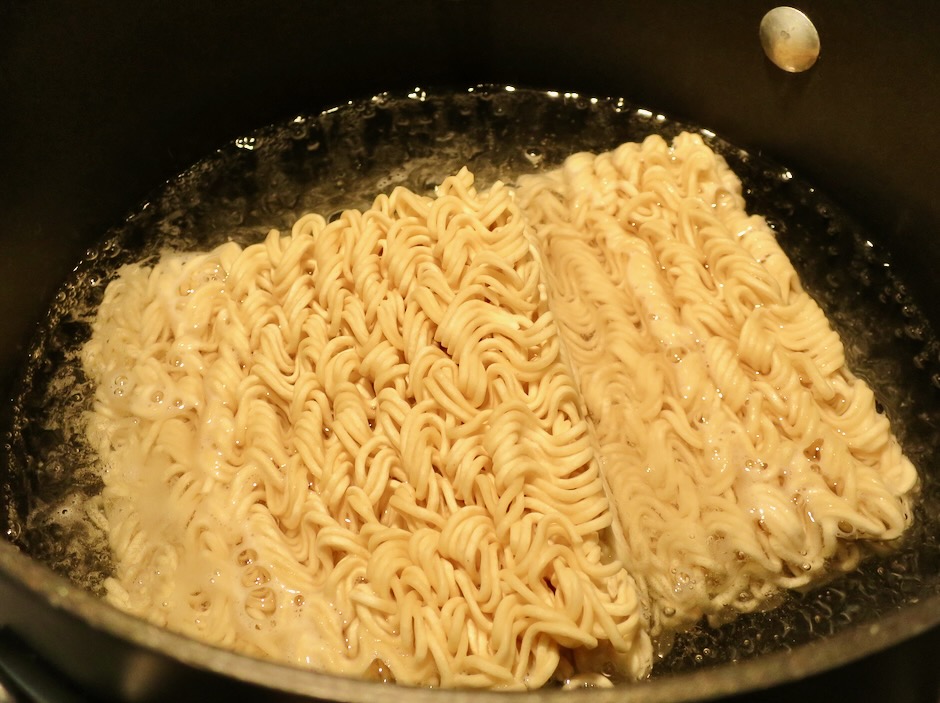
The noodles cook in no time and before you know it you’ll have a bowl of delicious ramen. It’s a fairly rich dish but everyone deserves a splurge now and then.

I always add a drizzle of our homemade sriracha to this dish. It adds that perfect little spicy kick that brings it all together. Break up the egg and swirl the cheese in the broth before diving in.

Perfect Instant Ramen

Recipe by Kiyo
Servings

2

servings

Adapted from Roy Choi’s recipe at NYT Cooking

Ingredients

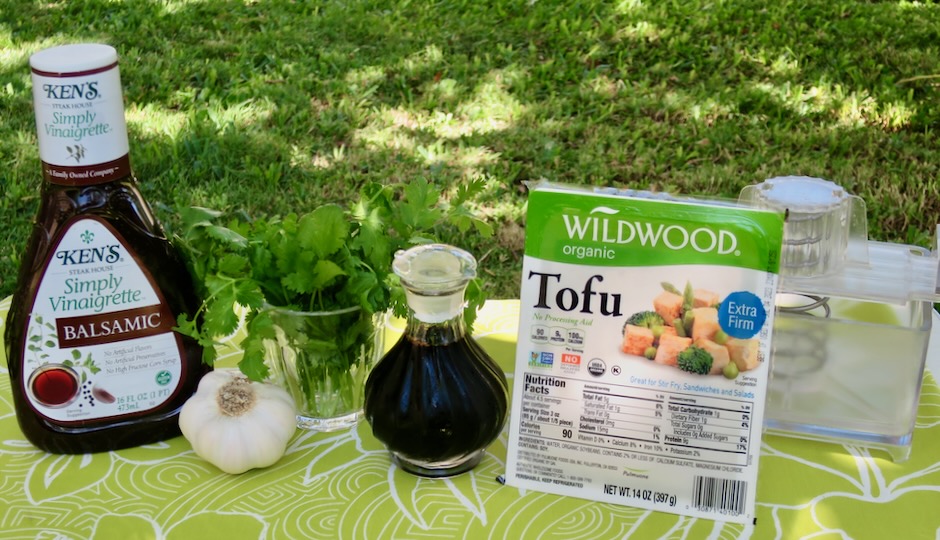
  • 2 packages instant ramen with flavor packets (I used Sapporo Ichiban)

  • 2 large eggs, poached

  • 2 teaspoons butter (I used lactose free Earth Balance, optional)

  • 2 slices American cheese, room temperature (I used Green Valley lactose free)

  • 1/2 teaspoon roasted sesame seeds

  • 1 scallion, green part only, thinly sliced on the bias

  • sriracha sauce for serving (optional)

Directions

  • Bring 5 cups water to a boil in a medium saucepan. Add the noodles and cook for 2 minutes. Stir in the flavor packet.
  • Divide noodles and some of the broth between two bowls (you won’t need all of the broth). Immediately add the cheese slices to the noodles submerging slightly in the hot broth. Top noodles with poached eggs, pats of butter (optional), and sesame seeds. Garnish with scallions. Serve with sriracha sauce (optional).

Notes

  • To poach eggs, heat 3″ water with 1 tablespoon white vinegar in a small saucepan over high heat. Watch closely.  When the water barely reaches a boil and you see small bubbles in the bottom of the pan, gently slide eggs into the water one by one and immediately turn the heat down to medium (crack eggs into small separate bowls).  Set the timer for 4 minutes.  The water should not be boiling and the eggs should simmer gently. Lower heat as needed.  Remove eggs with a slotted spoon and drain on paper towels.
Dinner, Lactose Free, Recipes, Sandwiches, Tofu, Vegetarian

Balsamic-Soy Marinated Tofu

July 20, 2023

Tofu can be controversial in some American kitchens. Not in mine! I saw a photo of this glorious tofu in Bon Appétit magazine and couldn’t pass it up. Writer and editor Ali Francis had this tofu in a sandwich she bought at a bakery and was immediately smitten with it. She contacted the bakery and asked for the recipe. Though she didn’t receive an actual recipe with exact measurements, they supplied her with an ingredients list which was enough to devise a very close rendition of the tofu dish she had fallen in love with.

The plan is a simple one. Grab a few ingredients, place in a Ziploc freezer bag, marinate, bake, eat.

My reliable Tofuxpress has never let me down after using it for more than 13+ years. There are many other versions that do the same job of pressing out the water. If you love tofu as I do, it’s an essential gadget to have on hand.

I used cubed tofu but you could also slice the tofu into slabs for sandwiches. Fresh cilantro can be switched out with parsley or dried herbs.

The tofu has been marinating for 16 hours and is ready to be baked.

The leftover tofu marinade is reduced and brushed over the tofu as it bakes.

Now that is some good-looking tofu. If you chose to bake tofu slabs instead of cubes, you can use them in a sandwich. Slather sriracha mayonnaise on a soft baguette, top with balsamic tofu, crispy lettuce, sliced cucumbers and cilantro sprigs.

Balsamic-Soy Marinated Tofu

Recipe by Kiyo
Servings

2-3

servings

Recipe adapted from Bon Appétit magazine

Ingredients

  • 3/4 cup balsamic dressing or equal parts balsamic vinegar and olive oil

  • 3 tablespoons soy sauce

  • 2 large garlic cloves, minced

  • 1 tablespoon chopped herbs such as cilantro, flat leaf parsley, or a teaspoon of dried Italian herbs

  • 2 teaspoons maple syrup (optional but recommended)

  • 14 ounce extra firm tofu, water pressed out, cubed or cut into slabs for sandwiches

Directions

  • Whisk balsamic dressing, soy sauce, minced garlic, chopped herbs, and maple syrup in a 2 cup measuring cup. Pour marinade into a Ziploc freezer bag. Place tofu cubes or slabs in marinade and turn to coat. Place bag in the refrigerator for 12-24 hours, turning once or twice. I marinated the tofu from 7pm – 11am the following day (16 hours) so that it would be ready for lunch at noon.
  • Preheat toaster oven or standard oven to 375 degrees. Line a small baking sheet with foil and place a piece of parchment paper over the foil (for easy clean up). Transfer tofu cubes or slabs to baking sheet. Pour any leftover dressing from the marinated tofu into a small sauce pan (skim off some of the oil and discard). Gently simmer leftover marinade on very low heat until it reduces and thickens slightly, about 5-7 minutes. (It should not be bubbling vigorously or it will burn).
  • Bake tofu cubes or slabs for 45-50 minutes or until deeply golden brown, turning once, and basting occasionally with the reduced marinade. Serve with rice, steamed broccoli or your favorite salad or sandwiched between a soft baguette topped with crunchy iceberg lettuce and cucumbers.
Dinner, Japanese, Lactose Free, Pasta, Pork, Recipes

Pork and Asparagus Soba

May 18, 2023

We’re starting to harvest our homegrown asparagus spears which is one of the reasons I was drawn to this recipe. The other reason is that I love soba. Though dried soba cannot compare to fresh, it works well enough for this dish which turns out to be a real winner.

There’s not much to it, in terms of the amount of ingredients called for. However, you may need to make a quick trip to the market if you don’t have tahini or chili crisp in your refrigerator. There is a multitude of chili crisp/crunch options available these days. You can find it at Costco, the Asian food section of your local markets, or online. My current favorite is Zindrew (from Amazon). Though the jar says chili oil, I consider it to be a chili crisp since it has lots of crunchy bits of garlic and does not contain an excess amount of oil.

Tahini adds a rich and creamy note to the sauce. Mixed with soy sauce, rice vinegar and chili crisp, the flavor is an umami rich seasoning for the noodles and pork.

The soba is cooked briefly before adding the asparagus. It’s a one pot deal. Not having to blanch the asparagus separately saves time and dishes.

The sauce is added to the cooked pork before getting mixed in with the soba and asparagus. It’s so delicious.

Everything goes back into the pot with some of the reserved soba cooking water. A quick stir to warm everything up and it’s ready to be served with extra chili crisp or sriracha.

Pork and Asparagus Soba

Recipe by Kiyo
Servings

4

servings

Recipe adapted from Bon Appetit magazine

Ingredients

  • 1/4 cup chili crisp (1/3 cup if you want it spicier) + more for serving

  • 1/3 cup tahini, well stirred

  • 3 tablespoons + 1 teaspoon soy sauced divided

  • 3 tablespoons unseasoned rice vinegar

  • 9.5 ounces dried soba noodles (1 package Hakubaku soba, or about 10 ounces of your favorite dried soba)

  • 1 bunch (10-12 ounces) asparagus, trimmed, cut into 2-inch pieces (thinner spears work well in this dish)

  • 1 1/2 tablespoons vegetable oil

  • 1 pound ground pork

  • Thinly sliced green onions (for serving)

  • Roasted sesame seeds (for serving)

Directions

  • Whisk chili crisp, tahini, 3 tablespoons soy sauce, and vinegar in a small bowl. Taste and add a few extra teaspoons of chili crisp if you want it spicier. Set aside.
  • Cook noodles in a large pot of boiling water for half the time noted on the package directions. For Hakubaku brand soba, cook for 1 1/2 minutes (no longer). Add asparagus to noodles and cook for 45-60 seconds. Reserve 1 cup of cooking liquid just before the 45-60 seconds is up, then immediately drain noodles and asparagus in a colander and run under cool water to stop the cooking; reserve pot.
  • Heat oil in a medium skillet over medium-high heat. Cook pork in an even layer undisturbed, until nicely browned, about 5 minutes. Continue to cook, stirring and breaking up with a wooden spoon, until cooked through, about 3 minutes (adjust heat as needed if too hot). Add reserved sauce and cook, scraping up browned bits, 1 minute.
  • Transfer pork, noodles, and asparagus to reserved pot. Drizzle a teaspoon of soy sauce (or a few pinches of kosher salt) plus 2/3 cup reserved cooking liquid into the pot and cook over medium heat, stirring gently with a spoon adding more cooking liquid if needed, until noodles and meat are warm and well coated with sauce but not watery, about 1 minute (leaving the soba on the heat much longer can cause the soba to be over cooked). Taste and adjust with more soy sauce or kosher salt if necessary.
  • Transfer pork and asparagus to a large, shallow serving bowl. Sprinkle with green onions and sesame seeds. Serve with extra chili crisp or sriracha.

Notes

  • If you want to make this for two people, use half of the soba, asparagus and cooking liquid called for. I recommend making the full recipe for the pork and reserving half for the next day. It’s delicious with ramen (the dried wavy type) cooked al dente and warmed in a bit of vegetable oil seasoned with soy sauce. Mix it all together to warm up and shower with lots of green onions, roasted sesame seeds and sriracha sauce. Serve with crunchy bok choy on the side.
Dinner, Fish, Kimchi, Korean, Lactose Free, Recipes

Kimchi Tuna Salad

April 9, 2023

From the first time I made this kimchi tuna salad I knew it would become a regular on our lunch menu. Making kimchi has inspired me to use the spicy and crunchy Korean side dish in all types of recipes. Dishes such as fried rice, kimchi soup and cheesy kimchi ramen illustrate the versatility of this fiery fermented vegetable. In this dish it is paired up with tuna, fresh ginger, sesame oil, rice vinegar, and celery (for added crunch). You can have it as is, however, my favorite way to serve it is over soba or with rice.

A short list of ingredients make up this recipe adapted from NYT Cooking. Tuna in olive oil makes this extra luxurious but a good brand of tuna in water will work fine.

If homemade kimchi is not something you have in your refrigerator, use your favorite store-bought brand. There are so many to choose from these days, from mild to spicy (go spicy!).

Serve the kimchi tuna salad over rice or make onigiri (rice balls) to accompany the salad. A drizzle of sriracha adds extra spice.

Kimchi Tuna Salad

Recipe by Kiyo
Servings

2

servings

Adapted from NYT Cooking

Ingredients

  • 8 ounces kimchi + 2 1/2 tablespoons kimchi juice

  • 1 tablespoon unseasoned rice vinegar

  • 1 1/2 teaspoons toasted sesame oil

  • 5 to 7 ounce canned tuna (preferably oil-packed), drained

  • 1 celery stalk, thinly sliced

  • 1 (1-inch) piece fresh ginger, peeled and sliced into 1/8-inch matchsticks

  • 2 1/2 tablespoons mayonnaise

  • 2 teaspoons roasted sesame seeds

  • 1-2 tablespoons thinly sliced green onions

  • Nori furikake (optional)

  • Sriracha sauce (optional)

  • Cooked soba noodles or rice

Directions

  • Cook soba noodles or rice according to package directions. If serving salad with onigiri (rice balls), make these once the rice is cool enough to handle and wrap in plastic wrap until ready to serve. Set aside.
  • Place kimchi in a small colander set over a bowl and drain the kimchi. Reserve the kimchi juice. Coarsely chop the kimchi (you should have about 1 cup)
  • In a medium bowl, whisk together 2 1/2 tablespoons of the reserved kimchi juice, rice vinegar, sesame oil and mayonnaise. If you prefer a thicker sauce, add another 1/2 tablespoon mayonnaise. Gently stir in the drained tuna and celery, breaking up the tuna into large chunks.
  • Add the chopped kimchi and ginger, and gently stir to combine. Because kimchi batches taste different, adjust seasonings as needed by adding a bit more vinegar if the salad needs more tang or a few extra drops of sesame oil if you prefer a toasty flavor.
  • Serve over soba noodles or rice or alongside onigiri. Sprinkle salad with green onions, roasted sesame seeds, furikake, and sriracha sauce.

Notes

  • Kimchi tuna salad is best eaten the day it is made, however, any leftovers can be stored in the refrigerator for a few days.
Dinner, Eggs, Japanese, Kimchi, Korean, Recipes, Vegetarian

Cheesy Kimchi Noodles

January 23, 2022

Cheesy Kimchi Noodles

Recently I started making homemade kimchi and have been in love with it ever since.  I’ve always enjoyed kimchi but the store-bought brands available here are not particularly exciting.  Homemade kimchi tastes so fresh and has the perfect spiciness level that I crave.  Kimchi is wonderful as a side dish that compliments many meals.  A regular bowl of rice, kimchi and a fried egg suits me just fine.  So this recipe from NY Times Cooking just hits the spot.  The surprise ingredient (grated cheddar) makes this dish “out of this world” delicious.  Add a sunny side up egg and you will have a truly satisfying meal.  Even though you may not make kimchi at home, a good kimchi with a nice level of spiciness will work well.

Homemade Kimchi

I love the gorgeous color and flavor of the Korean gochugaru pepper flakes.  It adds a subtle heat and a slightly smoky flavor to dishes and is the star of kimchi and other Korean dishes.Kimchi, Cheddar Cheese, Green Onions, Sesame Seeds, Ramen

This is a relatively simple recipe with very inexpensive ingredients (= the bomb!).  We use our homemade sriracha in the sauce but the popular Huy Fong sriracha will work well too.

Sautéing Kimchi, Green Onions, Garlic & Sesame Seeds

Kimchi, scallions, garlic and sesame seeds are quickly sautéed before adding the sauce and the cooked ramen.  

Ramen Added to Kimchi

Using dried instant ramen noodles is very appealing as they are readily available, shelf stable, and cheap.  For this recipe you will want cook the ramen for half the time instructed on the package.  This will ensure they are not overcooked for the final dish.

Grated Cheddar Added to Kimchi Noodles

Homemade Kimchi

Yum! Homemade kimchi will keep well in the refrigerator for months.  

Cheesy Kimchi Noodles

Cheesy Kimchi Noodles
 
Adapted from NY Times Cooking
Author:
Serves: 2
Ingredients
  • Noodles: 7 ounces dried instant noodles such as Sapporo Ichiban instant ramen (2 packets, 3.5 ounce each, discard seasoning packets)
  • 1½ tablespoons canola oil
  • 2 eggs
  • 5 green onions, thinly sliced on the diagonal (reserve 1 tablespoon for garnish)
  • ½ cup packed kimchi, sliced into thin strips or chopped
  • 1 large garlic clove, peeled and finely chopped
  • 1 tablespoon black or white roasted sesame seeds, plus more for serving
  • ½ cup finely grated cheddar cheese
  • Sauce: 1 tablespoon sriracha (more if you prefer extra spicy and if kimchi is not very spicy)
  • 2 tablespoons low sodium soy sauce
  • 1 tablespoon sesame oil
  • 1 tablespoon water
  • 1 tablespoon medium dry sherry or shaoxing wine
Preparation
  1. Bring a medium saucepan of water to a boil over high heat. Add the noodles and cook until tender but springy. I cooked the Sapporo Ichiban noodles for 1½ minutes instead of 3 minutes. Drain and rinse under cold water right away to stop the cooking. You may toss the noodles with a splash of canola oil to prevent sticking, or just give them a quick rinse to loosen the noodles before adding back to the pan.
  2. Meanwhile, prepare the sauce: In a small bowl whisk the sriracha, soy sauce, sesame oil, water and sherry or shaoxing wine. Set aside
  3. Set a medium nonstick skillet over medium-high heat. Add ½ tablespoon canola oil and, once shimmering, crack in the eggs. Reduce heat to medium or medium low and cook until the whites are done and the edges are browned, 2 to 3 minutes. You can cover the pan for 30 seconds or so to help the whites set but only for a short time or the yolks will become cloudy and loose their beautiful bright yellow color. Transfer eggs to a plate.
  4. In the same skillet, heat the remaining 1 tablespoon canola oil over medium heat. Add the green onions, kimchi, garlic and sesame seeds and cook for 1 minute stirring frequently. Turn heat up to medium-high and add the drained noodles and most of the sauce. Toss to combine using tongs, for 30 seconds (any longer and the noodles will become too soft). Add more sauce if needed. Stir in the grated cheese until it melts. This will take just a few seconds. Turn off heat. Transfer noodles to serving bowls, top with fried eggs (salt and pepper eggs) and garnish with reserved green onions and extra sesame seeds. Serve immediately.
Breakfast, Dinner, Eggs, Lactose Free, Recipes, Rice Dishes, Side Dishes, Veggies

Kale Fried Rice

March 8, 2021

Kale Fried Rice

There are countless versions of fried rice.  It can be a stand-alone meal or a splendid side dish. Some of my favorites are ramen fried rice and kimchi and Spam fried rice.  Quick and inexpensive, this particular version couldn’t be easier to make.  Leftover brown rice with wilted kale makes for a healthy meal.  I make it regularly and I don’t think I’ll ever tire of it.

Kale, Brown Rice, Turmeric, Eggs, Lime, Garlic, Ginger, Green Onions

Don’t skip the turmeric.  It’s what gives this dish a slightly earthy flavor and a gorgeous color.

Sliced Garlic, Kale, Light Green Onions, Ginger, Green Onions

Once the rice is warmed and crisped, handfuls of kale get tossed into the pan until wilted.  If your pan is hot enough, some of the kale will get a bit charred.  This adds another level of flavor to the fried rice.

Garlic, Green Onions, Ginger

The garlic is cut into thin slices then lightly browned until the edges are crisp.  Fresh ginger and green onions are stir-fried with the garlic before adding the turmeric and eggs.

Kale Fried Rice

You’ll end up with a gorgeous pan of fried rice that is healthy and delicious.  

Kale Fried Rice

Kale Fried Rice

I like to serve the fried rice with sriracha sauce which adds the perfect kick to this meal.  Sprinkle sliced green onions and squeeze fresh lime juice over the rice just before serving.

Kale Fried Rice
 
Adapted from Bon Appetit
Author:
Serves: 2
Ingredients
  • 6 green onions, thinly sliced (set aside a tablespoon for serving)
  • 2 tablespoons grapeseed oil, divided (or another mild flavored oil such as canola)
  • 2 cups cooked short grain brown rice (day old is best)
  • 1 small bunch Tuscan kale, ribs and stems removed, leaves torn (about 2-3 ounces)
  • 2 small garlic cloves, thinly sliced
  • 1 tablespoon finely chopped peeled ginger
  • ¾ teaspoon ground turmeric
  • 2 large eggs
  • lime wedges for serving
Preparation
  1. Heat 1 tablespoon of oil in a large nonstick skillet over medium heat. Add rice, breaking up any lumps. Pat down into an even layer and cook, undisturbed until beginning to crisp, about 3 minutes. Toss and continue to cook, adding kale by the handfuls and letting wilt slightly before adding more. Toss occasionally, until rice is heated through and all the kale is wilted, about 3 minutes. Season with salt and transfer to a plate.
  2. Heat remaining 1 tablespoon oil in same skillet over medium-low heat. Add garlic, ginger, and green onions, stirring often until garlic is lightly browned (careful not to burn) around the edges, about 1-2 minutes. Turn heat up to medium sprinkle turmeric over, then stir in eggs. Using a pair of chopsticks or a heatproof spatula, blend whites and yolks with garlic, ginger, and green onions until the eggs are barely set. Return rice and kale to the skillet, tossing occasionally until hot, adjusting heat as necessary. Divide fried rice between two plates and top with reserved green onions. Serve with sriracha sauce.


Follow

Get every new post delivered to your Inbox

Join other followers: