Browsing Category

Sandwiches

Bread, Breakfast, Lactose Free, Sandwiches, Vegan, Vegetarian

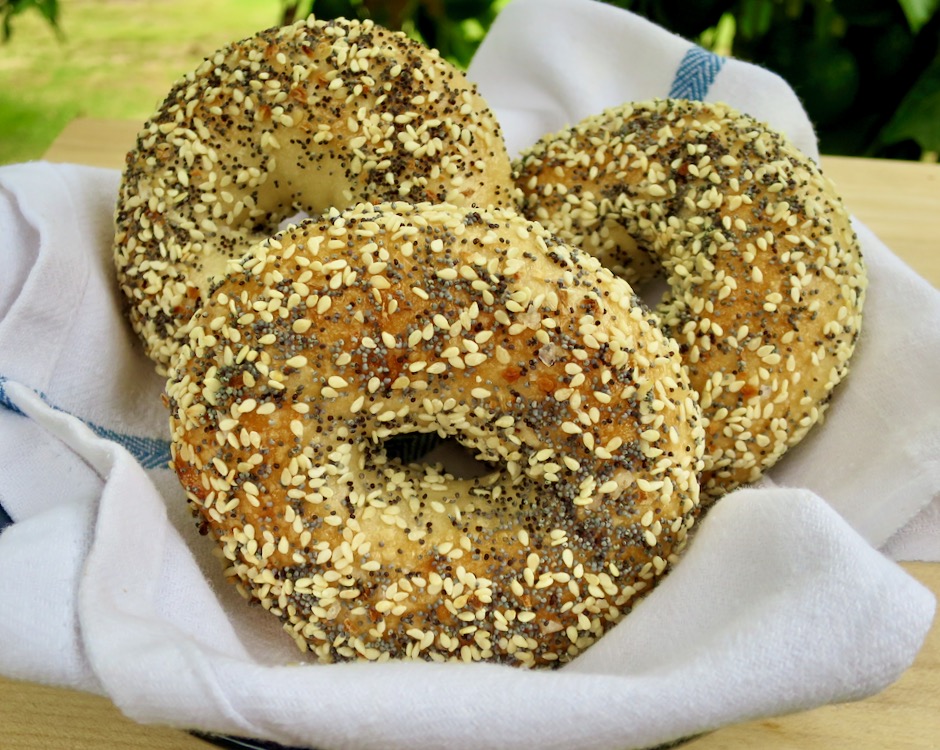
Homemade Almost Everything Bagels

December 1, 2020

Homemade Almost Everything Bagels

A few years ago I tried my hand at making bagels.  I experimented with several different recipes but none stood out enough to make again.  They were often beautiful bagels and we ate them all but I found some to be generally too chewy.  So I put bagel making aside until a few months ago when I took up the challenge again.  Good bagels are in a class of their own but they are hard to come by in the Islands.  Since there is nothing better than homemade bread which we make with considerable success, why not homemade bagels?

Overnight Bagel Dough

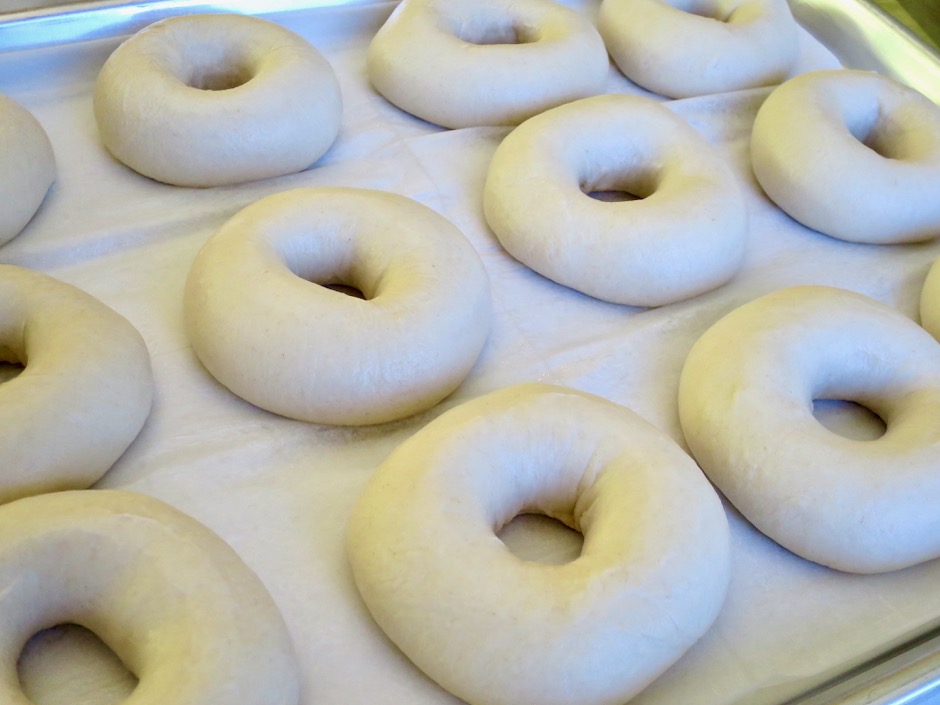
Making the dough is actually quite simple. Bagel dough is very stiff so a heavy duty stand mixer is a must for this recipe.  After shaping the bagels, they go into the refrigerator to proof overnight then are boiled and baked the following day.

Boiling Bagels

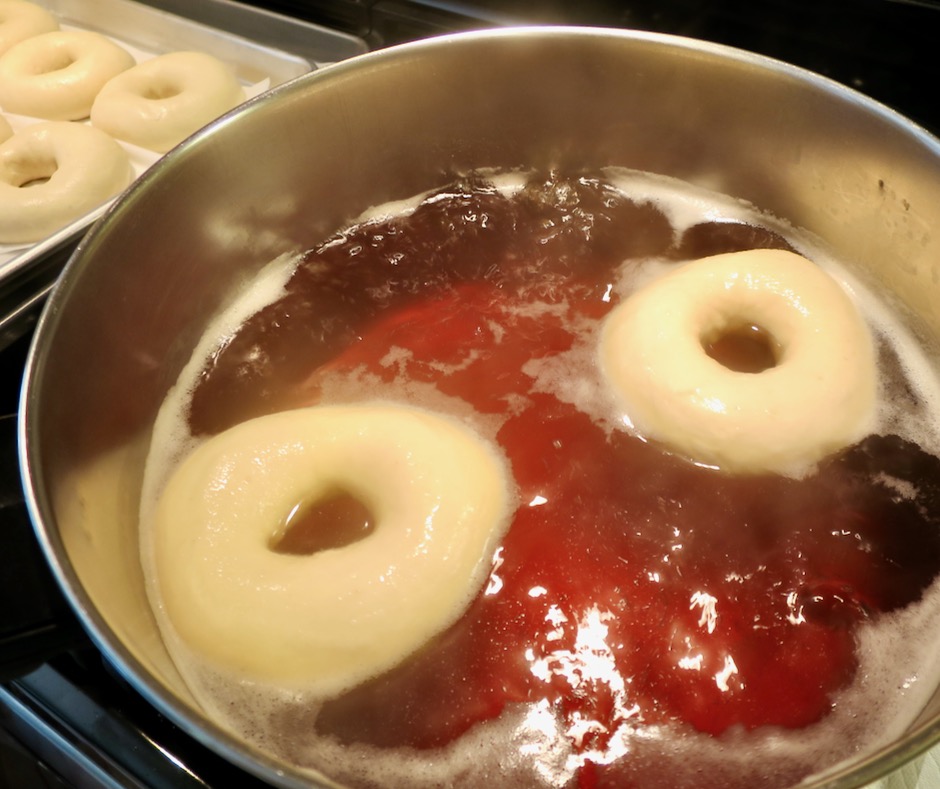
After testing different methods for boiling the bagels I found that the longer you boil them, the chewier they become once they have finished baking.  Many recipes call for boiling bagels for a minute on each side. My preference is to boil bagels for 10-15 seconds per side.  They puff up nicely and you’ll end up with bagels that have a perfectly soft yet chewy texture.

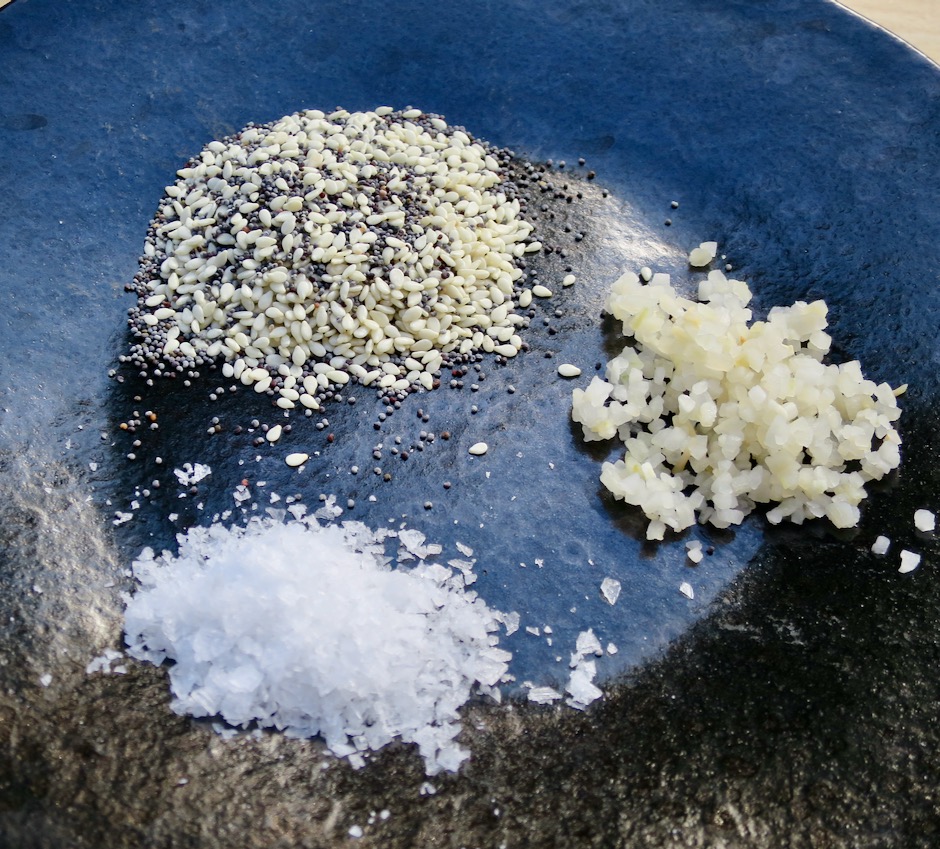
Toppings: Sesame Seeds, Poppy Seeds, Rehydrated Onions, Maldon Sea Salt

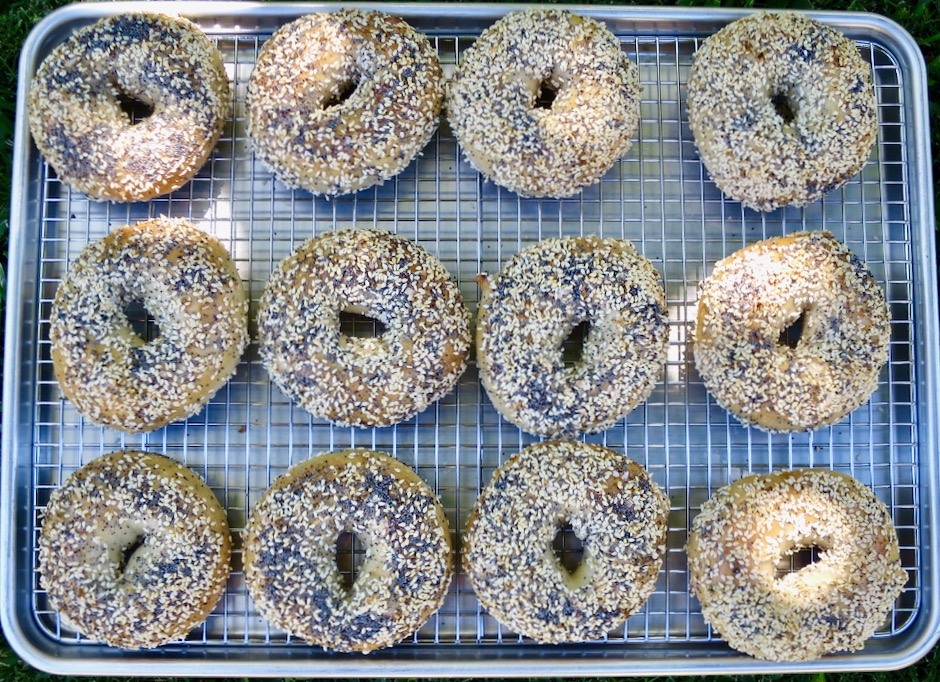
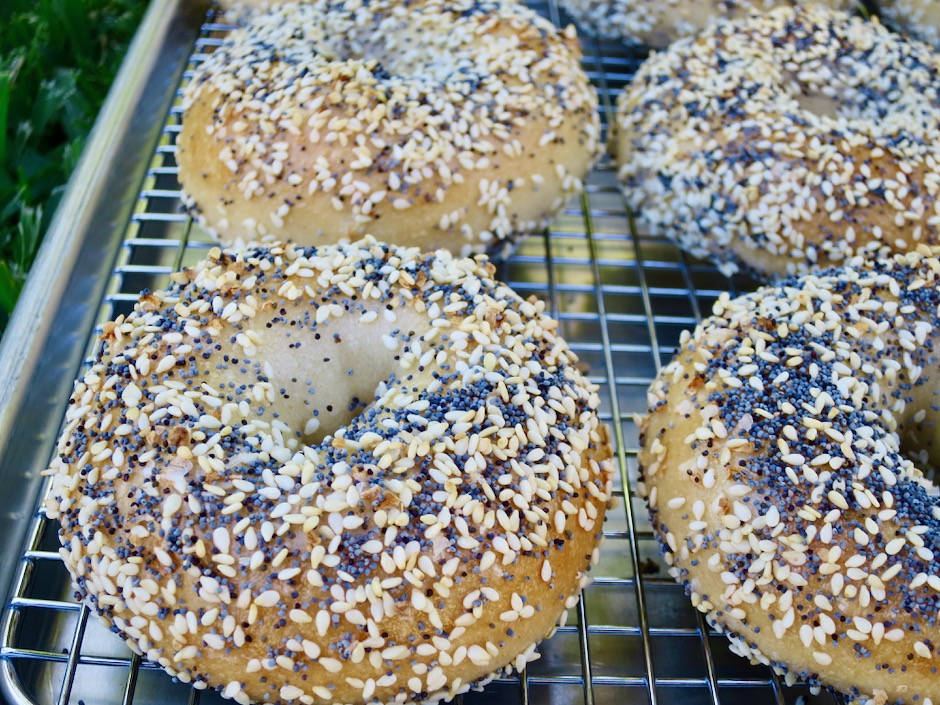
My “almost everything bagels” are generously coated on both sides with rehydrated dried minced onion, poppy seeds, sesame seeds and flaky Maldon salt.  Rehydrating the onions in hot water for a half hour keeps the onions from burning when the bagels are baking.

Homemade Almost Everything Bagels

Be generous with your toppings because inevitably, a few of the seeds will fall off when you slice the bagels.

Homemade Almost Everything Bagels

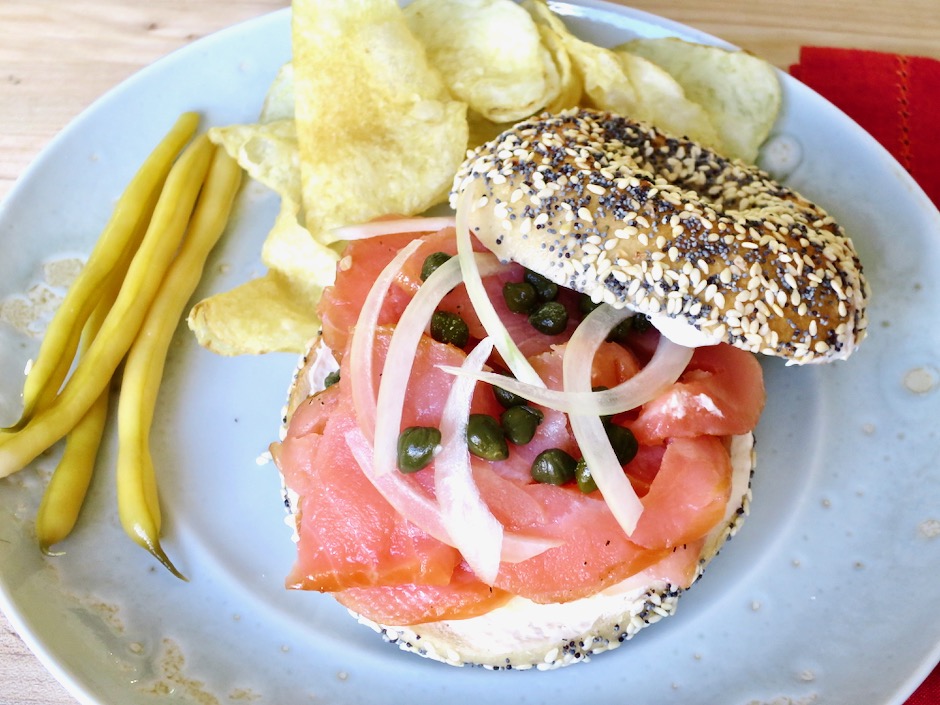
Homemade Almost Everything Bagel with Smoked Salmon

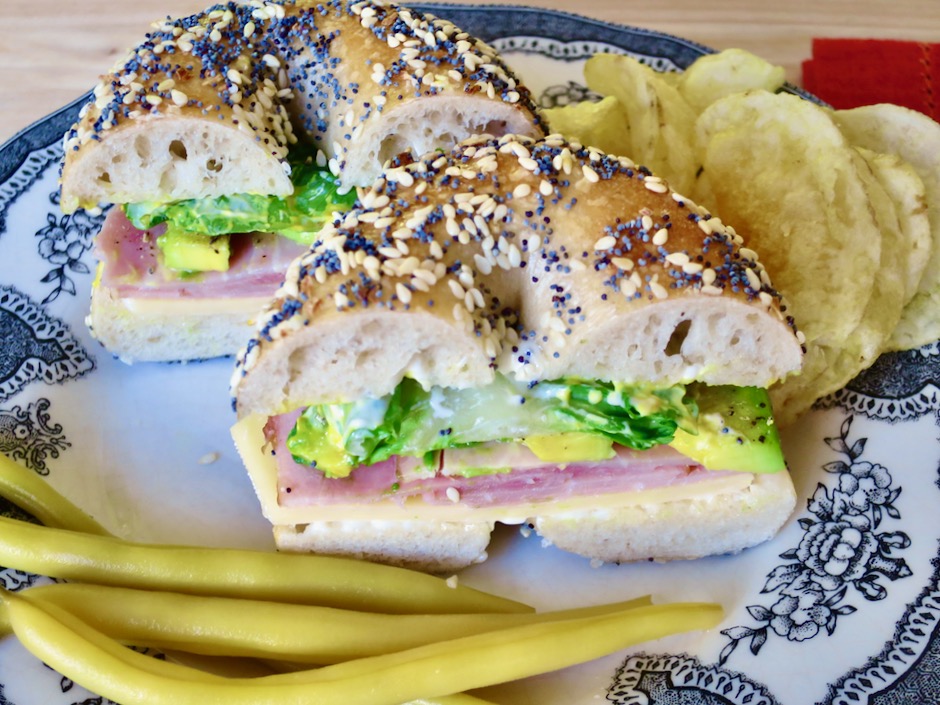
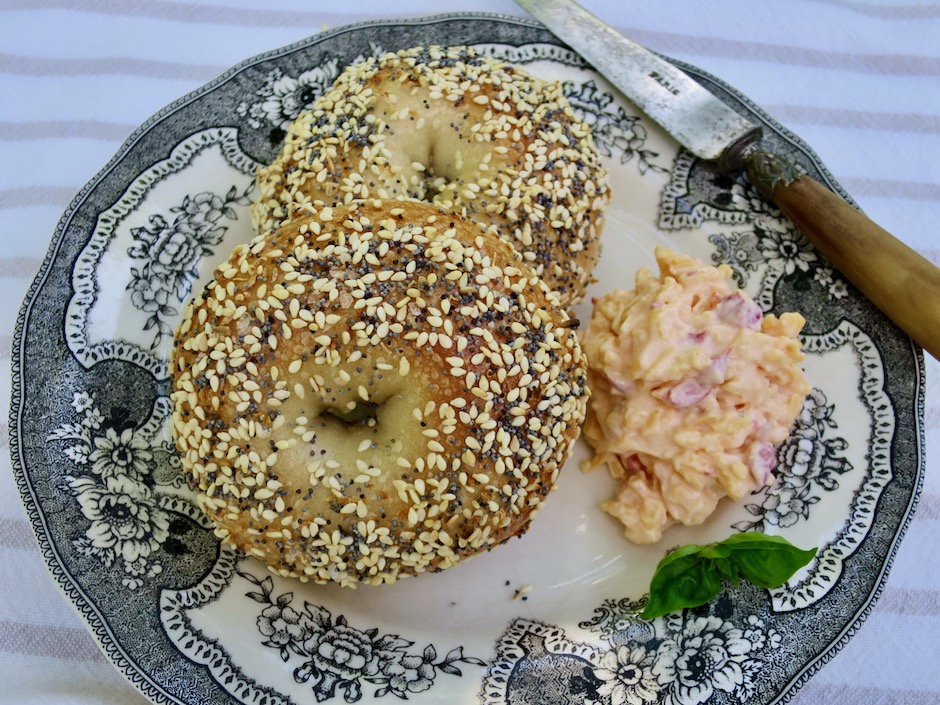
Bagels are superb served with smoked salmon, ham and cheese, avocado, pimento cheese or just butter.  According to bagel purists, toasting a bagel is verboten and that bagels should be eaten warm as they come out of the oven.  They are best eaten the day they are made.  So in my case, I freeze most of the bagels since there’s no way I can eat a dozen in a day.  When I am ready to have one, I take it out of the freezer to defrost, slice, and toast my bagel.  Then it’s ready for whatever toppings I want to add.  Sometimes just a few pats of butter does the trick.

Homemade Almost Everything Bagel with Cheddar, Ham & Avocado

Homemade Almost Everything Bagel with Pimento Cheese

Homemade Bagels
 
Author:
Serves: 1 dozen
Ingredients
  • 4 cups (623g, 22 ounces) King Arthur bread flour
  • 1½ teaspoons instant yeast (recommend SAF Red Instant Yeast, proofing is not necessary)
  • 1 tablespoon granulated sugar
  • 2 teaspoons fine sea salt
  • 2 teaspoons diastatic malt powder (available from Amazon)
  • 1½ cups (12 ounces) water
  • 1 tablespoon barley malt syrup (available from Amazon or local health food stores)
  • 1 tablespoon baking soda
  • egg white wash whisked until frothy
  • toppings of your choice
Preparation
  1. Special equipment: Heavy duty stand mixer, kitchen scale, parchment paper, 2 large sheet pans, diastatic malt powder, barley malt syrup, wide flat slotted spoon, kitchen timer, small pastry brush (silicone works great)
  2. Note: I use a half sheet pan and a quarter sheet pan to bake all 12 bagels at the same time on the center rack. If you use 2 large sheet pans, boil and bake 6 bagels at a time. Then continue with the second batch after the first 6 bagels have baked. It is a good idea to leave space between the bagels and not crowd them so they bake up nice and brown on all sides.
  3. Whisk flour, yeast, sugar, salt, and barley malt powder in the bowl of a stand mixer. Pour in water. With mixer on low speed (#2 on my KitchenAid), mix until dough starts to come together, about 4-5 minutes. Use a spatula to scrape down the sides to ensure all of the flour gets mixed in well. Bagel dough is very stiff, however, if the dough seems too dry, add a teaspoon of water.
  4. Increase the speed (#3 on my KitchenAid) and set a timer for 5 minutes and knead dough until it is cohesive and smooth. Remove dough and weigh it. Then divide it into 12 equal portions for small bagels, 10 for larger bagels. As you work, cover the dough pieces with plastic wrap or a clean kitchen towel to prevent drying. Working with 1 piece at a time, shape the dough into a smooth ball. Pinch the dough together on the bottom of the ball. Again, cover with plastic wrap to prevent drying and continue with the rest of the dough. Let the dough balls rest for 5 minutes, covered.
  5. To shape the dough, place dough round on the counter, push your index finger into the center of each dough round so that it goes all the way through. Twirl the dough between your two index fingers to create a hole about 1½-inches wide. Place shaped bagels on a baking sheet lined with parchment paper that has been lightly oiled. Cover with plastic wrap and refrigerate overnight.
  6. Preheat oven to 500 degrees with rack in center.
  7. Have ready: A thick layer of paper towels on the counter to place the boiled bagels on and a large piece of parchment paper for transferring bagels once dry (they will stick on paper towels if left too long). Have a second sheet pan lined with parchment paper ready and all of your toppings (if using) plus egg wash. Remove bagels from the refrigerator.
  8. Fill a large wide pot or Dutch oven with at least 6-inches of water. Bring water to a boil. Add barley malt syrup and baking soda. Give it a quick stir, skim off most of the foam. Working with 2-3 bagels at a time, gently place bagels in boiling water and set timer for 20 seconds. After 10 seconds have passed, gently flip bagels over for another 10 seconds. Immediately transfer bagels to paper towels using a wide, flat slotted spoon. Then transfer to parchment paper. Continue with the rest of the bagels.
  9. If you are adding toppings to your bagels, brush bottom side of bagel first with egg wash. Sprinkle toppings over the dough, flip bagel and repeat the process. Transfer to the parchment lined baking sheet. Continue with the rest of the bagels. You may choose to leave some of the bagels plain or simply coat with sesame seeds or other toppings of your choice. Place bagels in oven and reduce heat to 450 degrees. Bake bagels (rotate pan halfway through) for about 14 minutes or until bagels are nicely browned. Let bagels cool a bit before slicing.

 

Appetizers, Beef, Dinner, Korean, Lactose Free, Recipes, Sandwiches

Korean Buns

March 12, 2020


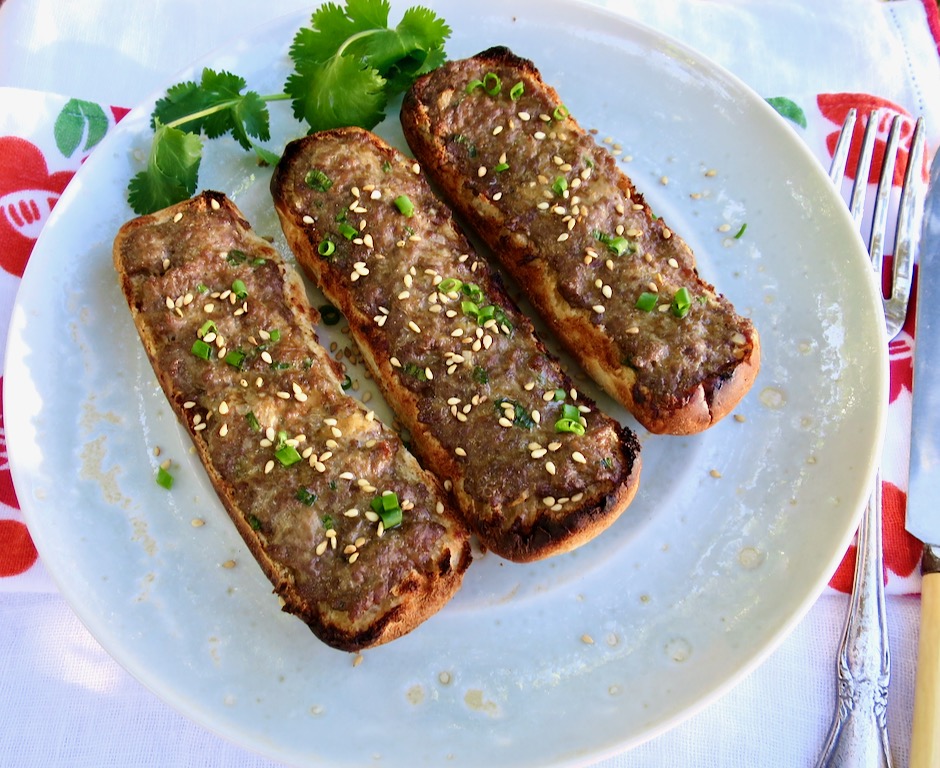
Korean Buns

I posted a recipe for Korean hamburger patties back in 2012. This is one of my favorite recipes and I make it on a regular basis.  This post is a description of how my mom originally made the dish using the ground meat mixture on hot dog buns.  I always requested these Korean buns when my girlfriends came over for a slumber party (back in the day).  These are so easy to make and very tasty.

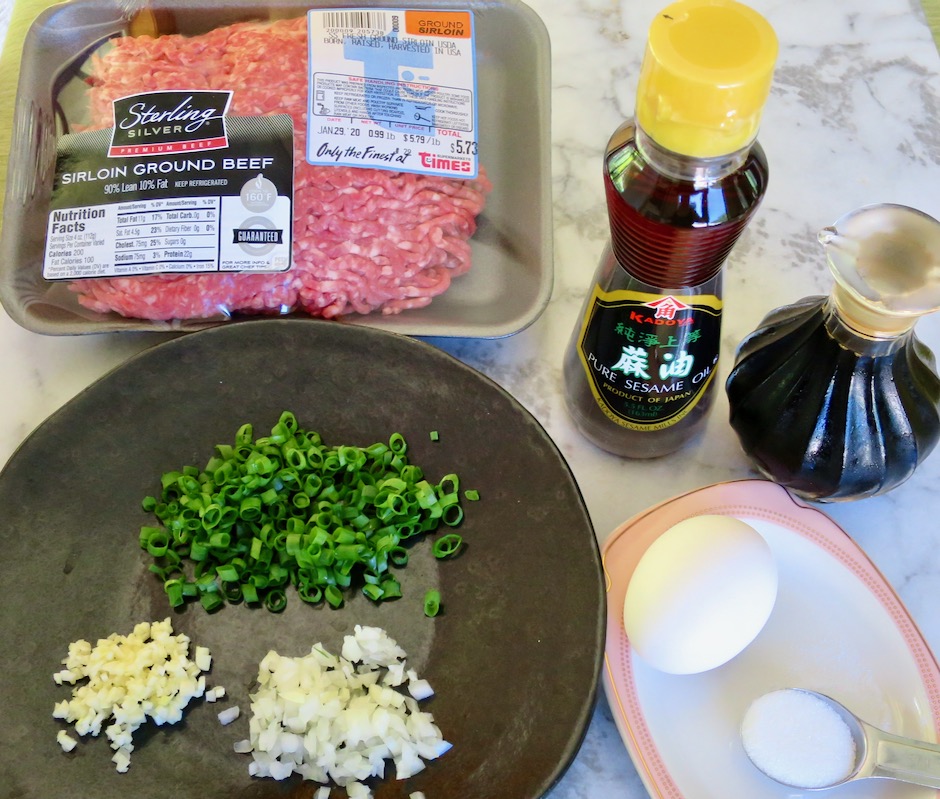
Korean Buns Ingredients

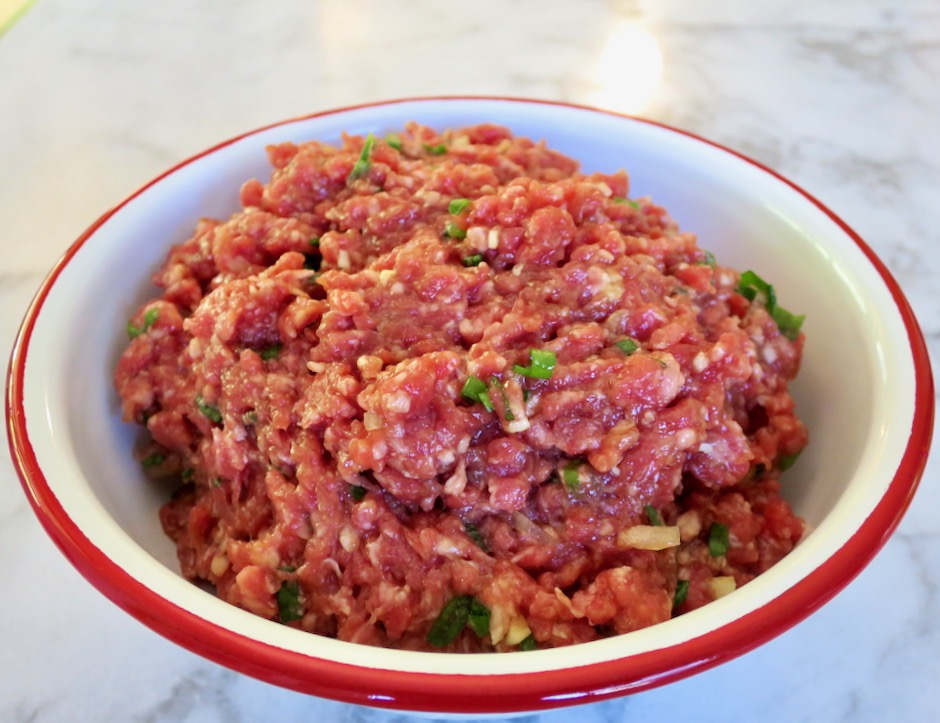
You can make the meat mixture earlier in the day and store it in your refrigerator until you are ready to prepare the buns.  The few ingredients for this recipe all have that umami flavor that makes this simple meal so good.

Korean Buns Meat Mixture

Hot Dog Buns

I used 5 hotdog buns that I split, making 10 Korean buns.  The meat mixture is spread thinly over each bun and broiled quickly.  I used the remainder of the meat for slider patties for another meal.  If you are making the buns for a crowd you can use 10-12 buns instead of 5.

Korean Buns

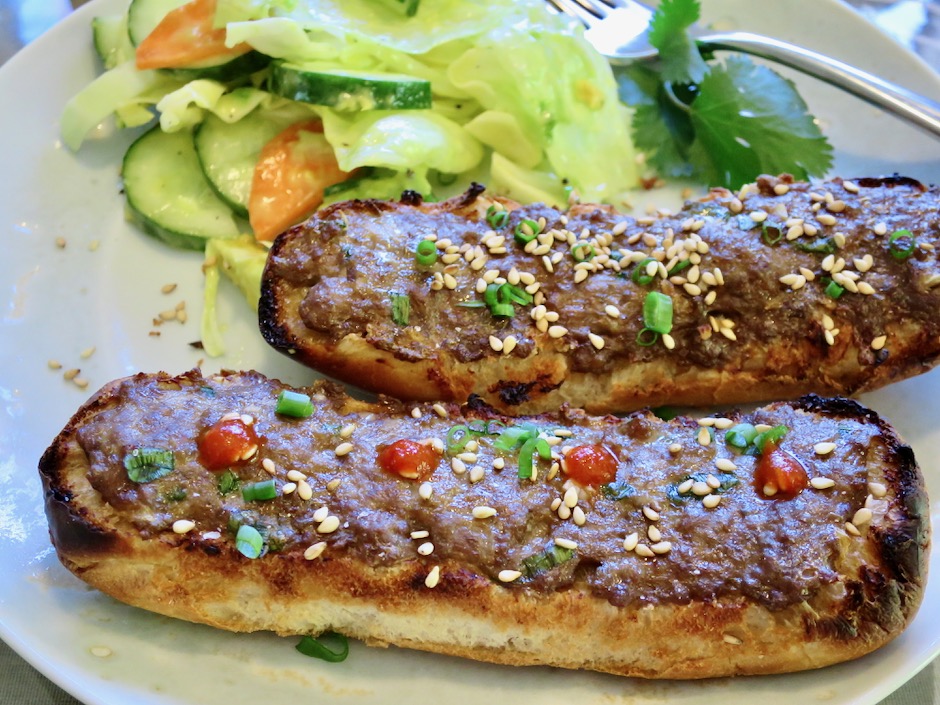
Serve the buns with a crispy salad and you’re all set.  If you want a little kick, drizzle a bit of sriracha on each bun.

Korean Buns

Korean Buns
 
Author:
Serves: 10 split buns
Ingredients
  • 5 hot dog buns, split (depending on how many people you are serving, use up to 12 buns making 24 split buns)
  • 1 pound lean ground beef (I use ground sirloin)
  • 1 tablespoon finely chopped onion
  • 3 tablespoons finely chopped green onion
  • 1 medium clove garlic, minced
  • 1 teaspoon sesame oil
  • 4 tablespoons soy sauce (Kikkoman recommended)
  • 1 heaping teaspoon sugar
  • 1 large egg
  • To garnish: Roasted sesame seeds and thinly sliced green onions
Preparation
  1. Place oven rack on the second position from the top, about 6 inches away from the element. Preheat broiler on high. Line a large sheet pan (jelly roll pan works great) with foil for easy clean up.
  2. In a large bowl, gently break up the ground beef with two forks or your fingertips. Add onion, green onion, garlic, sesame oil, soy sauce, sugar and egg. Mix gently to combine ingredients.
  3. Spread a thin layer of the meat mixture on each split bun, covering as much of the edge of each bun as possible.
  4. Place pan under the broiler and broil for a few minutes until the meat is cooked and the buns are nicely browned on the edges. The buns are best served right away but leftovers can be reheated in a toaster oven.


Bread, Dinner, Japanese, Lactose Free, Pork, Recipes, Sandwiches

Katsu Sando

August 18, 2019

Katsu Sando

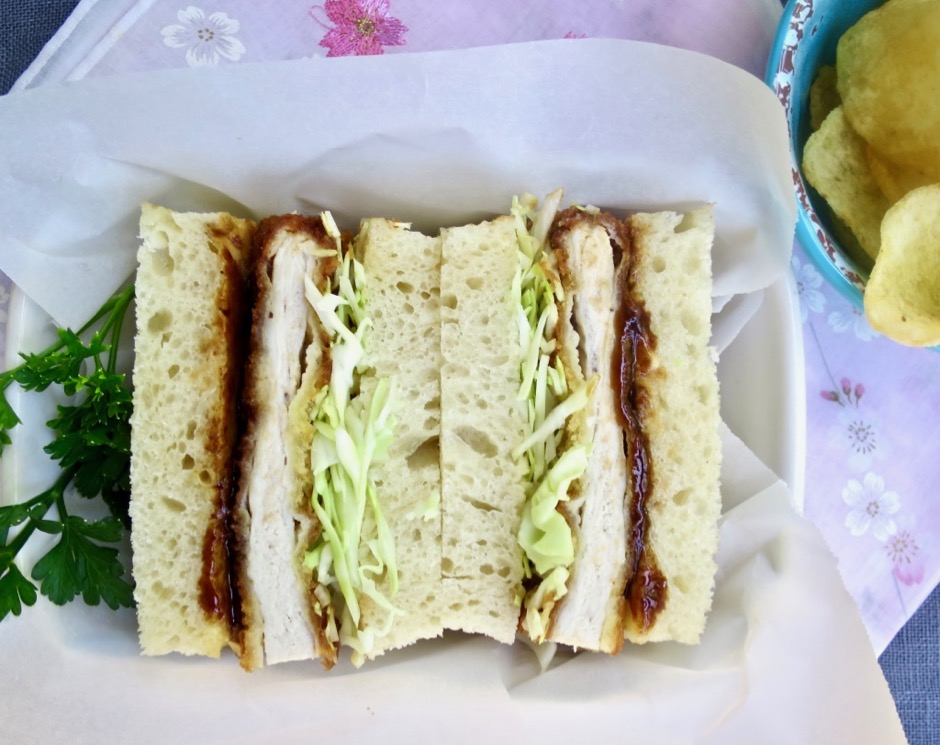
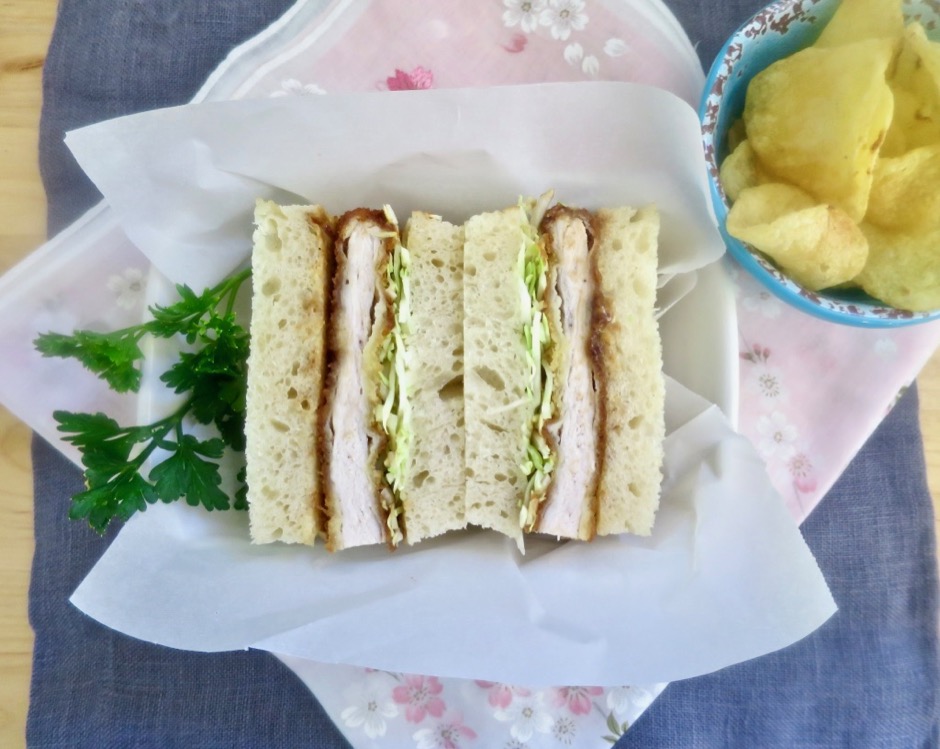
Tonkatsu is without a doubt one of my favorite dishes.  When we visited Japan in 2018 we went to the original Ginza Bairin inTokyo for tonkatsu.  They don’t take reservations, which means the line of patrons starts forming at least 30 minutes prior to opening.  We were pretty deep in the line, but luckily for us, we got the last two seats for the first seating.  The tonkatsu did not disappoint.  When we have a craving for katsu we make our own with pork or sometimes chicken.  Both are equally delicious served with rice, macaroni salad, shredded cabbage and namasu.  Katsu sando’s (the Japanese term for tonkatsu sandwiches) are another terrific way to serve the crunchy pork cutlets.  These sandwiches are compact, beautiful and tasty.

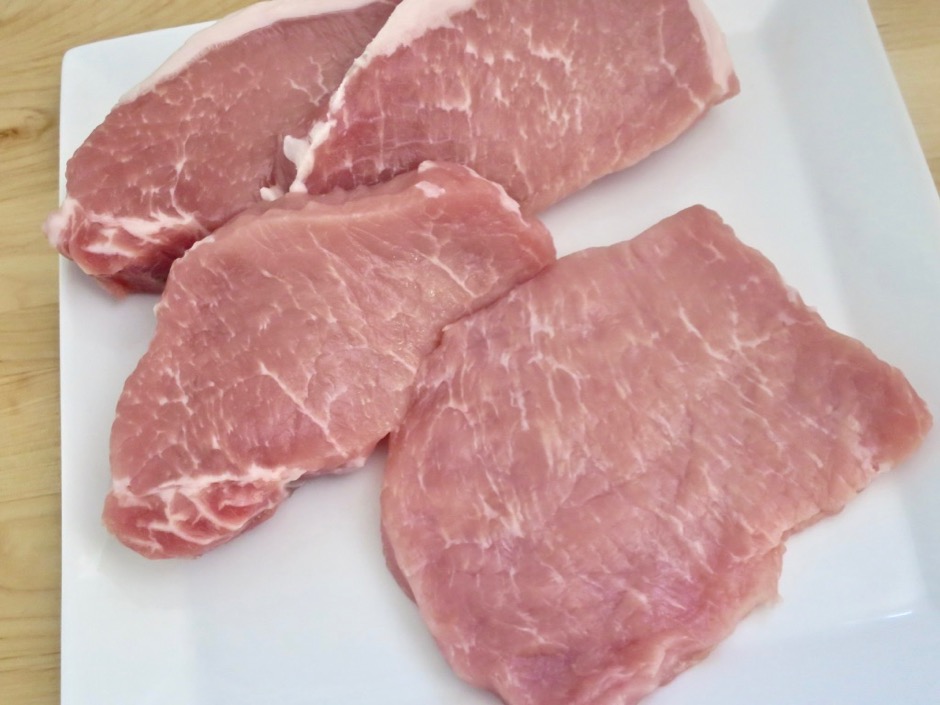
Pork Cutlets From Top to Bottom: Out of the Package, Trimmed, Pounded

Boneless pork loin chops are quite reasonably priced.  I bought a 4-pack that cost me under $6.00.  Once I got home from the market, I trimmed off the small amount of fat and pounded the pork to an even thickness of about 1/3-inch which also tenderizes the meat.

Panko

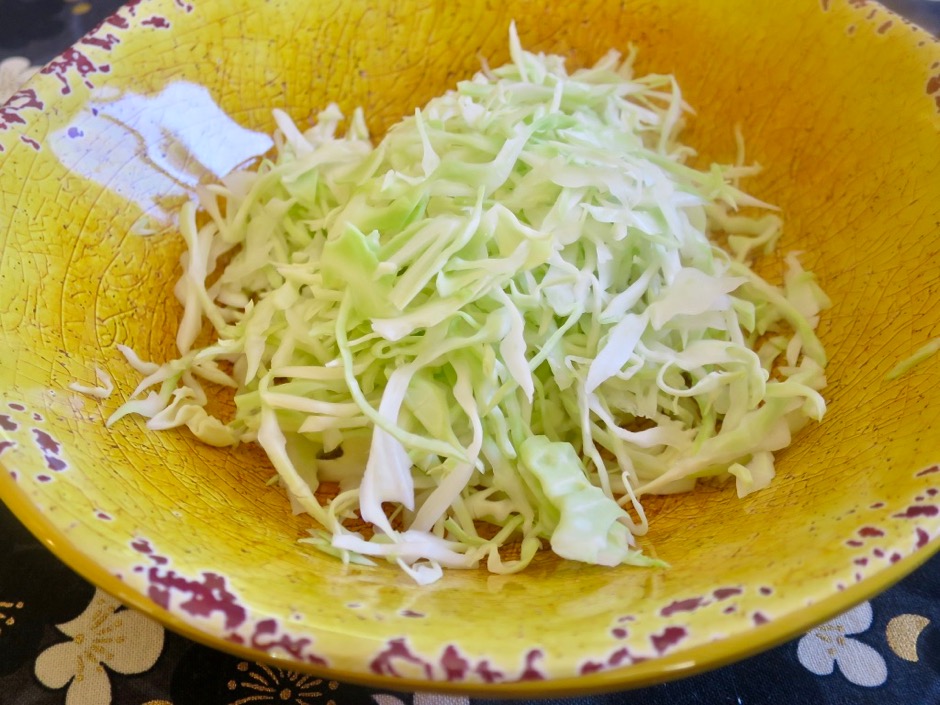
Crispy Shredded Cabbage

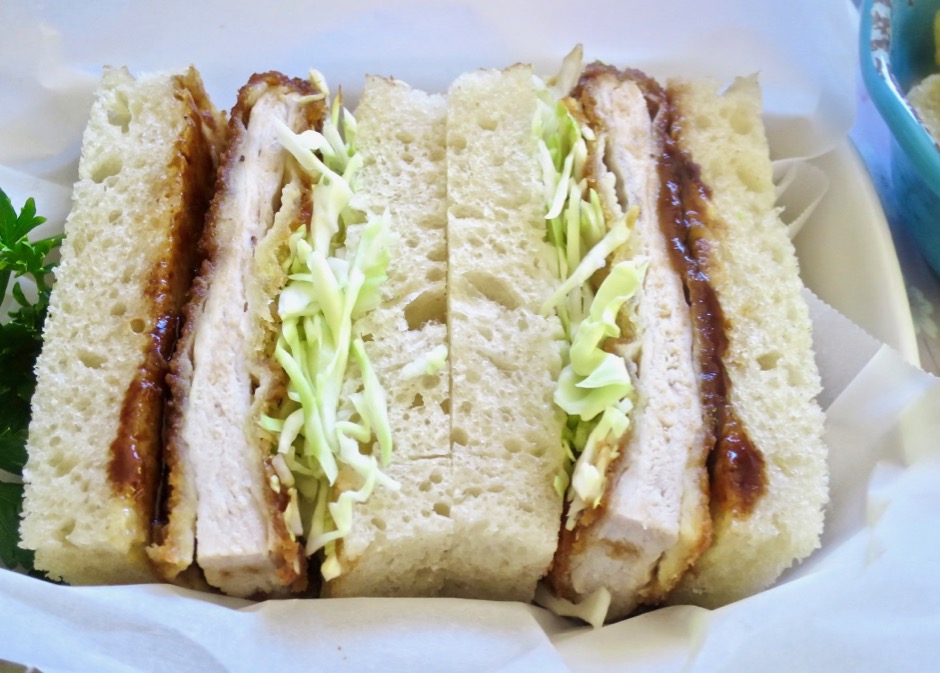
Shredded cabbage is a must with this sando,  The crispy cabbage enveloped in the soft bread and fried pork with savory tonkatsu sauce is absolutely the best sando you can imagine.

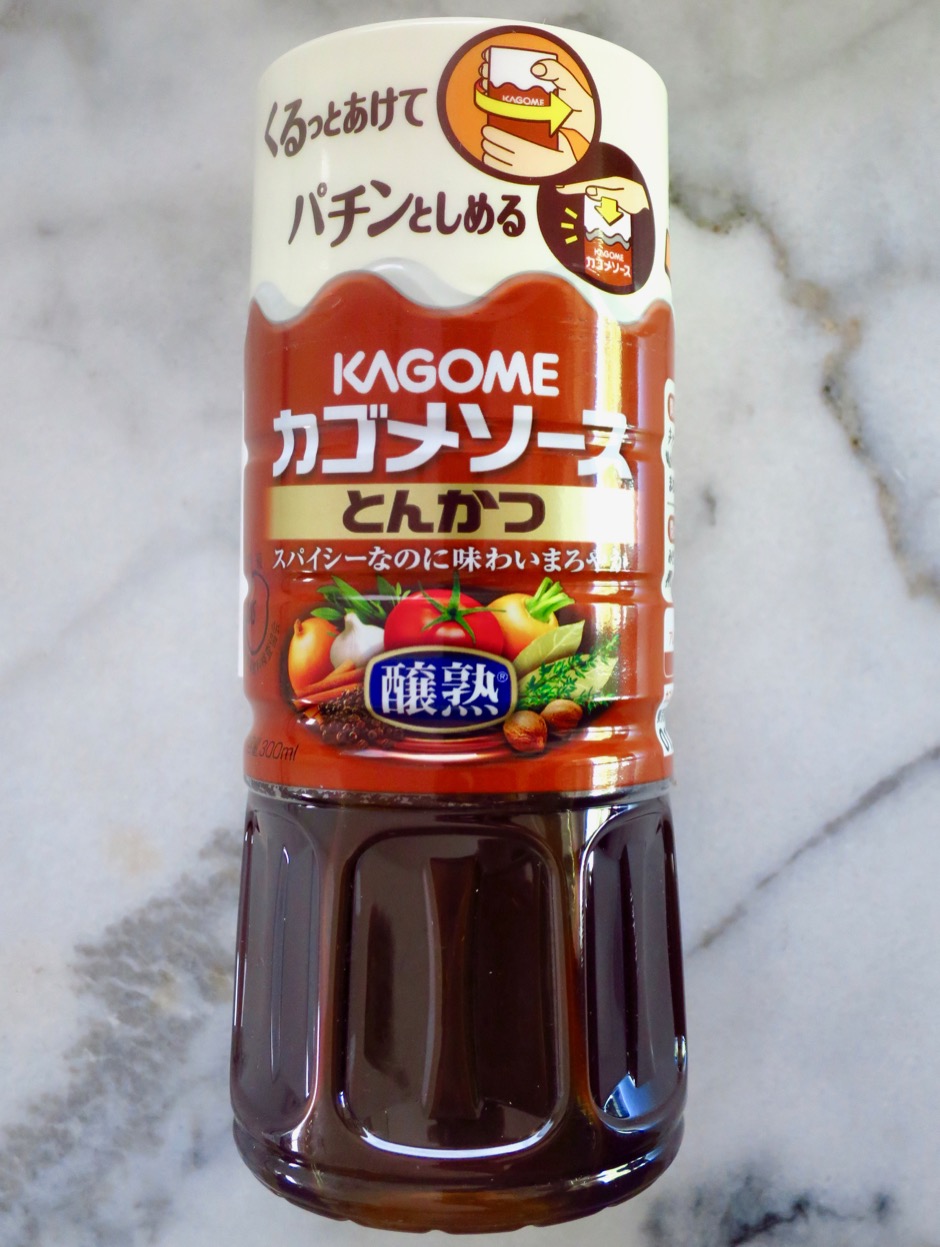
Tonkatsu Sauce

There are so many brands of tonkatsu sauce available.  My favorite is Kagome.  If you can find it, give it a try.  Good katsu sauce = tasty sando.

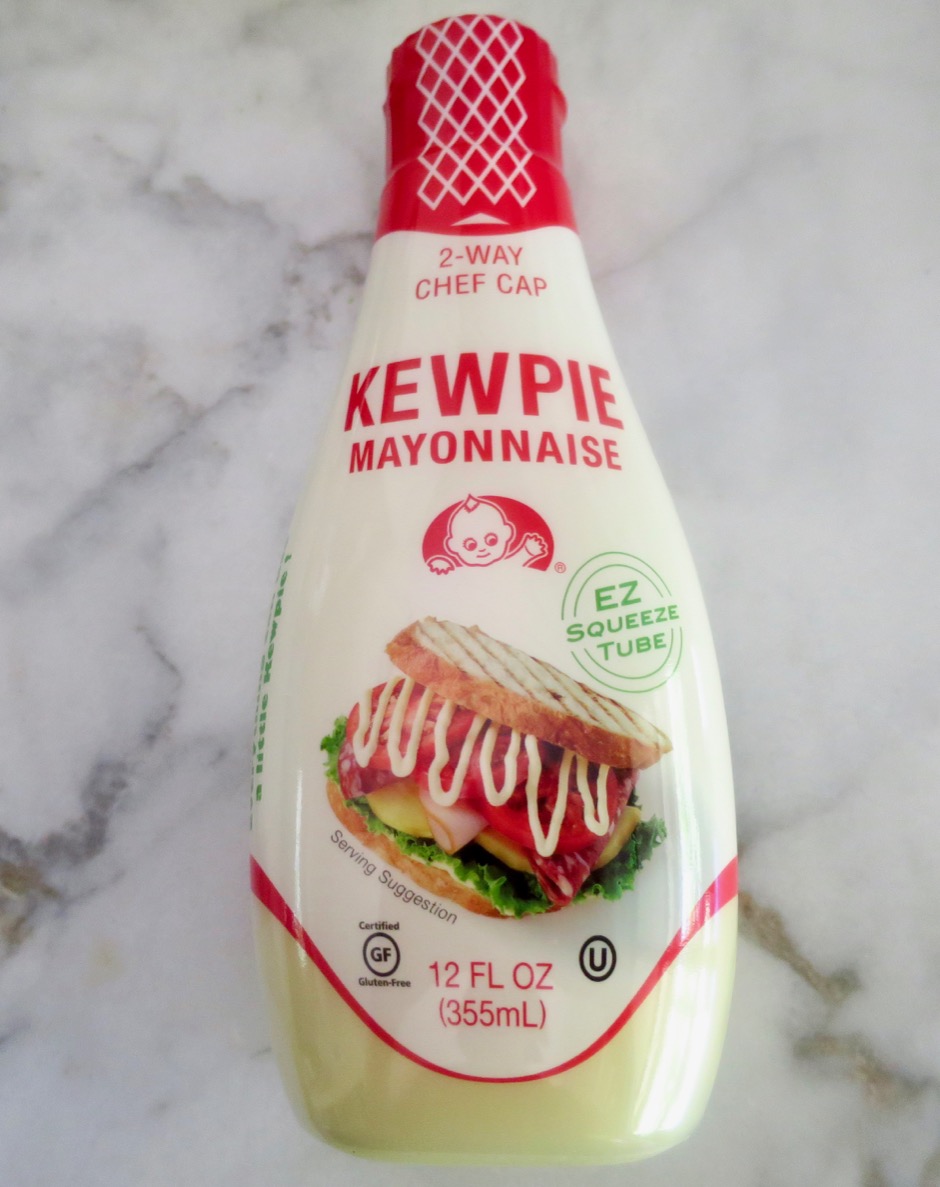
Kewpie Mayonnaise

Kewpie mayonnaise can be found at most markets these days and on-line.  Of course regular mayonnaise will do just fine, especially since it is not the star of the sandwich. But I like to go Japanese all the way when making this.  Most use Japanese milk bread for the sandwiches.  Since John makes all of our bread, he made this white loaf just for katsu sando and it turned out to be a keeper.

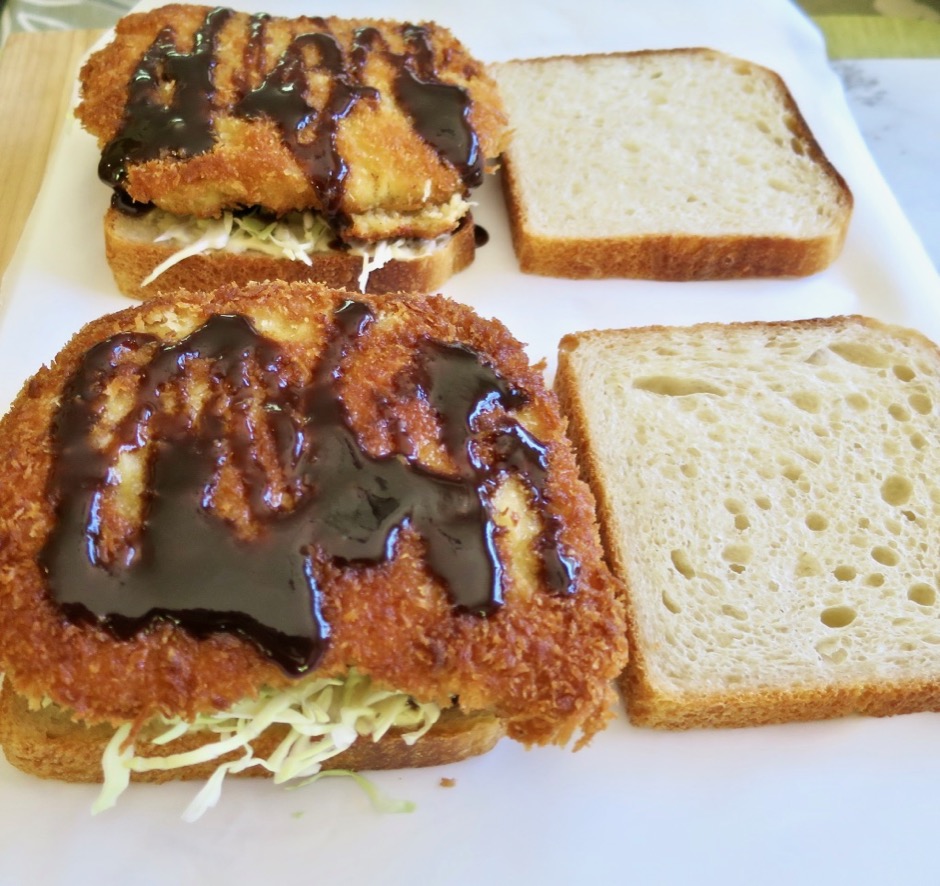
The Beginning of the Best Sando

Katsu Sando

Gazing at this photo of the Katsu Sando makes me want to eat one right now!

Katsu Sando

Katsu Sando
 
Author:
Serves: 4
Ingredients
  • 4 boneless pork chop cutlets (about 5 ounces each) trimmed of fat and pounded to ⅓-inch thick
  • ⅓ cup all-purpose flour
  • 2 large eggs
  • 1 tablespoon sour cream (optional)
  • 1½ cups panko
  • salt and pepper
  • canola oil for frying pork
  • 8 slices white bread
  • butter (we use Miyoko's vegan butter)
  • tonkatsu sauce (Kagome brand is our favorite)
  • Kewpie mayonnaise or regular mayonnaise
  • 1 cup shredded cabbage
Preparation
  1. Pork should be pounded to ⅓-inch thick or up to ½-inch if you prefer thicker pieces. Salt and pepper both sides of pork cutlets.
  2. Place flour and panko on separate large plates. Mix eggs with 1 tablespoon sour cream if using, in a wide shallow bowl.
  3. Dredge each piece of pork in flour, shaking off excess. Dip pieces in egg mixture. Allow remaining egg to drip back into the bowl. Place pork in panko and spread panko over the top. Press firmly so the panko adheres to the pork. It's best to use a dry, clean hand so the panko doesn't clump and fall off.
  4. Heat a large skillet preferably with high sides over medium to medium-high heat with enough oil to reach ¼-inch up the sides of the pan. Once the oil is hot, fry pork in two batches, until nicely browned and the internal temperature reaches 145 degrees. Transfer fried pork to a rack or plate. Continue frying the other two pieces of pork.
  5. To make the sandwich, butter 4 slices of bread. Spread tonkatsu sauce over the butter. Set aside.
  6. Spread mayonnaise on the other four slices of bread. Add shredded cabbage on the mayonnaise, followed by tonkatsu sauce. Place a fried pork cutlet on top and drizzle more tonkatsu sauce over the pork. Place buttered bread slices on top of the pork. Using a sharp knife, cut off the crusts and any extra pork to make a uniform sandwich. Cut each sandwich in half. Serve with chips and extra tonkatsu sauce.


Beef, Dinner, Lactose Free, Recipes, Sandwiches, Smoker, Sous Vide

Best Homemade Pastrami

January 30, 2019

Several years ago, we took a trip to the Big Apple and, of course, we had to try the renowned pastrami sandwich at Katz’s Deli.  It was as good as advertised.  Since that visit, John has been on a quest to make a pastrami that would rival that of Katz’s, Langer’s in L.A., and Wise Sons in San Francisco.  With this recipe, we think we have succeeded.  We tried using the traditional brisket (sometimes difficult to find here), but after seeing a post by Kenji Lopez-Alt, we decided to use a tri-tip and have never turned back. We buy the 2-pack from Costco (about 4 pounds), either prime or choice (prime is a bit richer).  It requires little if any trimming and is very evenly marbled, unlike brisket.  After several less than satisfactory attempts, John discovered a recipe by the ChefSteps crew who created the Joule precision circulator (sous vide device).  This recipe turns out perfect pastrami.  We reduced the recipe by 2/3’s and substituted tri-tip for the short ribs they use.

Best Homemade Pastrami

The gallon of cure/brine is just right for 4 pounds of tri-tip.  Mix everything together and refrigerate until it is below 40 degrees.  The Briner Jr. bucket is perfect for this recipe.  Add the meat to the brine after it has thoroughly chilled and return it to the refrigerator.  Let the meat cure for 7 days, stirring once per day.  After the meat has cured,  you are ready to smoke.

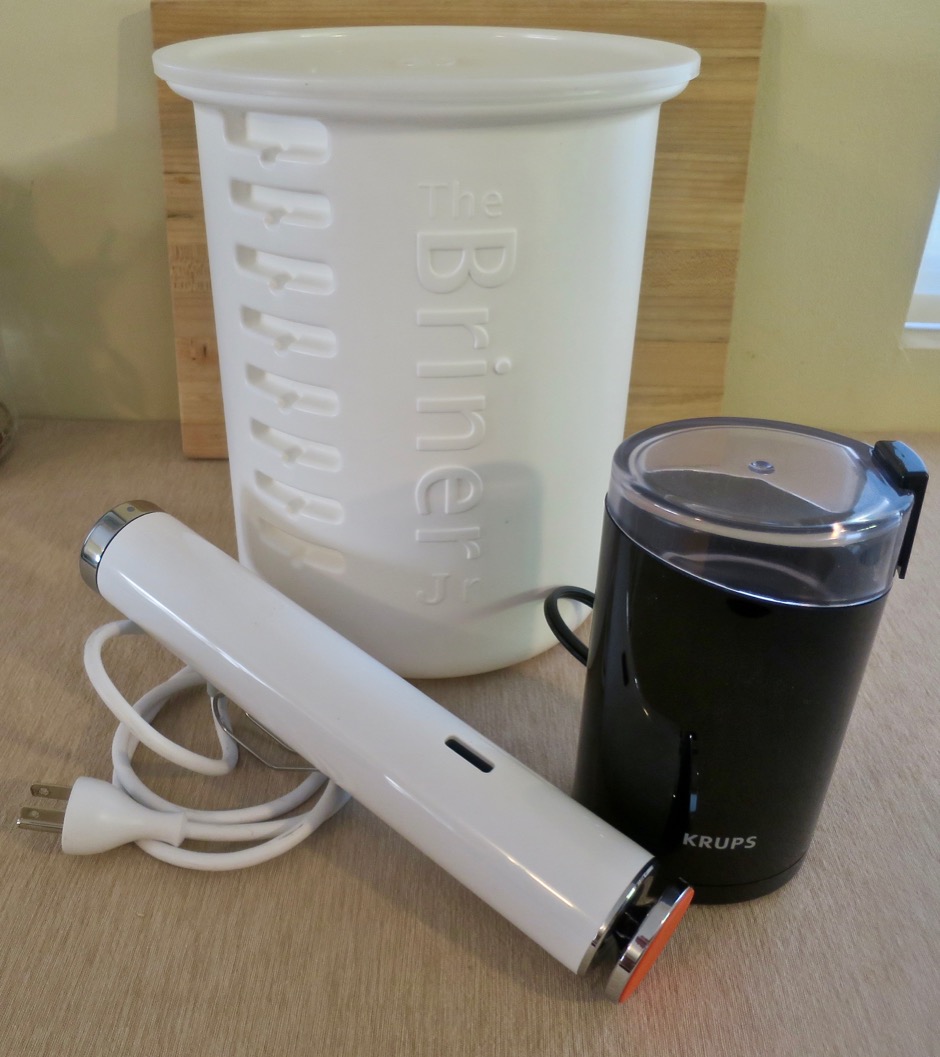
Joule Precision Circulator, Briner Jr. Brining Bucket, Spice Grinder

Here is some of the special equipment you will need.
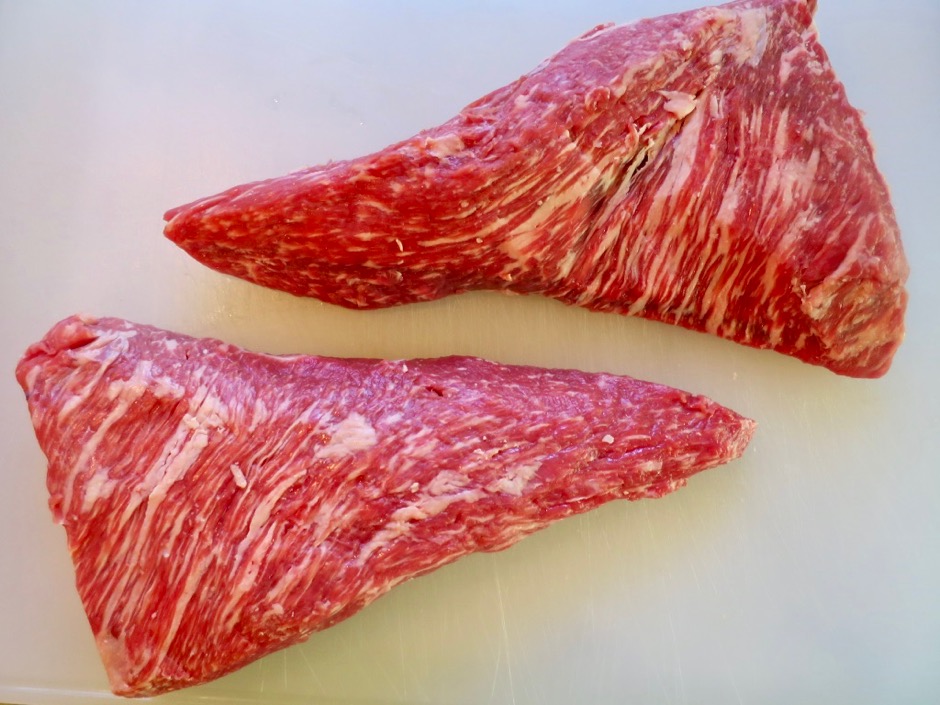
Prime Tri-Tip

These are the prime grade tri-tips we bought from Costco.  You can see how marbled they are.  If you prefer a richer cut of pastrami these are the way to go.

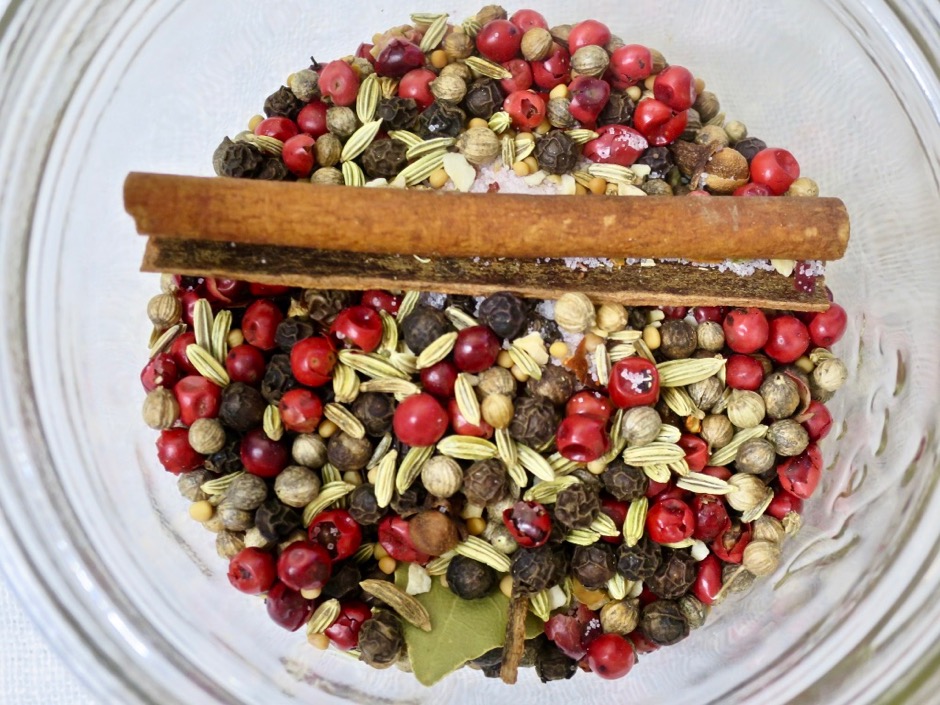
Brining Spices

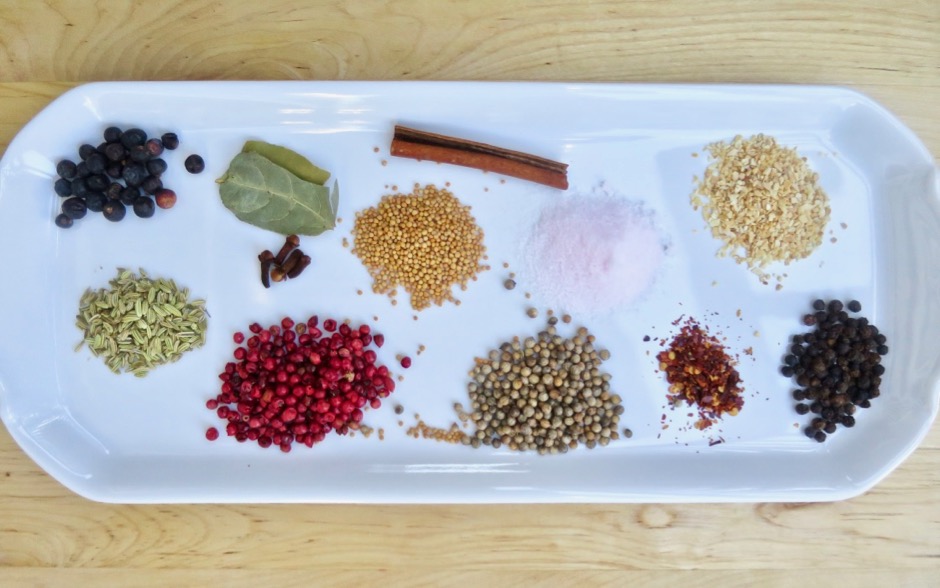
These are the brine spices.

Spices & Seasoning for Brine & Dry Rub: Juniper Berries, Bay Leaves, Mustard Seeds, Cinnamon Stick, Pink Salt, Granulated Garlic, Fennel Seeds, Cloves, Pink Peppercorns, Coriander Seeds, Chili Pepper Flakes, Black Peppercorns

Here are some of the various spices and seasonings used for the brine and the dry rub.

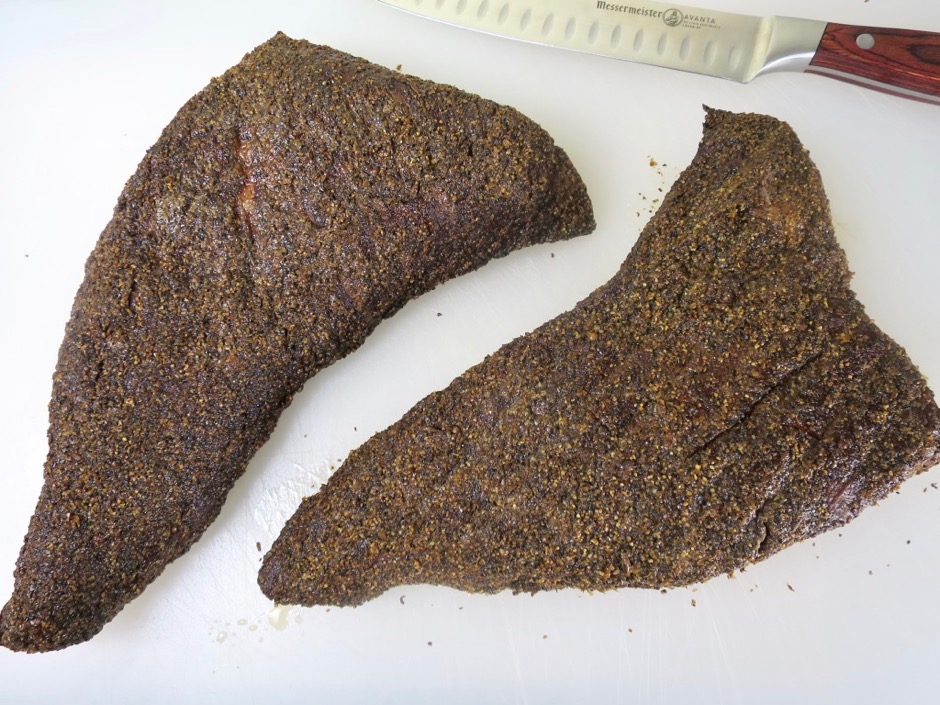
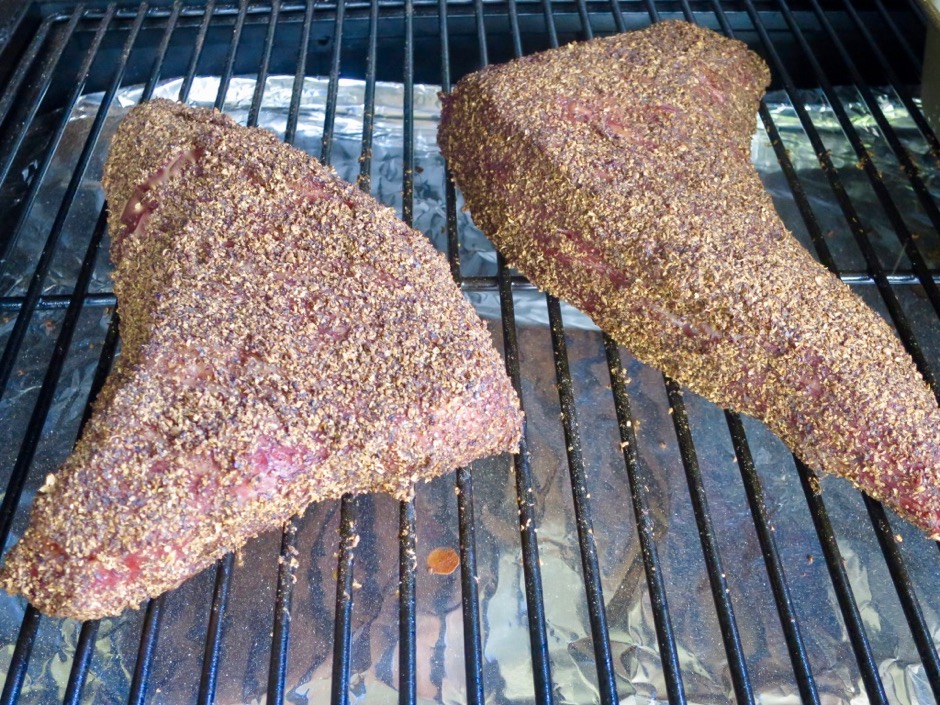
Dry Rub Applied, Time to Smoke

The dry rub has been applied to the meat that will smoke for 7 hours.  Once out of the smoker, the meat will sous vide for 48 hours.  
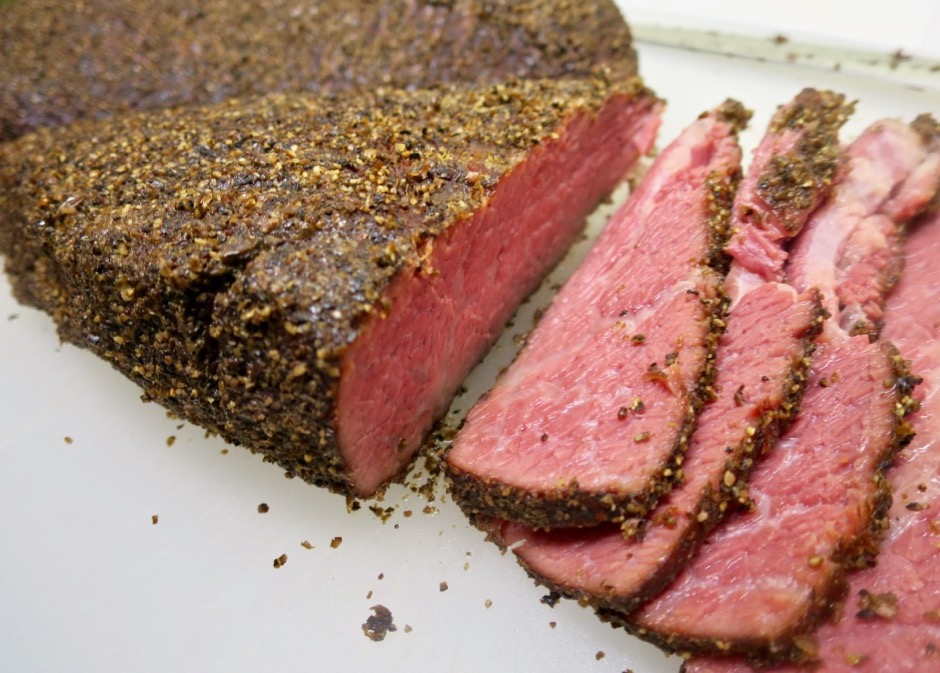
Ready to Slice

Here it is after 48 hours sous vide, moist and tender and ready for slicing.  Typically authentic pastrami is finished by steaming for several hours.  We prefer the sous vide method as it makes for a consistently tender result.
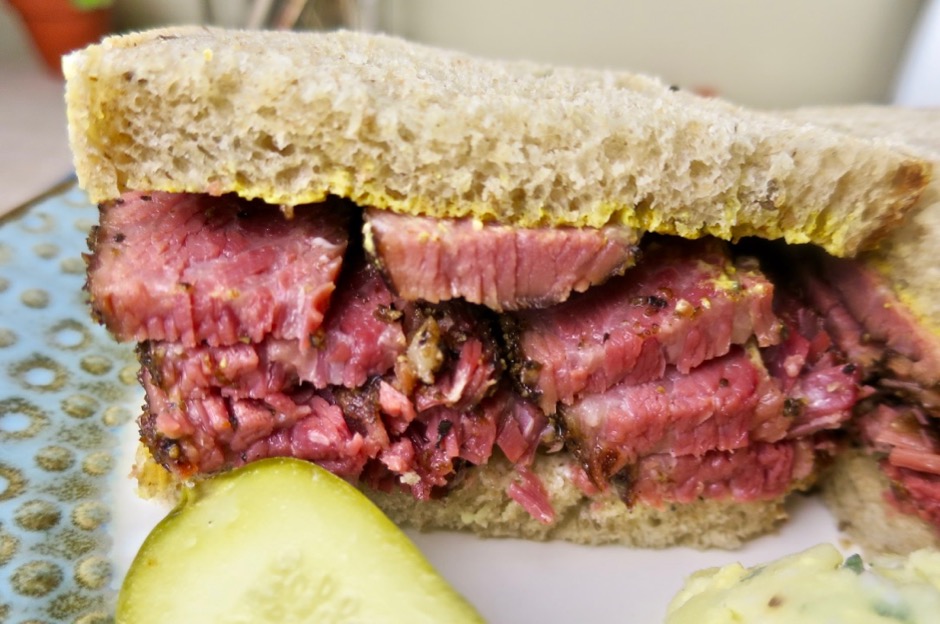
The Perfect Sandwich

Here is the ultimate reason for all of this effort: the perfect pastrami sandwich!

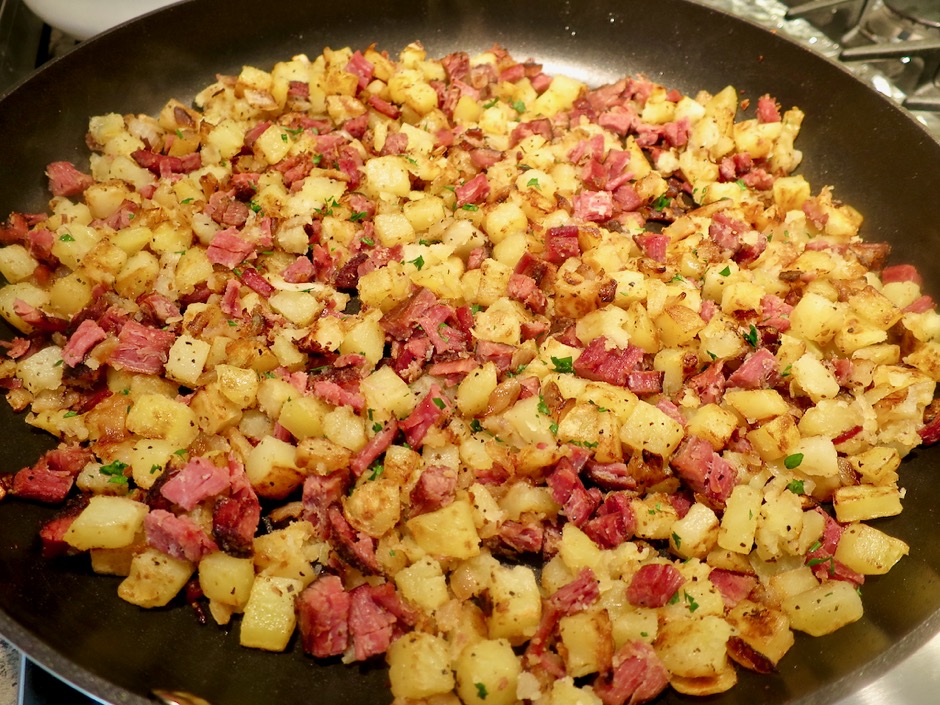
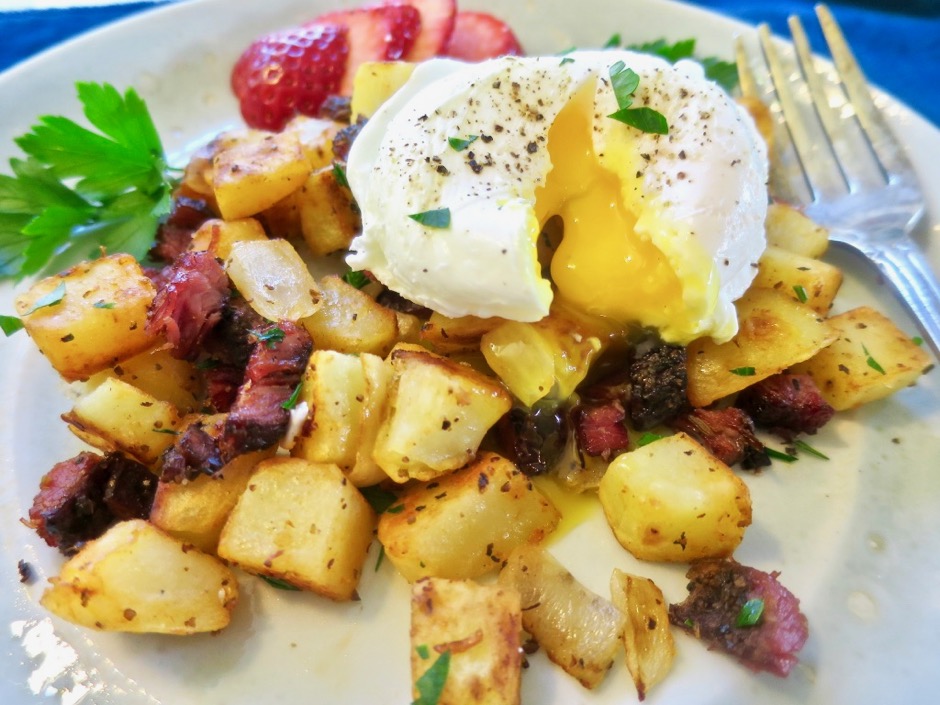
Pastrami Hash

Corned beef hash is a wonderful breakfast dish, however, pastrami hash is over the top.  So save some of your pastrami for this terrific treat. 
Pastrami Hash with Poached Egg

Pastrami hash with a poached egg.  Divine.


Best Homemade Pastrami
 
Special Equipment: Briner Jr. bucket or equivalent, spice grinder, smoker (we use CampChef Pellet Grill), sous vide precision cooker (we like Joule), vacuum sealer and bags, large canning pot (for sous vide)
Author:
Ingredients
  • 2 Tri-Tips (4 pounds total)
  • For the Brine
  • 1 gallon water
  • 1½ cups brown sugar, packed
  • 5 tablespoons fine sea salt or pickling salt
  • 4 teaspoons #1 Prague Powder (pink/curing salt - sodium nitrite)
  • 1 tablespoon whole black peppercorns
  • 4 teaspoons whole coriander seeds
  • 1½ teaspoons yellow mustard seeds
  • 1 tablespoon whole pink peppercorns
  • 1 teaspoon whole fennel seed
  • ½ cinnamon stick
  • ½ teaspoon chili pepper flakes
  • 4 whole cloves
  • 2 small bay leaves
  • 1 teaspoon minced dried garlic
  • For the Dry Rub
  • 2 tablespoons brown sugar
  • 2 tablespoons fine sea salt or pickling salt
  • ¼ cup whole black pepper corns
  • ¼ cup whole coriander seed
  • 1 teaspoon garlic powder
  • 2 teaspoons whole juniper berries
  • 1½ teaspoons chili pepper flakes
Preparation
  1. Mix all the of brine ingredients together in your Briner Jr. bucket or equivalent. Refrigerate until the brine is below 40 degrees. Add the meat to the bucket, cover and return to the refrigerator. Let the meat cure for 7 days, stirring once per day.
  2. To make the dry rub, combine black pepper corns, coriander seed, and juniper berries. Grind to medium-fine consistency in your spice grinder. If you do not own a spice grinder you can substitute ground spices. Combine all dry rub ingredients.
  3. After the meat has cured, you are ready to smoke. Remove the meat from the brine, pat dry, and generously apply the dry rub to all sides. Set your smoker on it's low setting (ours is in the 160 degree range). John added a bread pan filled with ice to maintain a moist environment. Smoke the meat for 7 hours. Once smoked, the meat should be vacuum sealed. If you do not own a vacuum sealer, place the meat in 2 gallon Ziploc freezer bags and use the water displacement method to remove the air from the bags.
  4. Fill your large capacity pot with water within 4-inches of the rim (we use a 21 quart canning pot). Attach your sous vide device to the pot and set to 149 degrees. Once up to temp, add the meat to your sous vide set up and set the timer for 48 hours. It's a good idea to cover the pot opening with plastic wrap for the 48 hour cook, to avoid evaporation.
  5. Once finished, the meat can stay in the water bath for another hour or so, until you are ready to serve it. Otherwise, it can be removed, sliced, and refrigerated or frozen, then later steamed prior to serving. We usually trim off the narrow points of the tri-tips for later use in pastrami hash, one of the greatest breakfast dishes imaginable.
 

Bread, Breakfast, Dinner, Eggs, Lactose Free, Recipes, Sandwiches

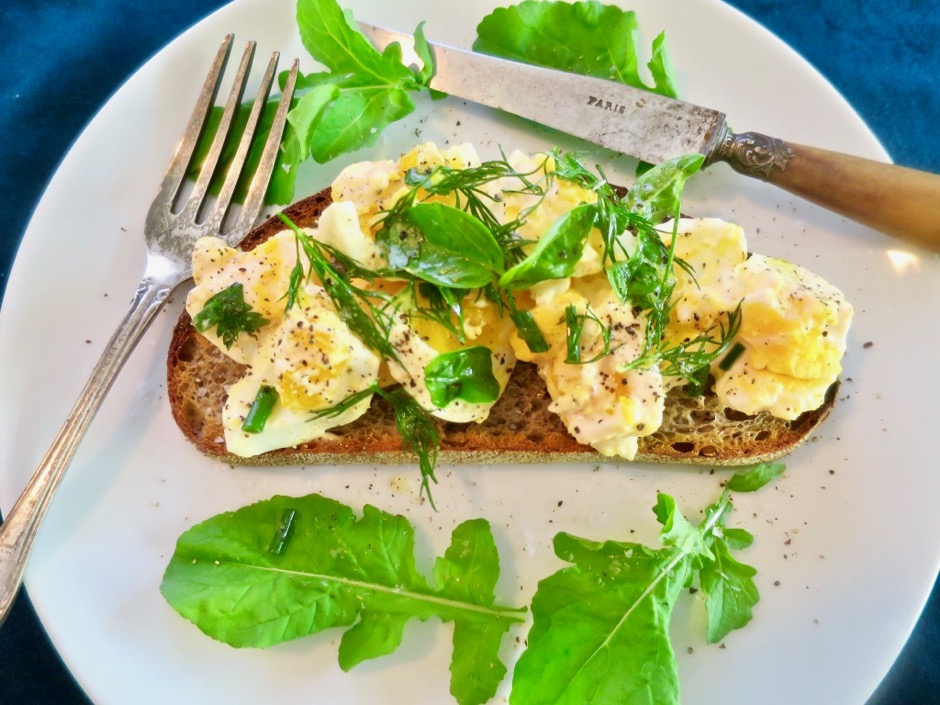
Egg Salad Tartine with Mixed Herbs

November 10, 2018

Egg Salad Tartine with Mixed Herbs

Anyone who visits this blog will have noticed that eggs are one of my favorite foods. I’m especially fond of the 6 1/2 minute egg with its perfectly set white and jammy yolk.  I also love egg salad on John’s homemade bread now and then.  In this case, the egg salad is piled on toasted country sourdough bread with herbs scattered over the top. It is delicious for breakfast, lunch or even dinner and ever so simple to prepare.

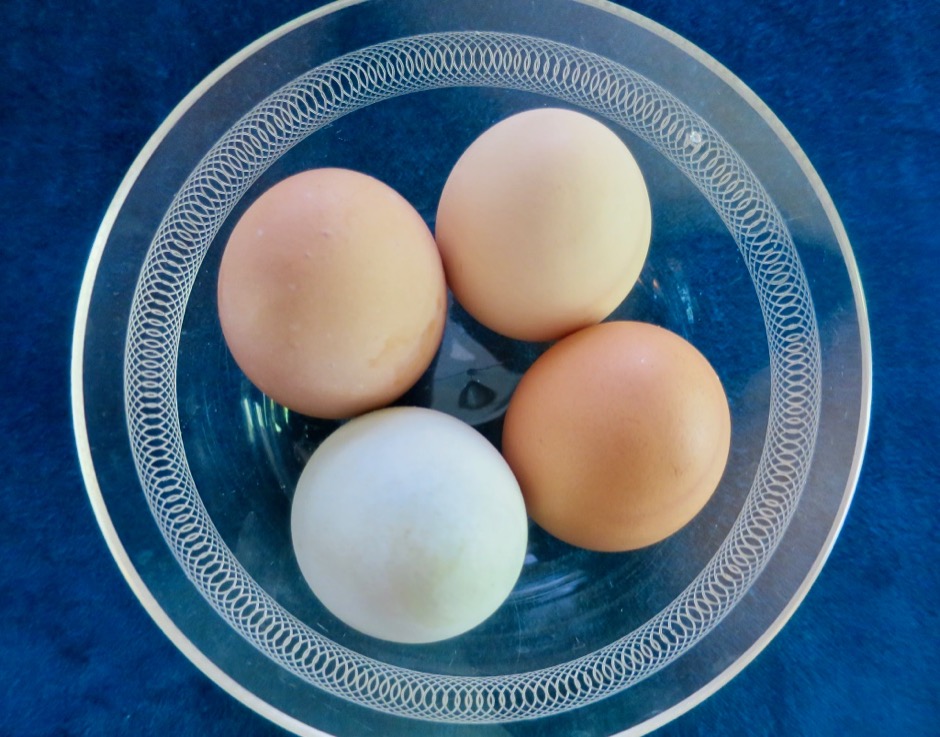
Our Neighbor's Fresh Eggs

Our neighbors Judy and John raise an assortment of chickens that provide them with fresh eggs every day.  Whenever Judy comes by our house with a dozen eggs our faces light up with joy.  I love how her eggs are of various colors and sizes.  They are always so fresh with bright yellow yolks.

Dill, Chives, Basil, Italian Parsley

The original recipe calls for dill, chives and basil. I added a few torn sprigs of parsley from the garden. This combination is perfect, however, you could switch them out with whatever fresh herbs you happen to have on hand.  The lemon juice adds a nice zing to make the perfect egg salad toast.

Egg Salad Tartine with Mixed Herbs

Egg Salad Tartine with Mixed Herbs
 
Adapted from Bon Appetit magazine
Author:
Serves: 2
Ingredients
  • 3 tablespoons good mayonnaise
  • 1 teaspoon cider vinegar
  • ¼ teaspoon (more, or less) of your favorite hot sauce
  • 4 large eggs, boiled for 8 minutes (10 for fully cooked/hard)
  • kosher salt and freshly ground black pepper
  • 2 large slices country-style bread, toasted
  • 3 teaspoons ½-inch pieces chives
  • handful of baby basil leaves, or larger leaves torn into small pieces
  • a few sprigs of Italian parsley, torn into pieces
  • a few dill fronds, torn into small pieces
  • ½ teaspoon finely grated lemon zest
  • 1 teaspoon fresh lemon juice
  • extra virgin olive oil (for drizzling)
Preparation
  1. Combine mayonnaise with vinegar and hot sauce. Set aside.
  2. Tear eggs into large pieces; add mayonnaise (you may not need all of it). Gently fold to coat, and season with salt and pepper. Spoon egg salad over toasted bread.
  3. Toss chives, basil, parsley, dill, and lemon zest in a small bowl. Add lemon juice, a drizzle of olive oil, and season with salt. Toss to coat and pile on top of egg salad. Season with extra salt and pepper to taste.


Appetizers, Breakfast, Eggs, Recipes, Sandwiches, Sauces, Veggies

Pimento Cheese

July 2, 2018

Pimento Cheese Appetizer

Pimento cheese is a divine dish, known in the American South as Carolina caviar, Southern pâté or caviar of the South.  There are numerous ways to enjoy it whether it’s right out of the bowl spread on crackers and crunchy vegetables, or melted and drizzled over scrambled eggs or nachos.  Pimento cheese makes a wonderful grilled cheese sandwich and I can’t imagine a better spread on a warm, buttery biscuit or over a grilled burger.

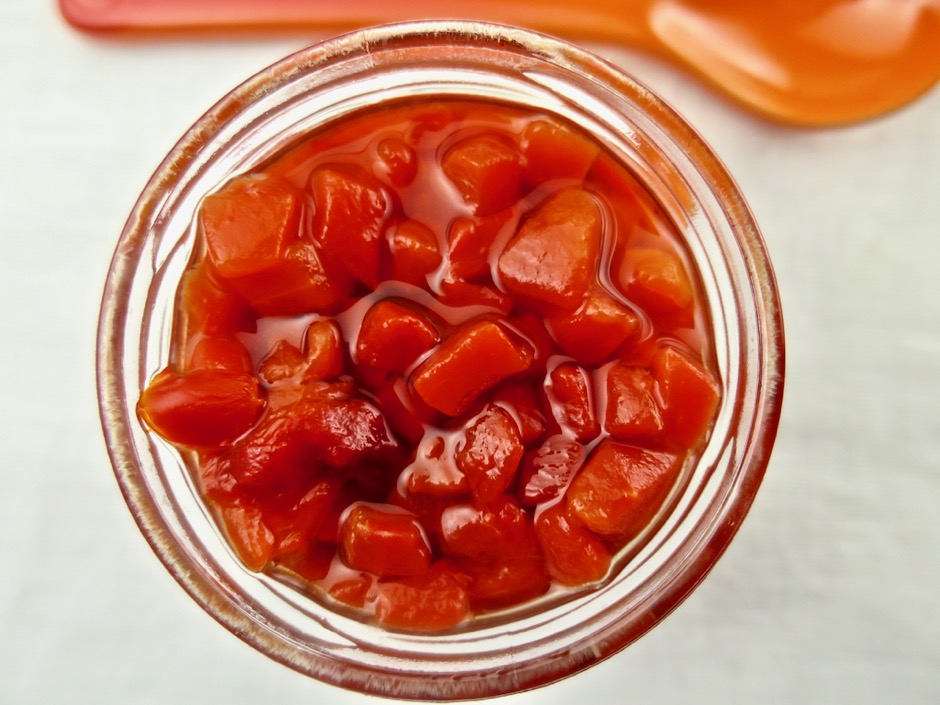
Pimentos

Jarred pimentos are mild, sweet and vibrantly red.

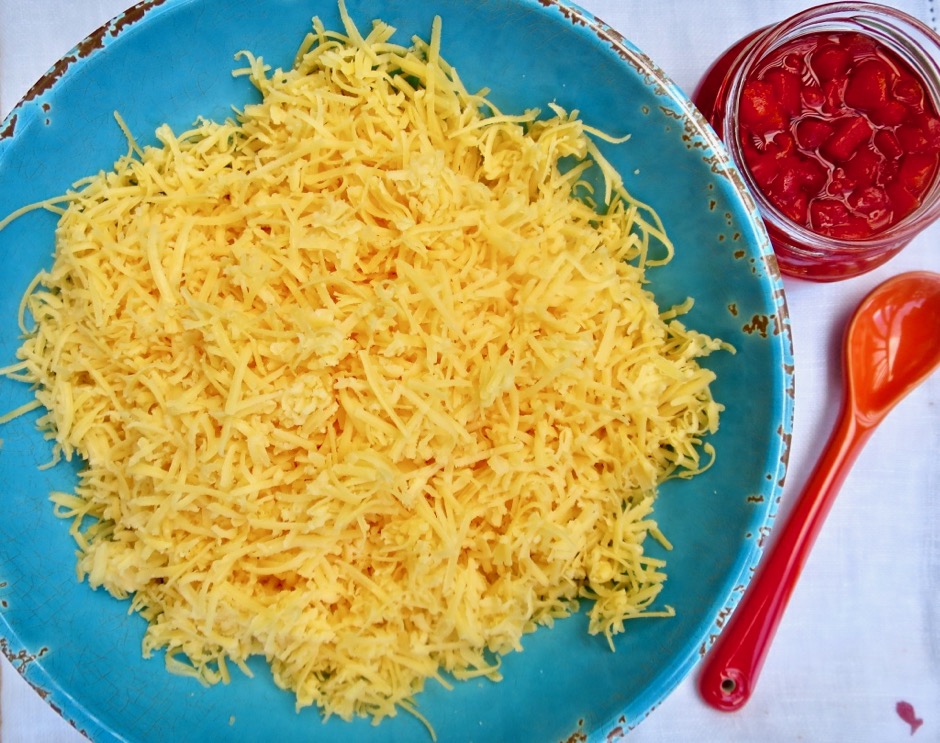
Grated Sharp Cheddar

Cheddar cheese, mayonnaise, and pimentos are the three main ingredients.  To add a little depth to my pimento cheese, I add a bit of Dijon mustard and Worcestershire, and sometimes a dash of cayenne pepper.  Louisiana-style hot sauce is another common addition. Next time I will add some of our homemade pickled jalapeños. Freshly grated cheese is a must for this recipe.  Pre-grated cheese has added ingredients to prevent it from clumping and getting moldy.  These ingredients greatly affect its melting quality and taste.  So get out your grater, it will take just a few minutes if that, to grate a block of cheese.

Pimento Cheese Eggs Benedict

Melted pimento cheese makes a fabulous sauce for Eggs Benedict.  I also like to drizzle it over soft scrambled eggs.

Pimento Cheese Nachos

Nachos!  I came across the idea to use pimento cheese on nachos from South Carolina’s curiously named “Garden & Gun” web site (named after a 1970s Charleston disco called the Garden & Gun Club).  This turned out to be the best cheese sauce for nachos.  Once melted, it is easy to drizzle over the corn chips and other toppings.

Pimento Cheese Stuffed Baby Bell Peppers

Pimento Cheese
 
Author:
Ingredients
  • ½ cup mayonnaise (not light)
  • 1 teaspoon dry mustard, such as Coleman's
  • 1 teaspoon Dijon mustard
  • ½ teaspoon Worcestershire sauce
  • 2 tablespoons diced pimentos
  • 1½ teaspoons finely chopped parsley
  • 8 ounce block of sharp cheddar, finely shredded
Preparation
  1. Combine mayonnaise, dry mustard, Dijon, Worcestershire sauce, pimentos and parsley in a medium bowl. Stir in shredded cheddar cheese. Refrigerate pimento cheese in an airtight container until ready to use.
  2. Spread on crackers and vegetables such as cucumbers and bright peppers for a lively and delicious party appetizer. To use over eggs or nachos, heat pimento cheese in a small saucepan over low heat, whisking constantly so that the mixture does not separate.
  3. Pimento cheese will keep for 5 days or so.


Follow

Get every new post delivered to your Inbox

Join other followers: