Browsing Tag

Gochugaru

Dinner, Japanese, Lactose Free, Recipes, Tofu, Vegetarian

Crispy Pan-Fried Tofu with Scallion Sauce

January 30, 2023

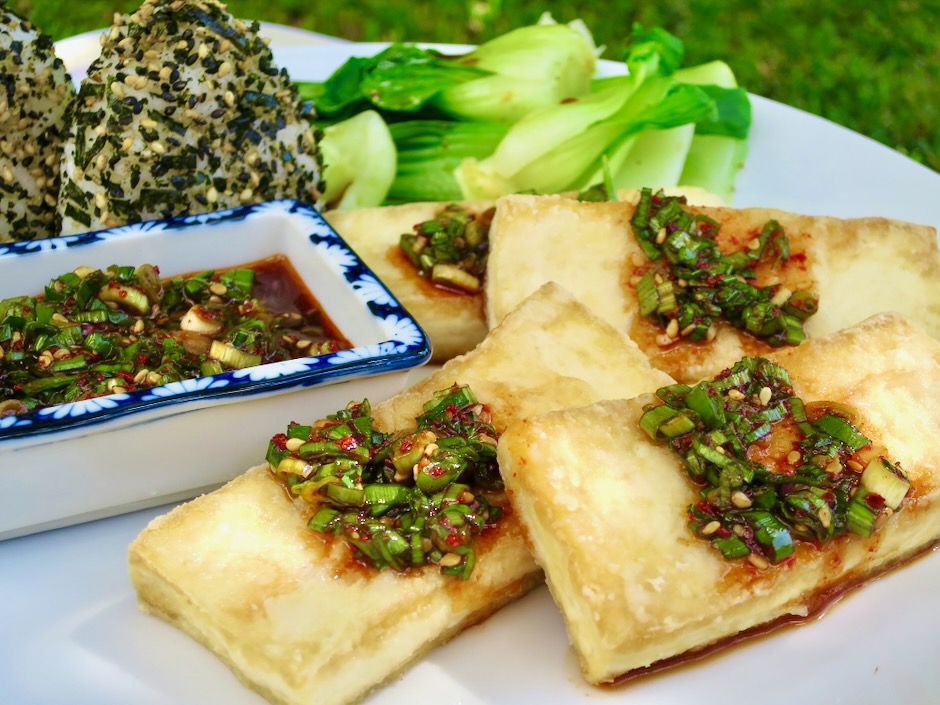
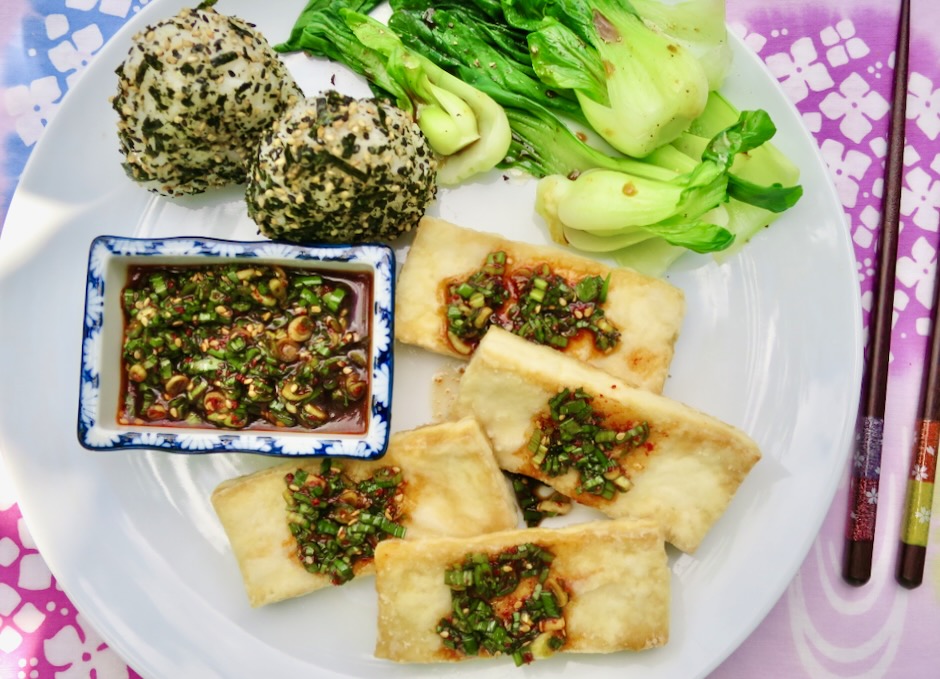
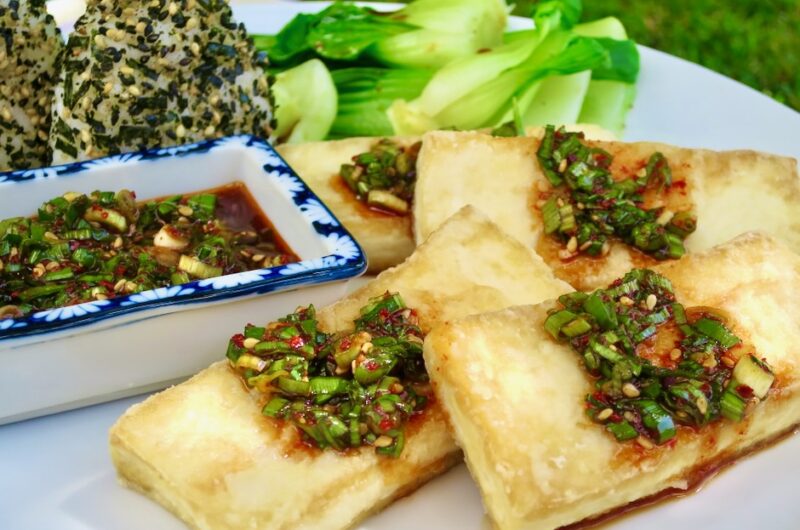
Crispy tofu drizzled with a delicious scallion sauce is an easy and tasty dish to make any day of the week. A flavorful scallion sauce is drizzled over the tofu just before serving. The savory sauce really brings this dish together and makes this one of the best ways to enjoy tofu. Serve the tofu with onigiri (Japanese rice balls) and some wilted baby bok choy for a healthy and delicious meal.

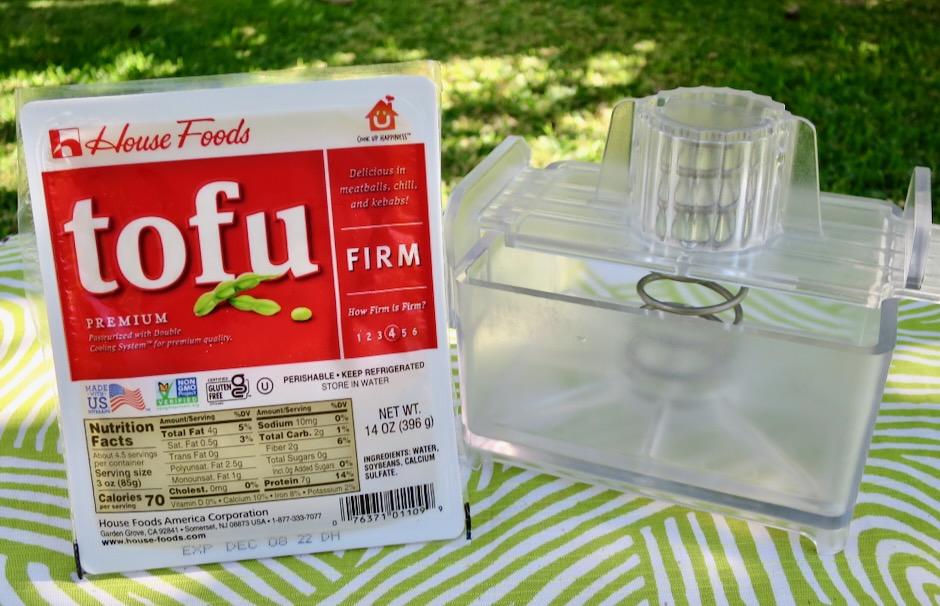
The Tofu Xpress has been one of my favorite kitchen gadgets for some time now. If you cook with tofu often, I encourage you to buy a tofu press (plenty of options online). Using a press means less waste of paper towels or kitchen towels and quicker results.

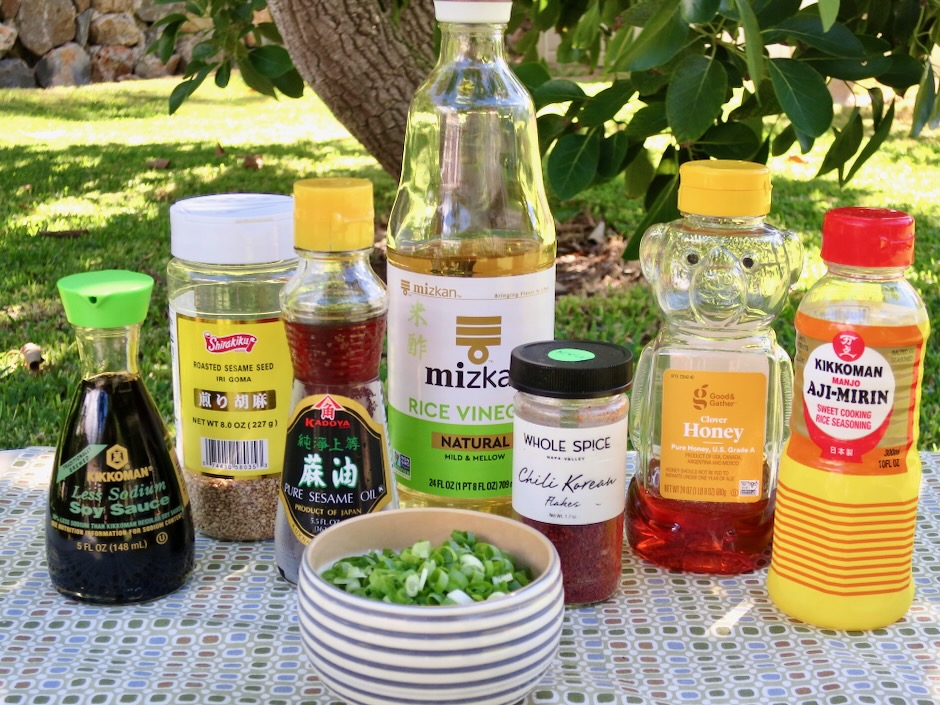
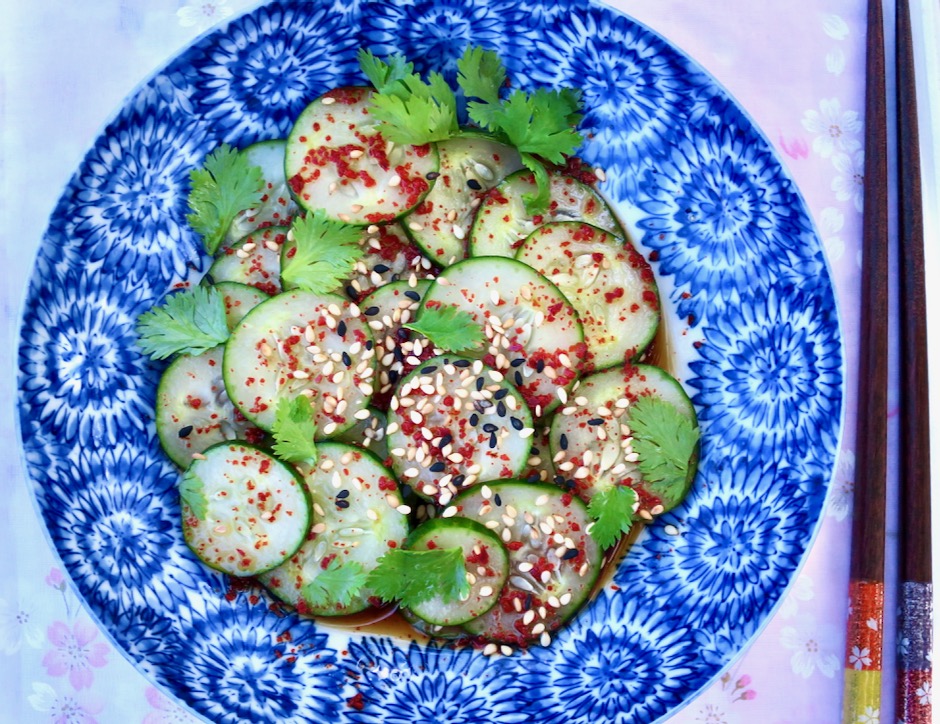
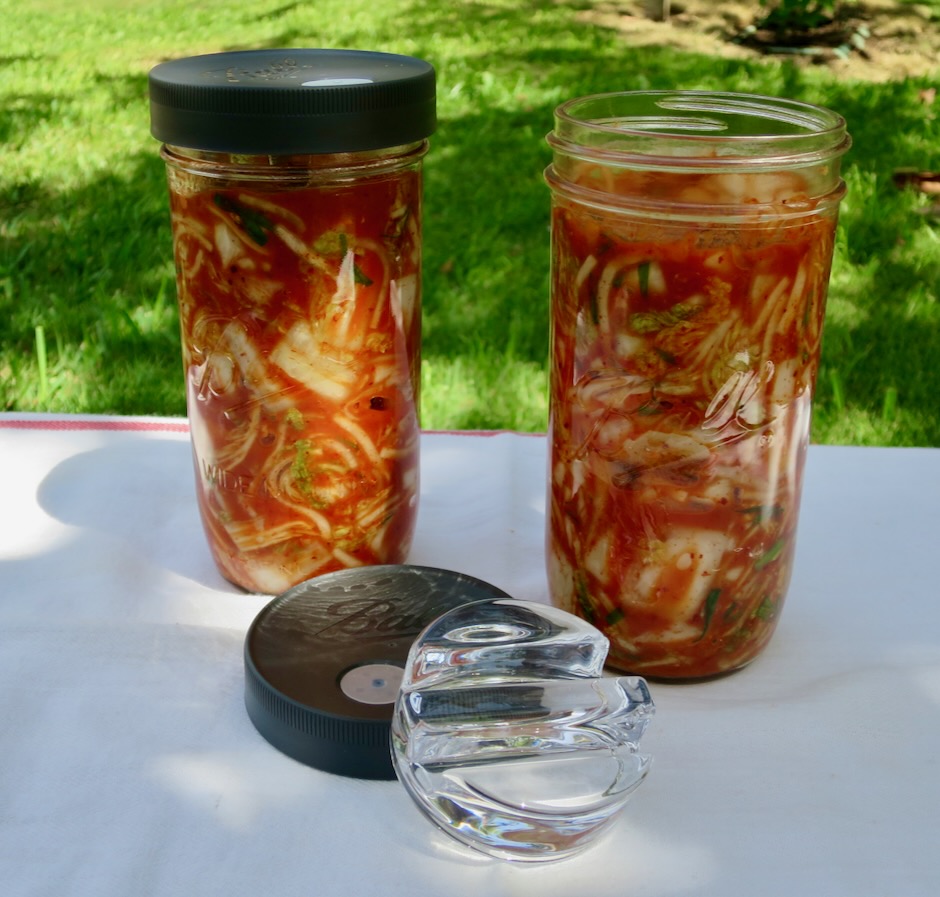
Most of the sauce ingredients are likely already in your pantry. If you are unable to find Korean chili flakes (gochugaru), you may substitute red pepper flakes. However, I highly suggest keeping a small jar of gochugaru in your cupboard. Most commonly used to make kimchi, gochugaru has multiple uses in many recipes. The slightly smoky flavor of the chili flakes with medium heat (heat can vary by brands) and gorgeous color make this one of my go to seasonings.

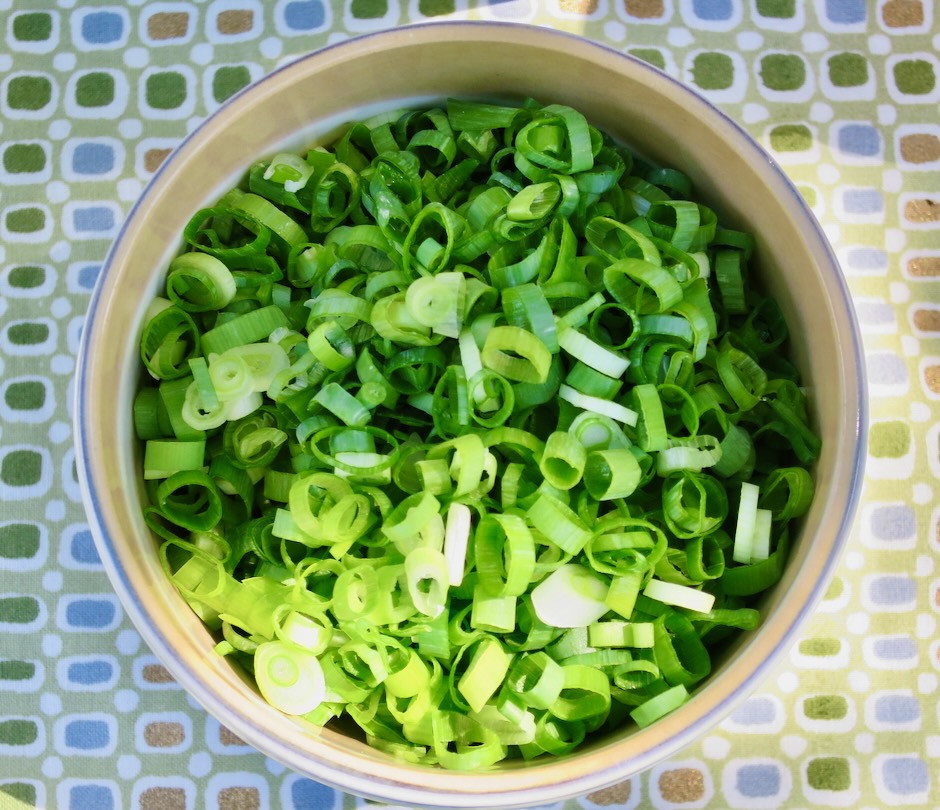
Initially it may seem like 3/4 cup of sliced scallions is far too much, however, the scallions will wilt once mixed with the other sauce ingredients.

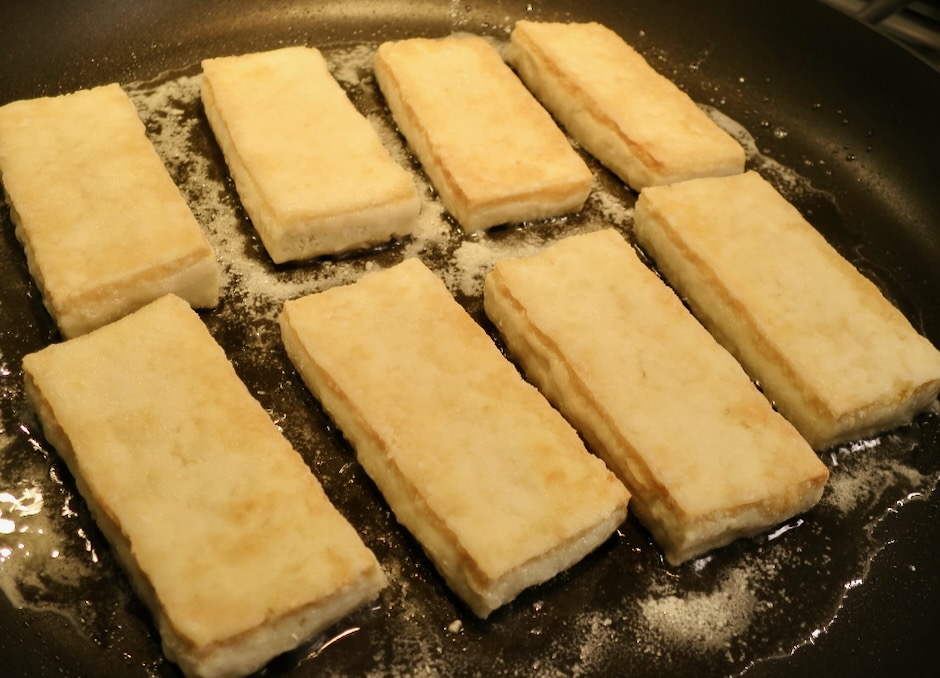
Once the tofu is lightly coated with cornstarch, it is fried until both sides are firm and crispy. In order to enjoy the crispiness of the tofu, serve it right away. This is a small recipe so you won’t have any leftovers!

Crispy Pan-Fried Tofu with Scallion Sauce

Recipe by Kiyo
Servings

2

servings

Adapted from Food52

Ingredients

  • 1 (14-ounce) package firm tofu (pressed for 10 minutes)

  • Kosher salt

  • 1/3 scant cup cornstarch

  • Neutral oil such as canola or vegetable for frying

  • Soy-Scallion Sauce
  • 2 tablespoons reduced-sodium soy sauce

  • 1 tablespoon mirin

  • 1 1/2 teaspoons gochugaru (substitute with 1/4 teaspoon red pepper flakes or more to taste)

  • 1 1/2 teaspoons roasted white sesame seeds

  • 1 teaspoon honey

  • 3/4 teaspoon roasted sesame oil

  • 1/2 teaspoon rice vinegar (unseasoned)

  • 3/4 cups thinly sliced scallions

Directions

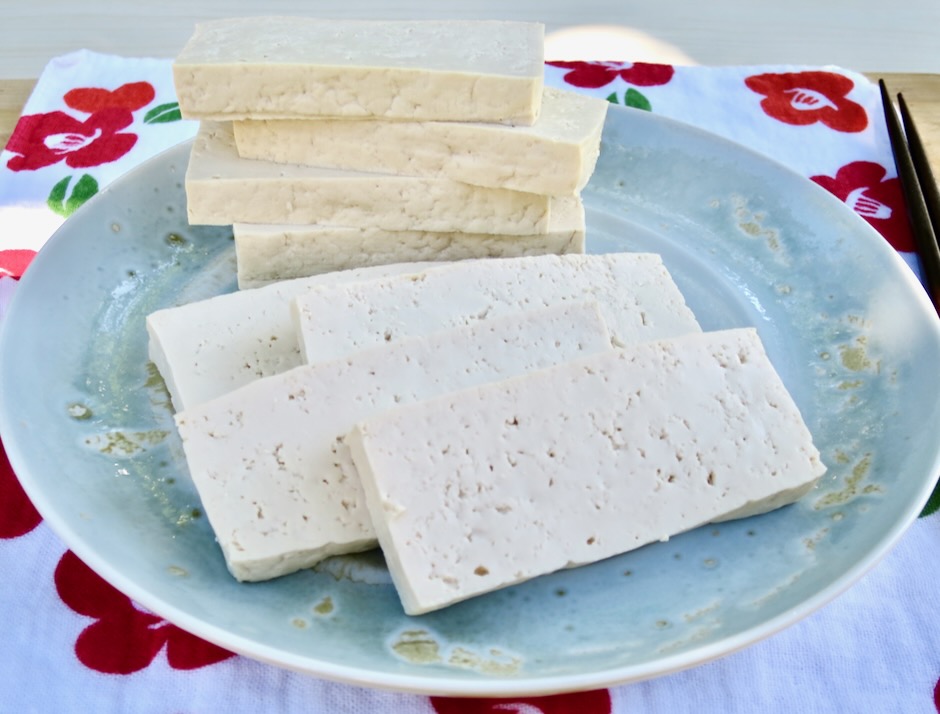
  • Press out water from tofu using a tofu press or kitchen towel (about 10 minutes). Cut tofu lengthwise into 8 even slices. Lay slices on a paper towel-lined plate and pat dry. Salt the tofu on both sides. Place the cornstarch in a shallow dish and set aside.
  • Let the tofu rest while you prepare the sauce. In a medium bowl, mix together all the sauce ingredients until combined (scallions will wilt as they sit).
  • Pour enough oil into a large 12-inch nonstick skillet to fully coat the bottom of the pan (about 1/4 cup or so) and heat the oil over medium-high heat. Working quickly with one slice at a time, lightly coat the tofu slabs with cornstarch (gently tap to remove excess cornstarch) and carefully place them in the hot pan. Cook, flipping once, for 3-4 minutes on each side until golden and crisp (adjust heat if too high).
  • Transfer the tofu to a large plate, slightly overlap the slices in two rows, and spoon sauce on top (start with a few spoonfuls, add more to taste or serve on the side). Serve immediately with onigiri and wilted greens.

Notes

    Appetizers, Dinner, Kimchi, Korean, Lactose Free, Recipes, Side Dishes, Vegan, Vegetarian, Veggies

    Homemade Kimchi

    November 26, 2021

    Homemade Kimchi

    I’ve had a keen interest in homemade kimchi for sometime now.  I attempted to make it before with ingredients that varied slightly, but they weren’t keepers.  I finally tried again, and this time the kimchi was delicious.  There are so many variations of kimchi, yet the main ingredients never change: Won bok cabbage, salt, garlic and gochugaru.  Additional ingredients such as thin strips of daikon radish and carrots, grated ginger, green onions, and a bit of sugar can be added to the mix.  With so many options, the kimchi you make will be your own unique recipe.  

    Homemade Kimchi

    Won Bok Cabbage (Napa Cabbage, Chinese Cabbage, Celery Cabbage)

    Start off with head of crispy won bok cabbage.  The outer leaves should be rinsed well, or removed if damaged.

    Won Bok Cabbage (Napa Cabbage, Chinese Cabbage, Celery Cabbage)

    Slice the won bok into quarters and remove the core.

    Won Bok Cabbage (Napa Cabbage, Chinese Cabbage, Celery Cabbage)

    Gochugaru (Korean Red Pepper)

    I bought a large bag of gochugaru from H Mart on Oahu.  You can easily purchase this online.  Gochugaru has a gorgeous deep red color and gives the kimchi its beautiful red hue.

    Gochugaru (Korean Red Pepper)

    Chopped Won Bok with Coarse Grained Salt

    The chopped cabbage is tossed with water and coarse salt.  It will shrink dramatically by the end of this step.

    Coarse Salt for Kimchi

    I’ve had this bag of salt for years.  I prefer to use this medium grain salt.  I read that there is a Korean version of this so I will look out for it the next time I’m at H Mart.

    Daikon Radish

    Thin strips of daikon are a nice addition to the won bok.  It has its own unique flavor and adds a bit of crunch to the kimchi.

    Ginger, Onion, Garlic, Daikon, Green Onions

    The garlic, ginger and onion are grated very finely.  I highly recommend the Microplane to grate the garlic and ginger.  I use a fine grater for the onion as the Microplane is too fine (you’ll end up with onion water!).

    Sweet Rice Paste/Porridge

    After studying different preparations for kimchi, I noticed that some recipes make a kimchi paste as they refer to it, by heating mochiko flour (sweet rice flour) with water, then adding a bit of sugar.  The mixture is cooled completely before the seasonings are mixed in.  This method is a winner and I will always use it when making kimchi.  The grated onion, garlic, ginger and gochugaru are mixed into the paste.  Once the cabbage has been rinsed and drained, the kimchi seasoning paste is mixed in along with the daikon and green onions.  The paste coats the vegetables thoroughly ensuring that they are all well seasoned.  It is a brilliant idea.

    Salted Cabbage with Kimchi Seasoning Paste

    Kimchi Seasoning Paste

    If you have fermenting weights or springs it helps to keep the cabbage submerged under the liquid.  Otherwise, press the cabbage down firmly with a spoon. 

    Homemade Kimchi

    I never thought I would say that kimchi is beautiful but if you make your own, it truly is.  There is no kimchi like this available at stores where I live.  It’s fresh, spicy, and delicious.

    Homemade Kimchi

    Kimchi is delicious served with rice and sesame tofu.

    Homemade Kimchi with Sesame Tofu & Rice

    Homemade Kimchi
     
    Author:
    Serves: 2 quart jars
    Ingredients
    • 1 head Napa cabbage (about 2½ pounds) bottom trimmed, quartered, core removed, leaves cut into 2-inch pieces
    • ¼ cup medium grain salt (I use Pacific Brand by Aloha Salt Co.)
    • 1 cup distilled or purified water
    • Kimchi paste: ½ cup distilled or purified water
    • 1 tablespoon mochiko rice flour
    • 1 tablespoon granulated sugar
    • Vegetables: ½ small bundle green onions, julienned
    • ¾ cup daikon radish cut into 2-inch long matchsticks (optional)
    • ¼ medium sweet onion finely grated
    • 4 cloves garlic (medium size) peeled and finely grated
    • 1 2-inch piece ginger, peeled and finely grated
    • ¼ cup gochugaru (Korean red pepper)
    Preparation
    1. Place cut cabbage in a large, wide bowl. Mix salt with 1 cup water (distilled or filtered). Pour salt water over the cabbage and toss well (I use food-safe disposable gloves). Not all of the salt will have dissolved but that's OK, just mix the salt in with the cabbage and water. Cover the bowl and set aside for 1½ hours, tossing a few times.
    2. Meanwhile, whisk ½ cup water with mochiko flour in a small saucepan over medium heat, stirring constantly. Once the mixture begins to thicken and bubble (pudding consistency) add the sugar and whisk until combined. Remove from the burner, transfer kimchi paste to a bowl and let cool completely. Once kimchi paste has cooled, measure out 4 tablespoons and mix in grated onion, garlic, and ginger. Add gochugaru and mix thoroughly, adding more paste as needed.
    3. Drain cabbage in a colander and rinse under cool water to remove some of the salt. I give mine a fairly quick rinse making sure not to remove all of the salt. Drain and add back to the large bowl. Toss in daikon if using, and green onions. With food-safe gloves or clean hands, mix in kimchi seasoning paste and toss to coat the vegetables well. Transfer to clean quart jars leaving at least 2-inch headspace. Use fermenting springs or glass weights and lids if you have them. Otherwise press down on the kimchi firmly with a spoon so it is packed tightly. Cover with a lid and set aside away from the sun for 24 hours before refrigerating. This will allow enough time for fermentation to begin. You may leave the kimchi out at room temperature for another day if you prefer a more sour flavor. Taste the kimchi to see if the flavor is just right for you. The kimchi will continue to ferment very slowly when kept in the refrigerator. Kimchi will keep well in the refrigerator for months, if you can make it last that long.
    Dinner, Korean, Lactose Free, Recipes, Tofu, Vegetarian, Veggies

    Green Tea Noodle Salad

    March 2, 2021

    Korean Green Tea Noodle Salad

    On my recent trip to Oahu I visited H Mart, a terrific Korean market in Kakaako.  I had so much fun checking out all of the items on the shelves, slowly making my way down each aisle being careful not to miss anything.  There are dozens of types of nori, instant noodle bowls, rice, snacks and more. They also have a nice selection of meat and produce.  I always bring back some Chinese broccoli if they have it.  This time I was able to squeeze a large package of fresh green tea noodles in my small cooler bag.  When I returned to Maui I decided that I should create a dish that would feature these noodles in a refreshing salad. 

    Korean Green Tea Noodles

    Korean Green Tea Noodles

    These noodles are similar in shape to the fresh Sun Noodle udon I buy at Island Grocery (a good substitute for this dish).

    Cilantro, (mint for garnish), Fresno Pepper, Japanese Cucumber, Radish, Edamame

    I love the bright green colors in this salad which consists of cucumbers, edamame and lots of fresh cilantro.  For a pop of color and crunch, I included sliced radishes that I cut as thin as possible and placed in an ice bath for 5 minutes to get them super crispy.  Use whatever you have on hand, such as julienned carrots, lettuce, watercress and avocado.  

    Homemade Sriracha Sauce

    Sriracha is a key ingredient in the dressing.  We use our homemade sriracha but the “Rooster Sauce” works very well.

    Salad Dressing

    The dressing can be used on any cold noodle salad, drizzled over tofu, or as a dressing for a crispy iceberg salad.

    Korean Green Tea Noodle Salad

    Korean Green Tea Noodle Salad
     
    Author:
    Serves: 2
    Ingredients
    • 8 ounces fresh green tea noodles (substitute fresh udon or your favorite noodles)
    • ½ cup cooked edamame
    • ½ Japanese cucumber, julienned
    • 1 small radish, sliced thin and chilled in ice bath for 5 minutes
    • chopped cilantro
    • chopped green onions
    • sliced Fresno pepper (optional)
    • Dressing:
    • 3 tablespoons rice vinegar (not seasoned)
    • 1½ tablespoons sesame oil
    • 1 tablespoon honey
    • 2 teaspoons soy sauce
    • 2 tablespoons light miso
    • 1 teaspoon gochugaru
    • 3 teaspoons sriracha (less or more depending on your preference)
    • 2 teaspoons finely ground roasted sesame seeds
    Preparation
    1. Boil the noodles according to the package directions. Immediately transfer to a colander and rinse under cold water to stop the cooking. Set aside to drain.
    2. Whisk all of the dressing ingredients in a medium bowl until well combined.
    3. Divide noodles between two bowls. Drizzle some of the dressing over the noodles. Top noodles with vegetables, cilantro, green onions and Fresno pepper if using. Serve extra sauce on the side to drizzle over the vegetables.


    Dinner, Korean, Lactose Free, Recipes, Side Dishes, Vegan, Vegetarian, Veggies

    Asian Cucumber Salad

    January 24, 2021

    Asian Cucumber Salad

    This is a quick (10 minutes max) cucumber dish that is perfect to serve alongside teriyaki meat sticks, lemon grass tofu, and Korean hamburger patties.  It’s a very refreshing salad that everyone will enjoy.

    Japanese Cucumber, Cilantro & Gochugaru

    Japanese cucumbers are the best choice for this salad.  They are super crispy with tender skins and have very few seeds.  I always have a big jar of gochugaru (Korean chili flakes) on hand.  The chili flakes add a subtle heat and beautiful pop of color to salads like this one.

    Asian Cucumber Salad

    We have some beautiful cilantro growing in the garden so I added a few tender leaves to the salad.  If you’re not a fan of cilantro, use thinly sliced green onions or chives.  If you are not planning to eat the salad right away, store cucumbers and dressing separately until ready to serve.

    Asian Cucumber Salad with Tofu & Rice

    Asian Cucumber Salad
     
    Author:
    Serves: 2
    Ingredients
    • 1 Japanese cucumber (about 5 ounces)
    • 1 tablespoon soy sauce (Kikkoman recommended)
    • 2 tablespoons rice vinegar (unseasoned)
    • 2 teaspoons sugar
    • ½ teaspoon gochugaru (Korean red chili flakes)
    • ¼ - ½ teaspoon roasted sesame seeds
    • few sprigs of fresh cilantro torn into pieces (may substitute thinly sliced green onions or chives)
    Preparation
    1. Slice the cucumbers into thin rounds, about ⅛th-inch thick.
    2. Combine the soy sauce, rice vinegar, and sugar in a small bowl. Mix well until sugar has dissolved. Mix in gochugaru and and most of the sesame seeds.
    3. Place cucumbers in a low sided bowl. Spoon sauce over the cucumbers. Sprinkle remaining sesame seeds over the top followed by the cilantro.


    Beef, Dinner, Korean, Lactose Free, Recipes

    Meat Jun

    November 3, 2020

    Meat Jun, Cucumber Salad, Rice, Korean Potatoes

    I was only vaguely familiar with meat jun until my sister sent me a text with a photo of her “plate lunch” which featured this dish.  That piqued my interest enough for me to delve into the subject of this simple and homey dish.  I discovered that meat jun was introduced by a local Korean restaurant on Oahu many years ago.  It is a type of jeon, which refers to a Korean method of preparing seasoned meat or vegetables that are coated in flour and egg wash before being fried.  As is the case with many cross-cultural dishes in Hawaii, meat jun is a local island style invention.

    Filet Mignon & Marinade

    The meat for this recipe should be very thin so that it cooks quickly.  Many use top sirloin or ribeye.  I went to my local Safeway and asked the butcher if he would slice some filet mignon for me.  He asked me what I was going to make with it and when I told him, he said “that is going to be the best meat jun ever!”  As it turned out, filet mignon worked well because it’s so tender.

    Marinating Meat Jun

    Because the meat is sliced thin, it only needs to marinate in the sauce for 20 minutes before it is coated with flour, dipped in egg and pan-fried.

    Meat Jun, Cucumber Salad, Rice, Korean Potatoes

    Meat jun is delicious served with  rice and crunchy cucumbers or kimchi.  Leftovers hold up very well and need just a quick zap in the microwave to warm the meat up a bit.  The dipping sauce is excellent drizzled over the meat.  It has a good dose of vinegar which adds a nice zing to the soy marinated meat.  This unassuming dish is most addicting.

    Meat Jun, Cucumber Salad, Rice, Korean Potatoes

    Meat Jun
     
    Author:
    Serves: 2 - 4
    Ingredients
    • For meat jun:
    • ½ pound thinly sliced filet mignon
    • ¼ cup less sodium soy sauce (Kikkoman recommended)
    • 1½ tablespoons sugar
    • 2 teaspoons sesame oil
    • 1 garlic clove, minced
    • 1 tablespoon thinly sliced green onion
    • 1 teaspoon roasted sesame seeds
    • ½ cup flour
    • 3 large eggs
    • canola oil for frying
    • For dipping sauce:
    • 2 tablespoons less sodium soy sauce
    • 1 tablespoon white vinegar
    • 2 teaspoons sugar
    • 2 teaspoons finely chopped green onion
    • ½ teaspoon roasted sesame seeds
    • ½ - 1 teaspoon gochugaru
    Preparation
    1. Combine soy sauce through sesame seeds in a medium sized bowl. Add meat slices and marinate for 20 minutes (up to 30 minutes for thicker slices). Place marinated slices of meat on paper towels to drain slightly, just before you are ready to cook them (discard sauce).
    2. Meanwhile, combine dipping sauce ingredients in a small bowl. Mix well and set aside.
    3. Place flour in a wide shallow bowl, and whisk eggs in another wide shallow bowl. Heat ¼ cup of canola oil in a large skillet over medium heat (enough to generously coat the entire bottom of the pan). Use tongs to dip meat in the flour making sure to cover each piece well. Gently shake off any extra flour, then dip meat in whisked eggs making sure to coat well. Place on a piece of foil. Continue with all of the meat slices. Working in batches, fry meat until golden brown, about 45-60 seconds per side. Transfer to a paper towel lined plate. Continue cooking the rest of the meat. Slice meat into strips about 1-inch wide. Arrange meat on platter and serve with dipping sauce on the side.


    Beef, Dinner, Eggs, Korean, Lactose Free, Recipes, Rice Dishes, Veggies

    Korean Soybean Sprouts Rice Bowl

    September 26, 2020

    Soybean Sprouts Rice Bowl with Sunny-Side Up Egg

    To say that I love rice would be an understatement, so making this umami filled rice bowl was an easy decision.  Once you do a little prep work, everything goes into a rice cooker.  It’s a suitable meal for lunch or dinner.

    Soybean Sprouts & Kimchi

    Even thought the sprouts are cooked with the rice and other ingredients, they still retain a nice texture.  The kimchi adds such a wonderful flavor to the rice, with just a bit of heat.

    Soybean Sprouts

    Soybean Sprouts, Kimchi & Filet Mignon over Rice

    The original recipe from Korean Bapsang calls for adding a bit of seasoned beef or pork to the rice dish as an option. However, you can omit this for a vegetarian version. I have cooked this dish with and without meat and both are equally delicious.  All ingredients are added on top of the rice (pictured above) then cooked together.

    Cooked Soybean Sprouts, Kimchi & Filet Mignon over Rice

    Once your rice timer goes off, you are ready to serve your meal.

    Rice Bowl Sauce

    The sauce is drizzled over the rice bowl.  I couldn’t resist adding a sunny-side up egg to mine.

    Soybean Sprouts Rice Bowl with Sunny-Side Up Egg

    Soybean Rice Bowl
     
    Adapted from Korean Bapsang blog
    Author:
    Serves: 2
    Ingredients
    • 1 cup (measuring cup for rice cooker) short grain white rice
    • Vegetables & Meat:
    • 8 ounces soy bean sprouts, rinsed and drained well
    • 3 ounces filet mignon, thinly sliced (omit meat and next 4 ingredients for vegetarian version)
    • ½ teaspoon minced garlic
    • 2 teaspoons soy sauce
    • 1 teaspoon mirin
    • 1 teaspoon sesame oil
    • ½ cup kimchi, thinly sliced
    • 1 tablespoon kimchi juice
    • Sauce:
    • 2 tablespoons soy sauce
    • 1 teaspoon sesame oil
    • ½ teaspoon gochugaru (Korean red pepper flakes)
    • 1 teaspoon roasted sesame seeds
    • ½ teaspoon garlic, minced
    • ½ teaspoon sugar
    • 2 green onions, finely chopped
    • 2 sunny-side up eggs (optional)
    Preparation
    1. Rinse rice and drain well. Place in rice cooker. Add water to 1 cup line minus 1 tablespoon.
    2. Marinate meat (if using) with garlic, soy sauce, mirin and sesame oil. Meanwhile, heat a small skillet with a 1½ teaspoons of canola oil over medium high heat. Stir fry kimchi for 2 minutes, adding some juice from the kimchi to intensify the flavor. Remove to a small plate. Add meat (if using) to the same pan and stir fry for a minute or two, just until barely cooked through.
    3. Spread soy bean sprouts over the the rice, followed by the kimchi, and meat. Start the rice cooker (do not use quick cooking option).
    4. While the rice is cooking, mix all of the sauce ingredients together in a small bowl. When the rice is nearly done, cook your sunny-side up eggs. When the rice timer goes off, gently fluff the rice distributing the bean sprouts, kimchi and meat. Serve in bowls with sauce drizzled over the rice and top with sunny-side up eggs.


    Follow

    Get every new post delivered to your Inbox

    Join other followers: