Browsing Category

Veggies

Beans, Dinner, Lactose Free, Recipes, Side Dishes, Vegan, Vegetarian, Veggies

Roasted Green Beans with Caper Butter

March 1, 2023

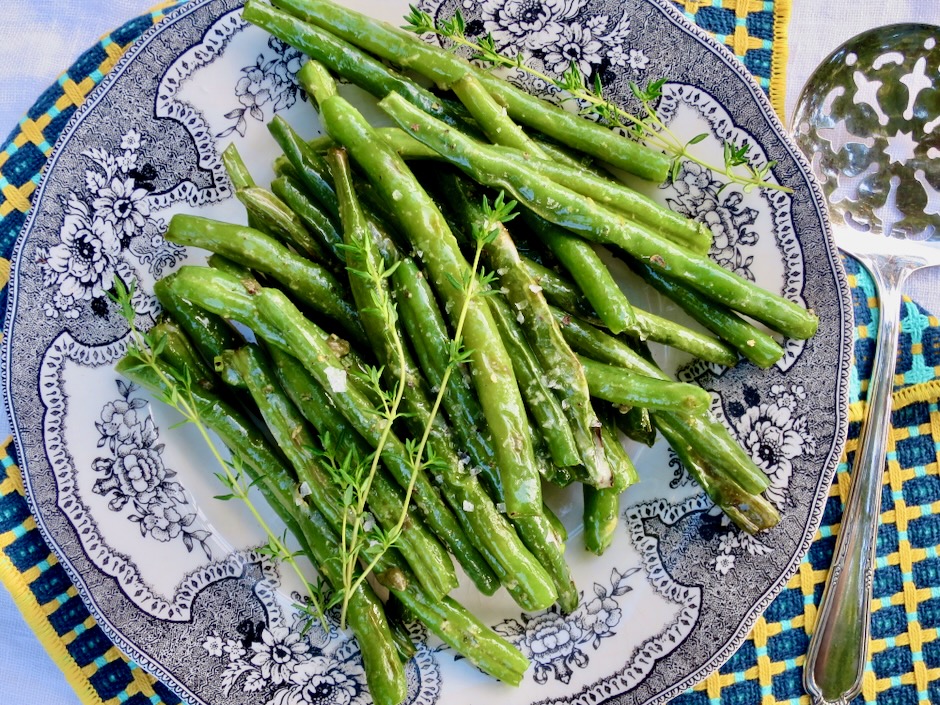
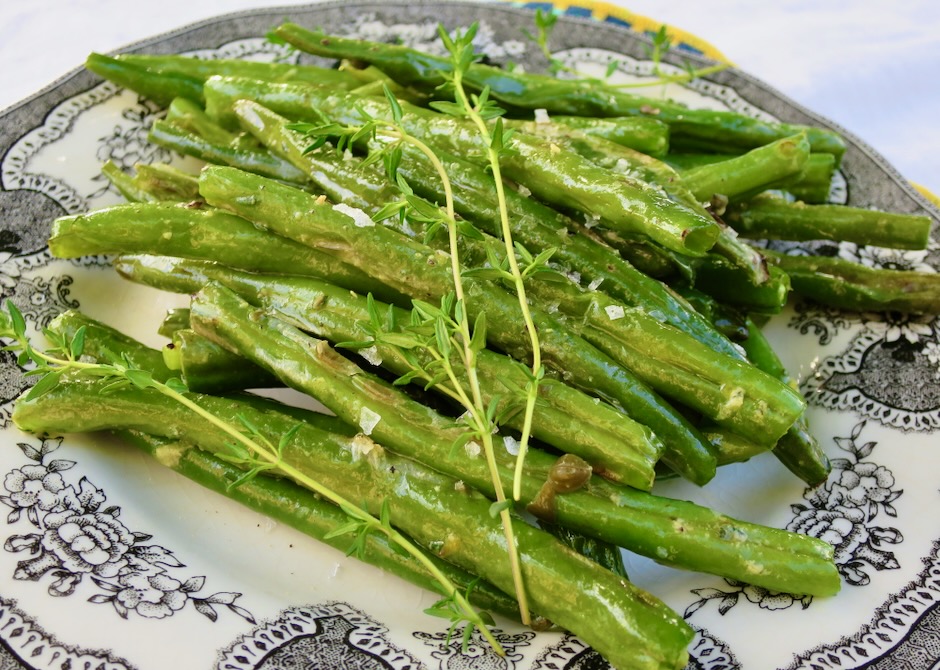
Sometimes just a few simple ingredients can turn a dish into a delectable treat, as is the case with these roasted green beans. Though there’s nothing fancy about this side dish, it reminds me of something I might find at a fine restaurant. I love how uncomplicated this recipe is. You can have it ready in less than 30 minutes.

Capers are the definition of a flavor bomb. Briny, bold, salty and tart they add umami to the butter and other ingredients. The lemon zest adds a bright flavor and the fresh thyme (don’t leave it out!) is just delightful with the roasted beans. This basic compound butter can be whisked up in a jiffy.

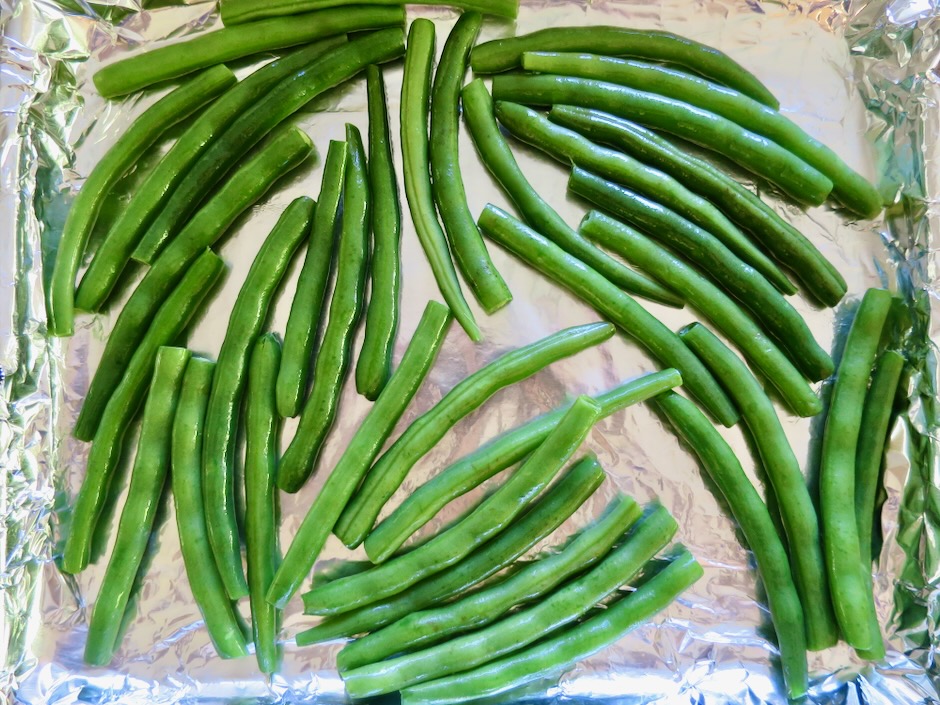
The green beans are quickly roasted at high heat, 450 degrees for just about 12 minutes, or until slightly charred in areas.

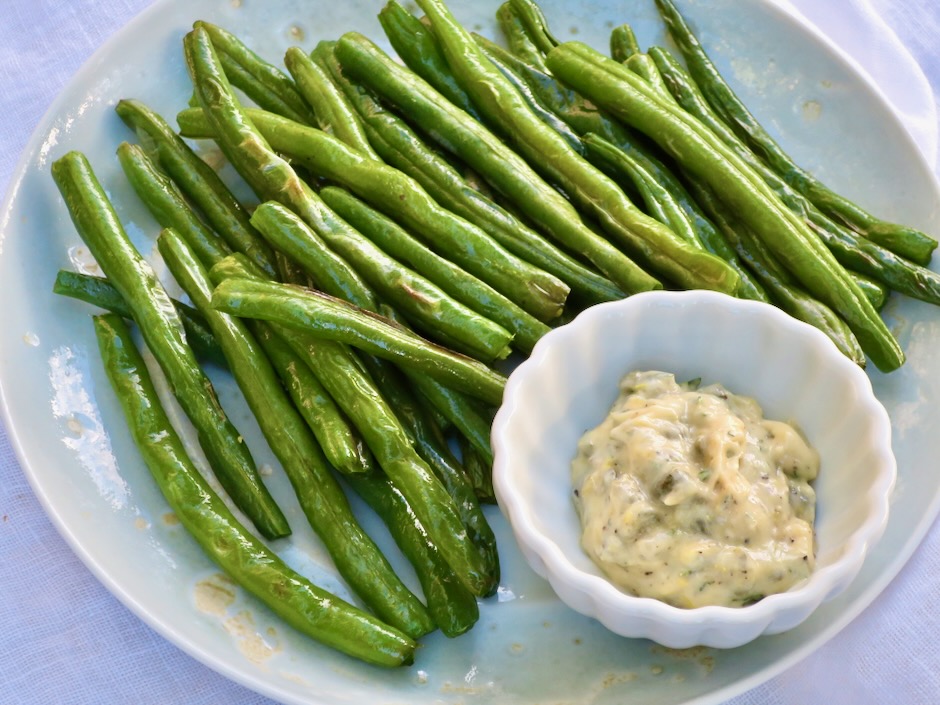
Once roasted, the beans get tossed with the caper butter before being served.

Roasted Green Beans with Caper Butter

Recipe by Kiyo
Servings

4

servings

Ingredients

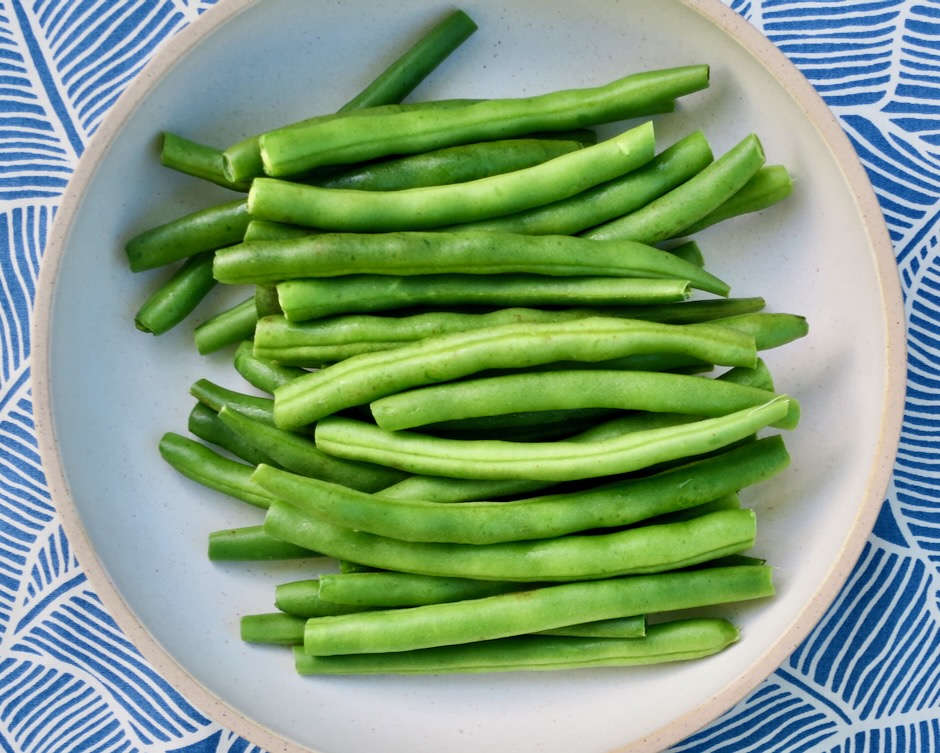
  • 1 pound fresh green beans, ends trimmed

  • 2 teaspoons olive oil

  • kosher salt

  • freshly ground black pepper

  • 2 tablespoons Earth Balance Buttery Sticks for lactose free version (or regular butter), softened

  • 1 1/2 teaspoons Dijon style mustard

  • 1 1/2 teaspoons chopped fresh thyme (not packed)

  • 2 teaspoons capers, drained and chopped

  • 1/2 teaspoon lemon zest (add additional 1/2 teaspoon for zestier flavor)

Directions

  • Preheat oven to 450 degrees. Line a sheet pan with foil for easy clean up.
  • Toss green beans with olive oil. Sprinkle with kosher salt and freshly ground pepper.
  • Roast green beans (in one layer) for 10-12 minutes or until lightly charred in areas, stirring once. They will soften a bit more once they are out of the oven.
  • Meanwhile, in a small bowl, stir together Buttery Sticks (or regular butter), mustard, thyme, capers, lemon zest and a dash of salt. Toss roasted green beans with the butter and serve immediately.
Dinner, Kimchi, Korean, Lactose Free, Recipes, Soups, Vegetarian, Veggies

Kimchi Noodle Soup with Wilted Greens

December 30, 2022

Is there anything more delicious than a bowl of spicy kimchi noodle soup to warm you up? A riff on the beloved Korean dish jjigae (kimchi stew), this easy soup is quick to make and calls for just a handful of inexpensive ingredients. This kimchi soup is warm, spicy, hearty and has lots of umami flavor. Once you take your first bite, you won’t be able to stop until your bowl is completely empty.

I recently made a big jar of kimchi that was ready to be eaten and wanted to try it in a new recipe. I’ve made kimchi fried rice, cheesy kimchi noodles, and kimchi pancakes , but never kimchi soup. I found this recipe on one of my favorite sites, New York Times Cooking.

You’ll need just a few ingredients besides the kimchi. If you don’t have homemade kimchi, use your favorite store bought brand.

I am particularly fond of Sun Noodle’s fresh udon which are thick, chewy, and oh so delicious. They elevate any dish that calls for udon noodles. Here on Maui they are available at Island Grocery in Kahului so if you’re in the area stop by to pick up a package. Otherwise, feel free to use another brand of fresh or dried udon.

This recipe is pretty straight forward. Once you have all of your ingredients ready to go, the scallions, ginger and garlic are briefly cooked until fragrant. The kimchi and kimchi juice are then added to the pan followed by the stock, soy sauce and greens. Once the greens are tender, the soup is ladled over the udon noodles and garnished with more scallions and sesame seeds. Extra toppings such as a boiled egg and fresh sprigs of cilantro (if you are a fan) and crunchy garlic chili crunch for added heat transform this into a truly memorable bowl of soup.

Kimchi Noodle Soup with Wilted Greens

Recipe by Kiyo
Servings

2

servings

Adapted from New York Times Cooking

Ingredients

  • 6 ounces udon (fresh recommended)

  • 1 tablespoon neutral oil

  • 4 scallions thinly sliced, plus more for garnish

  • 1 (1 1/2-inch) piece fresh ginger, about 1 1/2 tablespoons finely chopped

  • 1 large garlic clove, finely chopped

  • 1/2 cup roughly chopped kimchi, plus 3 tablespoons kimchi juice

  • 2 1/2 cups chicken stock (or vegetable stock for vegetarian version)

  • 2 tablespoons less sodium soy sauce (Kikkoman recommended)

  • 2 cups roughly chopped baby bok choy (substitute with kale or spinach)

  • White roasted sesame seeds, boiled eggs, chili crunch, and roughly chopped cilantro (optional)

Directions

  • Bring a large pot of water to a boil and cook udon according to package instructions. Drain and distribute evenly among two serving bowls.
  • In the same pot used for boiling udon, heat 1 tablespoon neutral oil over medium heat. Add the scallions, ginger, and garlic, and cook until they begin to soften and the garlic is fragrant, about 2-3 minutes. Stir in kimchi and kimchi juice and cook for 1 minute.
  • Add the stock and soy sauce and stir together to combine. Bring to a simmer and stir in your greens. If using baby bok choy, stir in the chopped stems and let simmer for a minute before adding the greens. Allow everything to simmer until the greens are tender and the flavors come together, about 5 minutes. Taste and adjust with salt if needed.
  • Ladle soup over the udon and garnish with scallions and other toppings to taste.

Notes

  • Using baby bok choy adds a nice crisp texture to the soup, however, feel free to use other greens such as spinach or kale.
  • Place the cooked noodles in a colander and run hot water over them to briefly warm them up before adding the soup to the bowl.
Dinner, Lactose Free, Recipes, Salad, Side Dishes, Vegan, Vegetarian, Veggies

Arugula, Fennel & Blood Orange Salad

November 22, 2022

Peppery arugula, anise flavored fennel, and sweet blood oranges make a delicious and gorgeous salad. The champagne vinegar, Dijon and honey vinaigrette compliments the bold flavor of arugula and brings out the sweetness of the fennel and oranges. You can find blood oranges during the months of December through April. On Maui, I was lucky to find them at Whole Foods. They are worth the drive no matter where you live!

Blood oranges are much more petite than navel oranges. They are super sweet and the colors are stunning.

I usually don’t pay much attention to produce labels. But in this case, it caught my eye. Thank you Australia for growing these delightful “Dracula” blood oranges….

Fennel has a distinctive flavor that can be described as anise-like, sweet and perfumy. The texture of raw fennel is crispy, similar to celery. If you haven’t yet tasted fennel, give it a try. You’ll be surprised how delicious it is whether you eat it raw in salads like this one, or cooked as in this dish, which mellows the flavor a bit. To make the fennel slices extra crisp, soak in an ice water bath for about 10 minutes before adding to the salad.

This beautiful salad deserves to be a feature on your seasonal menu. The three main ingredients are flawless together. It can be served alongside a main dish, or as the main dish itself along with yogurt flatbread, baked feta and roasted tomatoes. If you can’t find blood oranges, feel free to use regular oranges cut into segments.

Arugula, Fennel & Blood Orange Salad

Recipe by Kiyo
Servings

4

servings

Ingredients

  • 6 ounces (about 8 cups lightly packed) arugula

  • 1 pound (about 3 medium-sized) blood oranges, peeled and sliced into rounds

  • 8 ounces (1 large bulb) fennel, cut in half lengthwise, core removed. Cut the bulb halves crosswise into very thin slices (for extra crispy texture, soak slices in ice water bath for 10 minutes)

  • 2 teaspoons Dijon mustard

  • 1 1/2 teaspoons honey

  • 1/4 cup champagne vinegar

  • 2 tablespoons fresh orange juice

  • 1/4 cup extra virgin olive oil

  • kosher salt and freshly ground black pepper

Directions

  • Place the arugula in a large bowl. Scatter fennel slices into the bowl. Set aside
  • Peel and slice the blood oranges. Set aside.
  • In a small bowl, whisk together the mustard and honey. Whisk in the vinegar and orange juice. Once the ingredients are incorporated, slowly whisk in the olive oil. Add salt and pepper to taste.
  • Just before serving, spoon a generous amount of the dressing over the arugula and fennel. Toss well so the dressing is nicely distributed. Add kosher salt to taste and toss again. Transfer to a large, low-sided platter. Place blood orange slices on and around the salad. Drizzle a bit of dressing on the orange slices. Finish with a few grinds of black pepper. Serve immediately.

Notes

  • The dressing can be made a day in advance, bring to room temperature before using.
Appetizers, Gardening, Italian, Lactose Free, Recipes, Side Dishes, Sous Vide, Vegan, Vegetarian, Veggies

Sous Vide Giardiniera

November 5, 2022

Giardiniera (Italian for pickled vegetables from the garden) are a delightful treat to serve alongside sandwiches or as part of an appetizer plate with salami, cheese and crackers. You will find it difficult to stop once you take a bite of these gorgeously colored, crispy vegetables. The sous vide method ensures the vegetables retain their crisp texture.

It all started with our homegrown poblano and anaheim peppers. I used some of the peppers for chile verde but we still had quite a few growing on the plants so the idea of pickling them came to mind.

You’ll find that cauliflower, carrots, peppers (hot or mild), celery and onions are most commonly used in giardiniera. However, you can also use green beans, fennel, olives, or any other type of vegetable that will hold its shape well.

The seasoning for the brine is quite simple. Fresh garlic, bay leaf, whole coriander seeds, red pepper flakes, dried oregano, calcium chloride (for keeping pickles crisp), and black peppercorns.

The seasonings are divided equally into 4 pint canning jars.

The jars are packed with the vegetable assortment before the brine is added. They are so colorful!

Hot brine is added to the jars before the sous vide process begins.

The giardiniera is canned via the sous vide pasteurization process for 30 minutes at 190F.

The finished product turned out to be one of our new favorite snacks. The assortment of vibrant colors and various shapes of the vegetables makes a beautiful jar of homemade pickles.

Sous Vide Giardiniera

Recipe by Kiyo
Servings

4

servings

Special Equipment: Sous Vide Precision Cooker (we use Joule), 4 1-Pint Canning Jars, Canning Pot
Recipe adapted from America’s Test Kitchen

Ingredients

  • Vegetables
  • 1 head cauliflower (about 1 3/4 pounds, 1 pound trimmed) cut into bite-sized pieces

  • 1 large carrot (6 ounces), thinly sliced on the diagonal

  • 1 red onion (10 ounces), peeled and cut into thick wedges

  • 10 ounces poblano or anaheim peppers red and green preferred, cut into short strips (substitute with bell peppers for very mild flavor or jalapeño peppers for spicy version or a combination)

  • Seasonings per jar
  • 1/4 teaspoon black peppercorns

  • 1/4 teaspoon whole coriander seeds

  • 1/4 piece bay leaf (from one whole bay leaf)

  • 1/8 teaspoon dried oregano

  • 1/4 teaspoon chili pepper flakes (optional depending on pepper heat)

  • 1/8 teaspoon calcium chloride (optional but recommended for crispness)

  • 1 medium garlic clove, thinly sliced

  • Brine
  • 2 1/2 cups distilled white vinegar

  • 2 1/2 filtered water

  • 2 tablespoons pickling salt (substitute kosher salt 2 tablespoons + 1 1/2 teaspoons, do not use salt that has additives)

  • 3 tablespoons granulated sugar

  • dash of turmeric

Directions

  • Cut vegetables as described above, set aside.
  • Wash and dry 4 pint sized canning jars. Place seasonings in each jar. Begin adding vegetables into each jar, pressing down firmly leaving 3/4-inch headspace. Set aside.
  • Fill canning pot with hot water to cover jars by at least 1-inch. Place pot on stove and heat to about 190F, checking with a digital thermometer. This is optional but gives you a head start to heating up the large pot of water. Once up to temperature turn off stove burner. Connect sous vide device to the pot and set temperature to 190F.
  • Meanwhile, in a medium saucepan, combine brine ingredients. Bring to a boil over medium-high heat, stirring until salt and sugar has dissolved. Pour the hot brine over the vegetables, leaving 1/2-inch headspace from the rim of the jar. Add lids and screw on rings until finger tight. Do not over tighten. Place jars in canner and set timer for 30 minutes when water temperature is 190F.
  • Once 30 minutes has passed, turn off sous vide device and let jars sit in the water for 5 more minutes. Remove jars to a cooling rack and let sit undisturbed for 24 hours.
  • Remove rings, check seals (unsealed jars should be refrigerated). Jars can be stored in your pantry for 1 year.
Appetizers, Dinner, Japanese, Lactose Free, Recipes, Side Dishes, Vegan, Vegetarian, Veggies

Kinpira Gobo

September 27, 2022

Kinpira gobo is a traditional Japanese side dish that will enhance any Japanese-style meal. Serve it for breakfast with a bowl of steaming Japanese rice, pack it in a bento box with musubi for lunch, or serve it for dinner along with tofu for a delicious vegetarian meal.

If you’re not familiar with gobo (burdock root) you might not even take notice of it. Gobo is rather homely looking, however, don’t let that stop you from picking up a few pieces to take home. Once it has been cleaned and sliced thinly, its potential is revealed and you are on your way to a truly delicious meal.

Here on Maui gobo can be found at Foodland Kahului, Island Grocery Kahului, TJ’s Wailuku, and Times market in Kihei. Look for slender roots about 1-inch in diameter. These will be less fibrous and tough than the thicker pieces. Sometimes it can be hit or miss. Check the condition of the gobo. It should be firm like a carrot. If it’s not, then try again the following week or ask your grocer when they expect a new delivery.

Have a bowl of cool water ready when slicing the gobo. Burdock oxidizes quickly and the water helps to keep it from turning gray. The water also reduces some of the pungent flavor of the gobo. Change the water once or twice as it becomes darker. When all of the gobo has been sliced, drain in a colander and transfer to a clean dish towel or paper towels and pat dry. You want to avoid water hitting the hot oil when you begin to fry the gobo.

A short list of sauce ingredients makes this an easy dish to prepare. The Shichimi Togarashi is optional. I use it to add a bit of kick to the finished dish. I used instant dashi but using water is fine since you only need a small amount.

Start by cooking the gobo for a few minutes before adding the julienned carrots. Taste a few pieces to see if the texture is right. It should be firm yet cooked enough so that it isn’t tough and difficult to chew. Keep in mind that it will continue to cook a few more minutes when the carrots are added.

Once the gobo and carrots are the right texture, add the sauce and cook until the liquid is nearly gone.

Transfer kinpira gobo to a serving bowl, sprinkle with roasted sesame seeds and shichimi togarashi for a spicy kick.

Though kinpira gobo is considered a side dish, it can become a main dish simply served with a bowl of rice. The flavor is so delicious and the crunchy texture is delightful.

Kinpira Gobo

Recipe by Kiyo

Adapted from Japanese Cooking 101

Ingredients

  • 9 ounces gobo (burdock root)

  • 4 1/2 ounces carrot

  • 1 tablespoon canola oil

  • 1/4 cup prepared instant dashi or water (vegetarian version)

  • 2 tablespoons + 1 teaspoon soy sauce

  • 1 tablespoon + 1 teaspoon granulated sugar

  • 1 tablespoon sake

  • 1 tablespoon mirin

  • roasted sesame seeds

  • shichimi togarashi (optional)

Directions

  • Rinse the gobo and remove a light layer of the skin with the back of a knife. Avoid using a peeler as this will remove too much of the edible part of the root.
  • Thinly slice gobo on a sharp diagonal (if cut too thick the gobo will be difficult to chew). Stack a few pieces together and slice thinly into 2-inch strips. Place strips in water as you slice them. Change water once or twice as it darkens.
  • Julienne carrot into similar size as the gobo. Set aside.
  • In a medium bowl, mix together the dashi or water, soy sauce, sugar, sake and mirin. Set aside.
  • Heat a scant tablespoon of canola oil over medium heat. Once the oil is hot, add the gobo (be sure it is dry so the oil does not splatter). Stir fry for a few 2-3 minutes adjusting the heat to medium-high if needed. Gobo is very fibrous and should be stir fried until it is just tender and crispy but not tough. Taste a few pieces to ensure you have the correct texture. Add julienned carrots to the pan and stir fry with the gobo until al dente, about 2 minutes.
  • Turn heat down to medium if using a higher heat to stir fry the vegetables. Pour in sauce and continue to stir until the liquid is nearly gone (the pan should not be dry).
  • Transfer kinpira gobo to a serving bowl. Sprinkle roasted sesame seeds over the top. Serve with shichimi togarashi for a spicy kick.
Dinner, Lactose Free, Recipes, Salad, Summertime Meal, Vegetarian, Veggies

Wedge Salad with Sour Cream Dressing

September 11, 2022

There’s nothing like biting into a crispy iceberg lettuce salad. Cutting it into wedges intensifies that desirable crisp factor. This wedge salad with sour cream dressing reminds me of summer, however, by all means make it all year long.

When shopping for iceberg lettuce I try to select one that is not too heavy. My thought is that a medium to light weight head of iceberg has more of those delightful wavy interiors between each leaf and that means extra crispy. If the lettuce is heavy the leaves tend to be very compact (like cabbage) and I find that indicates denser lettuce with less crunch.

Avocado adds a bit of richness to this wedge salad and radishes add color and more crunch. Slicing the radishes in thin rounds and soaking them in an ice water bath transforms them into radish chips. The dressing for this salad can be made in a jiffy. You can even make it a day in advance if you prefer. Bon appetit!

Wedge Salad with Sour Cream Dressing

Recipe by Kiyo
Servings

4

servings

Adapted from Bon Appetit magazine

Ingredients

  • 3/4 cup sour cream (I use Green Valley lactose free)

  • 1/4 cup mayonnaise

  • 1 small garlic clove, finely grated (microplane works great)

  • 2 teaspoons finely grated lemon zest

  • 3 tablespoons fresh lemon juice

  • 3/4 teaspoon kosher salt

  • 1/2 teaspoon freshly ground black pepper + more for serving

  • 1 head iceberg lettuce (about 1 pound)

  • 2 small avocados, halved and diced (large dice)

  • 2 medium radishes, sliced very thin, chilled in ice water bath for 5 minutes (optional)

  • 2 tablespoons minced chives

Directions

  • Whisk together sour cream, mayonnaise, garlic, lemon zest, lemon juice, salt and pepper in a medium bowl. Add more salt and pepper to taste. Dressing can be made 1 day ahead, cover and chill.
  • Trim root end of lettuce; discard any wilted outer leaves. Cut into quarters lengthwise, then cut each quarter into 3-inch pieces being careful not to separate the wedges into leaves. Transfer to a large platter. Tuck avocado pieces and radish slices if using, among the lettuce.
  • Spoon half of the dressing over the salad and top with chives; season with pepper. Serve with remaining dressing alongside.
Follow

Get every new post delivered to your Inbox

Join other followers: