


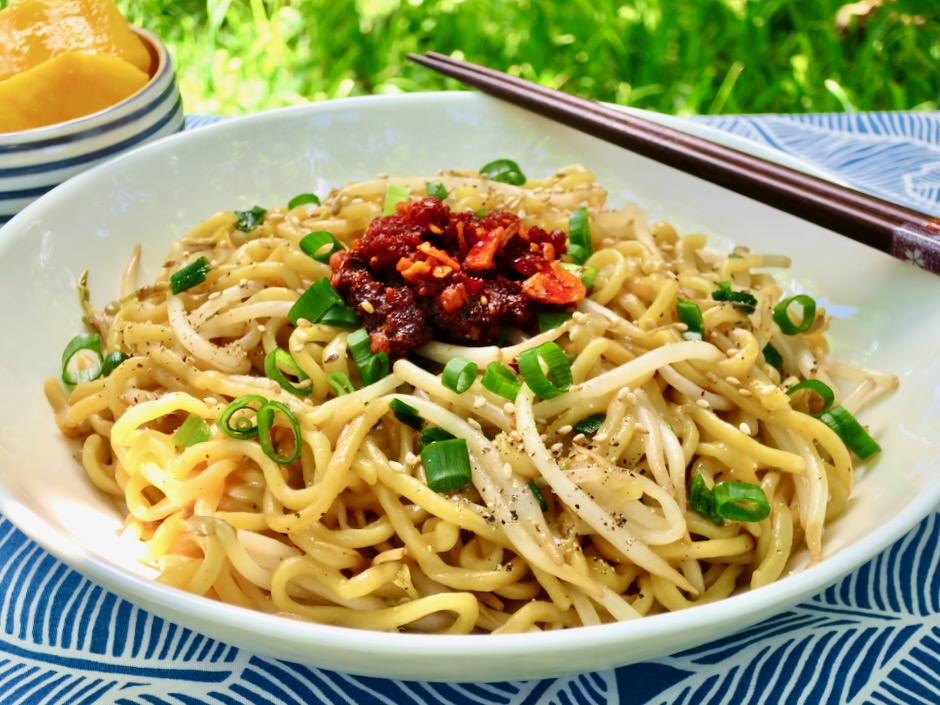
Here on Maui (and beyond), Sam Sato’s is known for their wide variety of local-style menu items (plate lunches). But they are most famous for their dry mein noodles. A bowl of well seasoned thick noodles is particularly delicious when dressed with hot mustard. While dining in at Sam Sato’s is the ideal way to enjoy this unique dish, it’s not always convenient when you have a craving. So with just a few basic ingredients why not whip up a bowl of dry mein at home?
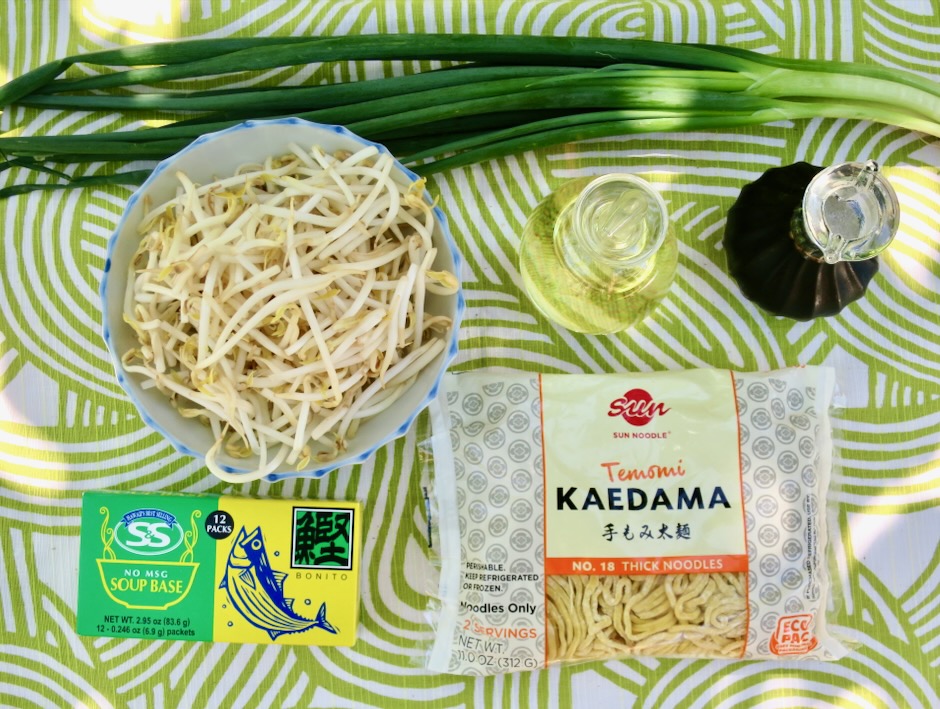
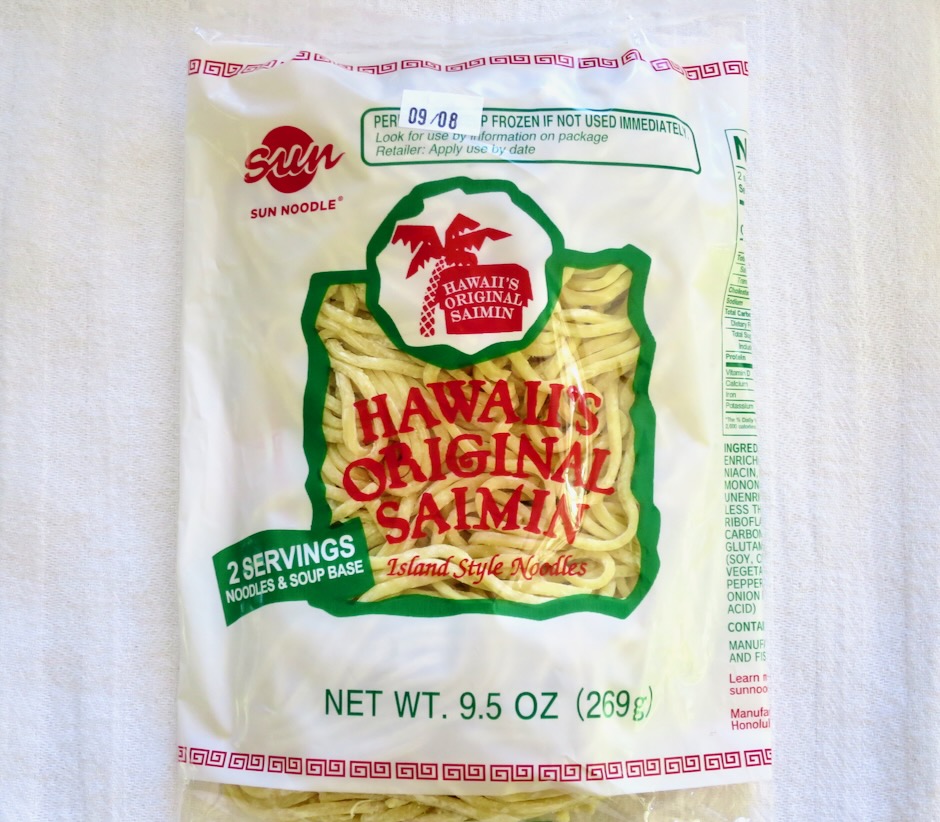
When I’m on Oahu I make a stop at Nijiya, a Japanese market conveniently located at Ala Moana Center. Their shelves are stocked with all kinds of goodies. They sell Sun Noodle’s Kaedama #18 thick noodles so I usually bring a few packages back home with me. I haven’t seen them on Maui, but a good substitute would be Sun Noodle’s saimin noodles which are sold in many markets here in Hawaii (Foodland, Safeway, Times, Island Grocery) or any other fresh, thick ramen.
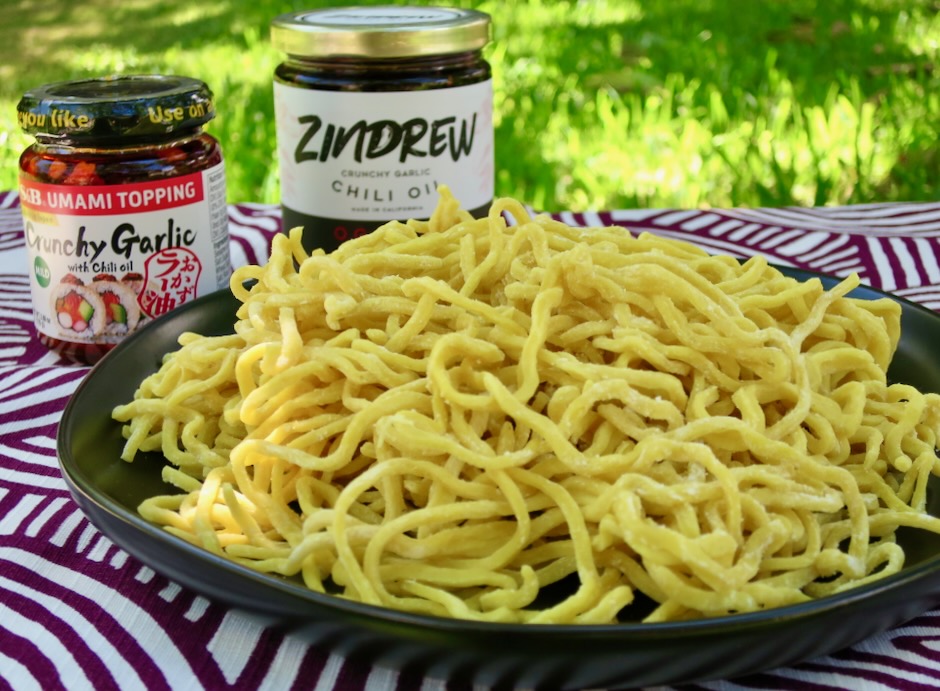
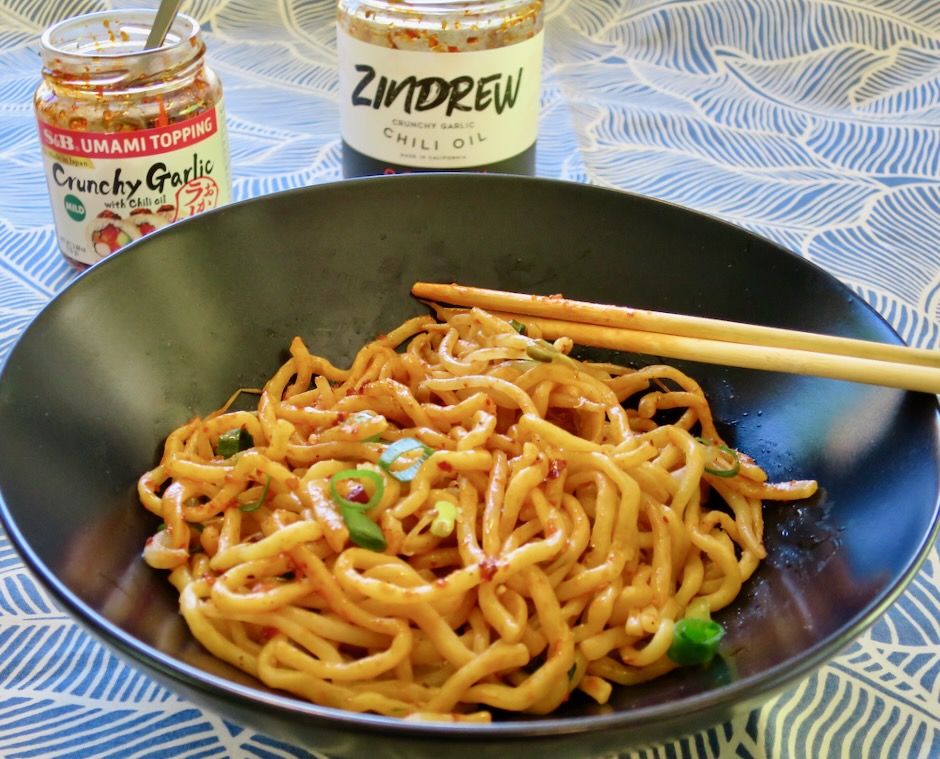
I love a spicy kick when I eat ramen. So adding a dollop of chili crunch on my noodles is a must. My favorite at the moment is Zindrew Crunchy Garlic Chili Oil. It has the perfect heat level for my taste and the jar has lots of crunchy garlic pieces. Very yummy. They also offer a spicier version if that’s your thing. Another option for those who prefer less heat is S&B Crunchy Garlic in Chili Oil. This is a mild chili oil with large pieces of very crispy garlic. As they say on the label, Umami Topping! It is easily found here in Hawaii at Longs, Safeway, Foodland and Times. If you are unable to find it at your local market, it is available online. Other times I use hot mustard powder mixed with a bit of water and soy sauce. This is the typical accompaniment offered at Sam Sato’s.
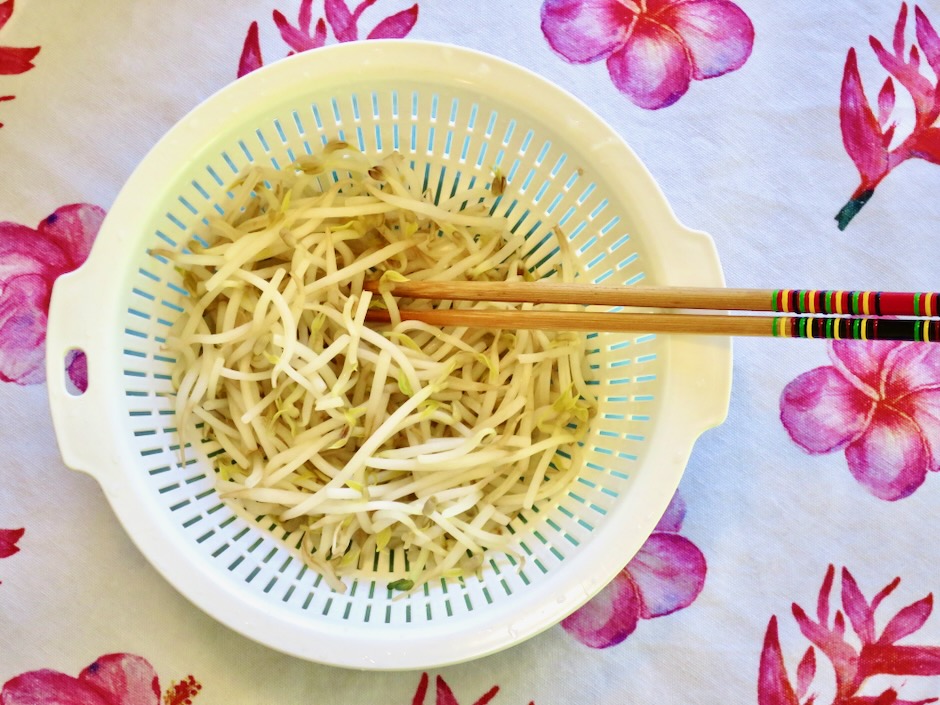
I use a good amount of bean sprouts (6 ounces) in this dish. They add a welcoming crispy texture when mixed in with the fresh ramen.
Making your own dry mein at home allows you to control the amount of oil and salt you use.
If you can’t make up your mind about which chili crunch to use, go ahead and use both as I sometimes do. A little heat and lots of crunchy garlic = noodle bliss.
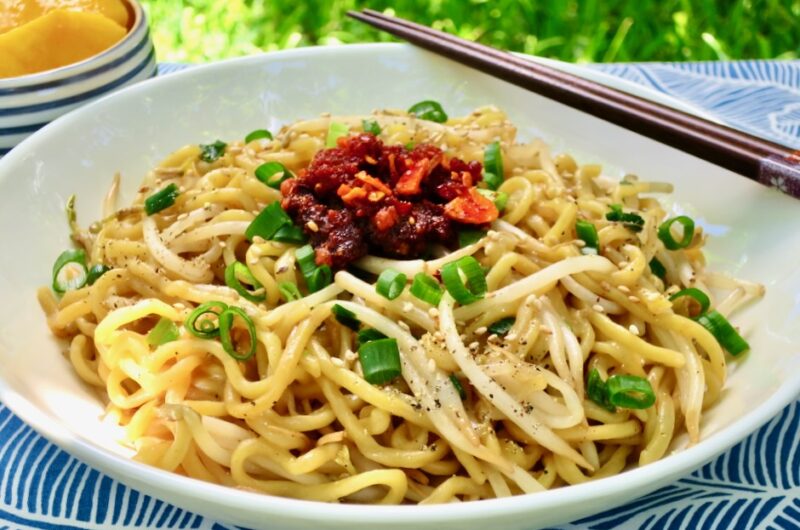
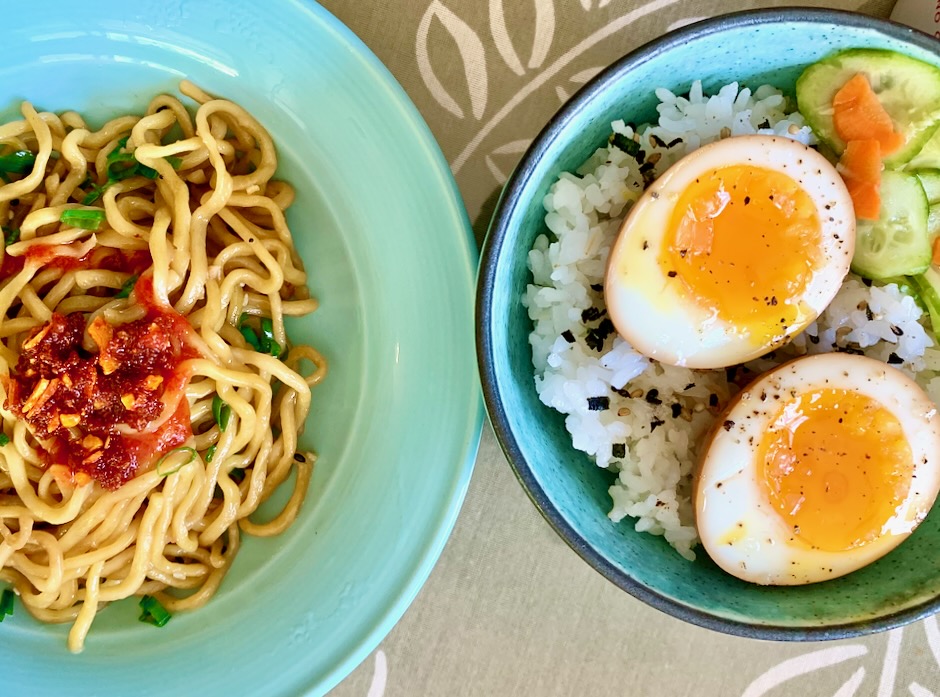
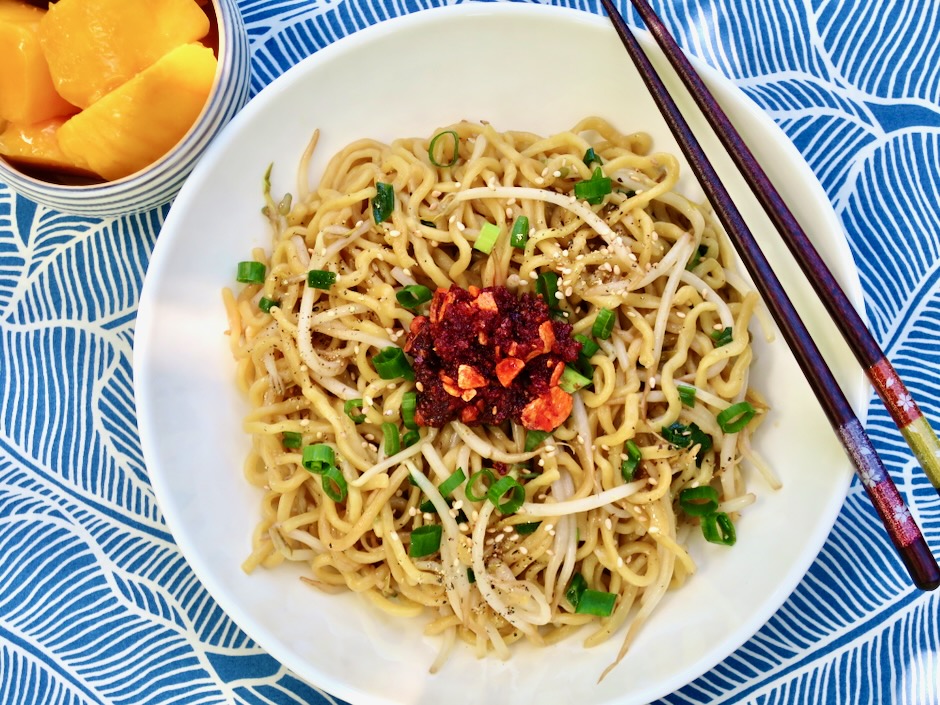
Dry Mein with Crunchy Bean Sprouts & Chili Crisp
2
servingsIngredients
9 – 11 ounces fresh thick ramen noodles
6 ounces (about 3 cups) bean sprouts, rinsed
1/3 cup finely chopped green onions (reserve 2 tablespoons for serving)
1/2 teaspoon instant soup base (such as S&S)
2 1/2 teaspoons soy sauce
salt and pepper
2-3 teaspoons canola or vegetable oil
hot mustard, chili crisp and/or crunchy garlic chili oil for serving (optional but recommend)
Directions
- In a 1-cup measuring cup, combine 1/2 teaspoon instant soup base such as S&S with 1/4 cup warm water. Stir in 2 1/2 teaspoons soy sauce. Set aside.
- Bring a large pot of water to a boil. Add bean sprouts and blanch for 1 minute. Using a spider strainer or large slotted spoon, transfer bean sprouts to a colander to drain then to a bowl. Reserve pot with water for ramen.
- Bring water back to a boil over high heat. Add ramen and cook to al dente, 60 seconds less than package directions. Drain in colander under cool running water to stop the cooking and to remove excess starch. Set aside.
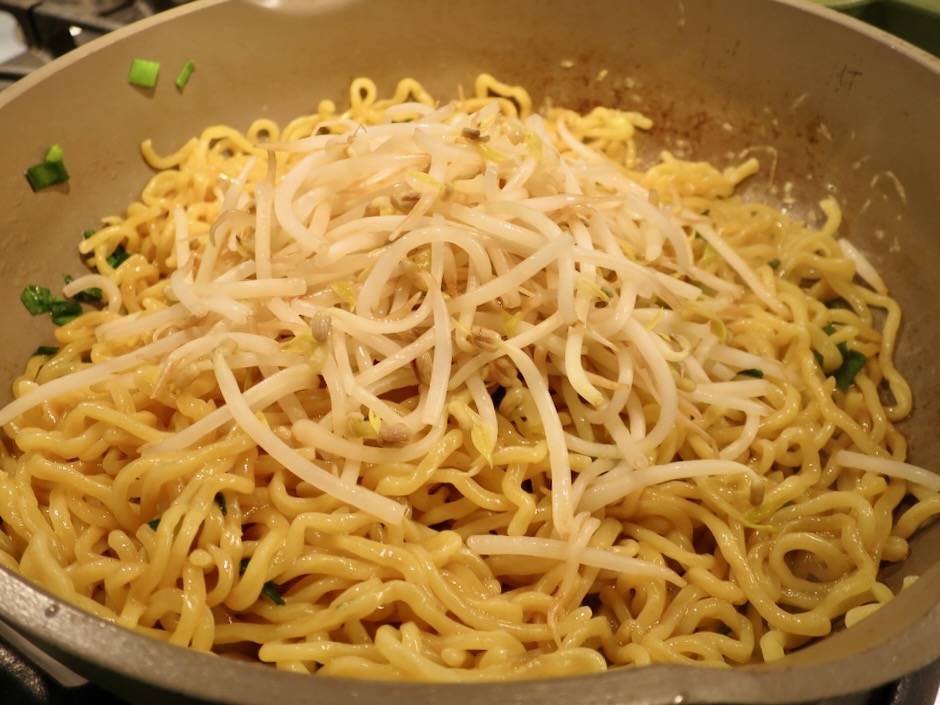
- In large skillet, preferably one with 2-inch sides, heat 2-3 teaspoons oil (depending on the amount of noodles you use). Add green onions, reserving 2 tablespoons for serving. Toss in oil for 20 seconds. Add ramen to the pan and toss with the oil and green onions. Add 3 tablespoons of the soy sauce seasoning, tossing to coat the noodles (use 2 1/2 tablespoons if using less than 11 ounces of ramen). The noodles should be well coated but not saucy (you will not need all of the sauce). Stir in bean sprouts. Allow sauce to evaporate for 30 seconds. Season with salt and pepper to taste. Divide noodles between two bowls. Top with reserved green onions. Serve with hot mustard mixed with soy sauce, chili crisp and/or crunchy garlic in chili oil.