Browsing Category

Beef

Beef, Dinner, Japanese, Lactose Free, Recipes, Sauces

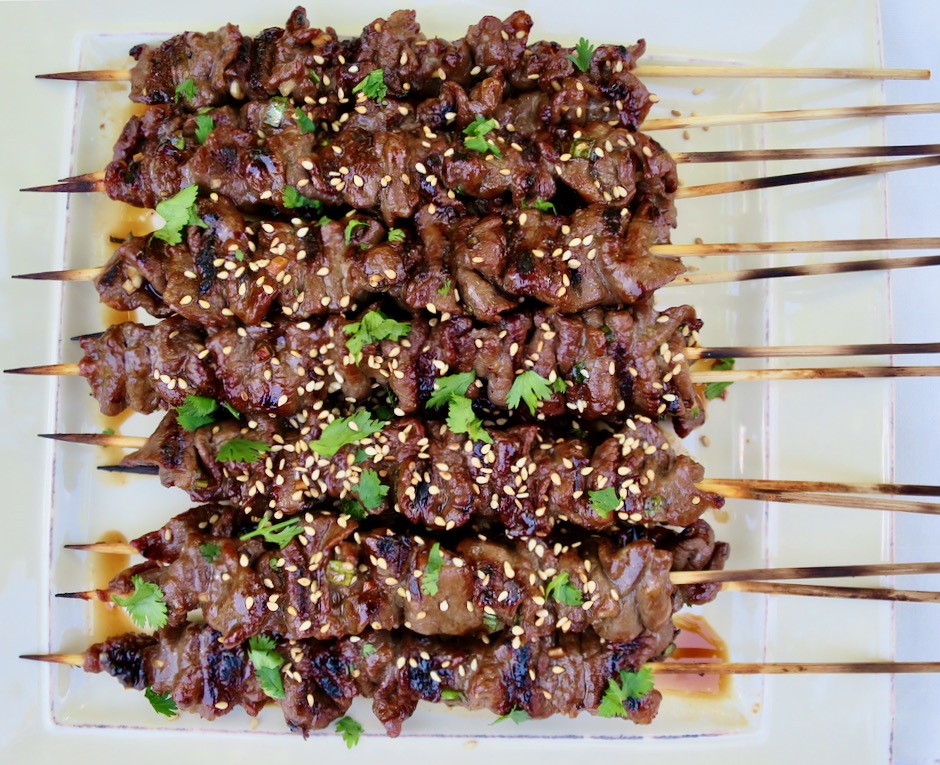
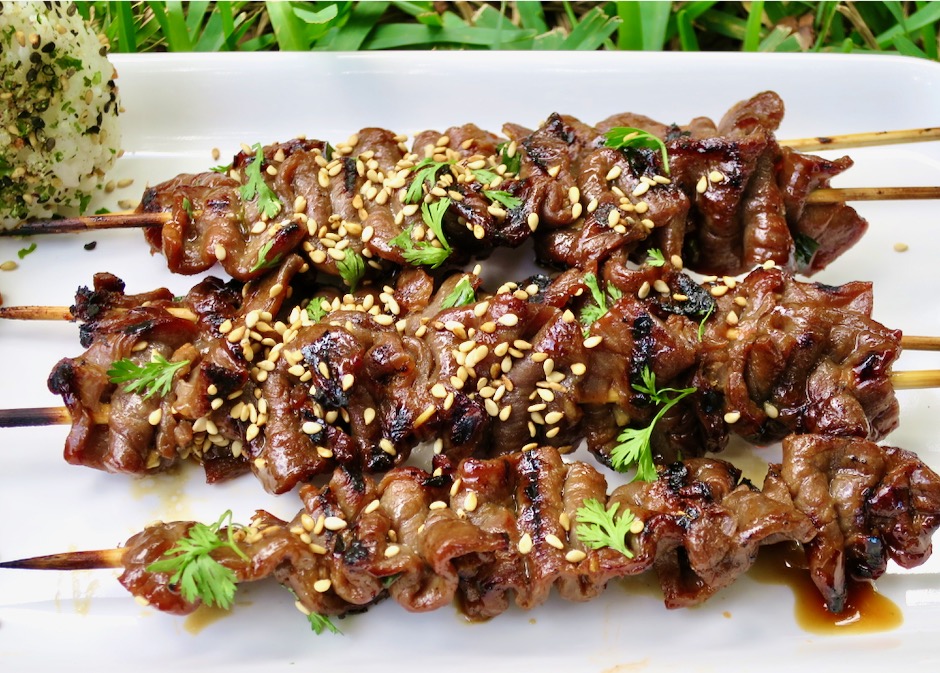
Best Teriyaki Meat Sticks

July 31, 2020

Best Teriyaki Meat Sticks

Over the course of a month or so, I have been on a quest to find the best cut of meat for my teriyaki meat sticks.  I first tried ribeye which turned out to be just fine but not exactly what I was hoping for.  The next time I bought thinly sliced “teriyaki style” meat from my local market.  The thin slices of meat caught my attention but as it turned out, they use round steak which is generally quite tough.  I asked the butcher for his suggestion and tri-tip was his recommendation. Stan kindly offered to slice the meat for me so we made a plan.  I would pick up the meat the following day so he would have the chance to freeze the meat for a bit which makes it much easier to slice in to thin strips.

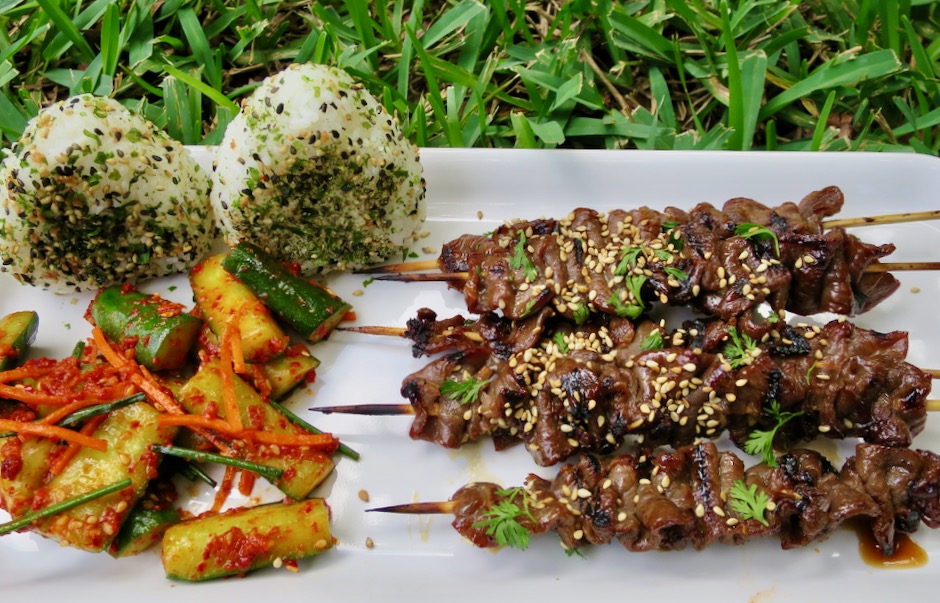
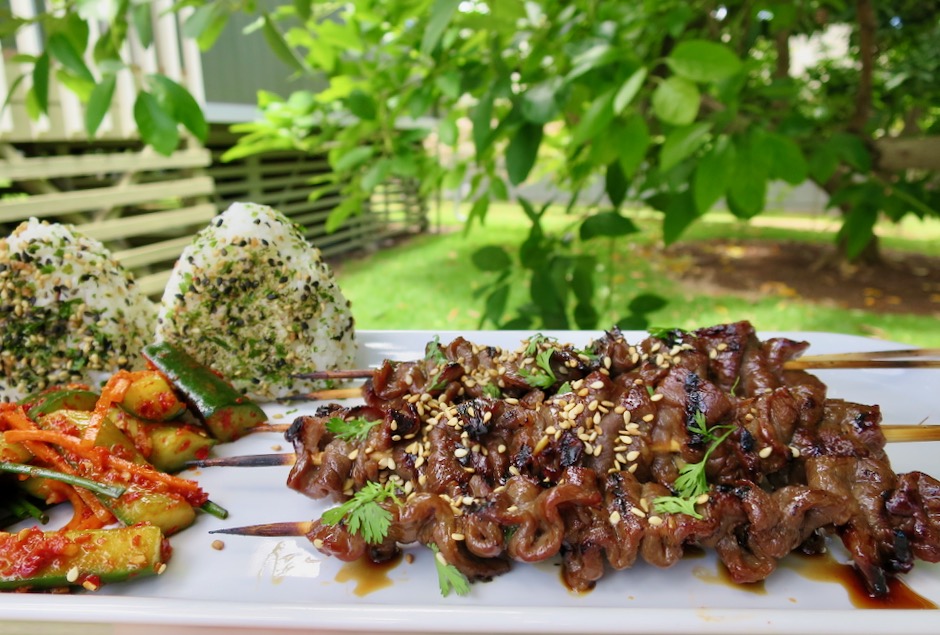
Best Teriyaki Meat Sticks with Oi Kimchi & Onigiri

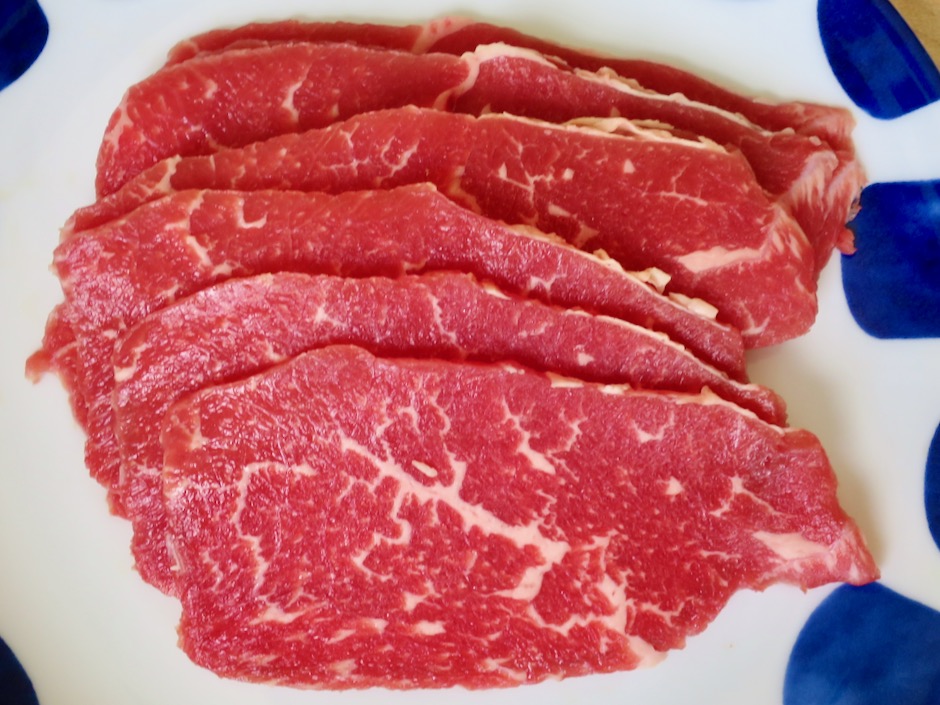
Tri-Tip

Stan was absolutely correct.  The trip-tip was tender and flavorful.  I appreciated that he offered to slice the meat for me which saved me some time.  It’s fairly easy to slice the meat at home once you freeze it for about an hour to firm up.  All you need is a steady hand and a good knife.

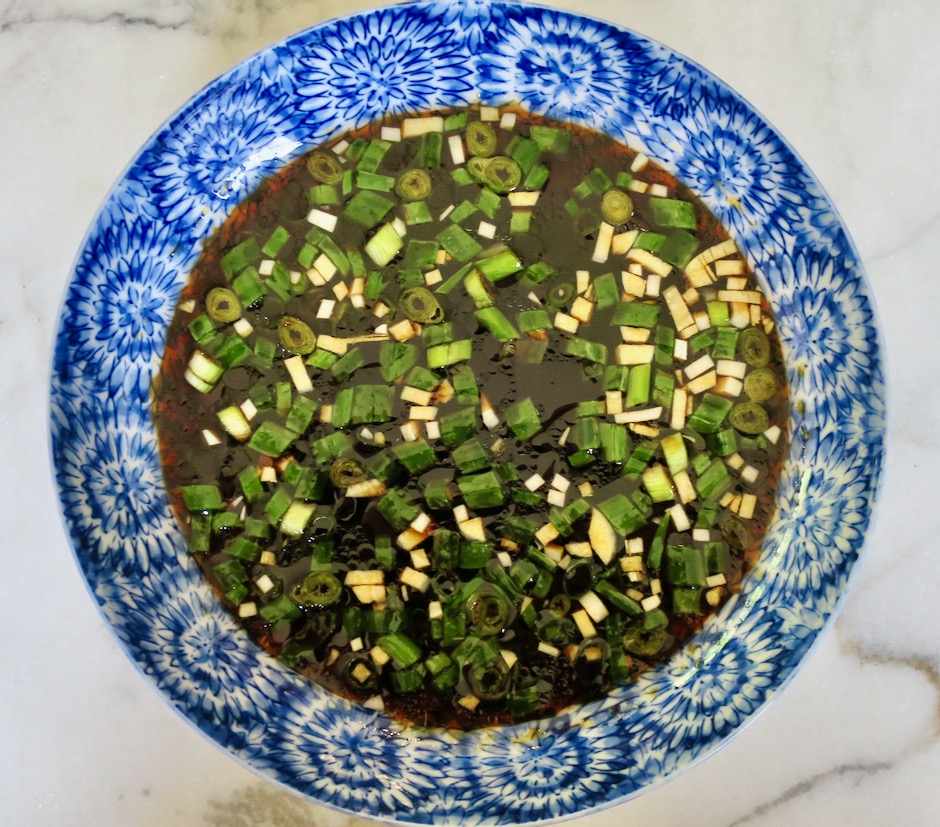
Teriyaki Sauce

The teriyaki sauce smells divine.  The secret ingredient in the sauce is Sherry.  Look for a decent dry or medium Sherry (from Spain=the real deal) if possible.

Medium Sherry

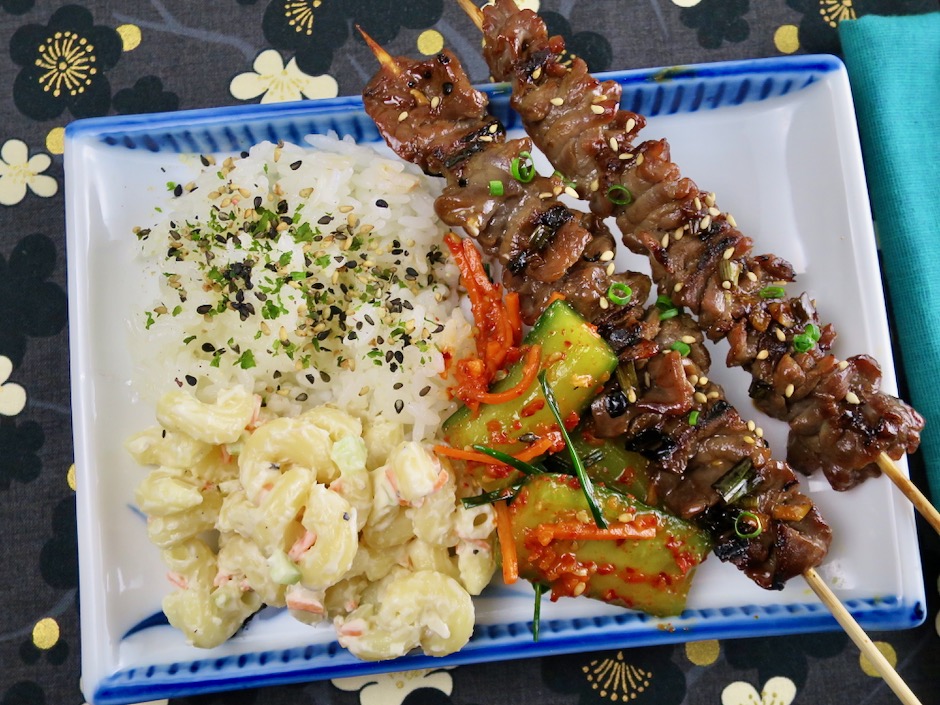
Best Teriyaki Meat Sticks with Oi Kimchi, Mac Salad, Rice

Leftover meat sticks makes a tasty lunch the following day.  I wrap them in foil and heat in the toaster oven for a 5 minutes. Serve with kimchi and mac salad.

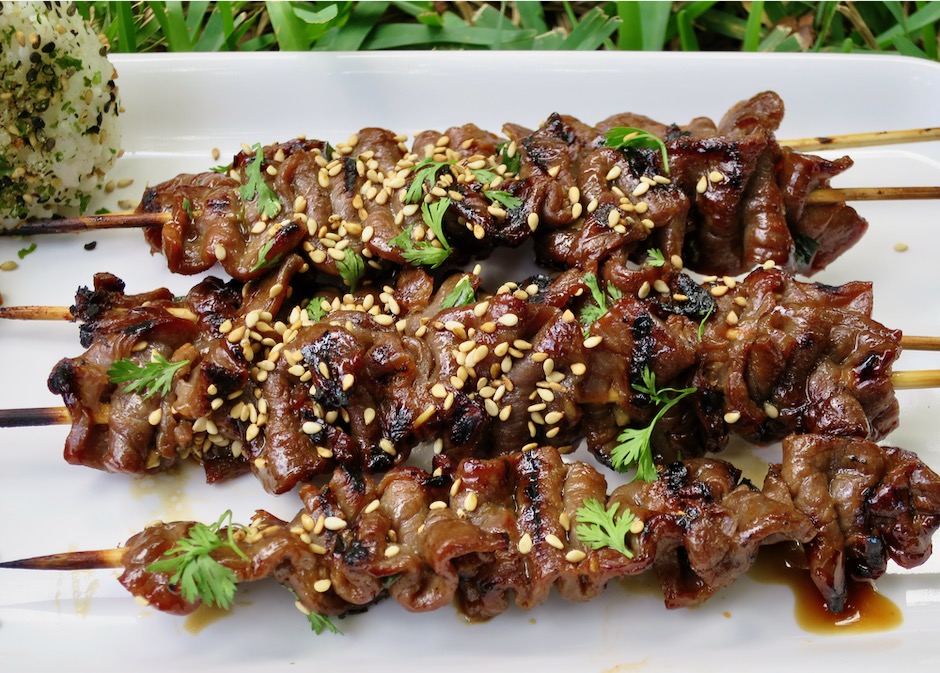
Best Teriyaki Meat Sticks

Best Teriyaki Meat Sticks

Best Teriyaki Meat Sticks
 
Author:
Serves: 14 meat sticks
Ingredients
  • 1 pound tri-tip, sliced into strips that are ⅛-inch thick and 1-inch wide
  • 14 bamboo skewers
  • Teriyaki Sauce
  • ¼ cup granulated sugar
  • ¼ cup + 1 tablespoon soy sauce (Kikkoman recommended)
  • 2 tablespoons sherry (Hartley & Gibson's Amontillado Medium Sherry recommended)
  • 1 tablespoon + 1 teaspoon canola oil
  • 2 medium garlic cloves finely chopped
  • ¼ cup thinly sliced green onions
  • roasted sesame seeds to finish (optional)
  • Note: If you want extra sauce to drizzle over the cooked meat sticks increase recipe by half. Use ½ cup + 3 tablespoons of sauce to marinate meat strips. Reduce the remainder of the sauce in a small saucepan over very low heat (or sauce will burn) until slightly syrupy, about 5 minutes or so. Brush or drizzle the sauce over the cooked meat sticks before serving.
Preparation
  1. Soak 14 bamboo skewers in water while you prepare the sauce and meat sticks
  2. Combine sugar, soy sauce and sherry in a medium bowl, stirring until the sugar has dissolved. Mix in oil, garlic and green onions. Set aside.
  3. Slice tri-tip in to ⅛-inch thick and 1-inch wide strips. Place in medium-sized bowl and pour in teriyaki sauce. Toss meat in sauce, cover and refrigerate for 1 hour (no longer or meat will be too salty), turning meat in marinade occasionally. Thread beef strips weaving back and forth, onto soaked bamboo skewers.
  4. Heat gas or charcoal grill to medium-high to high heat. Clean and oil grill grates. Place meat sticks on grates and cook, turning several times to ensure they are nicely charred. Cooking time is about 3-4 minutes total on a hot grill.

 

Appetizers, Beef, Dinner, Korean, Lactose Free, Recipes, Sandwiches

Korean Buns

March 12, 2020


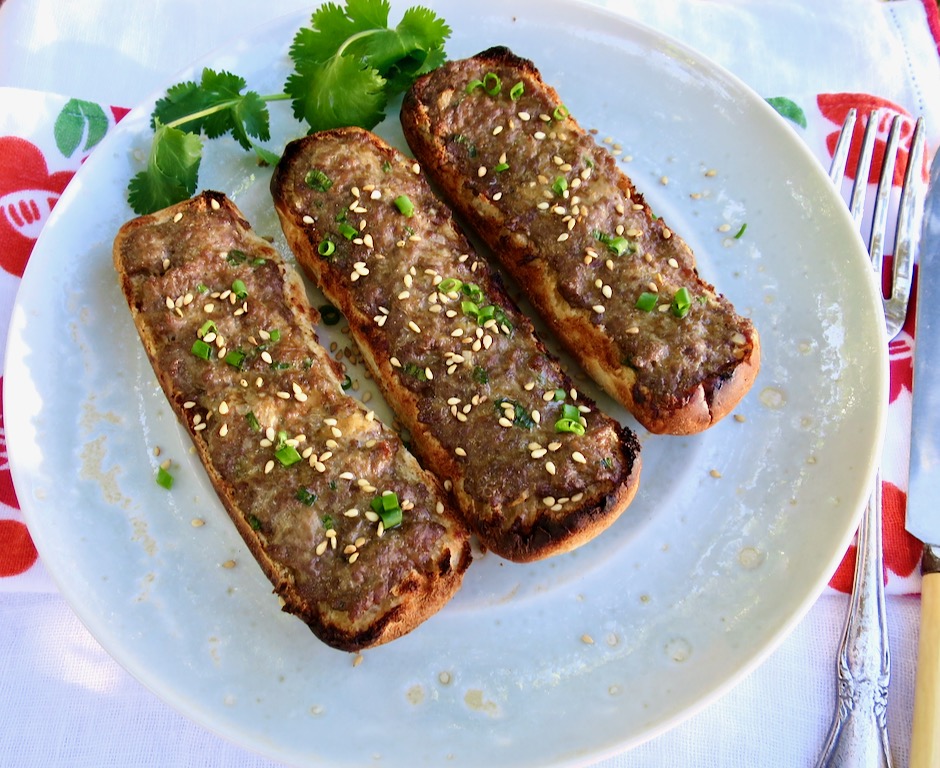
Korean Buns

I posted a recipe for Korean hamburger patties back in 2012. This is one of my favorite recipes and I make it on a regular basis.  This post is a description of how my mom originally made the dish using the ground meat mixture on hot dog buns.  I always requested these Korean buns when my girlfriends came over for a slumber party (back in the day).  These are so easy to make and very tasty.

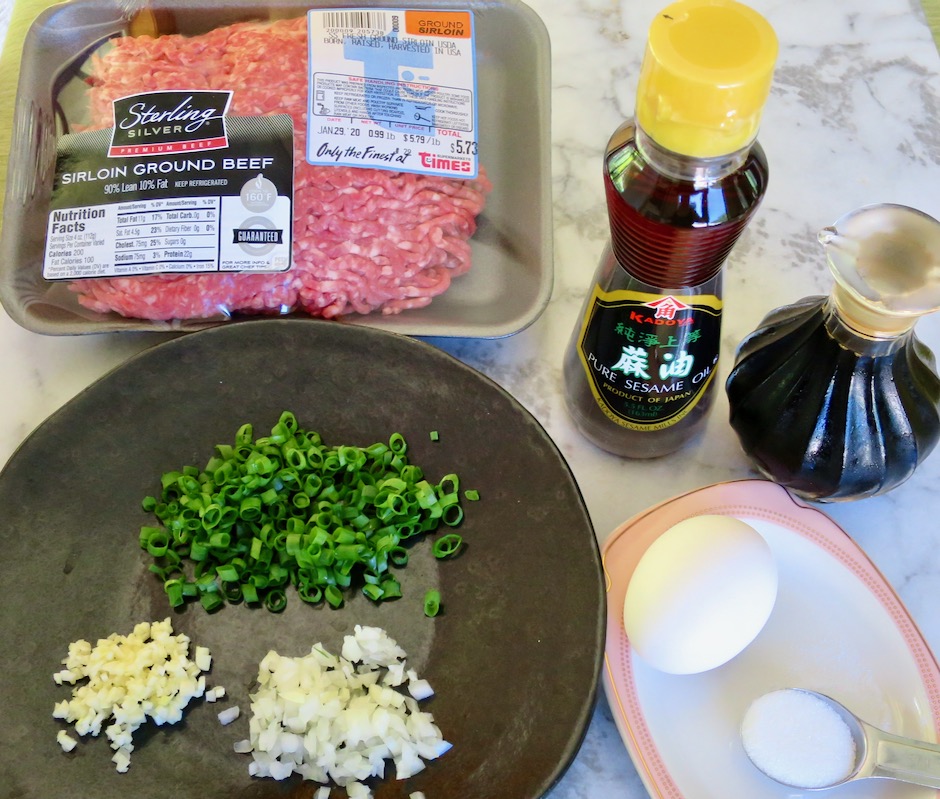
Korean Buns Ingredients

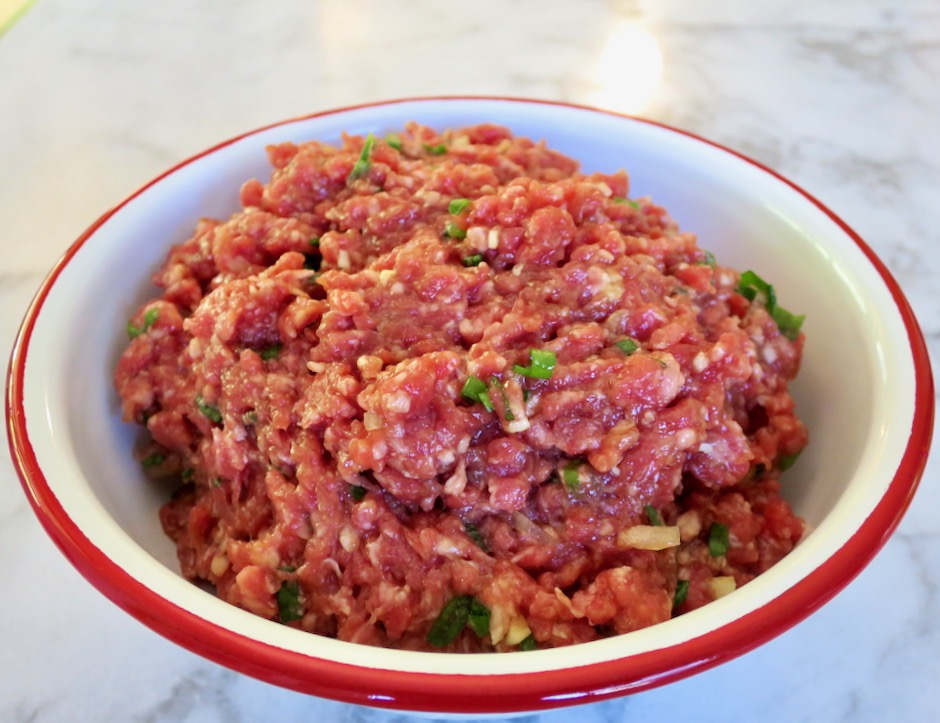
You can make the meat mixture earlier in the day and store it in your refrigerator until you are ready to prepare the buns.  The few ingredients for this recipe all have that umami flavor that makes this simple meal so good.

Korean Buns Meat Mixture

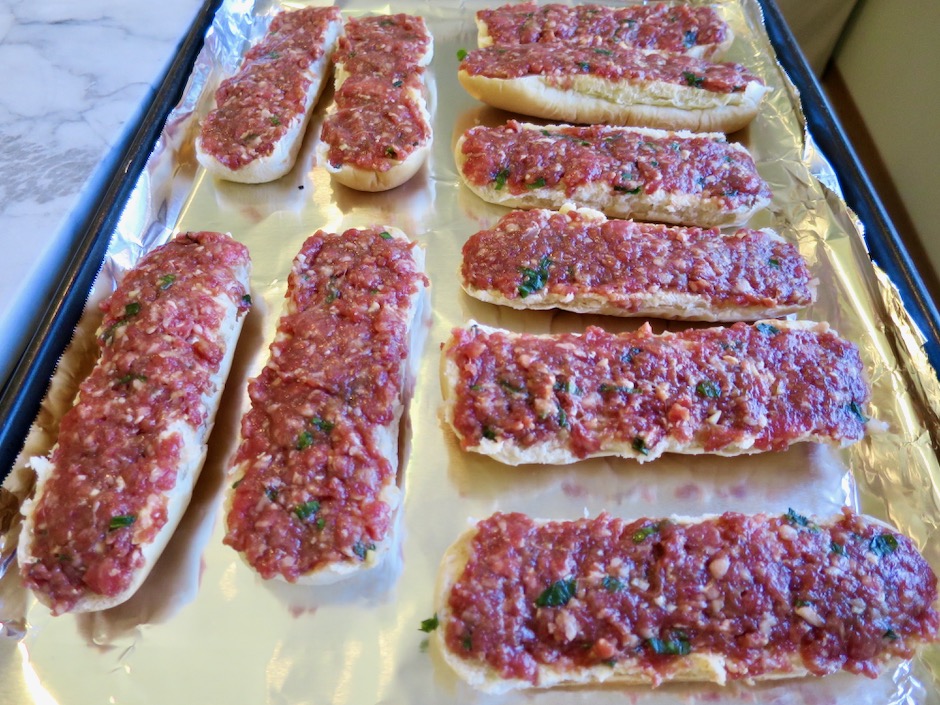
Hot Dog Buns

I used 5 hotdog buns that I split, making 10 Korean buns.  The meat mixture is spread thinly over each bun and broiled quickly.  I used the remainder of the meat for slider patties for another meal.  If you are making the buns for a crowd you can use 10-12 buns instead of 5.
Korean Buns

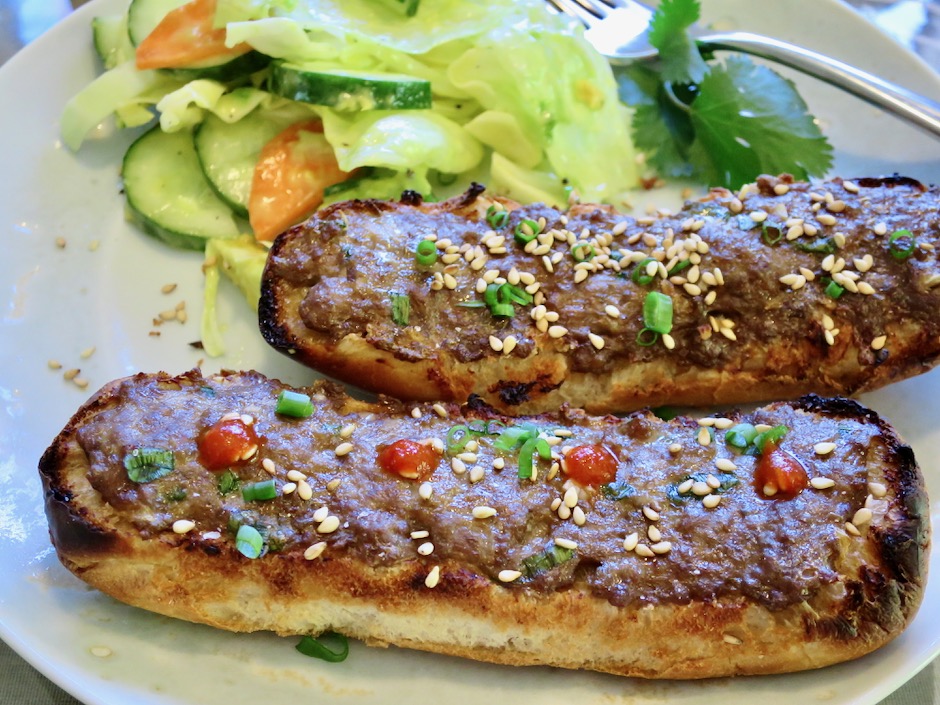
Serve the buns with a crispy salad and you’re all set.  If you want a little kick, drizzle a bit of sriracha on each bun.

Korean Buns

Korean Buns
 
Author:
Serves: 10 split buns
Ingredients
  • 5 hot dog buns, split (depending on how many people you are serving, use up to 12 buns making 24 split buns)
  • 1 pound lean ground beef (I use ground sirloin)
  • 1 tablespoon finely chopped onion
  • 3 tablespoons finely chopped green onion
  • 1 medium clove garlic, minced
  • 1 teaspoon sesame oil
  • 4 tablespoons soy sauce (Kikkoman recommended)
  • 1 heaping teaspoon sugar
  • 1 large egg
  • To garnish: Roasted sesame seeds and thinly sliced green onions
Preparation
  1. Place oven rack on the second position from the top, about 6 inches away from the element. Preheat broiler on high. Line a large sheet pan (jelly roll pan works great) with foil for easy clean up.
  2. In a large bowl, gently break up the ground beef with two forks or your fingertips. Add onion, green onion, garlic, sesame oil, soy sauce, sugar and egg. Mix gently to combine ingredients.
  3. Spread a thin layer of the meat mixture on each split bun, covering as much of the edge of each bun as possible.
  4. Place pan under the broiler and broil for a few minutes until the meat is cooked and the buns are nicely browned on the edges. The buns are best served right away but leftovers can be reheated in a toaster oven.


Beef, Dinner, Italian, Lactose Free, Pasta, Recipes

Tender Meatballs ~ Lactose Free

February 25, 2020

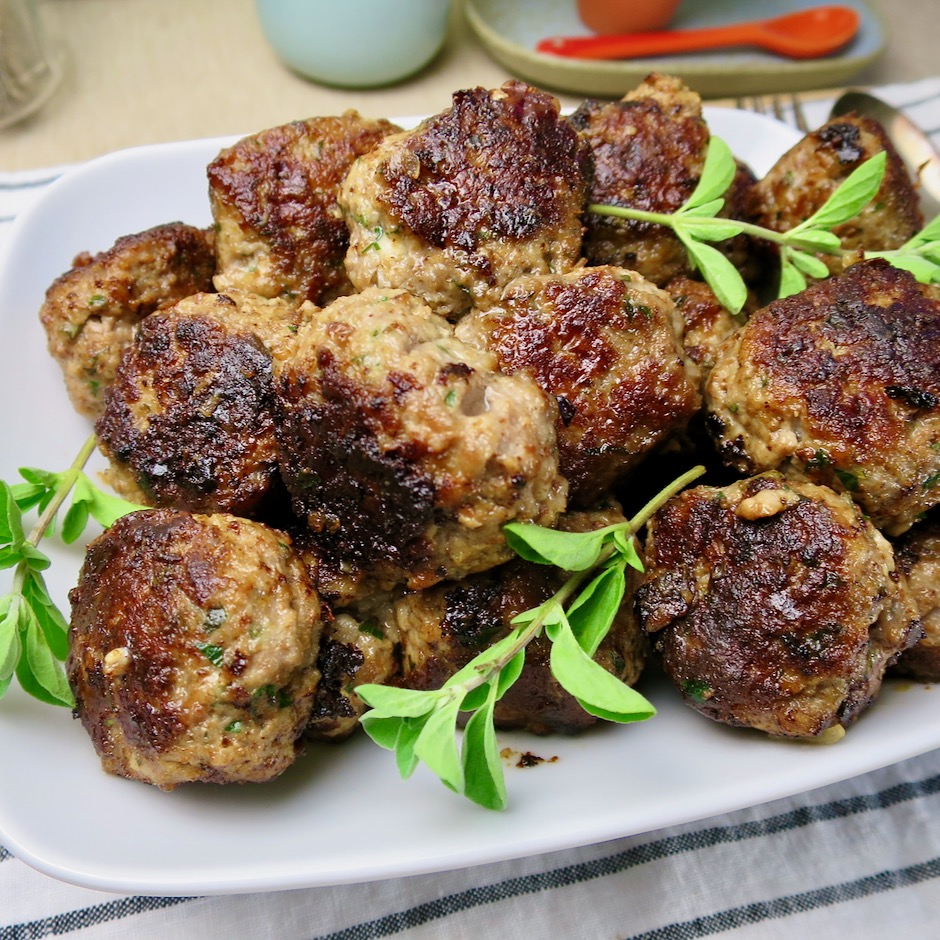
Tender Meatballs - Lactose Free

These meatballs are moist and tender thanks to the addition of cottage cheese.  I use a lactose free brand of cottage cheese as I am lactose intolerant.  Thankfully, there are many lactose free options available these days, which means dishes that were formally off limits for those of us who cannot tolerate regular dairy products are now on our menus.

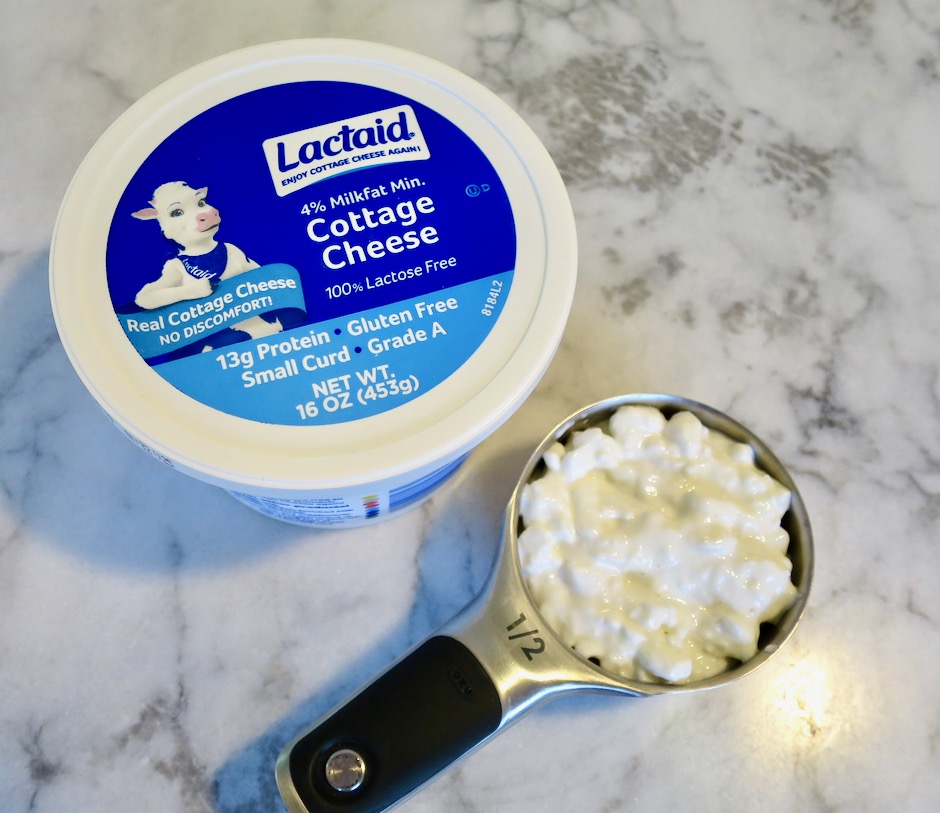
Lactose Free Cottage Cheese

Lactaid or Green Valley Creamery offers lactose free cottage cheese.  Of course you may use regular cottage cheese if you do not have lactose intolerance.

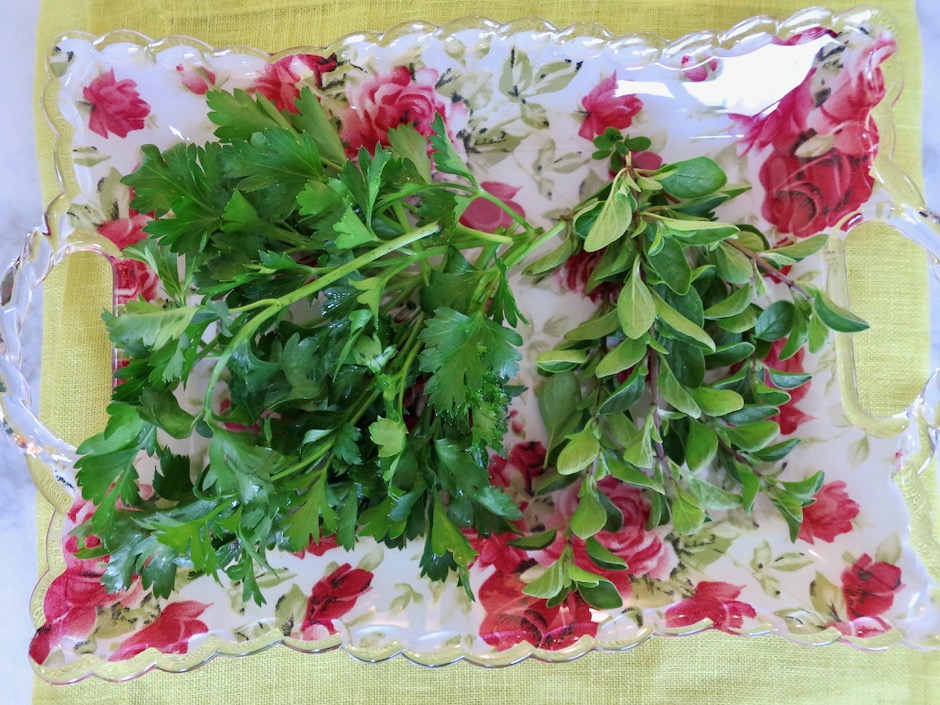
Fresh Italian Parsley and Marjoram

Fresh Italian parsley and marjoram add a wonderful flavor to these meatballs.  Marjoram is one of my favorite herbs.  If you are not familiar with it, give it a try!  I’m sure it will become a favorite of yours too.

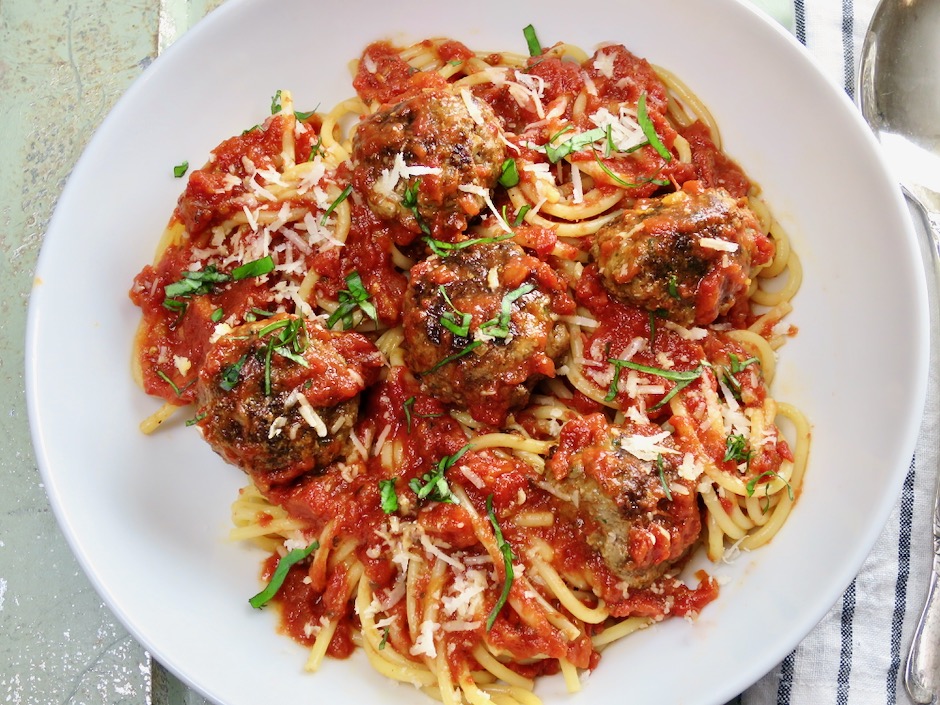
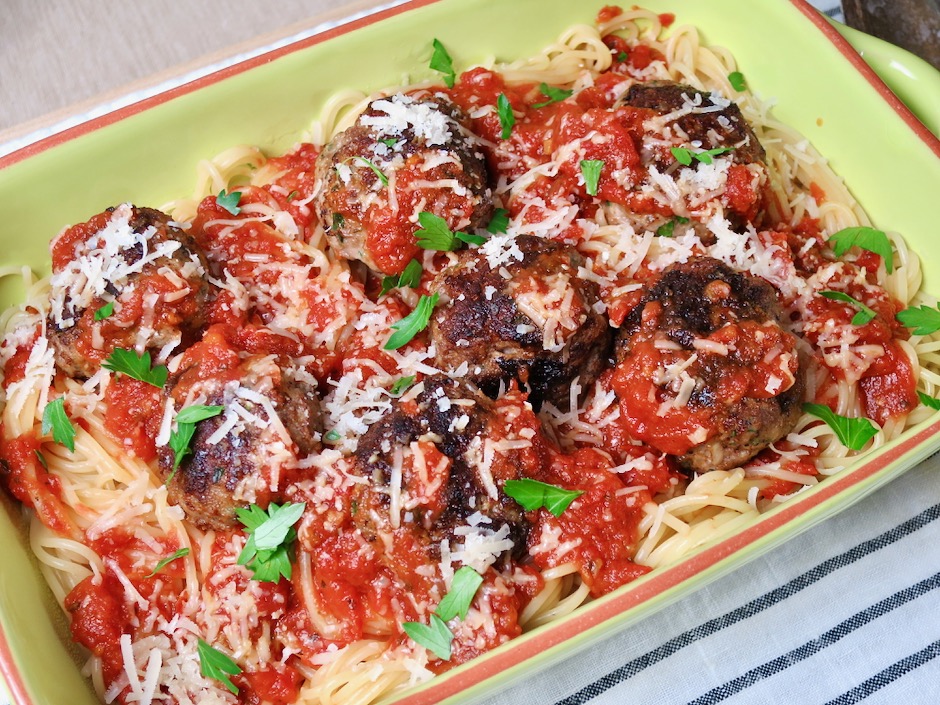
Tender Meatballs & Spaghetti

The meatballs are fried in a bit of olive oil until they are nicely browned on all sides. I like the texture and flavor the meatballs have when pan fried in a skillet.  Serve them with your favorite sauce and pasta.

Tender Meatballs - Lactose Free

Tender Meatballs & Spaghetti

Tender Meatballs
 
Author:
Serves: 24 meatballs
Ingredients
  • ⅓ cup panko
  • ⅓ cup lactose free milk (or regular milk)
  • ⅓ cup finely minced onion
  • 1 medium garlic clove, minced
  • ¼ cup chopped Italian parsley
  • 1 tablespoon chopped fresh marjoram (or 1 teaspoon dried marjoram)
  • 1 teaspoon dried oregano
  • 1 large egg, lightly beaten
  • ½ cup lactose free cottage cheese (drained if very wet, chopped if very large curds)
  • 1½ teaspoons kosher salt
  • freshly ground black pepper
  • 1 pound lean ground beef (I use ground sirloin)
  • 2 tablespoons olive oil for frying
  • Julienned fresh basil (optional)
  • Grated Parmesan (optional)
Preparation
  1. Place the panko in a small bowl and moisten them with enough milk to cover the crumbs. Give them a quick stir, then let them sit for 10 minutes to soften. Gently squeeze out the excess moisture.
  2. Place ground beef in a large bowl. Break it apart gently with two forks. Mix in panko, onion, garlic, herbs, egg, cottage cheese, salt and pepper. Mix gently with two forks until all of the ingredients are evenly incorporated.
  3. Roll meatballs into 24 golf ball sized balls.
  4. Heat oil on medium heat in a wide deep-sided skillet until shimmering. I use my Anolon 12" x 3" skillet. Fry all of the meatballs at once or in batches if your pan is smaller. Turn them to brown on each side, about 7 minutes total. They are done when they reach 165 degrees.
  5. Serve with your favorite pasta and sauce. Top with julienned fresh basil and parmesan cheese (I use lactose free Boar's Head brand).


Beef, Dinner, Pork, Recipes, Sauces, Smoker

Smoked Cheesy Barbecue Meatballs

February 18, 2019

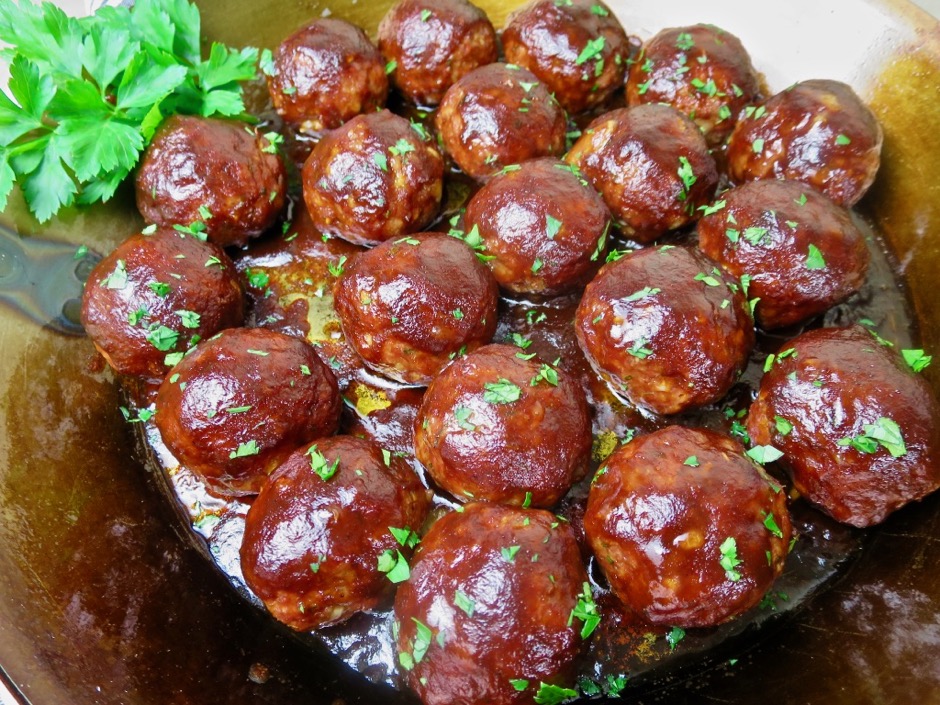
Smoked Cheesy Barbecue Meatballs

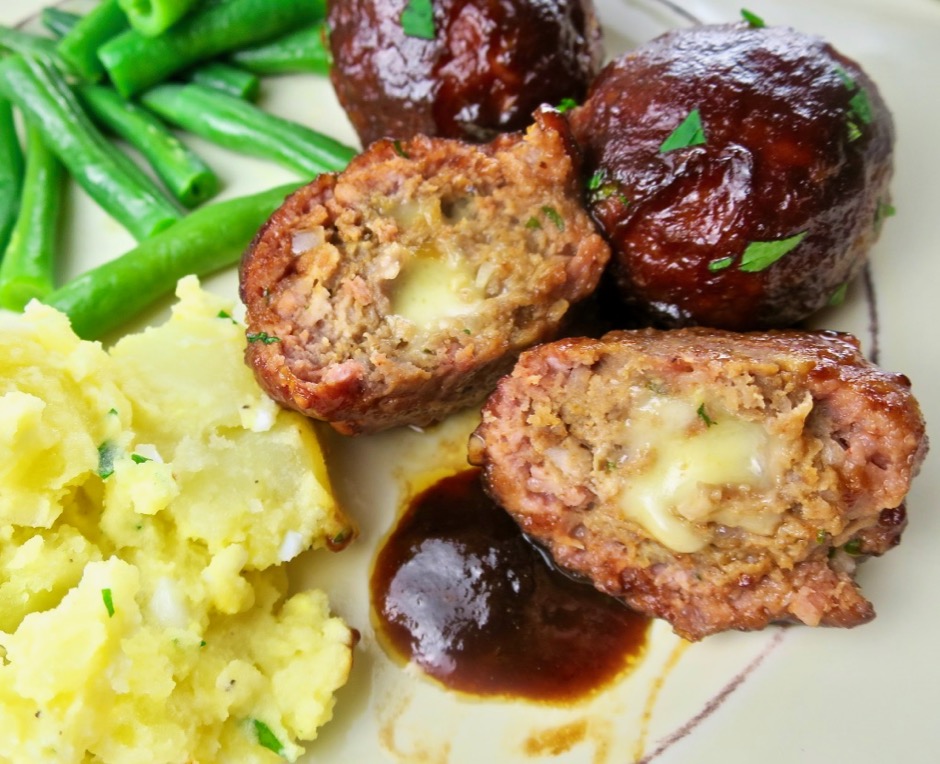
To say we love meatballs would be an understatement.  Whether tinkering with old recipes or trying new ones, meatballs are always a treat.  This recipe falls in the middle: old and new together.  I adapted this recipe from Vindulge.  I have made smoked meatballs before with great success.  But these smoked barbecue meatballs are more complex.  The centers are filled with just the right amount of pepper jack cheese that makes for a wonderful surprise when you cut into them.  They are delicious served with a side of potato salad or mac and cheese. I can imagine they would also be excellent served with grilled polenta or piled on top of a garlic toasted baguette.

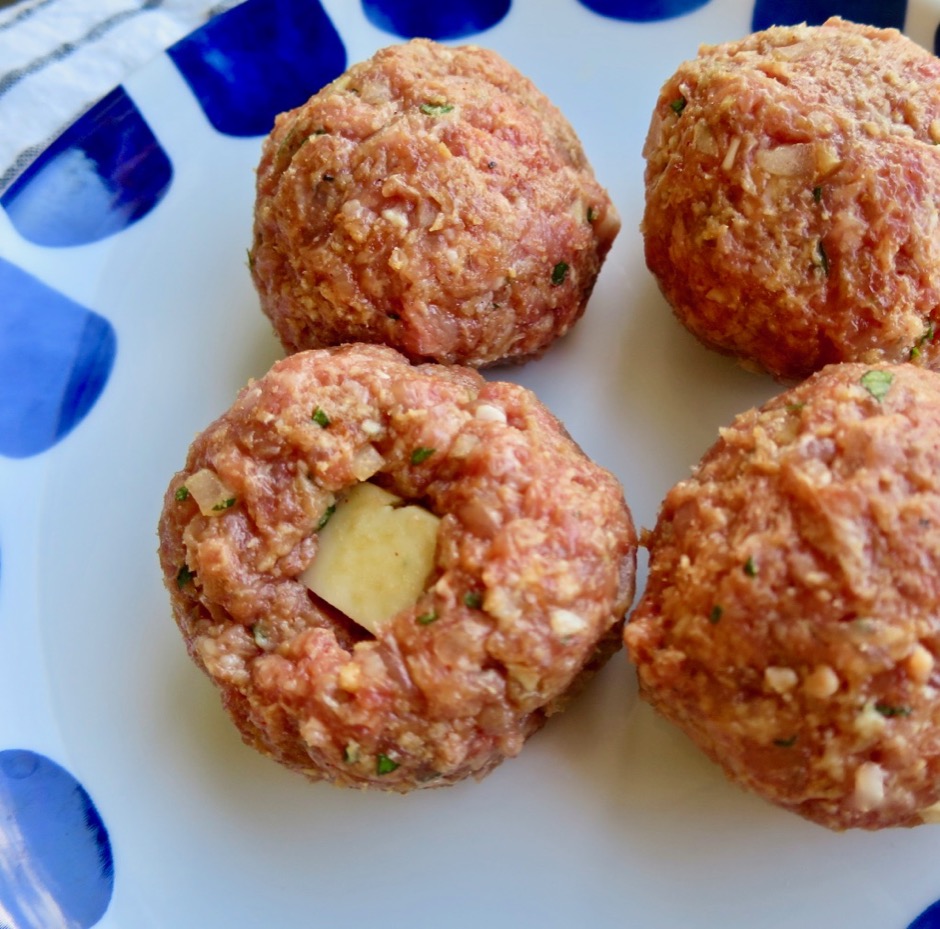
Stuffed with Pepper Jack Cheese & Rolled Into Balls

Once you have your meatballs prepped, there is little left to do but patiently wait for them to smoke, which takes about 2 hours.  These meatballs are particularly tender and flavorful due to the little bit of cheese in the center.  Use any good quality cheese that melts nicely.  Pepper jack is my first choice, but mozzarella or cheddar would also be tasty.

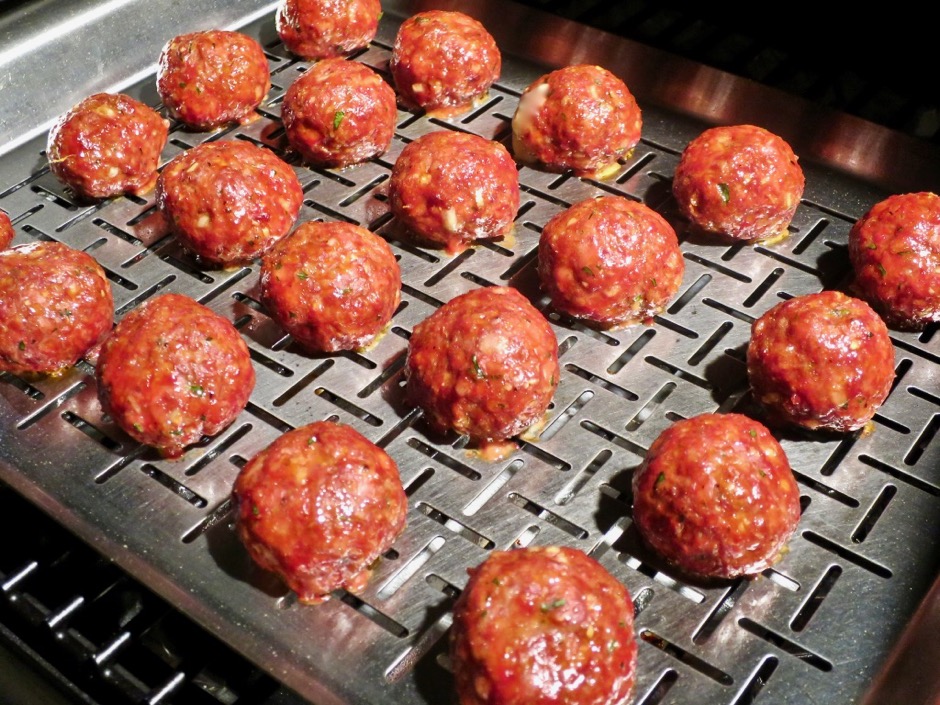
Smoking the Meatballs

Tasty Barbecue Sauce

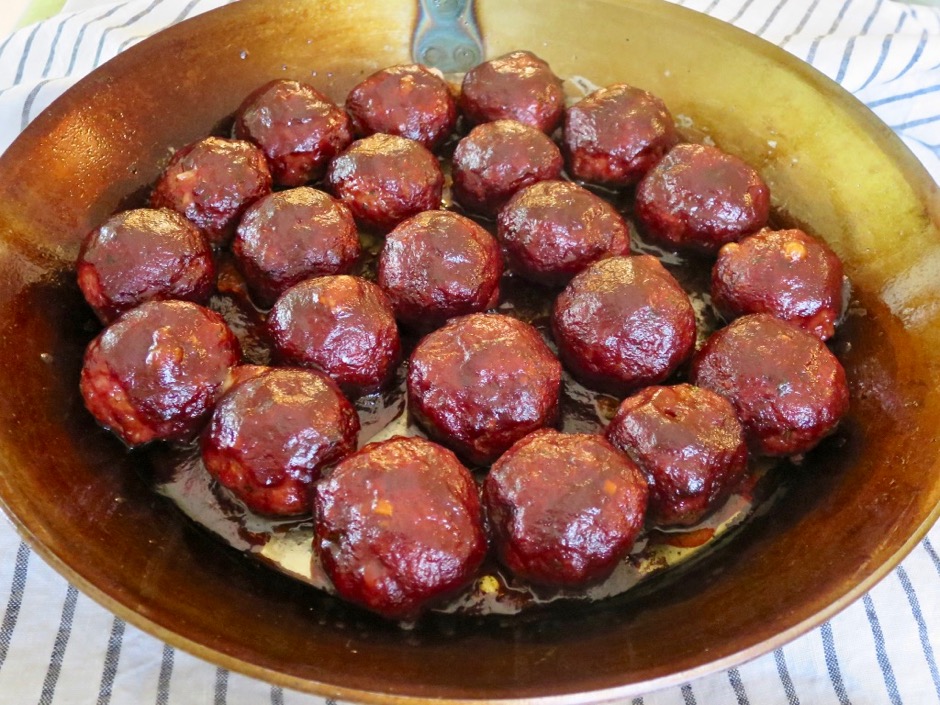
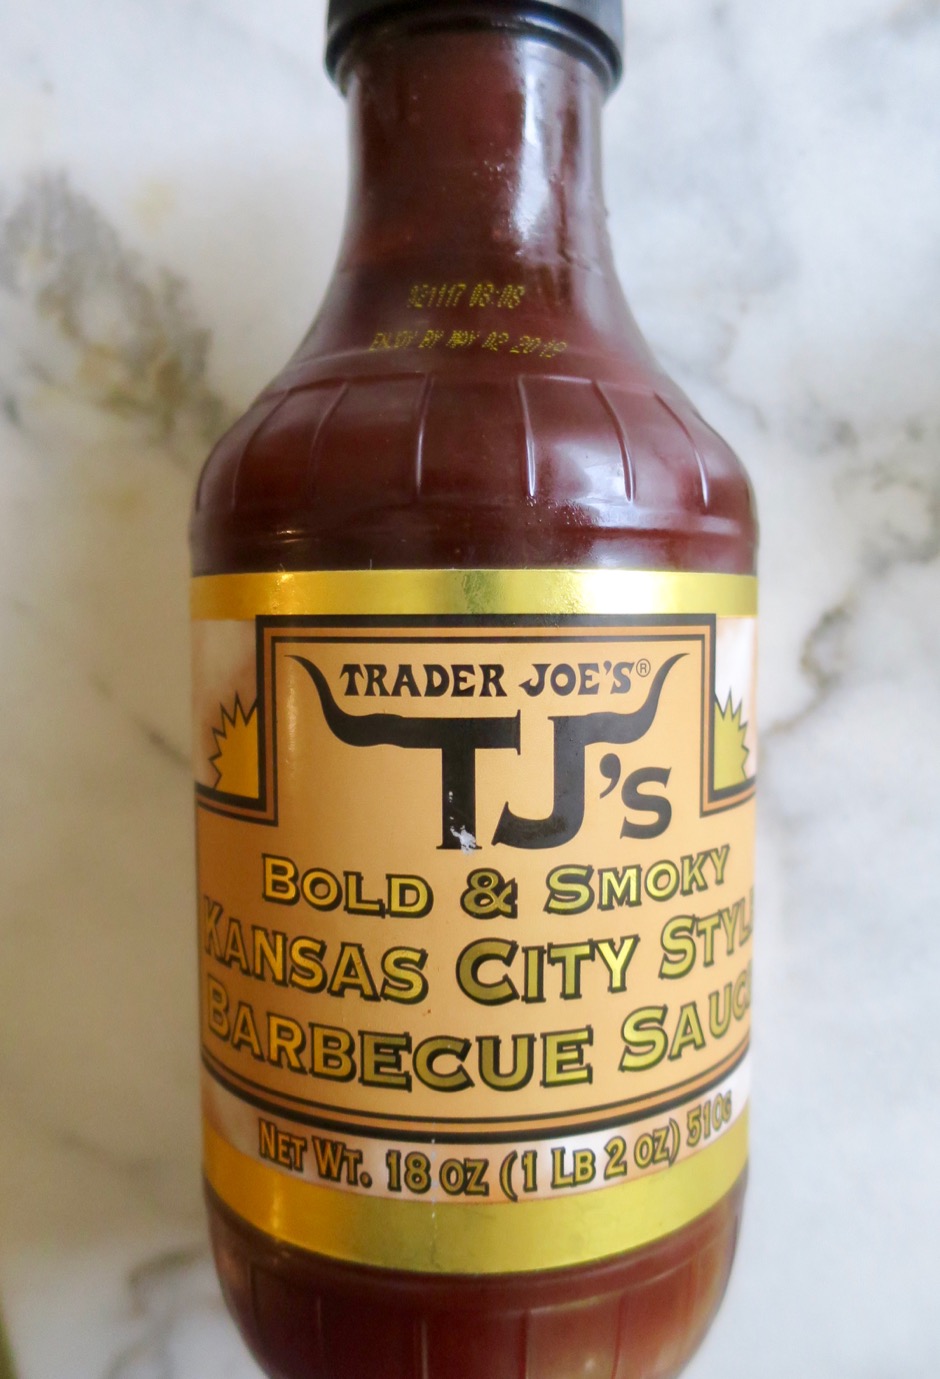
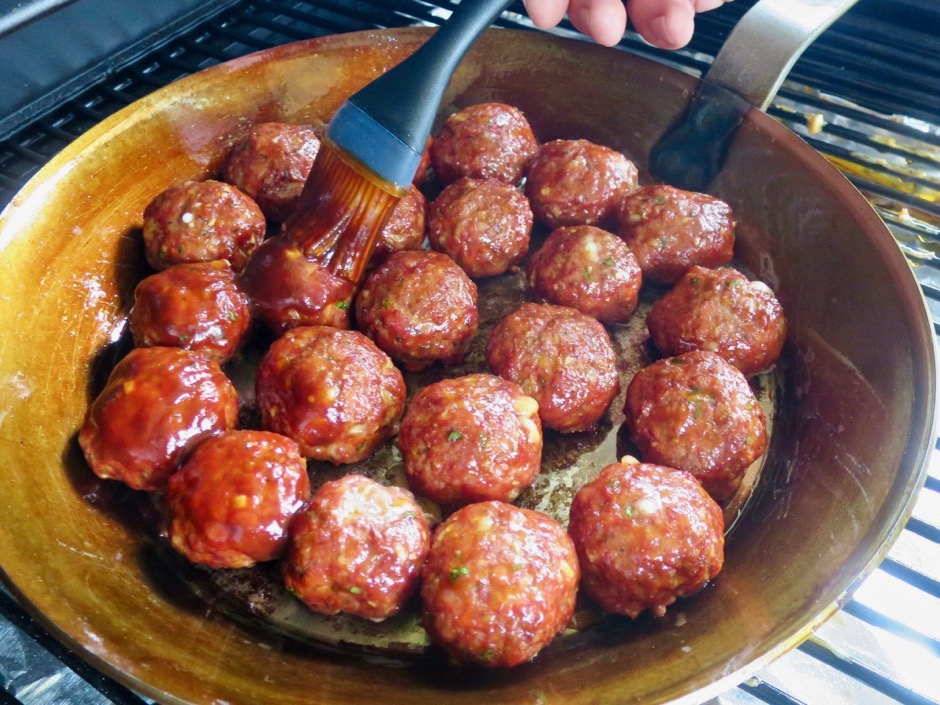
We don’t have TJ’s in Hawaii so whenever I’m in San Francisco I pick up a few items to bring back home with me.  I love the flavor of their Bold & Smoky Kansas City Style barbecue sauce.  Brush or drizzle the sauce over the smoked meatballs then send them back to the smoker for another 30 minutes.  You could also warm up the sauce and brush it on the meatballs once they are done smoking.


Brushing Barbecue Sauce on Smoked Meatballs


Smoked Cheesy Barbecue Meatballs

Very tender and flavorful meatballs served with eggy potato salad and green beans.

Smoked Cheesy Barbecue Meatballs


Smoked Cheesy Barbecue Meatballs
 
Cook time
Total time
 
Recipe adapted from Vindulge blog
Author:
Serves: 22-24 meatballs
Ingredients
  • 1 pound ground chuck
  • ⅓ pound ground pork
  • ¼ cup fine panko
  • ¼ scant cup milk
  • 1 tablespoon of your favorite dry rub or see below*
  • 1 teaspoon kosher salt
  • ½ teaspoon dried thyme
  • 2 heaping teaspoons finely chopped parsley
  • ¼ cup finely chopped onion
  • 2 garlic cloves, minced
  • 1 tablespoon Worcestershire sauce
  • 1 large egg, lightly beaten
  • 5 pepper jack cheese sticks, cut into 5 even pieces
  • 1 cup barbecue sauce
  • *dry rub ingredients (save the leftovers for more meatballs or grilled chicken)
  • ½ cup brown sugar
  • ¼ cup paprika
  • 2 teaspoons freshly ground coarse black pepper
  • 2 teaspoons mild chili powder
  • 1½ teaspoons onion powder
  • 1½ teaspoons garlic powder
  • ¼ - ½ teaspoon cayenne pepper
  • 1 tablespoon kosher salt
Preparation
  1. Preheat your smoker to 225 degrees.
  2. Combine panko with milk in a small bowl. Stir and set aside.
  3. In a large bowl mix ground chuck and ground pork together with two large forks. I find this keeps the meat from getting dense and tough. Add softened panko and all the other ingredients to the bowl except the cheese and barbecue sauce. Mix gently to ensure all ingredients are well distributed.
  4. Divide the meat into golf ball sized portions. You should end up with 22-24 pieces. Gently form each piece into a ball and make a small indentation in the center for the cheese. Pinch the meat together around the cheese and gently re-roll into a ball if needed. Do your best to make a tight seal around the cheese. Some of the cheese may seep out as the meatballs smoke but don't worry, they will be just fine.
  5. Place meatballs on a smoker tray or rack. Smoke for about 1½ hours, or until the internal temperature reads 155 degrees. Once they are 155 degrees, remove the meatballs to a heat proof pan (cast iron, stainless steel, or carbon steel pans work great). Pour or brush barbecue sauce over the meatballs and return to the smoker. Raise the temperature up to 275 degrees. The meatballs are done when they reach 165 degrees. Total time in the smoker is about 2 hours. Serve right away with your favorite side dishes.


Beef, Dinner, Lactose Free, Recipes, Sandwiches, Smoker, Sous Vide

Best Homemade Pastrami

January 30, 2019

Several years ago, we took a trip to the Big Apple and, of course, we had to try the renowned pastrami sandwich at Katz’s Deli.  It was as good as advertised.  Since that visit, John has been on a quest to make a pastrami that would rival that of Katz’s, Langer’s in L.A., and Wise Sons in San Francisco.  With this recipe, we think we have succeeded.  We tried using the traditional brisket (sometimes difficult to find here), but after seeing a post by Kenji Lopez-Alt, we decided to use a tri-tip and have never turned back. We buy the 2-pack from Costco (about 4 pounds), either prime or choice (prime is a bit richer).  It requires little if any trimming and is very evenly marbled, unlike brisket.  After several less than satisfactory attempts, John discovered a recipe by the ChefSteps crew who created the Joule precision circulator (sous vide device).  This recipe turns out perfect pastrami.  We reduced the recipe by 2/3’s and substituted tri-tip for the short ribs they use.

Best Homemade Pastrami

The gallon of cure/brine is just right for 4 pounds of tri-tip.  Mix everything together and refrigerate until it is below 40 degrees.  The Briner Jr. bucket is perfect for this recipe.  Add the meat to the brine after it has thoroughly chilled and return it to the refrigerator.  Let the meat cure for 7 days, stirring once per day.  After the meat has cured,  you are ready to smoke.

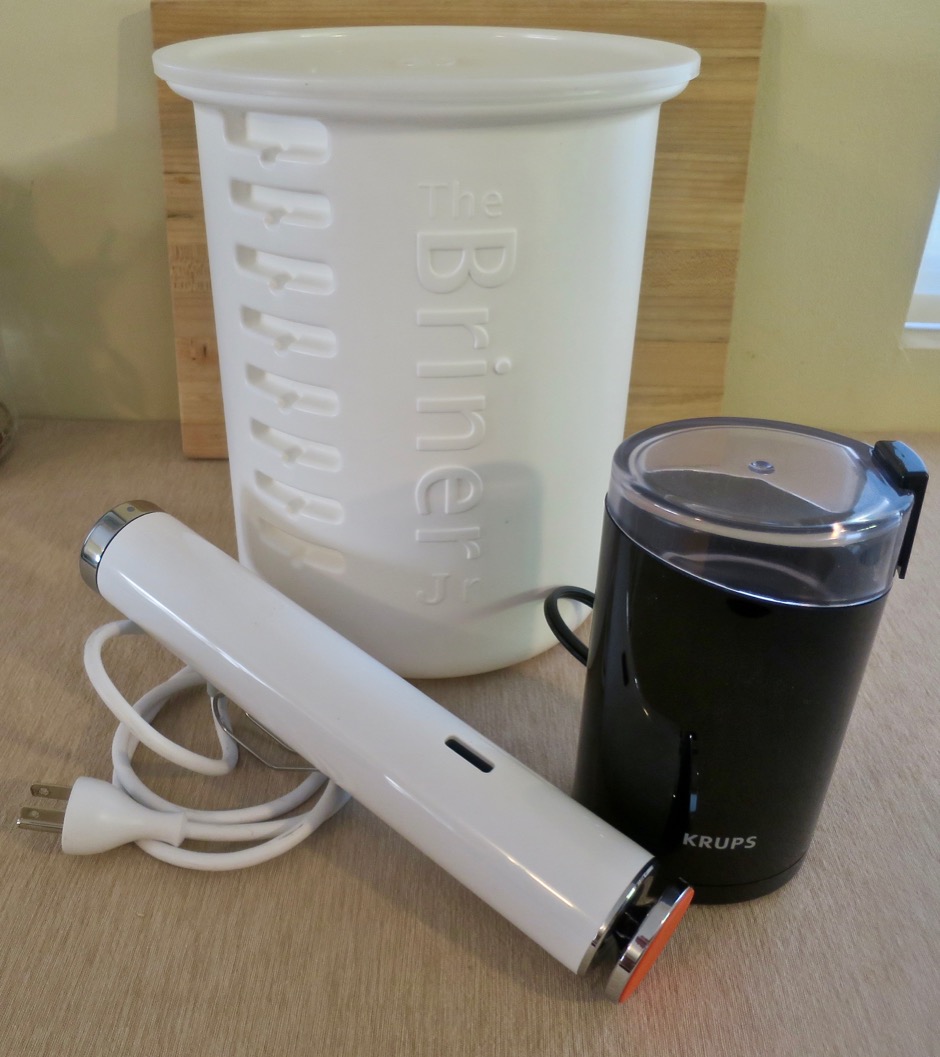
Joule Precision Circulator, Briner Jr. Brining Bucket, Spice Grinder

Here is some of the special equipment you will need.
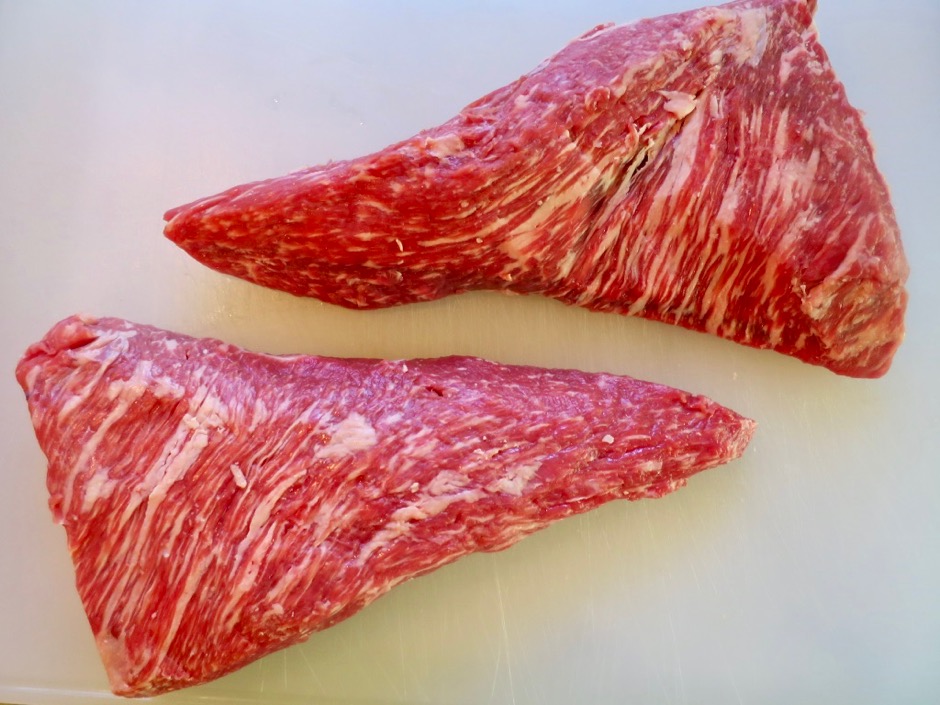
Prime Tri-Tip

These are the prime grade tri-tips we bought from Costco.  You can see how marbled they are.  If you prefer a richer cut of pastrami these are the way to go.

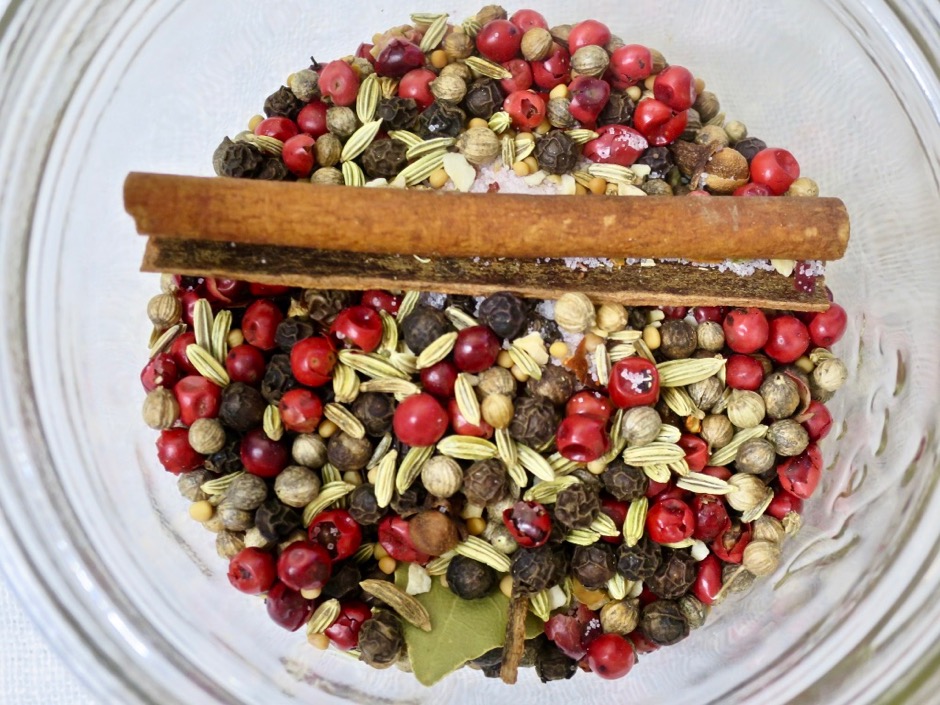
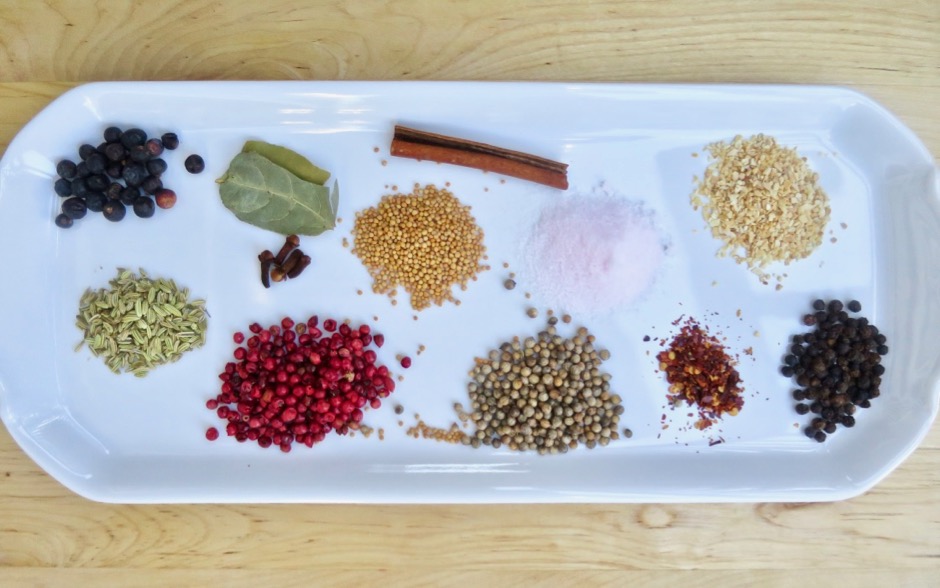
Brining Spices

These are the brine spices.

Spices & Seasoning for Brine & Dry Rub: Juniper Berries, Bay Leaves, Mustard Seeds, Cinnamon Stick, Pink Salt, Granulated Garlic, Fennel Seeds, Cloves, Pink Peppercorns, Coriander Seeds, Chili Pepper Flakes, Black Peppercorns

Here are some of the various spices and seasonings used for the brine and the dry rub.

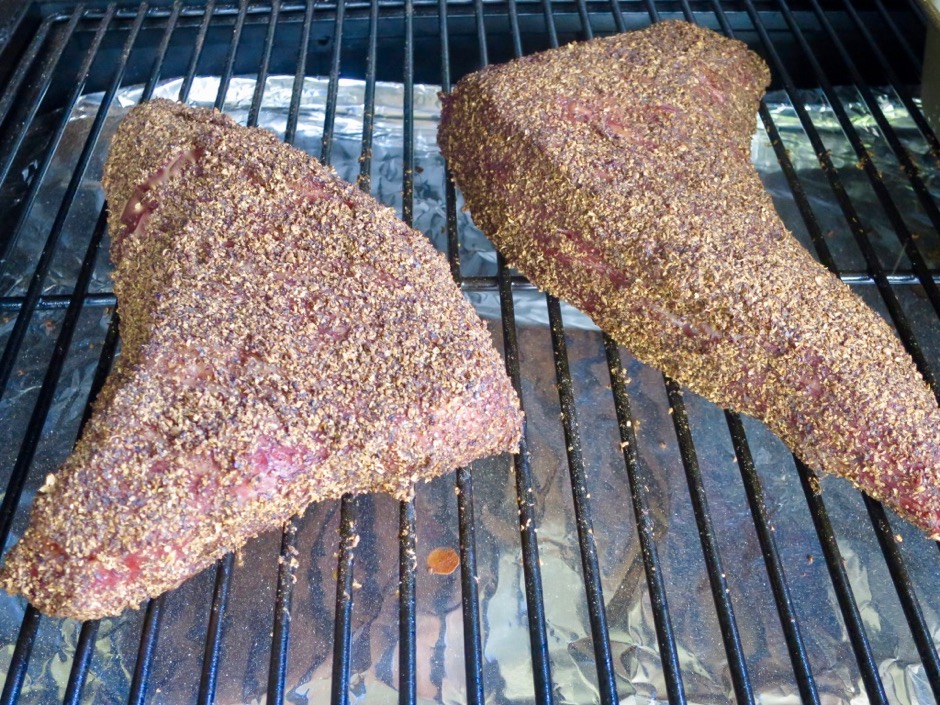
Dry Rub Applied, Time to Smoke

The dry rub has been applied to the meat that will smoke for 7 hours.  Once out of the smoker, the meat will sous vide for 48 hours.  
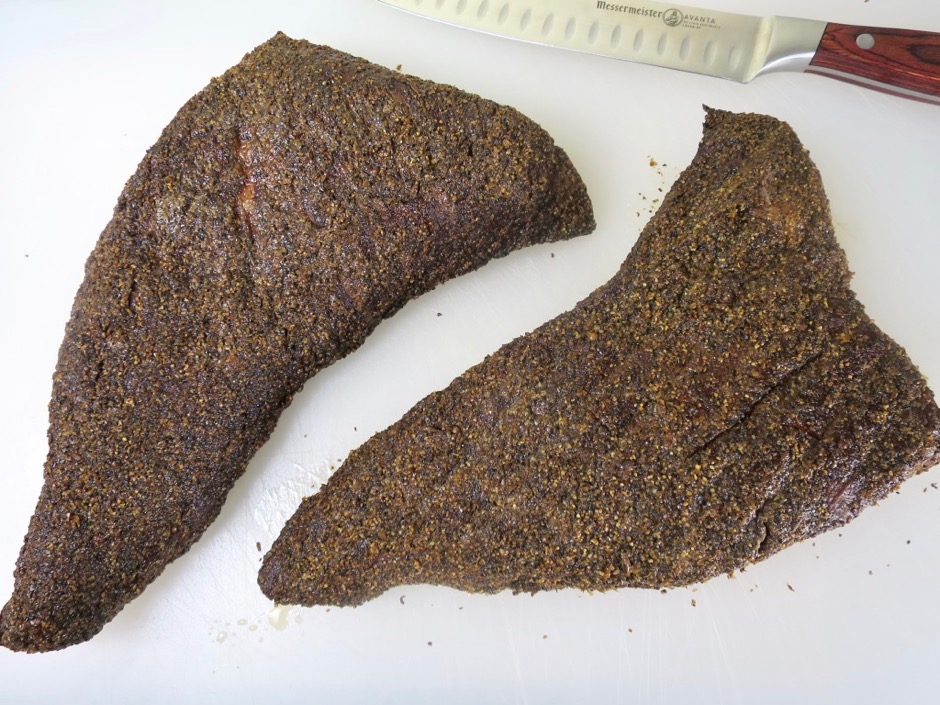
Ready to Slice

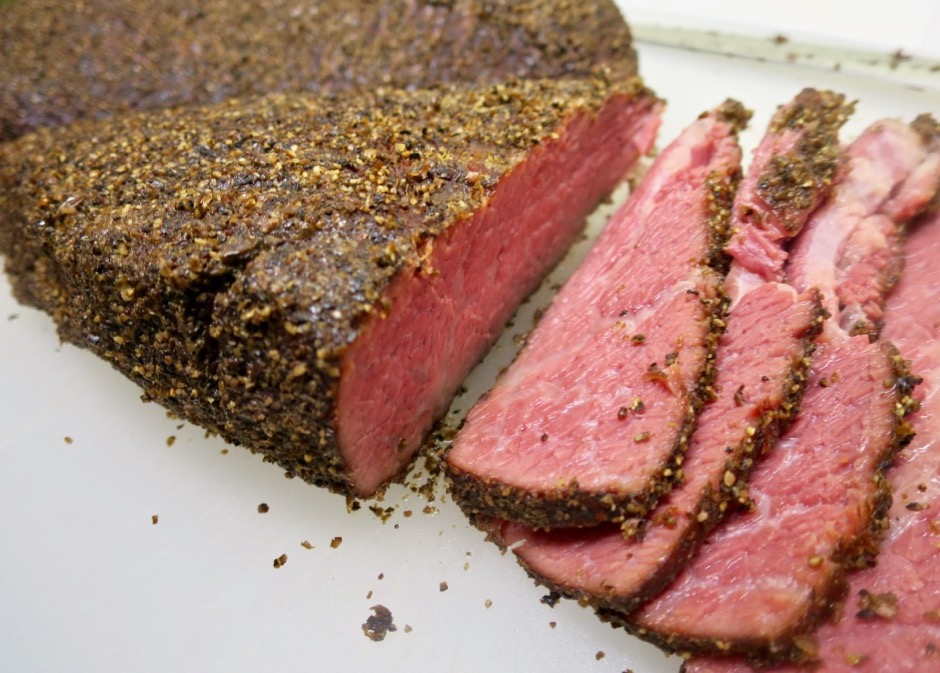
Here it is after 48 hours sous vide, moist and tender and ready for slicing.  Typically authentic pastrami is finished by steaming for several hours.  We prefer the sous vide method as it makes for a consistently tender result.

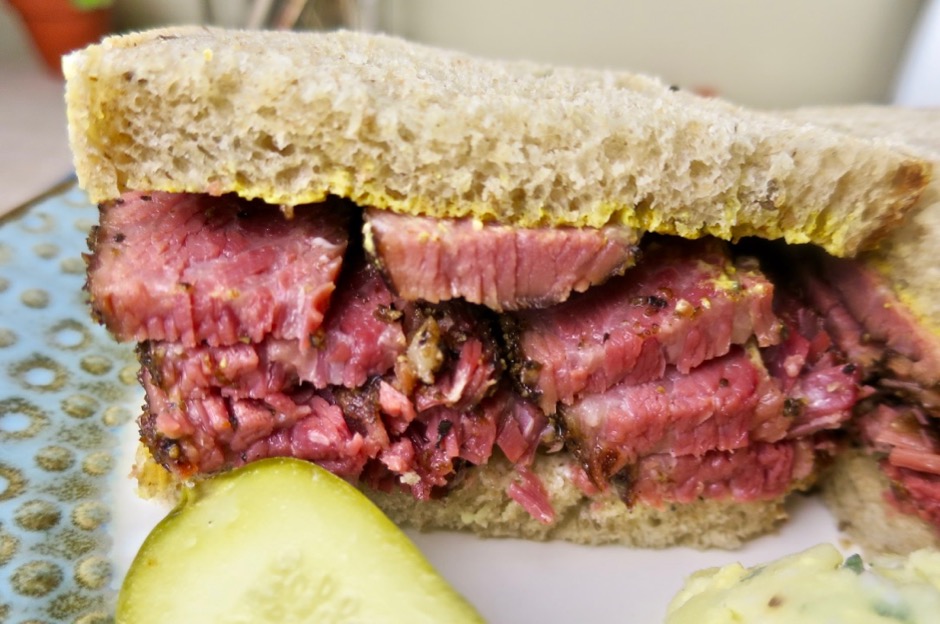
The Perfect Sandwich

Here is the ultimate reason for all of this effort: the perfect pastrami sandwich!

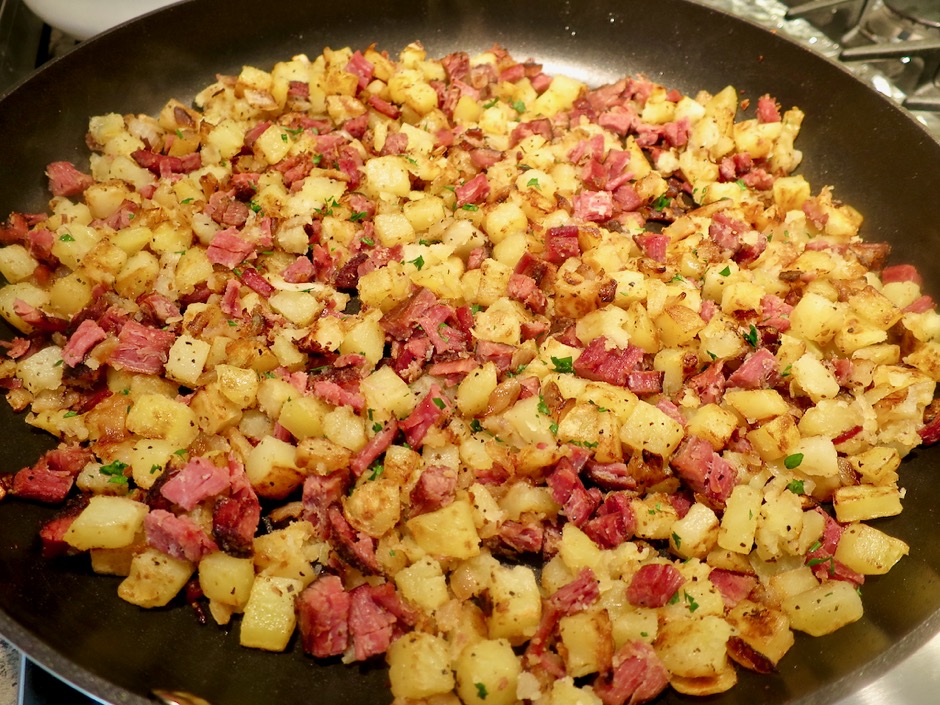
Pastrami Hash

Corned beef hash is a wonderful breakfast dish, however, pastrami hash is over the top.  So save some of your pastrami for this terrific treat. 
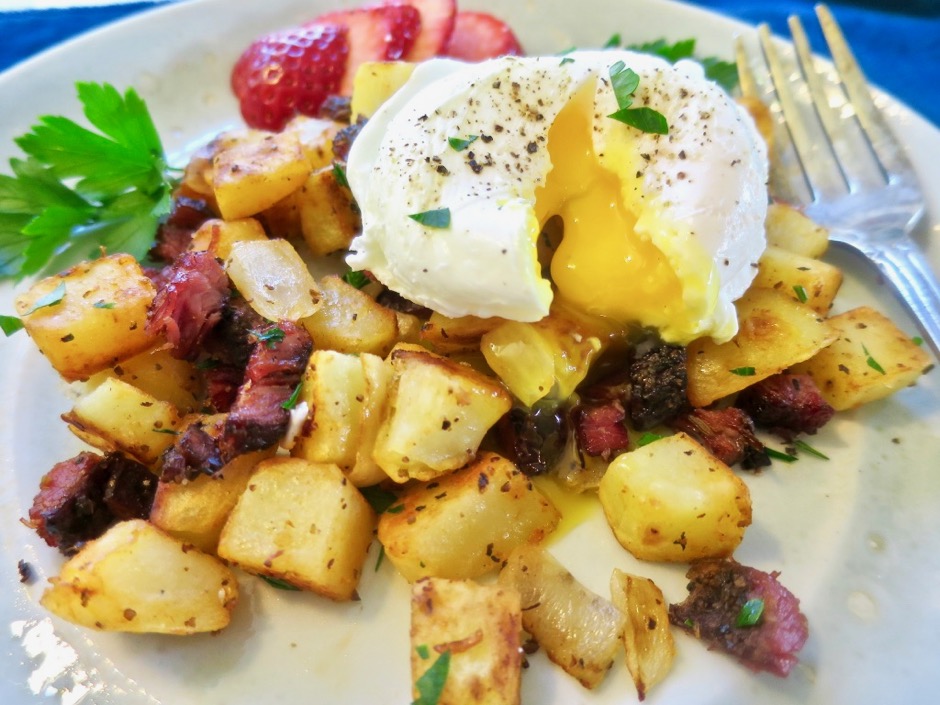
Pastrami Hash with Poached Egg

Pastrami hash with a poached egg.  Divine.


Best Homemade Pastrami
 
Special Equipment: Briner Jr. bucket or equivalent, spice grinder, smoker (we use CampChef Pellet Grill), sous vide precision cooker (we like Joule), vacuum sealer and bags, large canning pot (for sous vide)
Author:
Ingredients
  • 2 Tri-Tips (4 pounds total)
  • For the Brine
  • 1 gallon water
  • 1½ cups brown sugar, packed
  • 5 tablespoons fine sea salt or pickling salt
  • 4 teaspoons #1 Prague Powder (pink/curing salt - sodium nitrite)
  • 1 tablespoon whole black peppercorns
  • 4 teaspoons whole coriander seeds
  • 1½ teaspoons yellow mustard seeds
  • 1 tablespoon whole pink peppercorns
  • 1 teaspoon whole fennel seed
  • ½ cinnamon stick
  • ½ teaspoon chili pepper flakes
  • 4 whole cloves
  • 2 small bay leaves
  • 1 teaspoon minced dried garlic
  • For the Dry Rub
  • 2 tablespoons brown sugar
  • 2 tablespoons fine sea salt or pickling salt
  • ¼ cup whole black pepper corns
  • ¼ cup whole coriander seed
  • 1 teaspoon garlic powder
  • 2 teaspoons whole juniper berries
  • 1½ teaspoons chili pepper flakes
Preparation
  1. Mix all the of brine ingredients together in your Briner Jr. bucket or equivalent. Refrigerate until the brine is below 40 degrees. Add the meat to the bucket, cover and return to the refrigerator. Let the meat cure for 7 days, stirring once per day.
  2. To make the dry rub, combine black pepper corns, coriander seed, and juniper berries. Grind to medium-fine consistency in your spice grinder. If you do not own a spice grinder you can substitute ground spices. Combine all dry rub ingredients.
  3. After the meat has cured, you are ready to smoke. Remove the meat from the brine, pat dry, and generously apply the dry rub to all sides. Set your smoker on it's low setting (ours is in the 160 degree range). John added a bread pan filled with ice to maintain a moist environment. Smoke the meat for 7 hours. Once smoked, the meat should be vacuum sealed. If you do not own a vacuum sealer, place the meat in 2 gallon Ziploc freezer bags and use the water displacement method to remove the air from the bags.
  4. Fill your large capacity pot with water within 4-inches of the rim (we use a 21 quart canning pot). Attach your sous vide device to the pot and set to 149 degrees. Once up to temp, add the meat to your sous vide set up and set the timer for 48 hours. It's a good idea to cover the pot opening with plastic wrap for the 48 hour cook, to avoid evaporation.
  5. Once finished, the meat can stay in the water bath for another hour or so, until you are ready to serve it. Otherwise, it can be removed, sliced, and refrigerated or frozen, then later steamed prior to serving. We usually trim off the narrow points of the tri-tips for later use in pastrami hash, one of the greatest breakfast dishes imaginable.


Beef, Dinner, Mexican, Recipes

Tacos Dorados

August 7, 2018

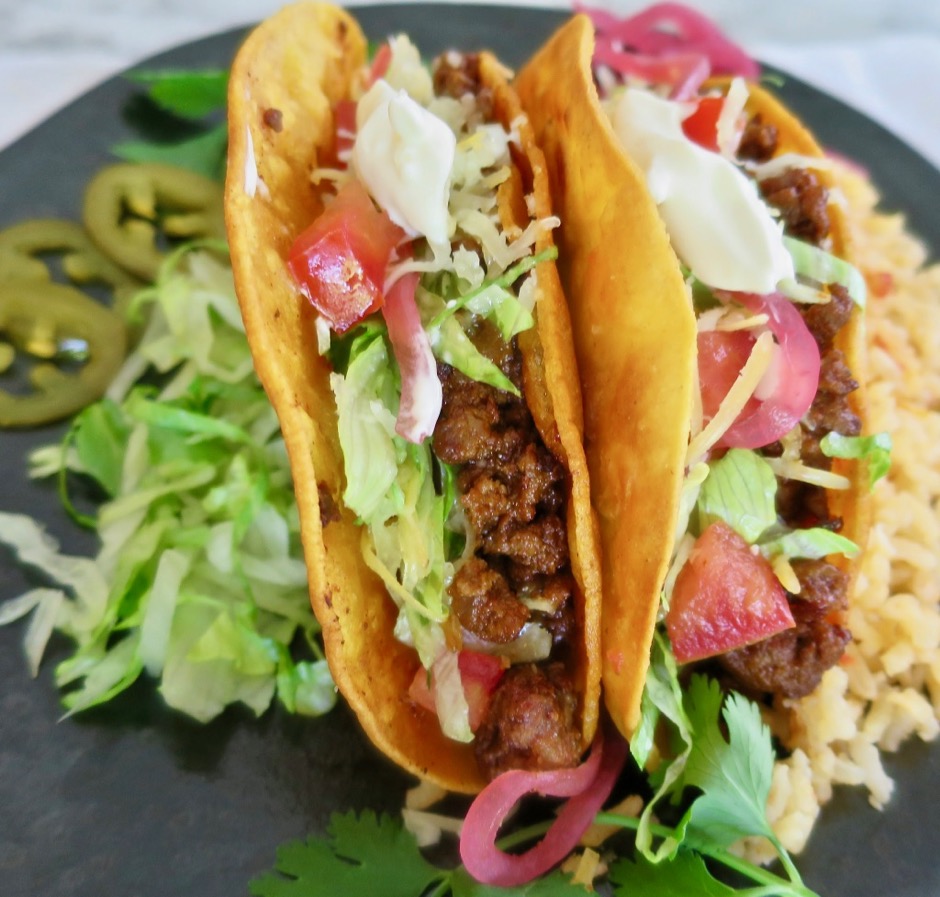
“The hard-shell taco has been an American staple for more than half a century.”  So opens “Introducing Tacos Dorados” in the July/August issue of Cook’s Illustrated. The crispy shell tacos have long existed in Mexico under the name tacos dorados or golden tacos.  We certainly enjoy a perfectly fried corn tortilla filled with savory meat and our favorite garnishes. Upon reading the article, I was intrigued by their promise of “the ultimate hard-shell tacos.” The Cook’s Illustrated recipe was a bit too elaborate for me so I decided to create my own version.  Voila, these are now our favorite tacos!

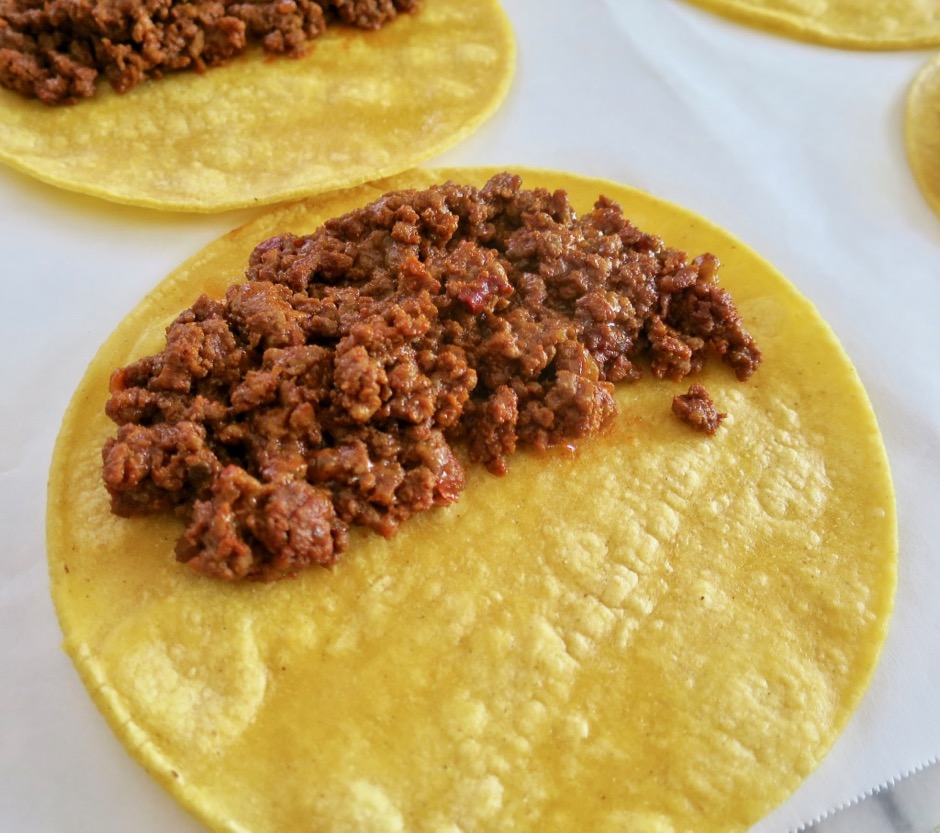
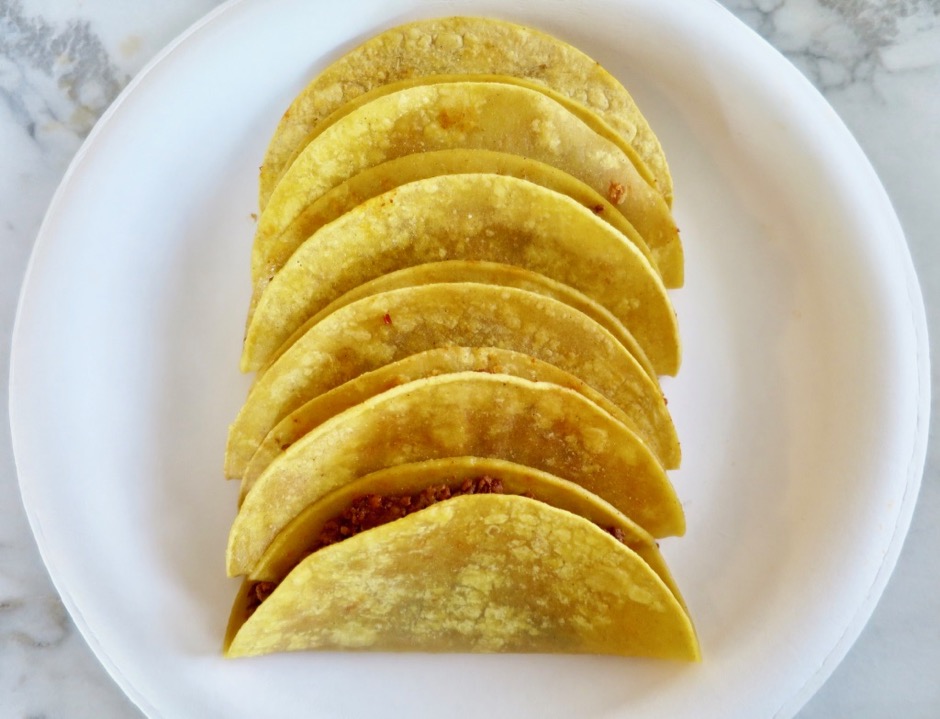
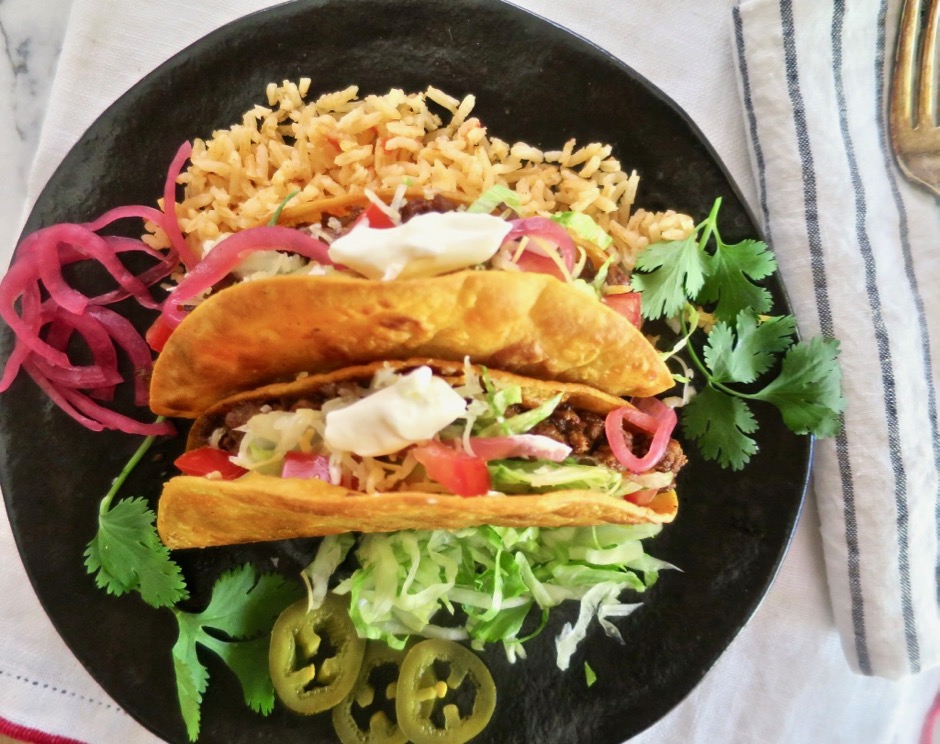
The meat filling is delicious. Once cooked, it is spooned on to one side of the prepared tortilla.  The tortillas are then folded over and ready to be fried.

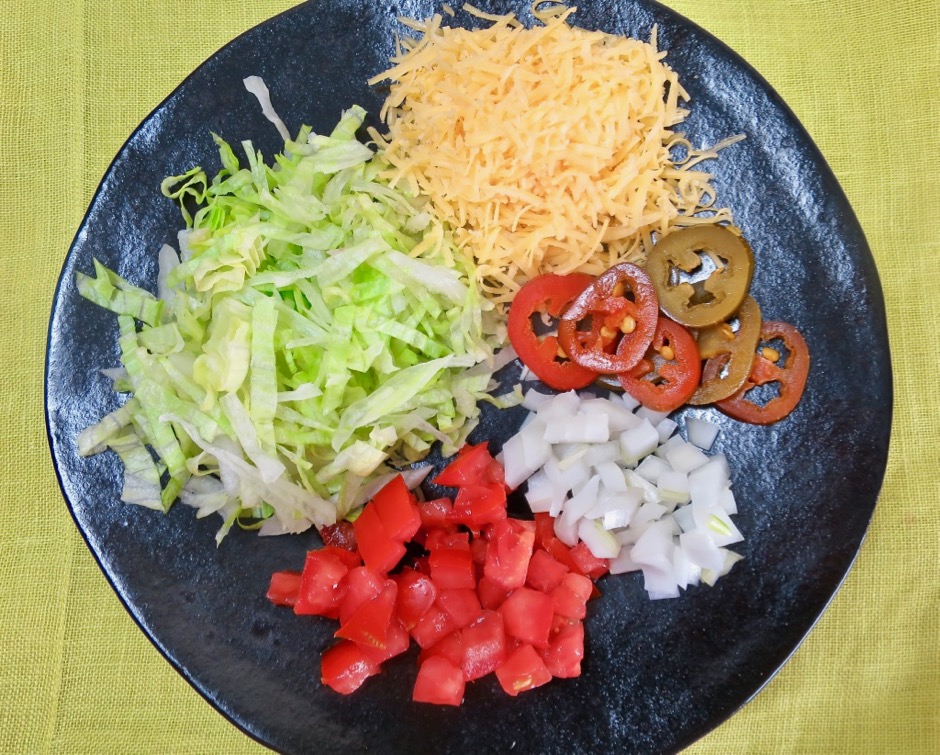
The cool thing about these crispy tacos is that the folded edge of the tortilla stays pliable.  Once they are fried crisp, you are able to pry them open and fill with your favorite taco garnishes.  And because the meat filling and garnishes are on one side of the tortilla and not stacked from the bottom up, each bite includes savory meat and whatever other fillings you prefer (ours are cheese, pickled jalapeños, onions, diced tomatoes, and crispy iceberg lettuce).  I serve these with my favorite sopa de arroz and Cuban style black beans.


Tacos Dorados
 
Adapted from Cook's Illustrated
Author:
Ingredients
  • 1 pound ground sirloin or 90 percent lean ground beef
  • vegetable oil
  • 1 cup finely chopped onion
  • 1½ tablespoons mild chile powder
  • 1 tablespoon paprika
  • 1½ teaspoons ground cumin
  • ¾ teaspoon garlic powder
  • ½ teaspoon dried oregano
  • 1½ teaspoons kosher salt
  • 1½ tablespoons tomato paste
  • 1½ teaspoons finely minced chipotle chile in adobo
  • 2 ounces finely shredded cheddar cheese (1/2 cup)
  • 12 (6-inch) corn tortillas
  • Taco Garnishes:
  • shredded iceberg lettuce
  • diced onion
  • diced tomato
  • pickled jalapeños
  • shredded cheddar cheese
  • sour cream
Preparation
  1. Adjust oven rack to middle position and heat oven to 400 degrees.
  2. Combine chile powder, paprika, cumin, garlic powder, oregano and kosher salt in a small bowl.
  3. Heat 1 tablespoon canola oil in a 12-inch skillet over medium heat. Add onion and cook, stirring occasionally until softened, about 5 minutes. Add spice mix to the onions, stirring constantly for 1 minute. Stir in tomato paste and chipotle chile and cook for another minute. Add ground sirloin and cook, using a wooden spoon to break meat into pieces no larger than ¼-inch, until beef is cooked through and no longer pink, 5-7 minutes. Transfer beef to a bowl; stir in cheddar until cheese has melted and mixture is homogenous. Wipe skillet clean with paper towels.
  4. Thoroughly brush both sides of the tortillas with canola oil (or spray lightly with cooking spray). Arrange tortillas, overlapping slightly, on a foil-lined baking sheet (2 rows of 6 tortillas). Bake until tortillas are warm and pliable, about 5 minutes. Reduce oven temperature to 200 degrees.
  5. Place 2 tablespoons of filling on 1 side of each tortilla. Fold and press to close tortilla. The filled tortillas can be covered and refrigerated for up to 8 hours.
  6. Set a small wire rack in a rimmed backing sheet (for first batch of cooked tacos). Heat ¼ cup oil in the skillet over medium to medium-high heat until shimmering. Arrange 6 tacos in the skillet with open sides facing away from you. Cook, adjusting heat so oil actively sizzles and bubbles appear around the edges of the tacos, until tacos are crispy and deeply browned on 1 side, about 2-3 minutes. Using a spatula, carefully flip tacos. Cook until browned on second side, about 2 minutes, adjusting heat as necessary.
  7. Remove skillet from heat and transfer tacos to a paper towel lined plate and blot tops with paper towels. Transfer tacos to prepared rack and place in oven to keep warm. Return skillet to medium to medium-high heat and cook remaining tacos.
  8. Serve tacos with your favorite garnishes, rice and beans.


Follow

Get every new post delivered to your Inbox

Join other followers: