Browsing Category

Jams & Jellies

Dessert, French, Fruit, Jams & Jellies, Lactose Free, Recipes, Vegan, Vegetarian

Strawberry Galette

July 21, 2021

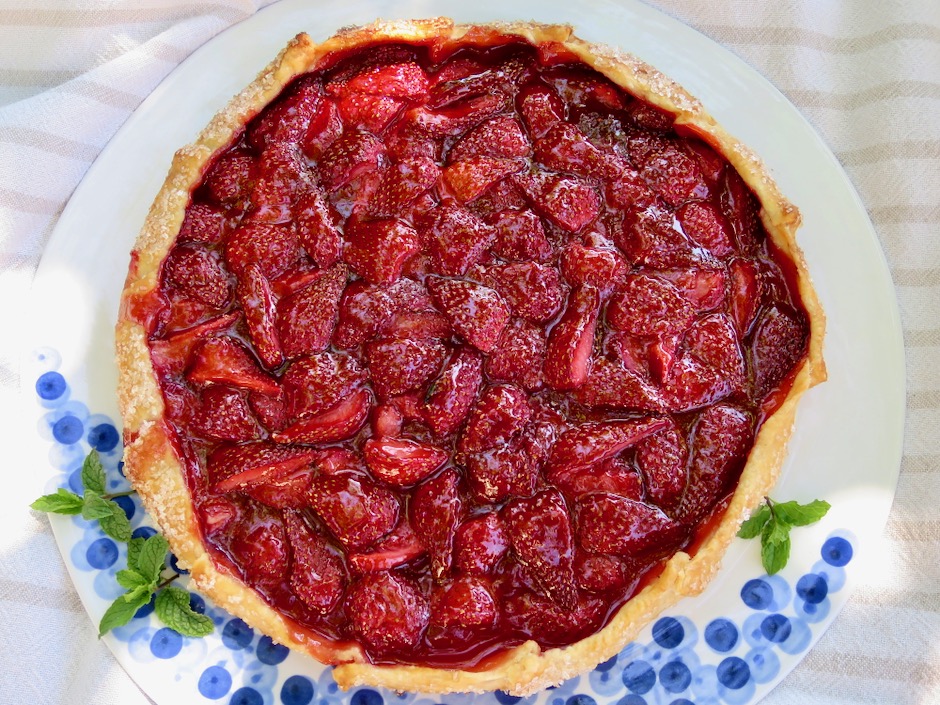
Strawberry Galette

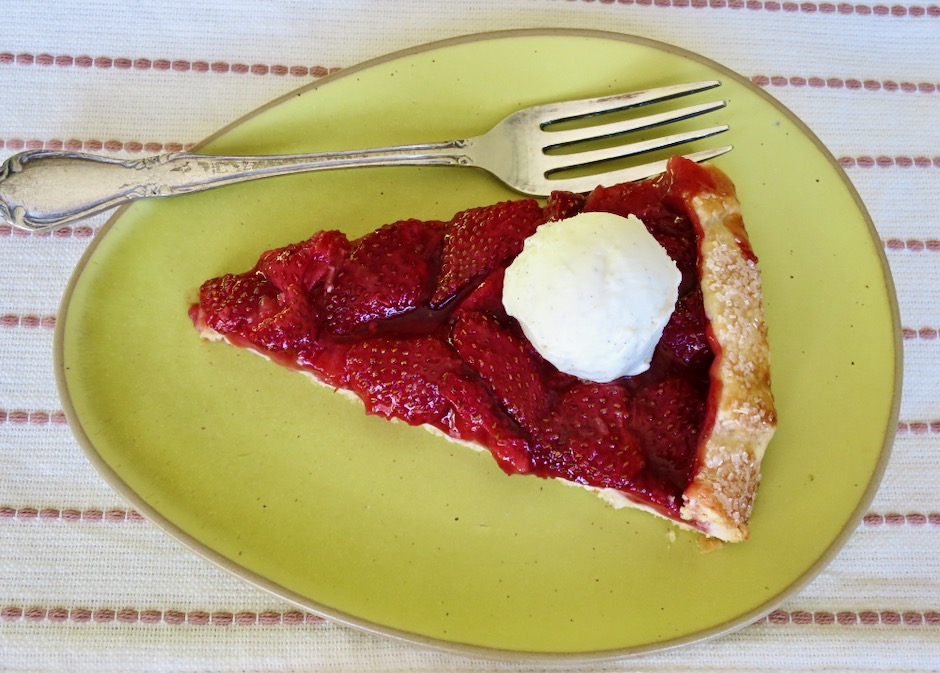
One of my favorite fruits to use in a galette is mango.  During the summer months our two trees produce a good harvest of fruit that we use in all sorts of recipes.  But not everyone has access to mangos so any number of other seasonal fruits or berries are suitable.  I particularly like strawberries.  They make a gorgeous galette that bakes up beautifully.  The crust holds up well and leftovers, if any, are a real treat with coffee the following morning.

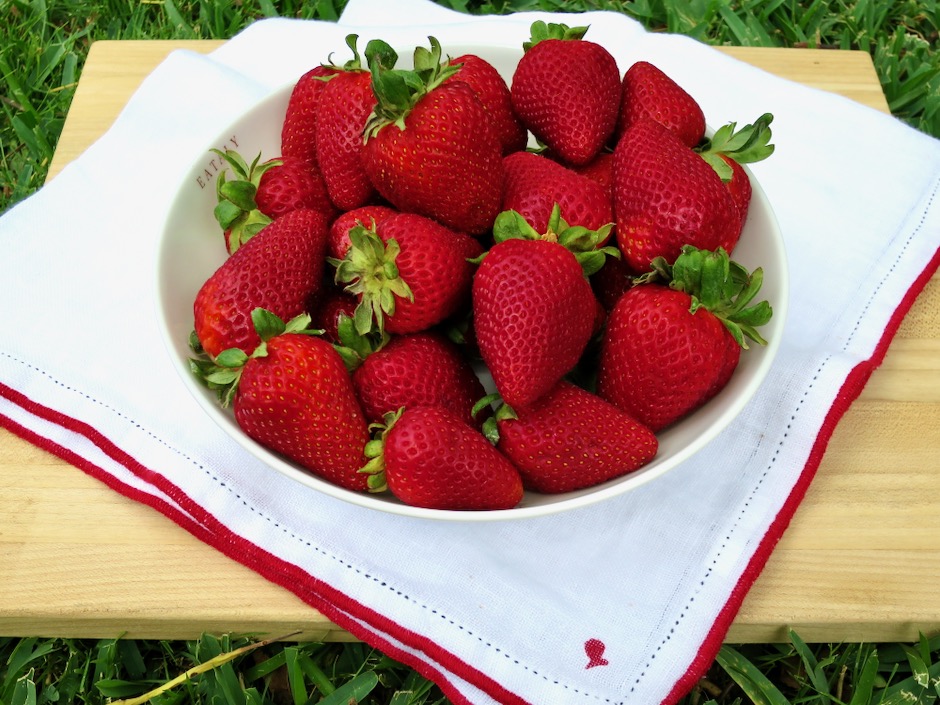
Fresh Strawberries

The strawberries found in the markets can vary in sweetness.  It’s a good idea to buy ones that are ripe and juicy in appearance but not at all soft.  Strawberries are quite perishable so plan on making the galette within a day or two of buying your strawberries.

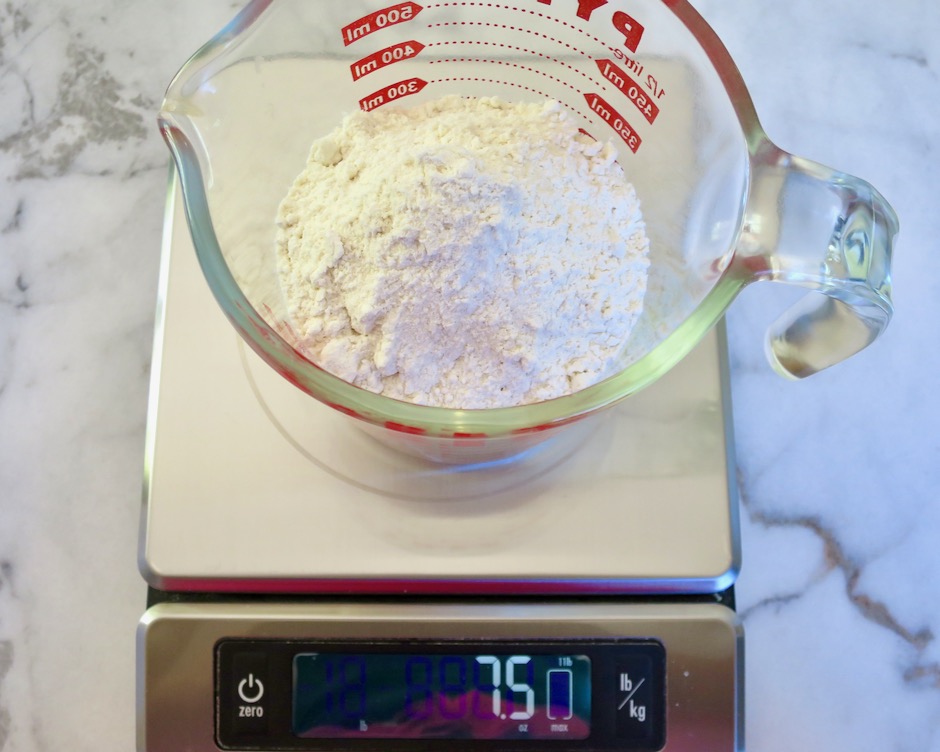
Weighing Flour

The crust for this galette is excellent. It holds up well to the juicy strawberry filling and does not become soggy even if you have leftovers the following day.

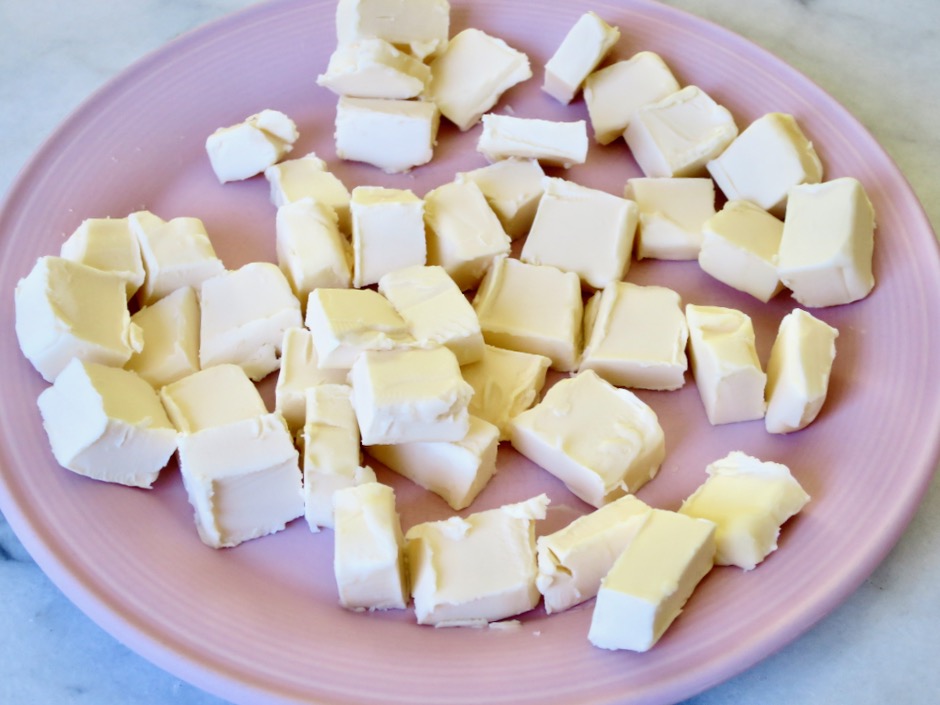
Chilled Earth Balance Buttery Stick Cubes

I used Earth Balance Buttery Sticks (vegan and lactose free) but feel free to use regular unsalted butter as the original recipe calls for.   Whatever you choose to use, make sure it does not sit out on the counter and is well chilled.  Buttery Sticks are not as firm as regular butter so I freeze the cubes for 15-30 minutes before proceeding with the recipe.

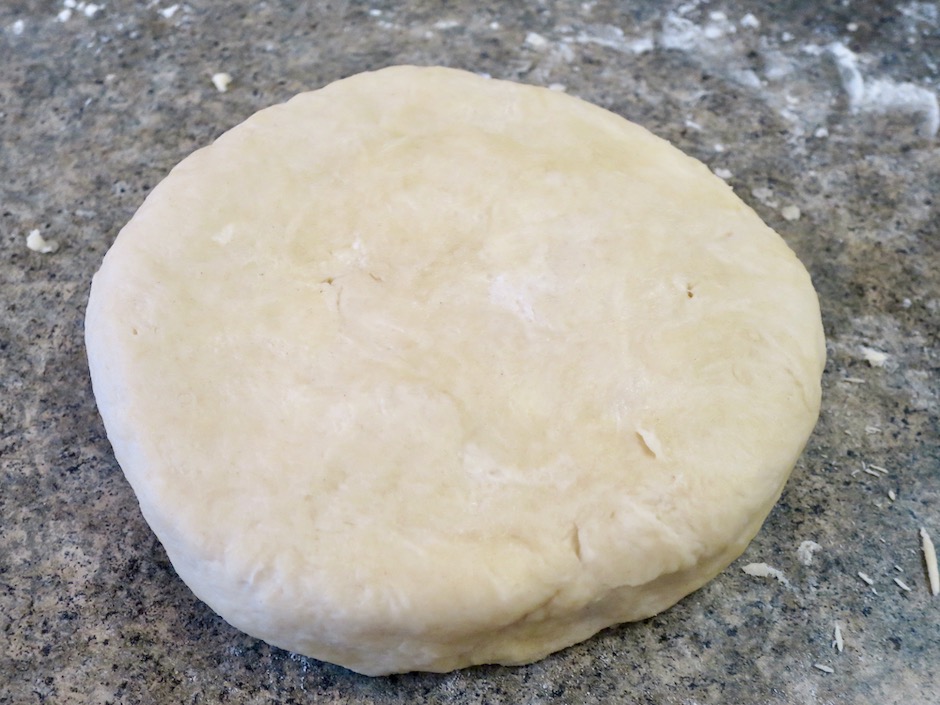
Galette Dough

If I am short on time I freeze the wrapped dough for 30 minutes instead of chilling it in the refrigerator for a few hours.

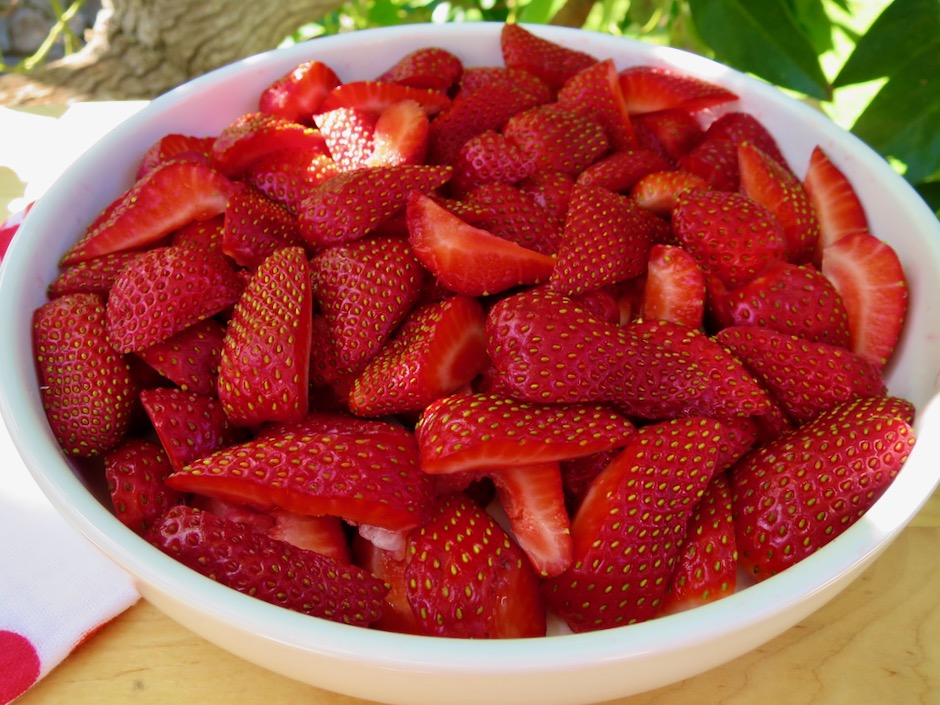
Sliced Strawberries

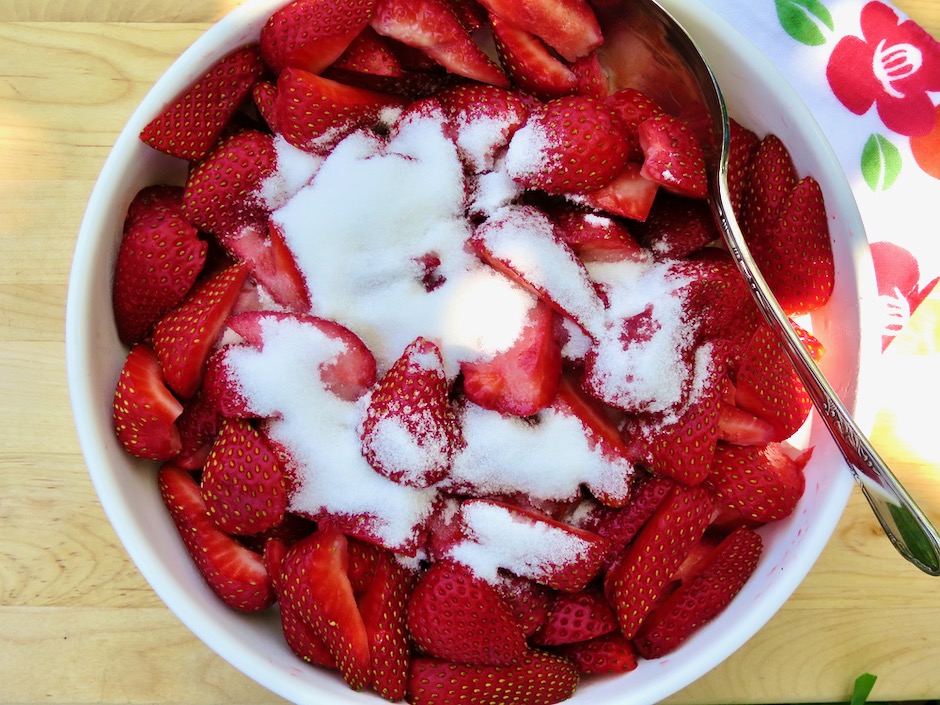
Strawberries & Sugar

A little sugar is stirred into the berries which will give them a bit of sweetness, but not too much.

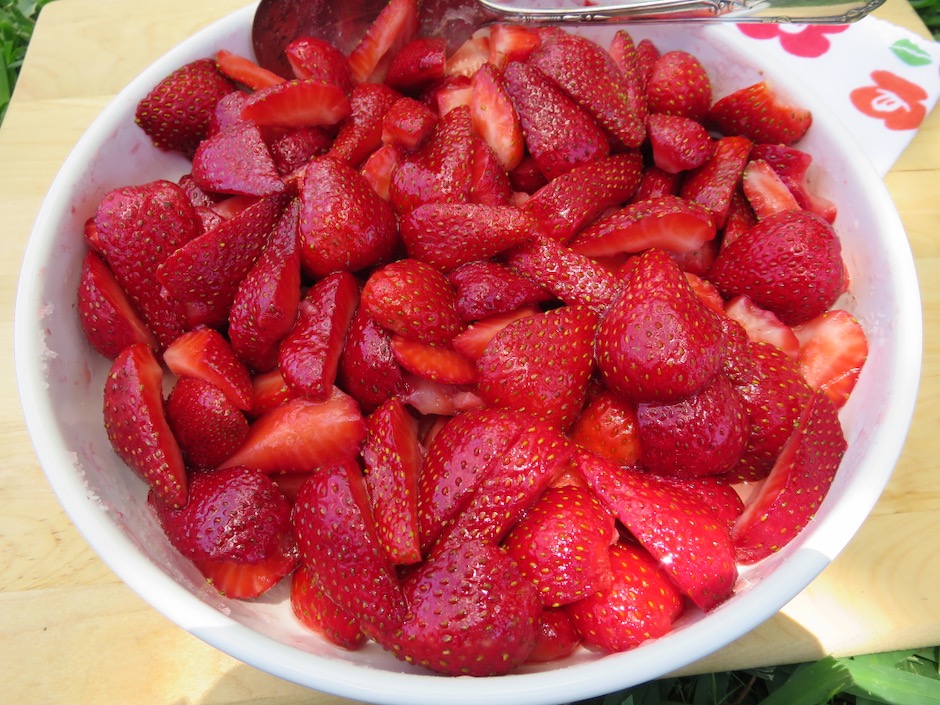
Strawberries & Sugar

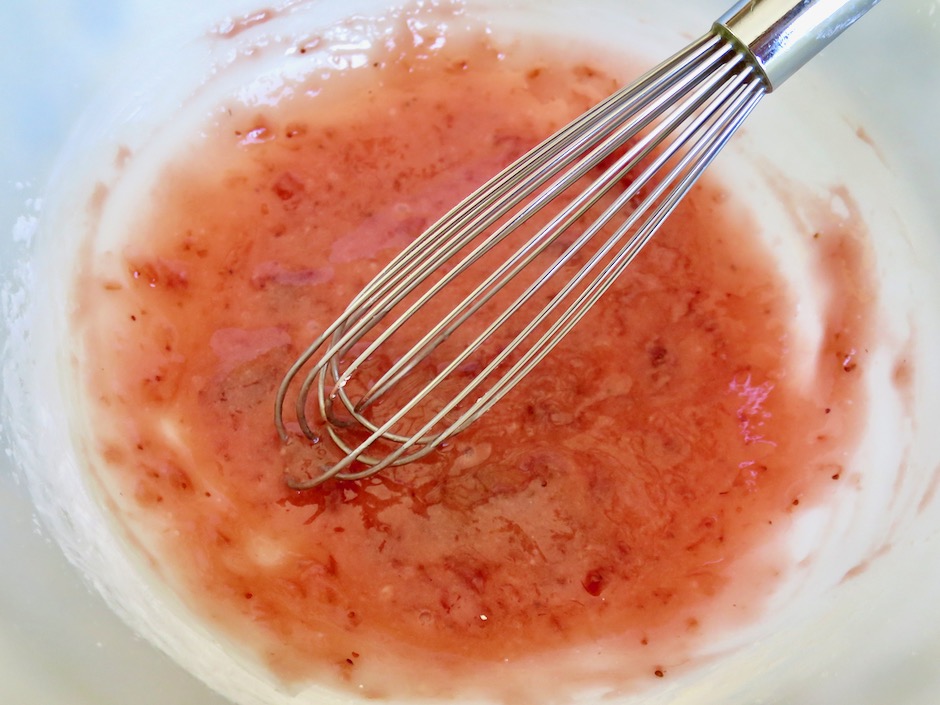
Strawberry Jam & Cornstarch Mixture

The strawberries are gently tossed into a mixture of strawberry jam that is mixed with cornstarch and a pinch of salt.  

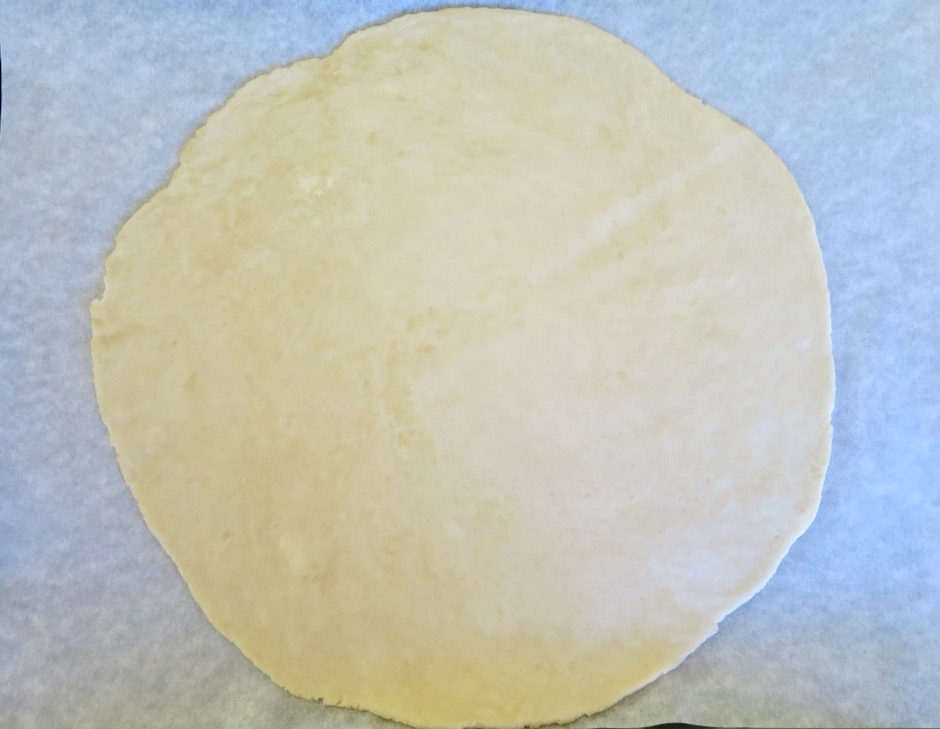
Rolled Out Dough

Roll the dough out on parchment paper.  Transfer the rolled out dough to your rimmed baking sheet and continue with the recipe.  

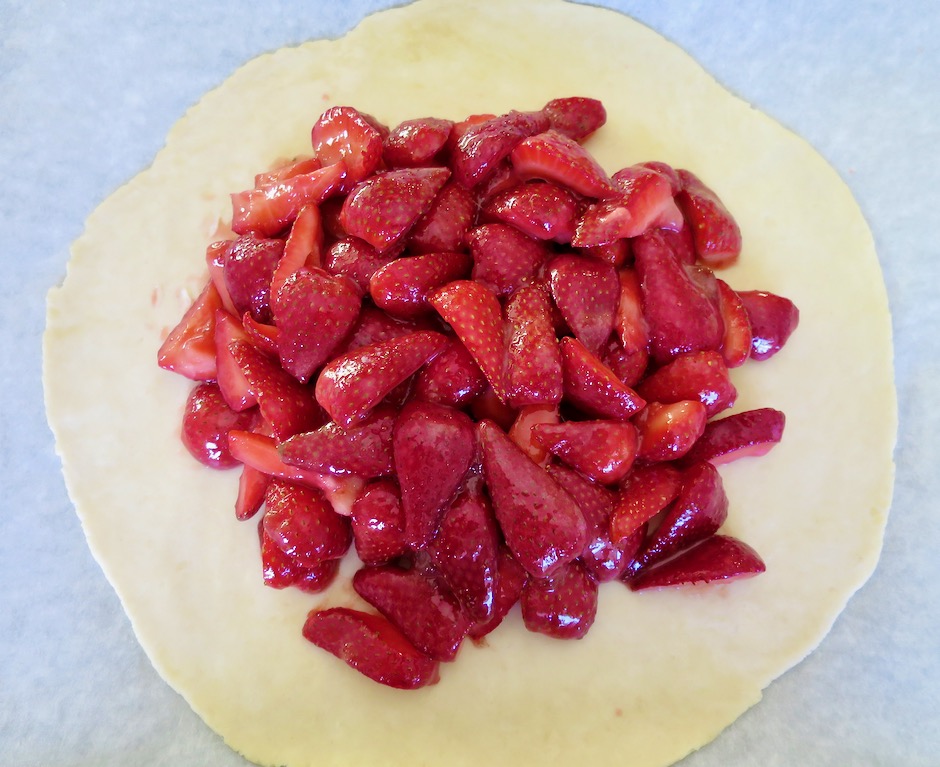
Strawberries on Galette Dough

Leave a 2-inch border (sometimes I end up with 1 1/2-inches!) to fold over the filling.  The original recipe calls for brushing the edges of the galette with some of the reserved strawberry juice and sprinkling sugar over the edges before baking.  Try not to apply too much of the juice as it is quite thin and will drip down the sides of the crust.  You can brush the crust with a bit of lactose free half and half or whole milk instead, then sprinkle with sparkling sugar.  The coarse-grained sugar adds a beautiful sparkle and sweet crunch to each slice of the baked galette.

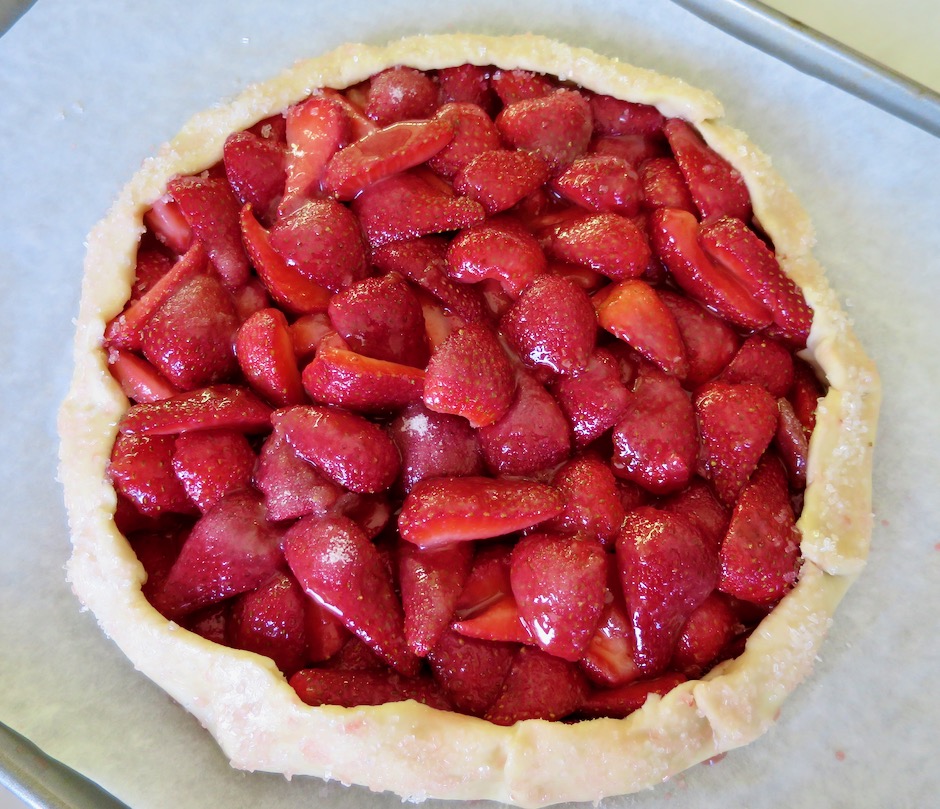
Strawberries in Galette Dough

The dough is pleated every 2 inches to shape the galette and keep the strawberries the center of attention.

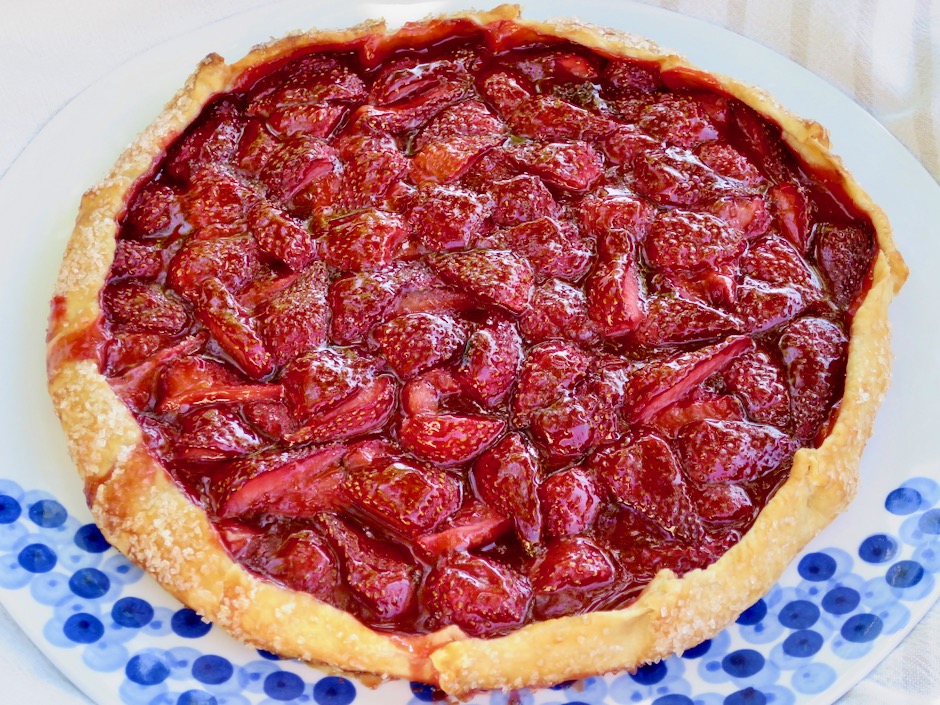
Strawberry Galette

I brush a bit of warmed strawberry jam over the strawberries once the galette is done baking. It gives the galette extra flavor and a beautiful sheen.

Strawberry Galette with Ice Cream

Strawberry Galette
 
Adapted from Cook's Country
Author:
Serves: 10
Ingredients
  • Dough:
  • 1½ cups (7½ ounces) all-purpose flour
  • ¼ teaspoon salt (1/2 teaspoon if using unsalted butter)
  • 1 tablespoon granulated sugar
  • 10 tablespoons Earth Balance Buttery Sticks cut into ½-inch cubes and frozen for 15 - 30 minutes (or unsalted butter well chilled)
  • 6 tablespoons ice water
  • Filling:
  • 1½ pounds strawberries, hulled, halved if small or quartered if large (about 5 cups)
  • ¼ cup (1¾ ounces) granulated sugar + 1 tablespoon sugar, divided
  • ⅓ cup strawberry jam + 1 tablespoon, divided
  • 1½ tablespoons cornstarch
  • ⅛ teaspoon fine sea salt
  • 1 tablespoon coarse sparkling sugar
Preparation
  1. For the dough: Process flour, salt, and sugar in a food processor until combined, about 4 pulses. Scatter Buttery Sticks cubes over the top and pulse until mixture resembles coarse sand and butter pieces are the size of small peas, about 10-12 pulses. Add ice water to flour mixture and pulse until dough begins to form small curds and holds together when pinched with your fingers, about 5 pulses.
  2. Transfer mixture to a lightly floured counter. Gather dough into a rough rectangular mound about 8 inches long and 4 inches wide. Starting at the farthest end, use the heel of your hand to smear a small amount of dough against the counter, pushing firmly down and away from you. Continue doing this while turning the dough as you go. Continue until all the dough has been worked, about 8 times. This is a process of working the crumbles of flour, butter, and water together into a dough by smearing them against the counter, making for a sturdy, flaky crust. Form dough into a 6-inch disk, wrap tightly with plastic wrap and refrigerate for 2 hours or freeze (if short on time) for 30 minutes. The dough can be refrigerated for up to 2 days.
  3. For the filling: One hour before rolling out the dough, toss strawberries with ¼ cup sugar in a medium bowl. Set aside for 1 hour. Reserve 1 tablespoon strawberry juice (if using for crust). Drain strawberries in colander while rolling out dough.
  4. Adjust oven rack to lower-middle position and heat oven to 375 degrees. Roll dough into 12-inch circle on parchment paper. Transfer dough on parchment paper to rimmed baking sheet, cover loosely with plastic wrap and refrigerate until firm, about 15 minutes.
  5. Whisk jam, cornstarch, and salt in a large bowl. Add drained strawberries and toss gently to coat. Remove dough from refrigerator (I transfer to dough to a second rimmed baking sheet that hasn't been chilled) and mound fruit in center, leaving a 2-inch border. Grasp one edge of dough and fold up 2-inches over fruit. Repeat around circumference of galette, overlapping dough every 2-inches. Firmly pinch pleated dough to secure. Sprinkle reserved 1 tablespoon of sugar over the strawberries. Brush top edges of dough with reserved strawberry juice, half and half or whole milk and sprinkle with sparkling sugar.
  6. Bake until crust is deep golden brown and fruit is bubbling, about 1 hour 5 minutes. Let galette cool on baking sheet for 5 minutes. Warm reserved tablespoon of jam. Brush jam over the berries. Let cool for 15 minutes. Using parchment, carefully slide galette onto serving plate. Serve warm or at room temperature.

 

Canning, Fruit, Jams & Jellies, Lactose Free, Recipes

Mango Lilikoi Jam

August 24, 2020

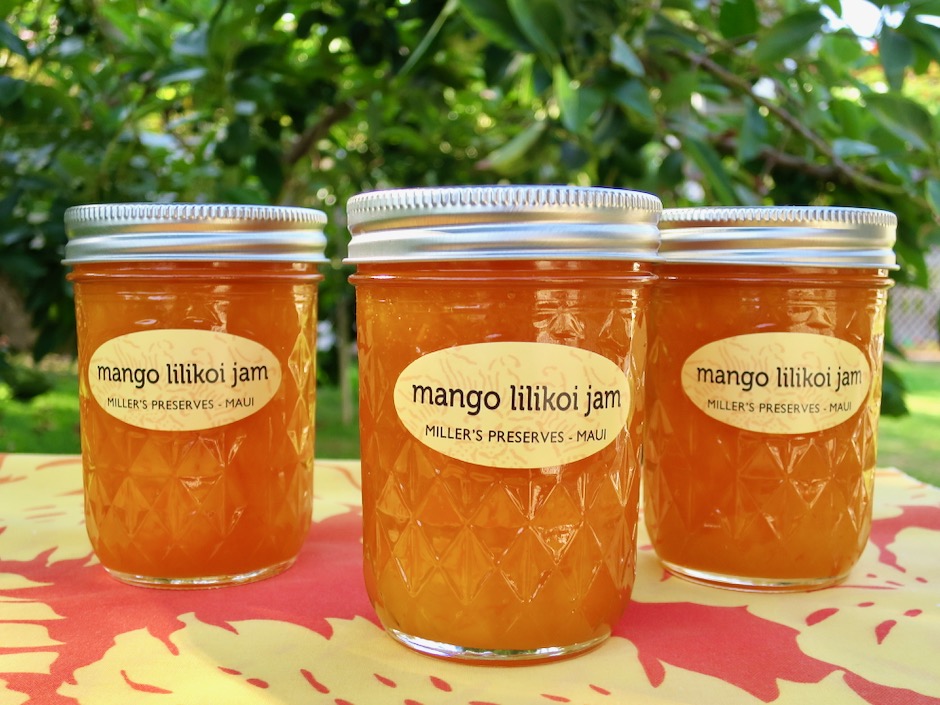
Mango Lilikoi Jam

This delightful lower sugar jam combines the taste and texture of Hawaii’s favorite fruit, mango, with the exotic flavor and scent of lilikoi (passion fruit).  With two prolific mango trees in our yard, every year we make dozens of jars of this jam, which has become our favorite.

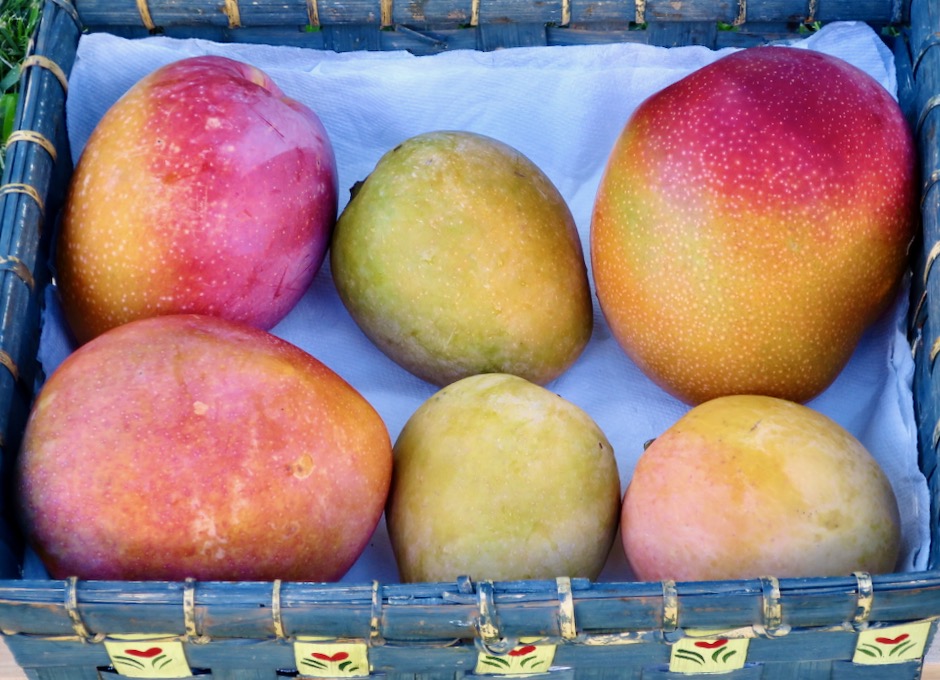
Homegrown Rapoza & White Pirie Mangos

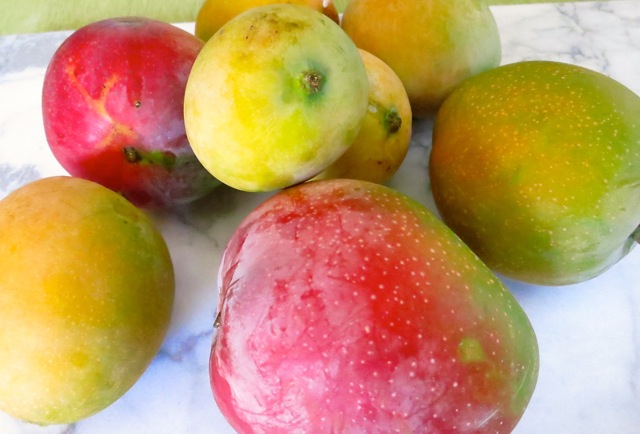
We have two varieties of mango trees in our yard, White Pirie and Rapoza.  The jams are usually a mix of the two.

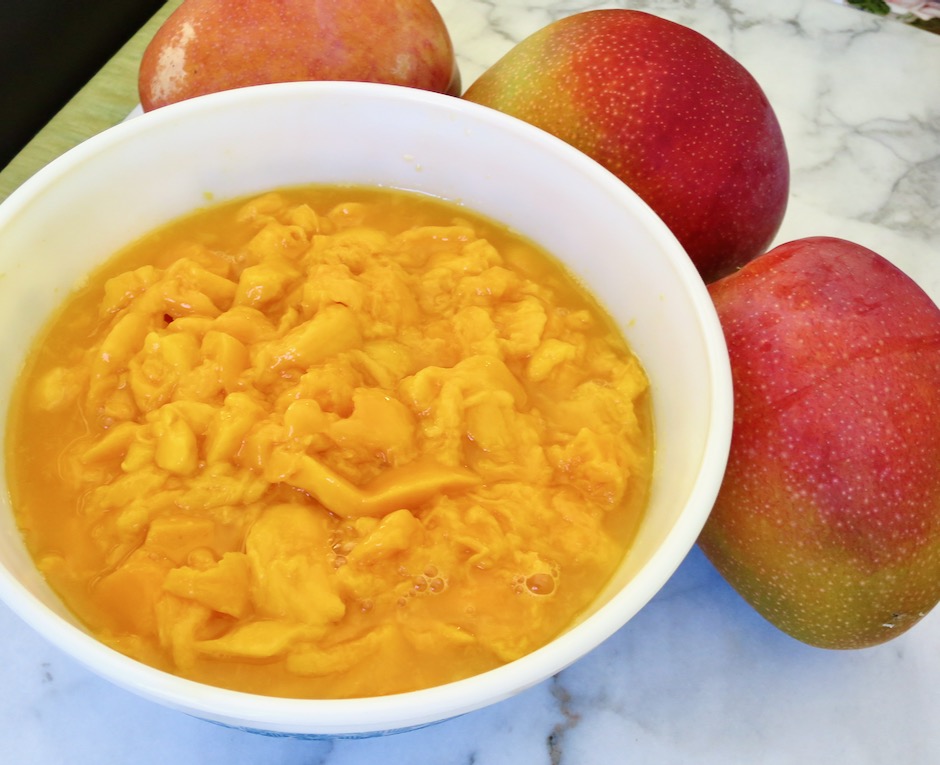
Crushed Mangos

After peeling and removing the seeds from the mangos, I roughly crush the fruit with my hands for a more rustic texture.  You could also chop the fruit with a knife into 3/4-1-inch pieces.
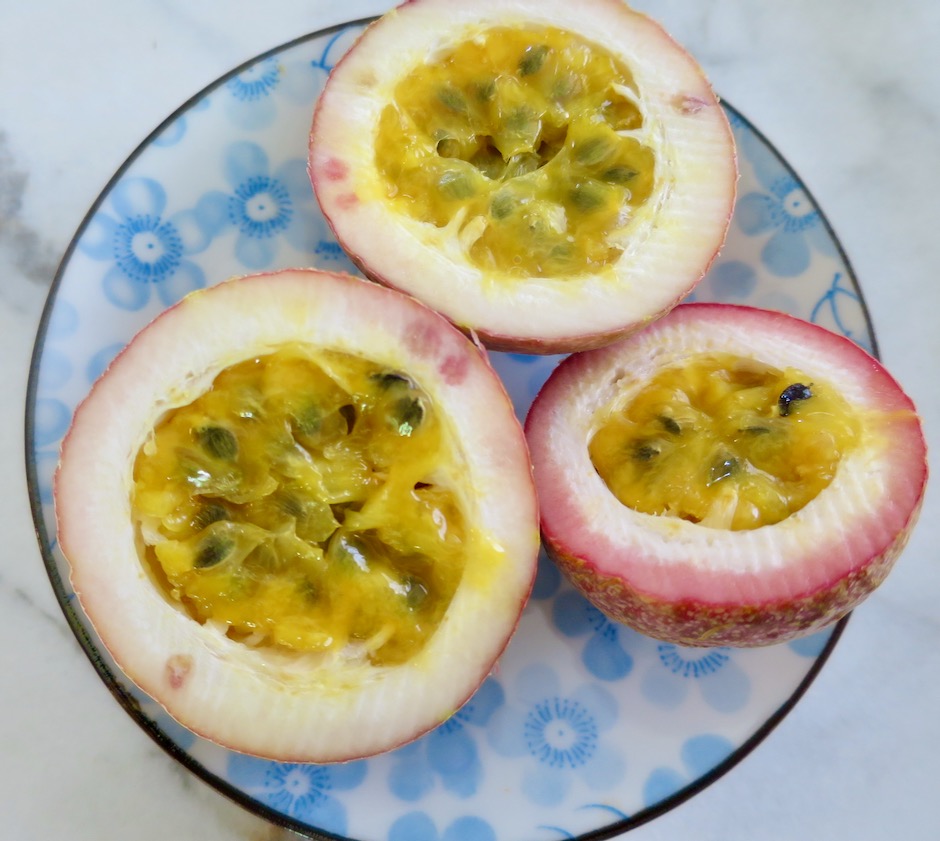
Purple Lilikoi

Pictured above are lilikoi from our garden.  The best way to juice them is to place the pulp in a blender and mix on low speed. This will break up the membranes and release the juice. We use our food mill to remove the seeds but pressing through a sieve will work too.
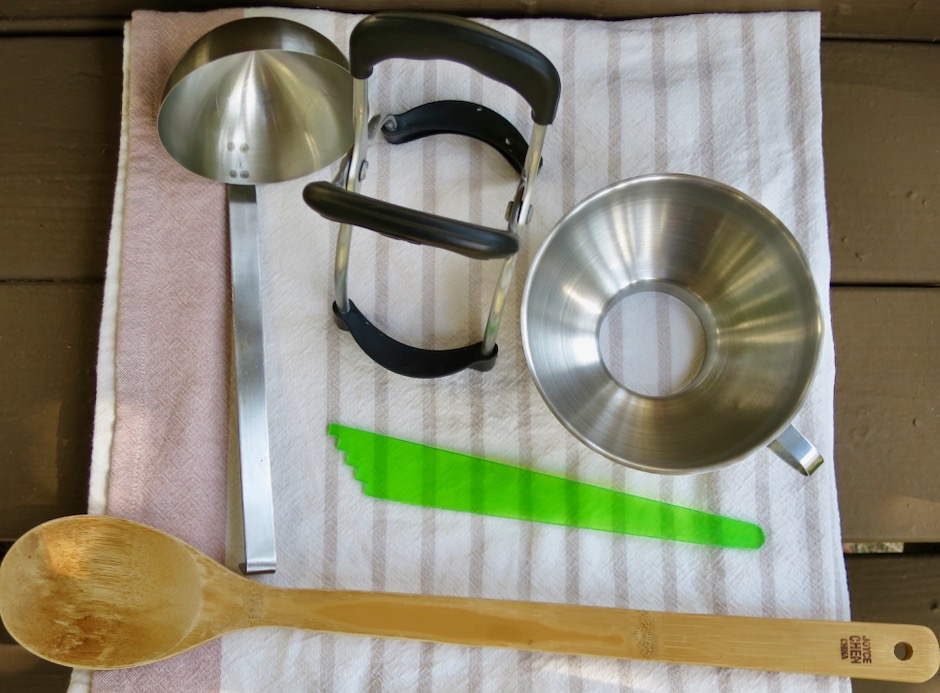
Essential Canning Utensils

Essential canning utensils: large ladle, jar lifter, canning funnel, headspace measuring tool, long handle spoon.

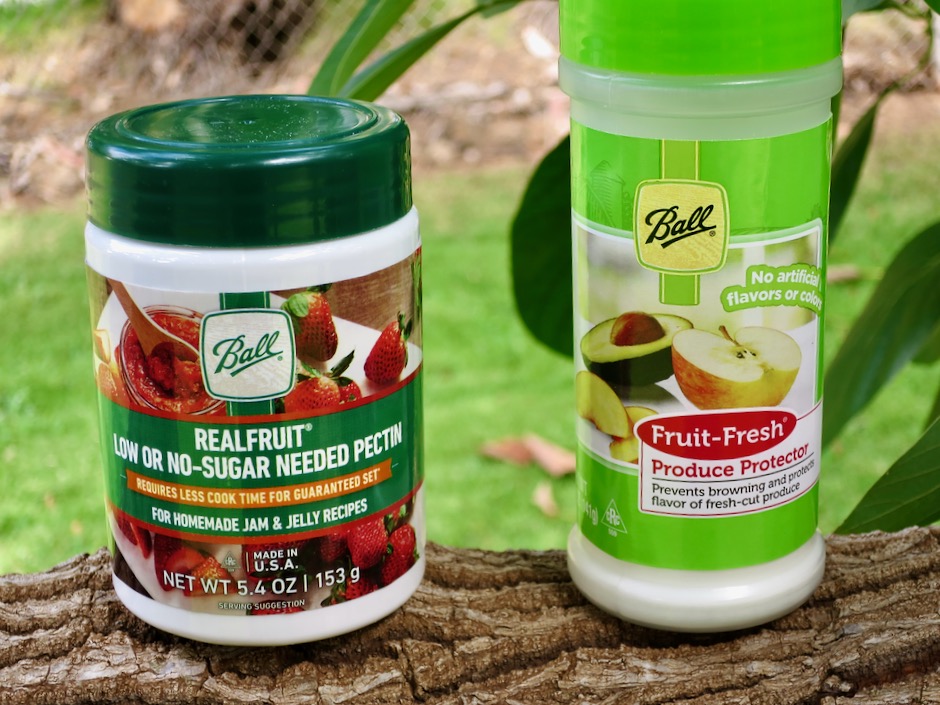
Low or No-Sugar Pectin & Fruit-Fresh

Low or no-sugar pectin and Fruit-Fresh (ascorbic acid/vitamin C).

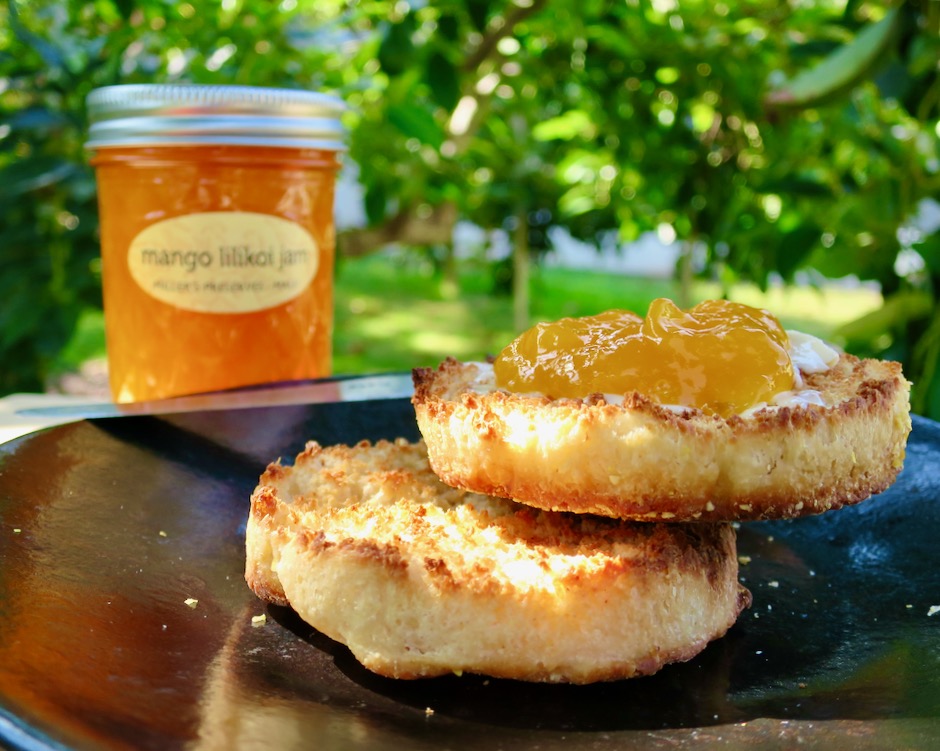
Mango Lilikoi Jam on English Muffin

Mango lilikoi jam on homemade English muffins.

Mango Lilikoi Jam
 
Author:
Serves: 8 half pint jars
Ingredients
  • 6 (generous) cups of crushed or chopped mango (1,450g)
  • ½ cup fresh lilikoi juice
  • ¼ cup bottled lemon juice (best for safe canning)
  • 4 cups granulated sugar (800g)
  • 3 tablespoons low/no sugar pectin
  • 2 tablespoons + 1 teaspoon Fruit Fresh (ascorbic acid, optional but recommended for maintaining vibrant color of jam)
Preparation
  1. Special equipment: Boiling water canner with jar rack, 8 half-pint mason jars with two piece lids, 8-quart stock pot, large ladle, jar lifter, canning funnel, headspace tool, long handle spoon.
  2. Prepare boiling water canner, 8 half-pint mason jars and two piece lids: Wash jars and lids, place jars in canner pot and fill with water to 1-inch over top of jars. Place on stovetop and heat to a simmer.
  3. Peel and seed about 12 mangos, crush or chop into irregular pieces, about ¾-1-inch in size. You are aiming for a rustic look. You want to to have a generous 6 cups total (1,450g). Place mangos in large 8-quart stock pot, add lilikoi and lemon juice. Add pectin and Fruit-Fresh and stir to combine. Bring mixture to a full rolling boil that cannot be stirred down, over high heat, stirring constantly. Add sugar, stirring to dissolve. Return mixture to a full rolling boil. Boil hard for 1 minute, stirring constantly. Remove pot from burner.
  4. Remove jars from canning pot (water from jars can be emptied back into canner), and ladle hot jam into jars leaving ¼-inch headspace. Wipe rims with a damp cloth or a paper towel and affix lids and rings. Turn rings with fingertips until just tight, reverse, and tighten again until just finger tight. Place jars into canner, cover with lid and bring to a boil. Once boiling, set timer for 10 minutes, adjust burner temperature to maintain steady boil. At the end of 10 minutes, turn off burner, remove lid and let jars sit in the canner for 5 more minutes.
  5. Remove jars, wick off water from lids with a towel and let cool for 24 hours on a kitchen towel or cooling rack. Remove rings, check that lids are sealed. Sealed jars are shelf stable for 18 months. It's a good idea to date your jars.


Appetizers, Canning, Jams & Jellies, Lactose Free, Recipes

Maui Jalapeno Pepper Jam

June 27, 2020

Maui Jalapeno Jam

Every year we grow hot peppers, jalapeños and fresnos.  Occasionally we have a particularly large crop, and after putting up our usual jars of pickled nacho rings, jalapeño hot sauce and Maui cowboy candy, we still have peppers left over. After a little research, John discovered a jalapeño jam recipe on the Serious Eats website.  He tweaked it a bit and this terrific, sweet, spicy jam is the result.

Mucho Nacho Jalapeños

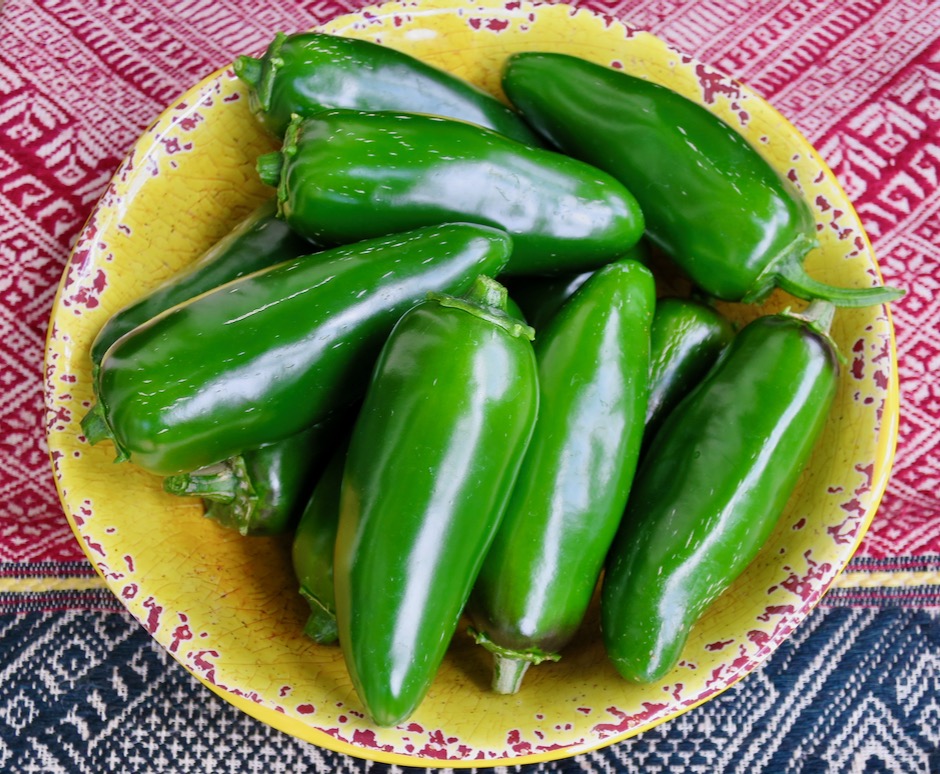
These particular jalapeños are a hybrid known as Mucho Nacho.  They are particularly hot!

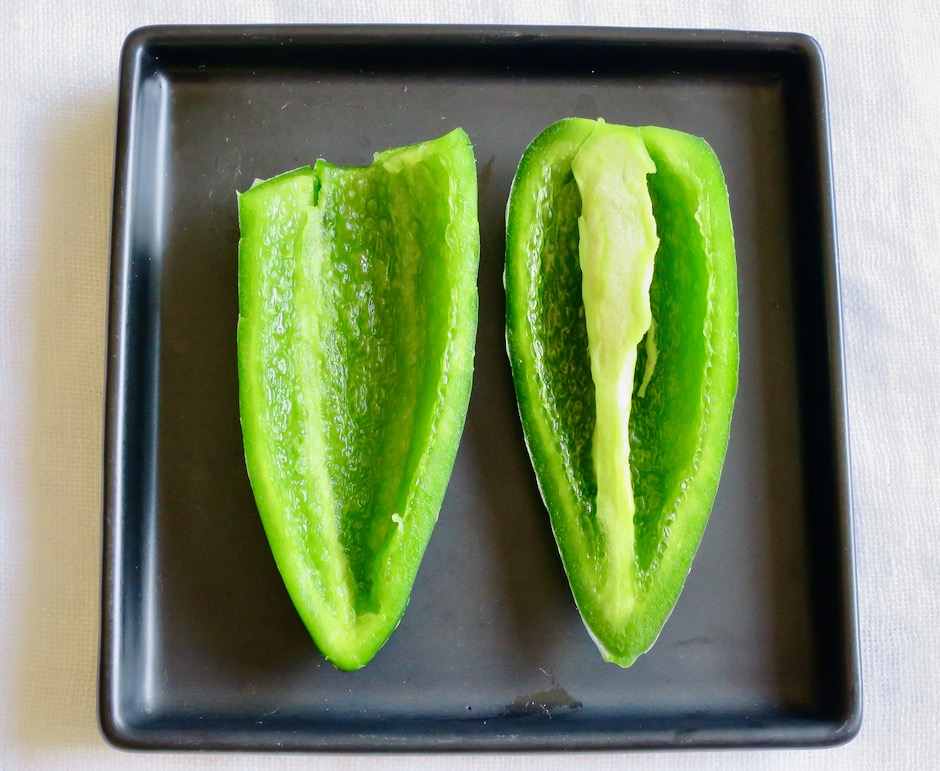
Seeded Mucho Nacho Jalapeños with and without Ribs & Pith

Prepare the peppers by cutting off the stems, slicing them lengthwise and removing the seeds with your fingers (disposable gloves are essential).  Contrary to popular myth, the seeds do not contain capsaician.  If you want a milder jam, remove the pith and ribs from the interior of the pepper as seen above.

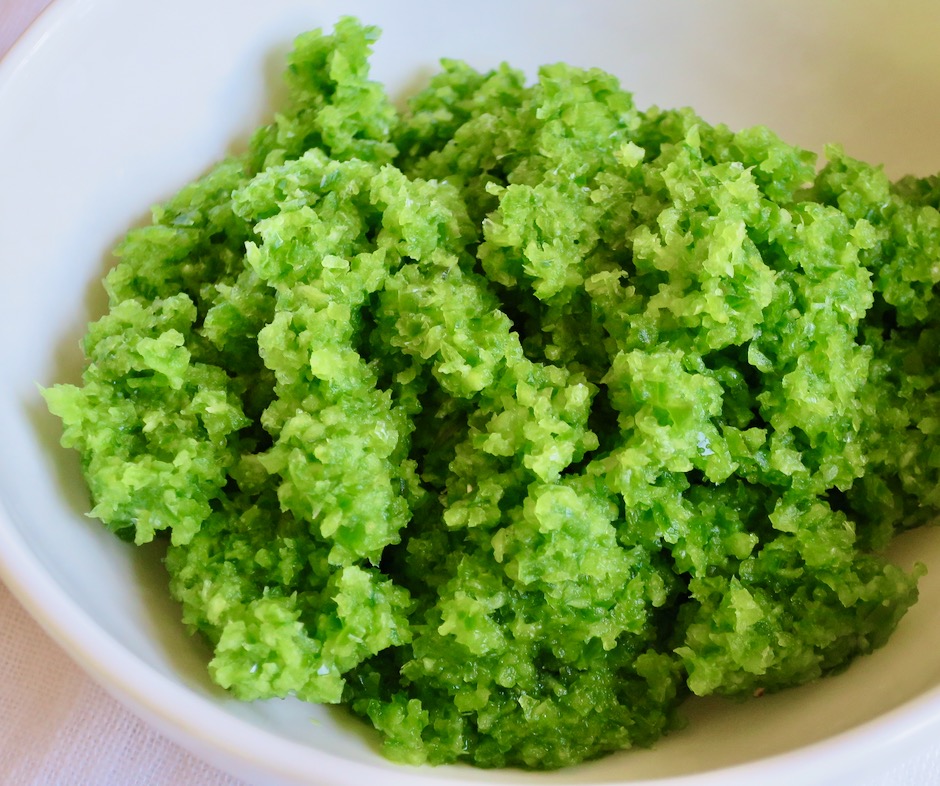
Mucho Nacho Jalapeños Finely Chopped

Once the stems and seeds are removed, place the peppers in a bowl of a food processor fitted with a steel blade and pulse until the peppers are finely chopped.

Maui Jalapeno Jam

Late in the season your peppers may start ripening to red.  You can use them to make a beautiful red version of the jam.  Do not mix the two colors of peppers or you will end up with brown jam!Maui Jalapeno Jam

Maui Jalapeno Pepper Jam
 
Adapted from Serious Eats
Author:
Serves: 7 Jars
Ingredients
  • 28-30 medium-sized jalapeños (28 ounces after removing stems and seeds)
  • 1¼ cups cider vinegar
  • ¼ cup fresh lime juice
  • 1 teaspoon kosher salt (we use Diamond Crystal)
  • 6 tablespoons dry pectin (we use Ball brand Real Fruit Classic Pectin)
  • 6 cups granulated sugar
Preparation
  1. Special equipment: Food processor, boiling water canning equipment, (7) 8 ounce canning jars with rings and 2-piece lids.
  2. Wash jars, place in water filled canner. Bring water to a simmer.
  3. Wash peppers and remove stems. Slice in half lengthwise and remove the seeds with your fingers (gloves are essential). Place the peppers in the bowl of a food processor fitted with a steel blade and pulse until finely chopped. Transfer peppers to a deep saucepan. Stir in the cider vinegar, lime juice, salt and pectin. Bring to a rolling boil over high heat. Add the sugar and return to a rolling boil for 1 minute, stirring constantly. Remove the saucepan from heat.
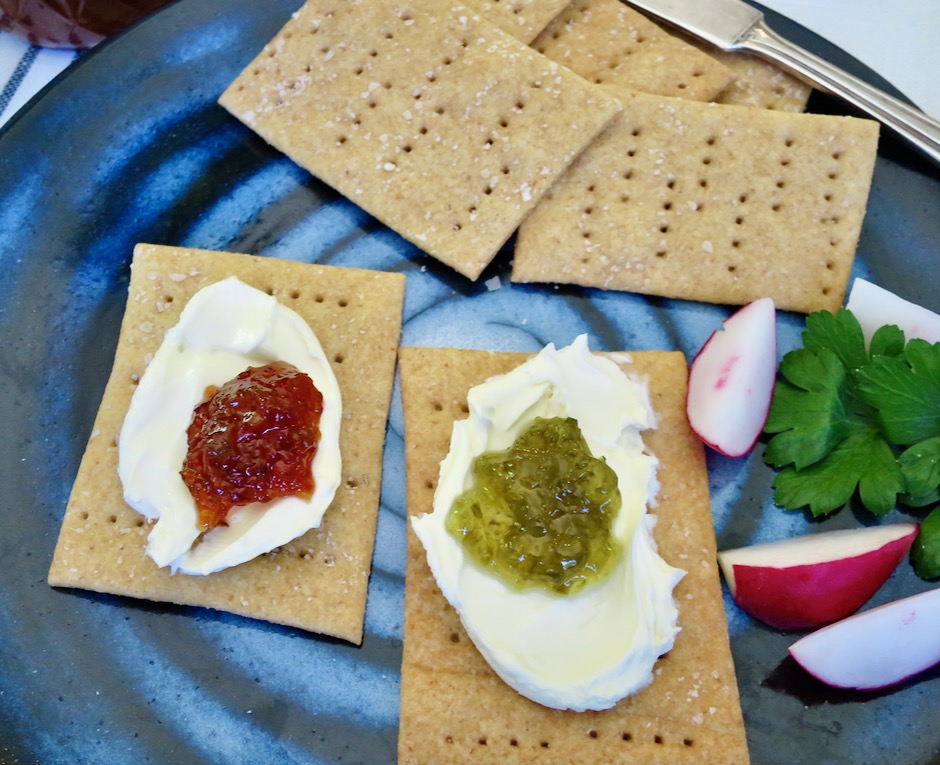
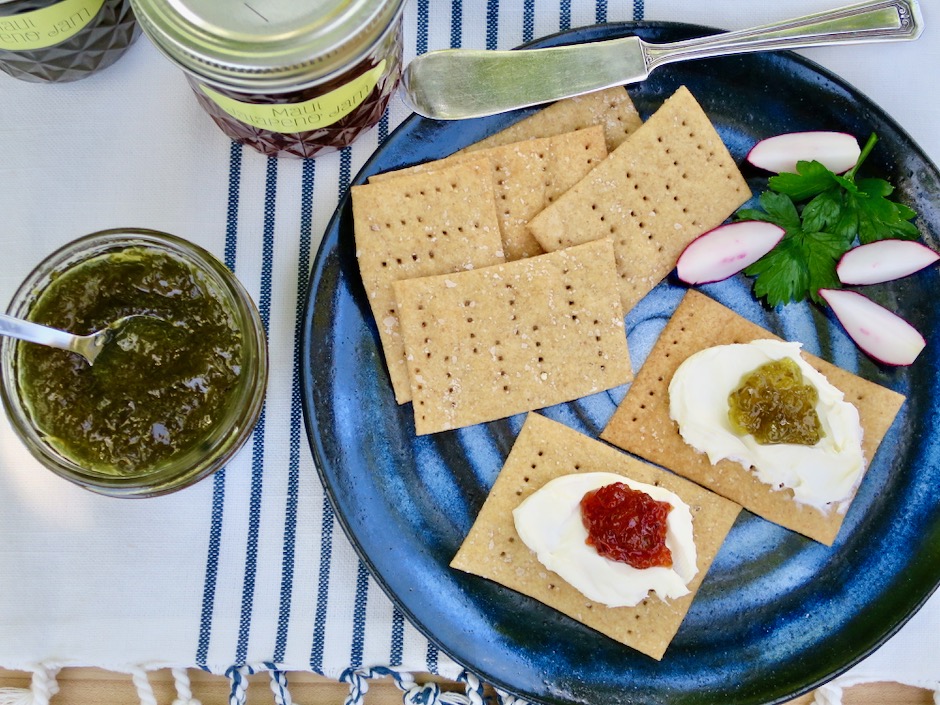
  4. Remove jars from canner and ladle hot jam into hot jars leaving ¼-inch headspace. Secure lids and rings just to finger tight. Cover and process jars in boiling hot water bath for 10 minutes. Turn off heat, leave jars in hot water for additional 5 minutes. Remove jars and let cool for 24 hours. Serve on crackers with cream cheese, use as a spicy barbecue glaze, or a spicy PBJ.


Canning, Fruit, Jams & Jellies, Recipes

Mango-Pineapple Jam

October 26, 2014

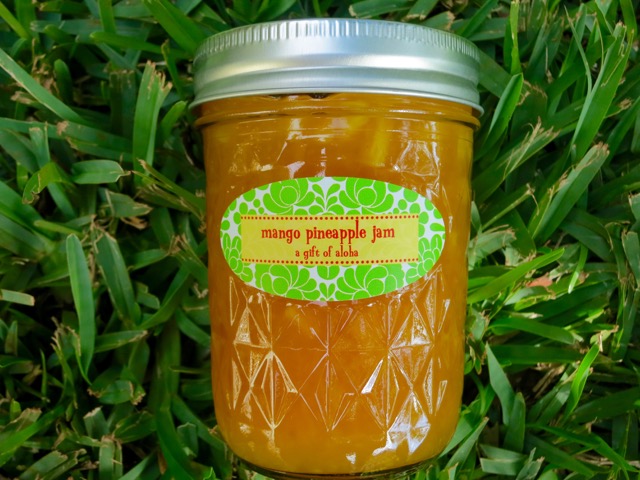
Mango-Pineapple JamThis past summer we once again had a good harvest of mangoes and were looking for a new jam recipe to try with our beautiful fruit. So after a bit of searching on-line, we tried Rachel’s recipe from her blog Coconut & Lime.  The combination of mango and pineapple is delicious.  Rachel mentions in her comment section that this particular jam is on the loose side.  The jam tasted fantastic, but I wished it were just a bit firmer.  The original recipe calls for liquid pectin.  The second time we made it, we tried using regular powdered pectin.  This still did not make for a firmer jam so we tried low-sugar pectin and adjusted the amount of fruit and sugar and it worked perfectly.

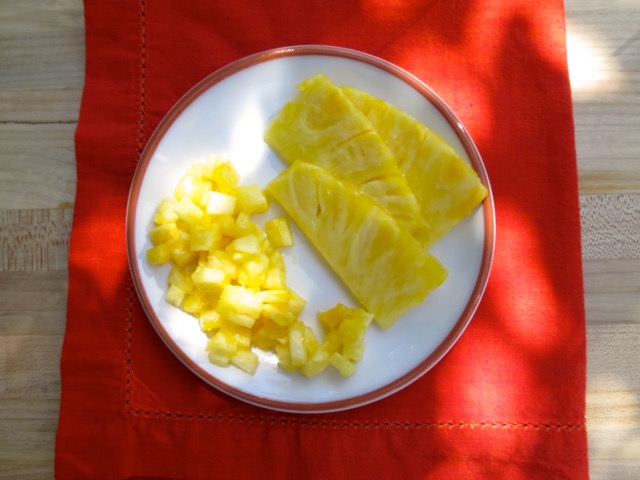
Maui Gold Pineapple Adding fresh pineapple gives this jam a lovely tropical flavor.  Being able to can the jam so that it is shelf stable for up to a year is the key to enjoying the flavors of summer even when summer is long gone.

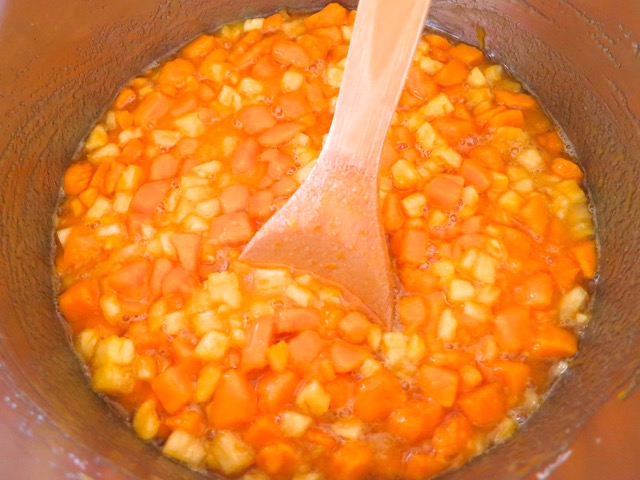
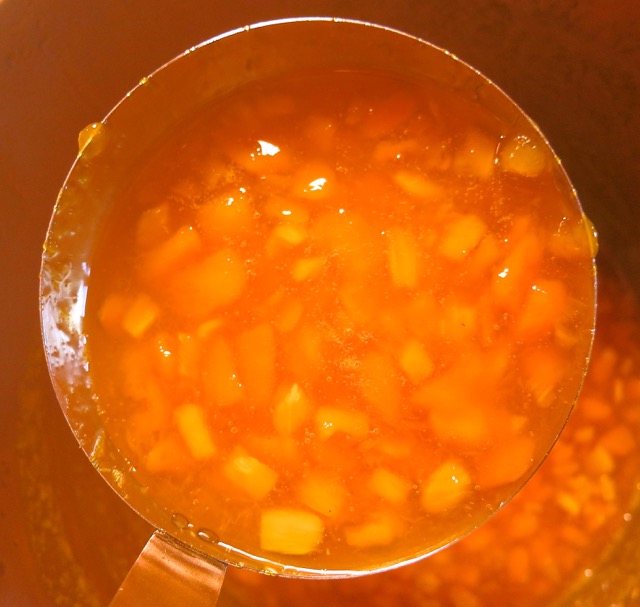
Making Mango-Pineapple JamThe fruit, lemon juice, rum and pectin are cooked on the stove before adding the sugar.  Once the sugar is added you continue to cook the mixture until it is thick and jammy as in the photo below.  Scrumptious.

Mango-Pineapple Jam


mango pineapple jam - 1 (1)

 Mango Pineapple Jam

Updated 10/31/20

Adapted from Coconut & Lime Blog

Makes 7 half pint jars

Ingredients

3 cups diced mango

3 cups diced fresh pineapple

2 tablespoons dark rum (optional)

1/4 cup lemon juice

1 package (1 3/4 ounce) Sure-Jell low/no sugar pectin or 3 tablespoons Ball low/no sugar pectin

4 cups sugar (800 grams)

Preparation

Wash jars and place them in boiling-water canner.  Fill the jars and canner with water to the top of the jars.  Cover and bring water to a simmer over medium heat, do not boil.  Prepare the two piece closures.  Wash lids and place in a small saucepan and cover with water.  Heat to just a simmer but do not boil.  Do not heat screw bands.

While jars are simmering, pour fruit, dark rum, lemon juice and pectin in an 8 – 10 quart pot, preferably with high sides.  Place over high heat, stirring constantly with a long-handled wooden spoon.  Bring to a rolling boil that cannot be stirred down.  Still stirring, add sugar.  Return to a boil that cannot be stirred down, and boil for exactly 1 minute.  Remove from the heat.

Lift the canner jar rack and fix into place on the rim of the canner. Remove one jar at a time from canner and empty hot water back into the canner. Place jar on a cutting board and place a canning funnel in the jar.  Ladle hot jam into jar leaving 1/4 inch head space.  With a clean damp cloth or paper towel wipe jar rim to remove any food residue.  Using a magnetic utensil, lift hot lid from water, center it on the  jar and place screw band on jar.  Tighten screw band evenly and firmly just until resistance is met.  Then increase to finger tip tight.  Do not over tighten.  Return jar to canner rack.  Continue filling jars individually until all jars are filled, lower rack into canner and ensure that all jars are covered by 1 inch of water.  Cover canner and bring water to a full boil over high heat.  Process for 10 minutes, starting timer only when water reaches a full boil. Turn off heat, remove jars from canner after 5 minutes to cooling rack.  Leave them undisturbed for 24 hours.  After 24 hours check lids for proper seal.  Remove screw bands  and press down on the lid with your finger.  Sealed lids will curve in and will show no movement when pressed.  Jars that haven’t sealed properly must be refrigerated immediately or reprocessed.  Wipe jars and store in a cool, dry place.  Label and date jars.  Properly sealed jars will keep in your cupboard for up to one year.


Canning, Fruit, Jams & Jellies, Recipes

Mixed Berry Jam

February 12, 2014

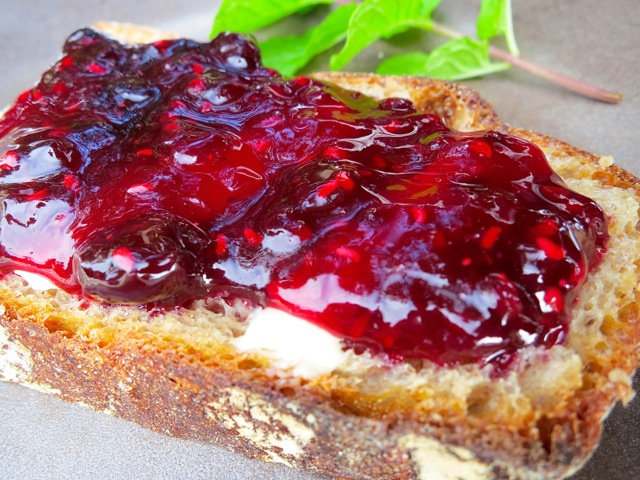
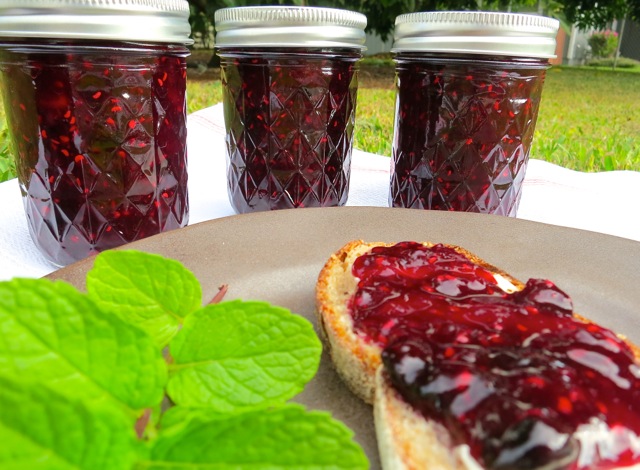
Mixed Berry Jam on ToastMango season is over and, alas, we have no lilikoi either. We love making jams and jellies from our own fruit, but when these fruits are out of season we look to other sources.

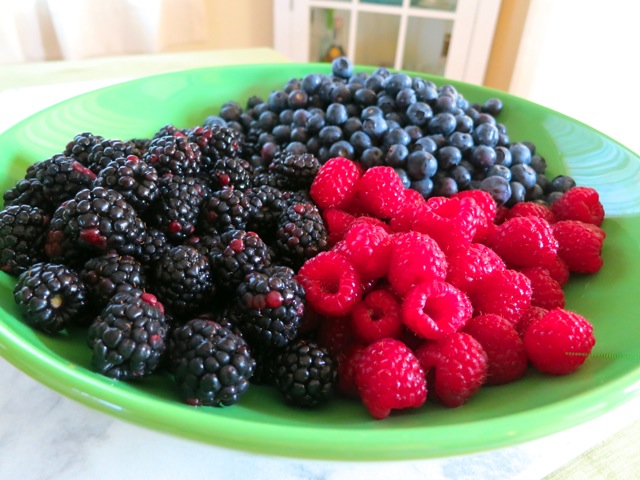
Blackberries, Blueberries, RaspberriesA mixed berry jam came to mind when John received his copy of Little Jars, Big Flavors published by Southern Living.  The book was on the Serious Eats list of  best Christmas gift books for 2013.  The recipes consist of small-batch jams, jellies, pickles, and preserves.  We were making our weekly trip to Costco and discovered that their selection of blackberries, raspberries and blueberries were all in perfect condition.  Buying various types of berries can be tricky.  I’ve purchased a container of blackberries that looked fine, however the next morning when I opened the container, to my dismay they were moldy. Aargh!

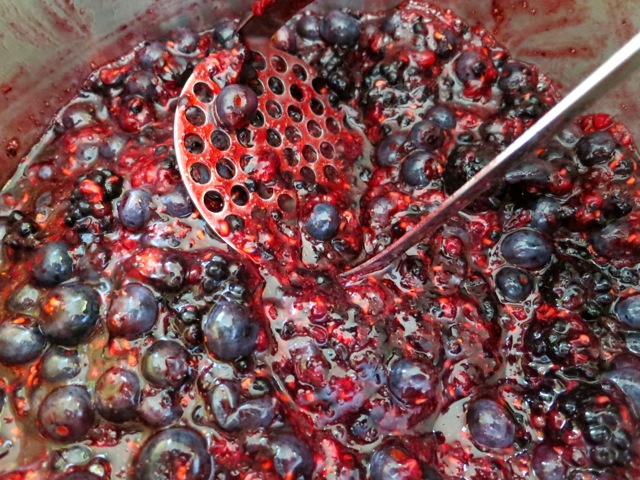
Crush Mixed BerriesThough the recipes in the book are “small-batch” we doubled the recipe because  we had bought so many good-looking berries.  Why not?

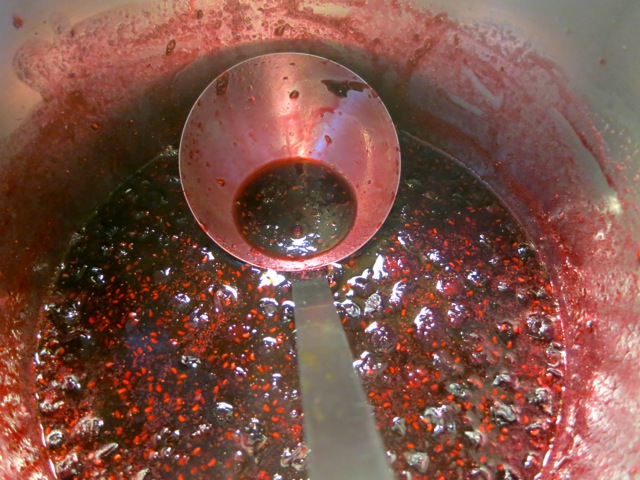
Cooked BerriesThis was a very simple recipe that produced the most delicious berry jam.  No pectin required.  We expected to have 8 half-pint jars of jam but ended up with 9 jars.  Since we only prepared 8 jars for canning we refrigerated the 9th jar and it was gone in a week! Have you ever had peanut butter and jam on toast for dessert? Scrumdiddlyumptious.

Mixed Berry Jam and Toast

Mixed Berry Jam

Southern Living ~ Little Jars, Big Flavors

Makes 9 half pint jars

Ingredients:

24 ounces (5 cups) blackberries

12 ounces (3 cups) raspberries

24 ounces (4 cups) blueberries

38 ounces sugar (6 cups)

2 tablespoons lime juice

Preparation

Rinse berries thoroughly under cold running water.  Remove and discard stems and any blemished berries.  Drain well.  Mash with a potato masher until evenly crushed.  Most of the blueberries will remain whole but that’s OK, they will soften once cooked and add a nice chunky texture to the jam.

Wash jars and place them in boiling-water canner.  Fill the jars and canner with water to the top of the jars.  Cover and bring water to a simmer over medium heat, do not boil.  Prepare the two piece closures.  Wash lids and place in a small saucepan and cover with water.  Heat to just a simmer but do not boil.  Do not heat screw bands.

While jars are simmering, bring crushed berries, lime juice and sugar to a rolling boil in an 8-quart stainless steel sauce pan or enameled Dutch oven over medium-high heat, stirring occasionally, until sugar dissolves.  Continue cooking, stirring often,  until it reaches 220 degrees on a digital thermometer (about 7 minutes).  Remove from heat and let foam settle (about 1 minute).  Skim off and discard any foam.

Lift the canner jar rack and fix into place on the rim of the canner. Remove one jar at a time from canner and empty hot water back into the canner. Place jar on a cutting board and place a canning funnel in the jar.  Ladle hot jam into jar leaving 1/4 inch head space.  With a clean damp cloth or paper towel wipe jar rim to remove any food residue.  Using a magnetic utensil, lift hot lid from water, center it on the  jar and place screw band on jar.  Tighten screw band evenly and firmly just until resistance is met.  Then increase to finger tip tight.  Do not over tighten.  Return jar to canner rack.  Continue filling jars individually until all jars are filled, then lower rack into canner and ensure that all jars are covered by 1 inch of water.  Cover canner and bring water to a full boil over high heat.  Process for 5 minutes, starting timer only when water reaches a full boil.

Remove jars from water, and let stand, undisturbed, at room temperature 24 hours.  You will hear the seals pop rather quickly once the jars are removed from the water.  If any of the lids do not seal, refrigerate the jam and enjoy right away.  Properly sealed jars will keep in your cupboard for up to one year, but why wait? Share them with your family and friends.  They will be delighted to receive a precious jar of homemade jam.

***We write the date the jam was made on the bottom of the jar with a Sharpie pen.

Canning, Fruit, Jams & Jellies, Recipes

Mango Strawberry Jam

August 15, 2013

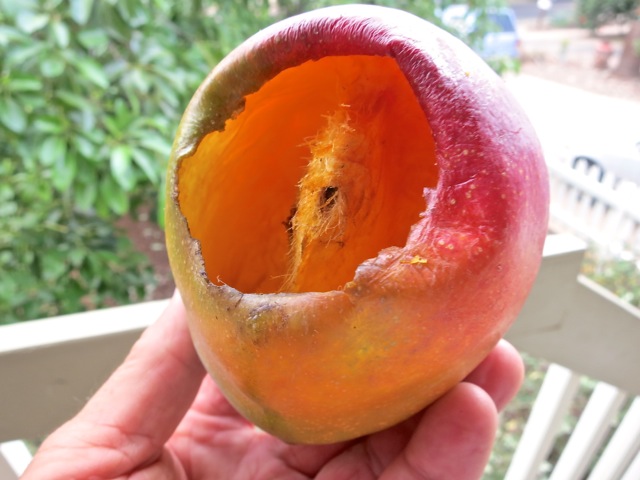
MangoesMangoes are our favorite fruit.  We have two mango trees in our yard, Rapoza and White Pirie.  Both provide us with sweet and juicy fruit throughout spring and summer and even occasionally into fall.  Apparently we are not the only ones who love mangoes.  This year the birds decided they couldn’t wait for the occasional mango that falls to the ground.  They have been devouring the mangoes while still on the tree.

Birds eat mangoThe nerve of those birds!

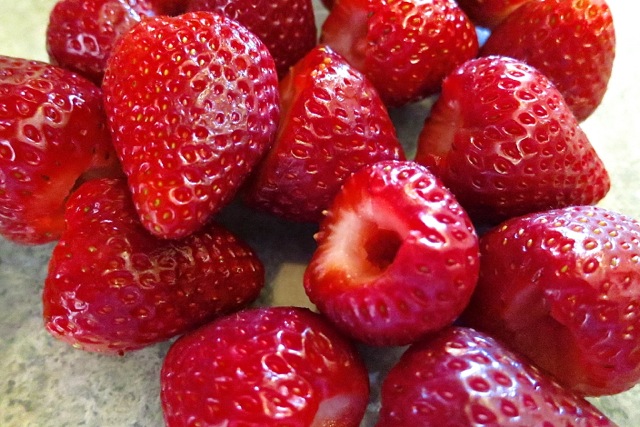
Hulled StrawberriesNo thanks to those hungry birds, we were still lucky to have enough fruit to make some jam this summer.  This time we mixed it up a bit and made mango-strawberry jam.  It turned out great.

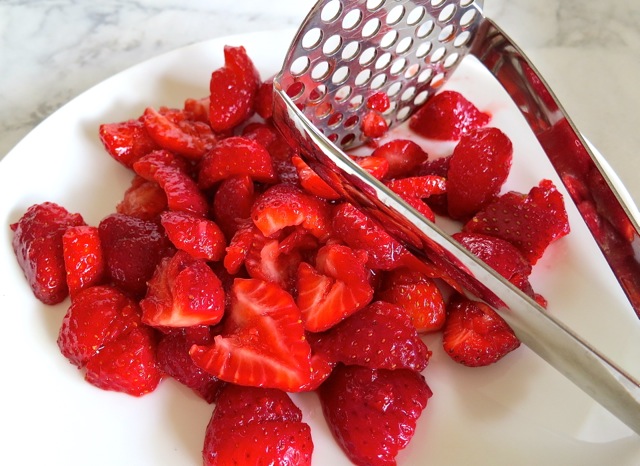
Crushed StrawberriesStrawberries are lightly crushed with  a potato masher to soften a bit and release their fragrant flavor.

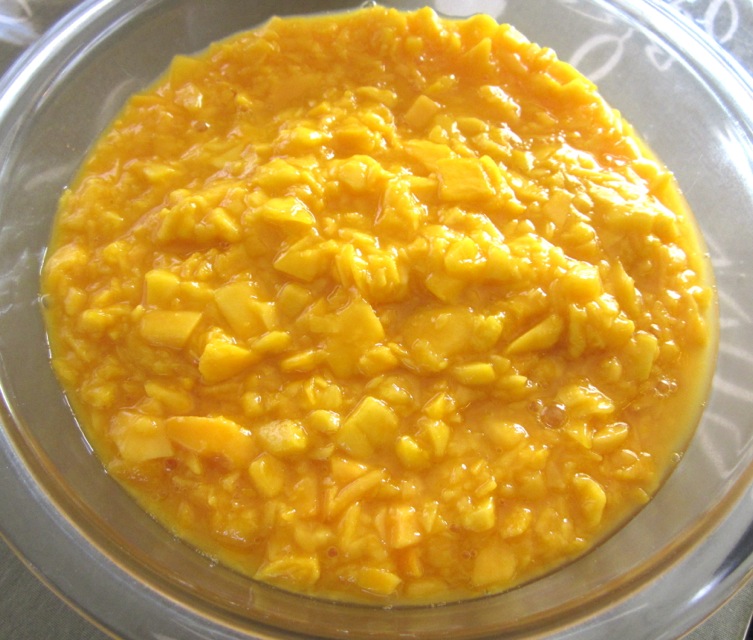
Chopped Mangoes

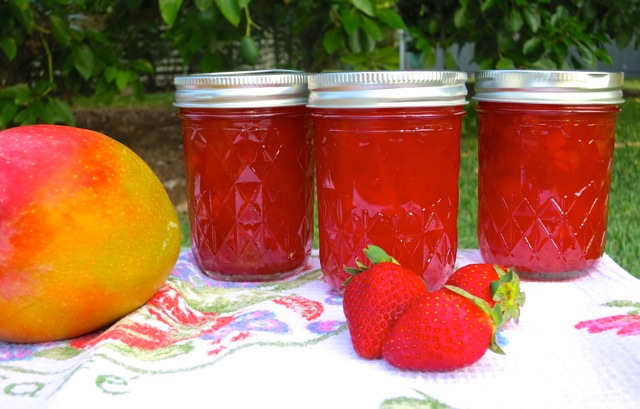
Mango Strawberry Jam Jars

Mango Strawberry Jam

Makes 7 half pint jars

Ingredients

1 1/2 cups packed crushed strawberries

3 1/4  cups diced mango (I cut the mango into small chunks then pulse a few times in the food processor.  Be careful not to pulse too much or you will end up with mango purée!)

1/4 cup fresh lemon juice

5 1/2 cups sugar (1038 g)

1 package powdered pectin

Preparation

Place jars in boiling-water canner.  Fill the jars and canner with water to the top of the jars.  Cover and bring water to a simmer over medium heat, do not boil.  Prepare the two piece closures.  Place lids in a small saucepan and cover with water.  Heat to just a simmer but do not boil.  Do not heat screw bands.

Wash and prepare strawberries and dice mangoes.  Using a potato masher lightly crush strawberries.  Measure out 1 1/2 cups strawberries and 3 cups diced mango. Measure sugar and set aside.

Transfer fruit to a large, deep stainless steel saucepan.  Add lemon juice to fruit.  Whisk in pectin until it dissolves.  Bring to a full rolling boil over high heat, stirring frequently.  Add sugar all at once.  Stirring constantly, return to a full rolling boil that cannot be stirred down.   Boil hard, stirring constantly for 1 minute.  Remove from heat and using a large slotted metal spoon skim off any foam.

Fill one jar at a time. Remove jar from canner and empty hot water back into the canner. Place jar on a cutting board and place a canning funnel in it.  Ladle hot jam into jar leaving 1/4 inch head space.  With a clean damp cloth or paper towel wipe jar rim to remove any food residue.  Using a magnetic utensil lift hot lid from water, center it on the  jar and place screw band on jar.  Tighten screw band evenly and firmly just until resistance is met.  Then increase to finger tip tight.  Do not over tighten.  Return jar to canner rack until all jam is used.  When all jars are filled lower rack into canner and ensure that all jars are covered by 1 inch of water.  Cover canner and bring water to a full boil over high heat.  Process for 10 minutes, starting timer only when water reaches a full boil.

At the end of the processing time, turn the heat off and remove canner lid.  Wait 5 minutes then remove jars without tilting.  Place jars upright on a rack or towel and let cool undisturbed for 24 hours.  After 24 hours check lids for proper seal.  Remove screw bands  and press down on the lid with your finger.  Sealed lids will curve downward and will show no movement when pressed.  Jars that haven’t sealed properly must be refrigerated immediately or reprocessed.  Wipe jars and store in a cool, dry place.  Label and date jars.

***If there is extra jam after filling all of the jars, transfer to a small container and store in the refrigerator.

Follow

Get every new post delivered to your Inbox

Join other followers: