Browsing Category

Gardening

Appetizers, Gardening, Italian, Lactose Free, Recipes, Side Dishes, Sous Vide, Vegan, Vegetarian, Veggies

Sous Vide Giardiniera

November 5, 2022

Giardiniera (Italian for pickled vegetables from the garden) are a delightful treat to serve alongside sandwiches or as part of an appetizer plate with salami, cheese and crackers. You will find it difficult to stop once you take a bite of these gorgeously colored, crispy vegetables. The sous vide method ensures the vegetables retain their crisp texture.

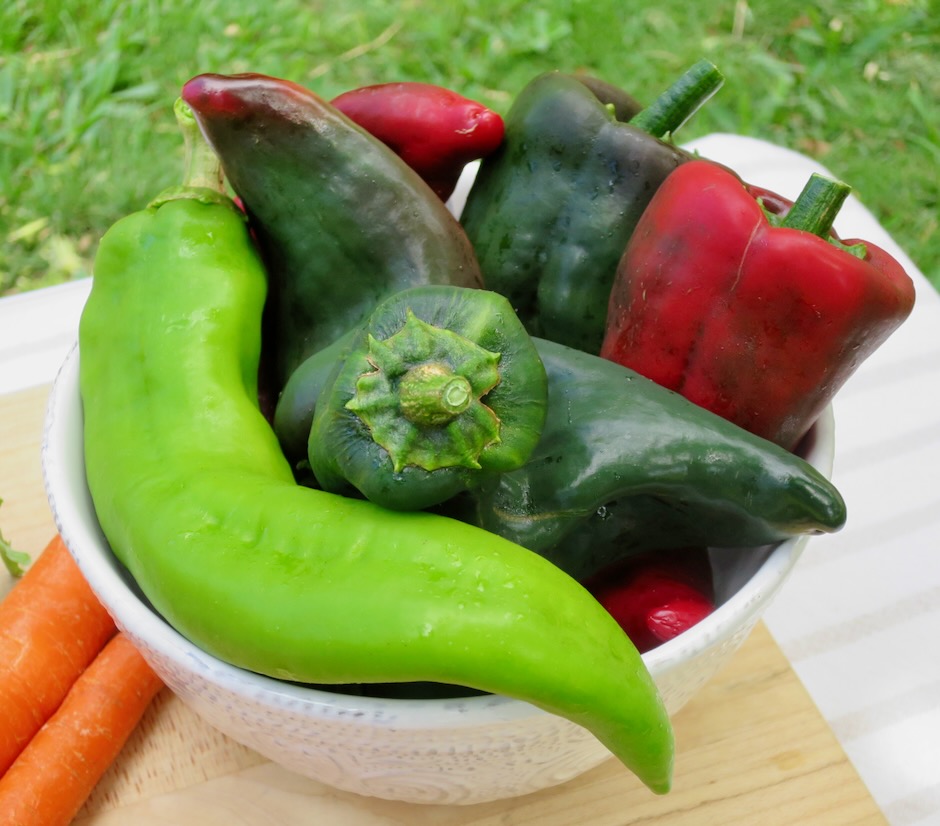
It all started with our homegrown poblano and anaheim peppers. I used some of the peppers for chile verde but we still had quite a few growing on the plants so the idea of pickling them came to mind.

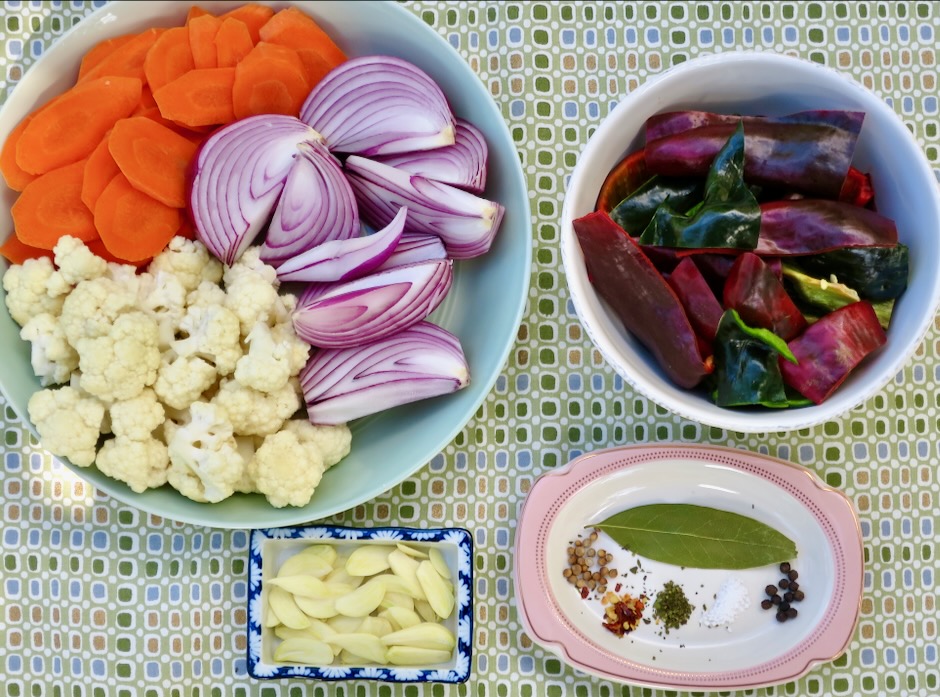
You’ll find that cauliflower, carrots, peppers (hot or mild), celery and onions are most commonly used in giardiniera. However, you can also use green beans, fennel, olives, or any other type of vegetable that will hold its shape well.

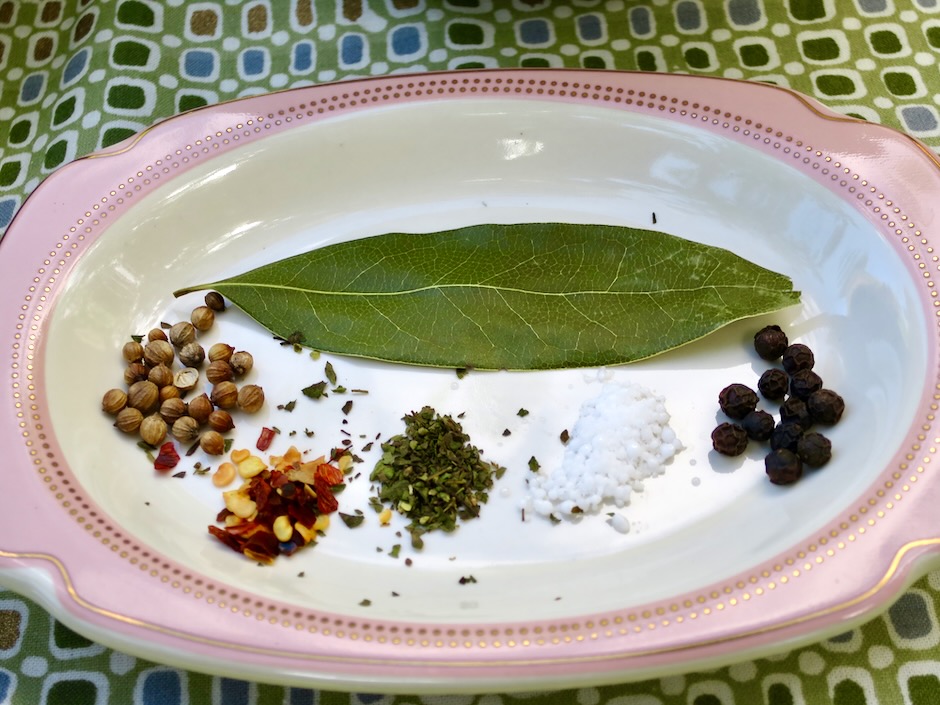
The seasoning for the brine is quite simple. Fresh garlic, bay leaf, whole coriander seeds, red pepper flakes, dried oregano, calcium chloride (for keeping pickles crisp), and black peppercorns.

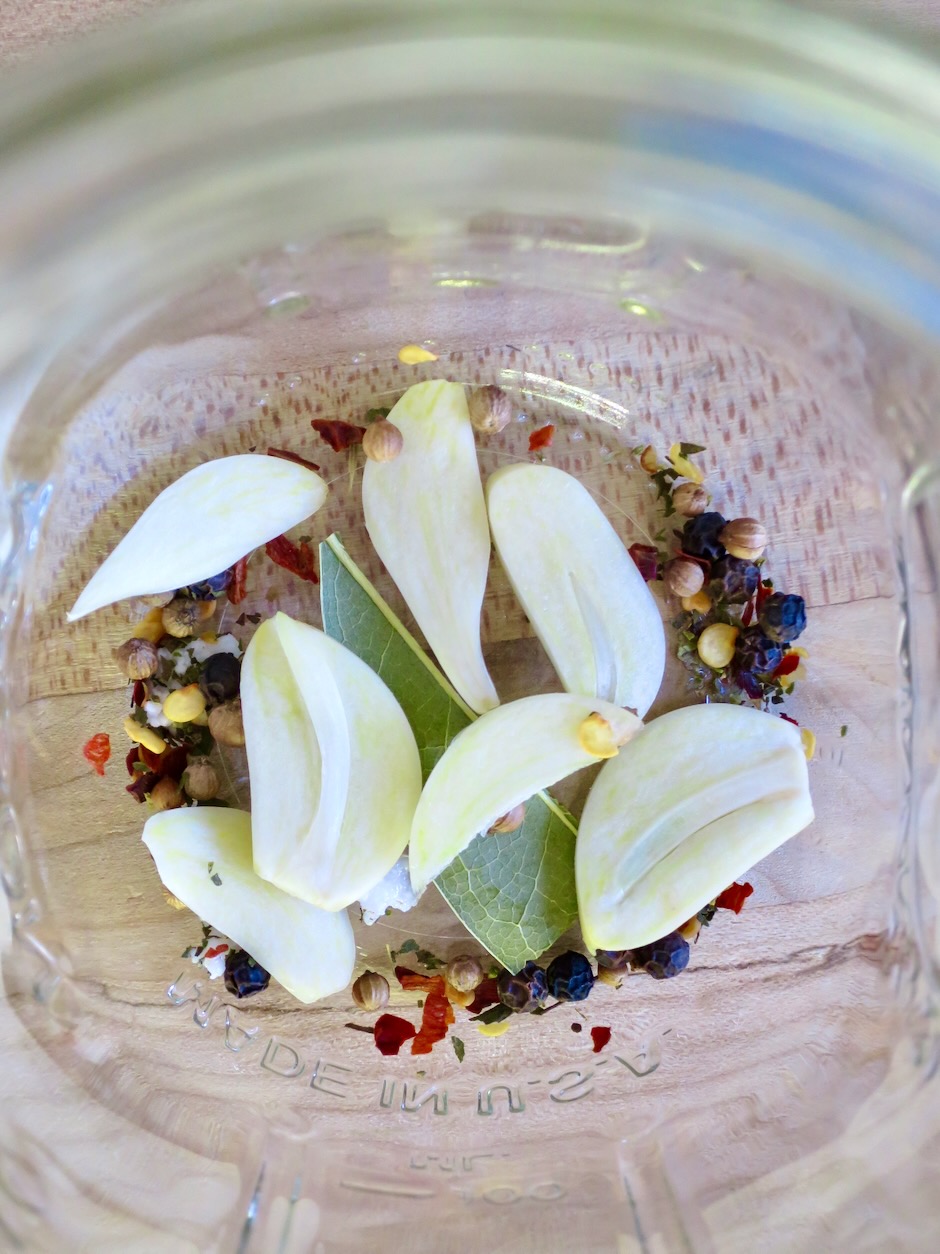
The seasonings are divided equally into 4 pint canning jars.

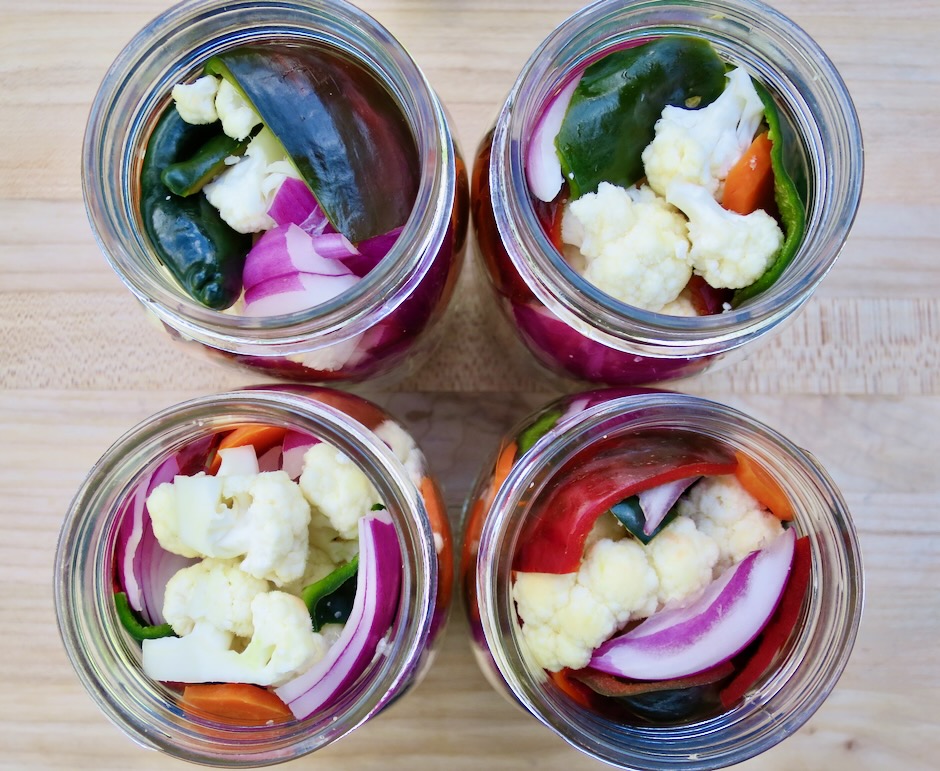
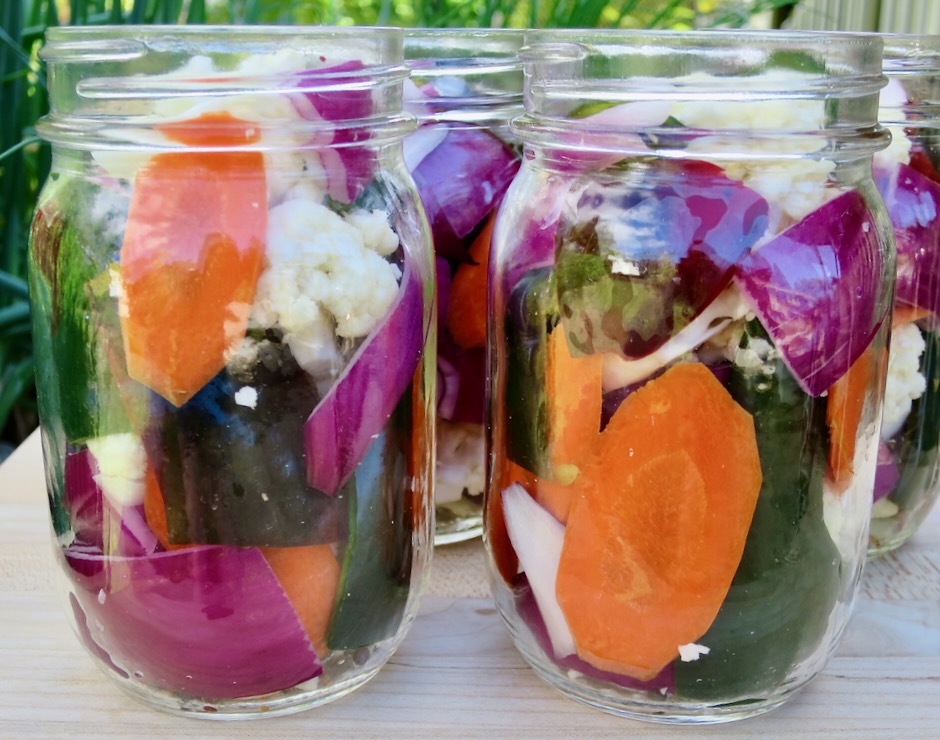
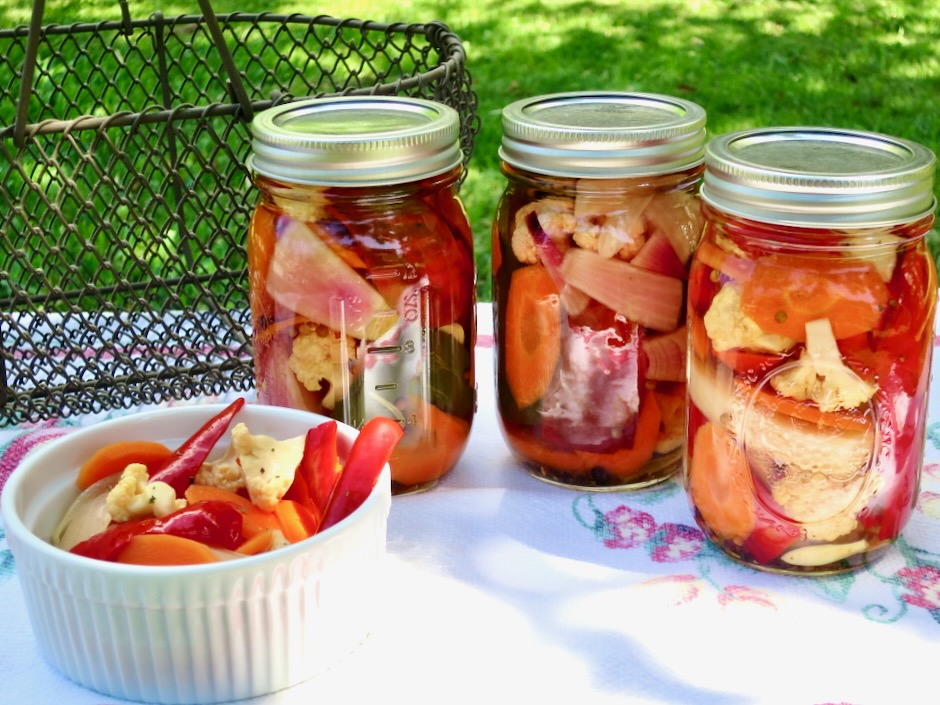
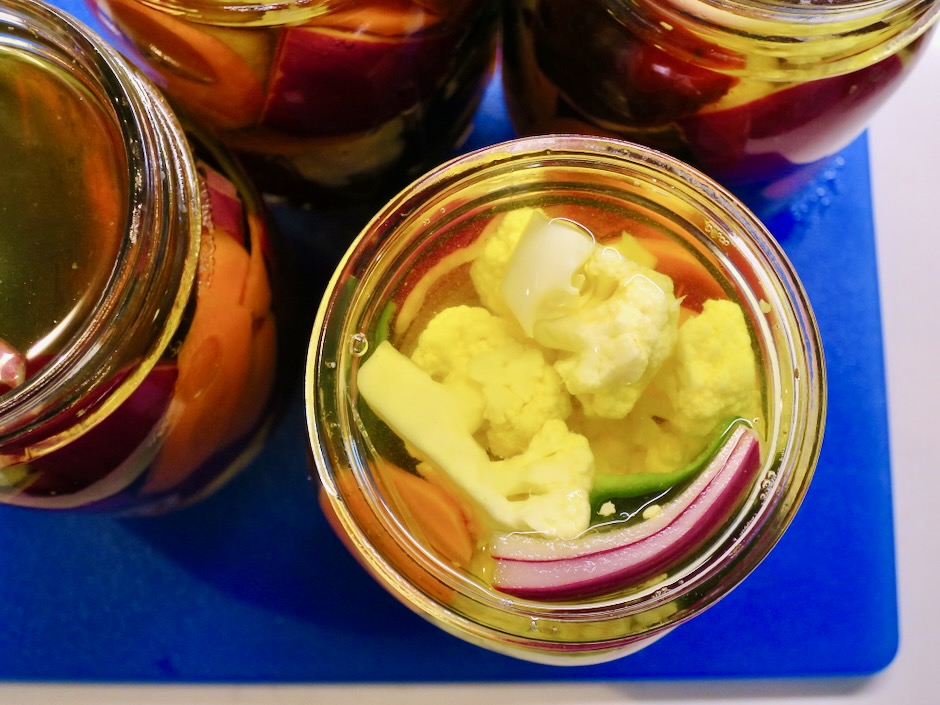
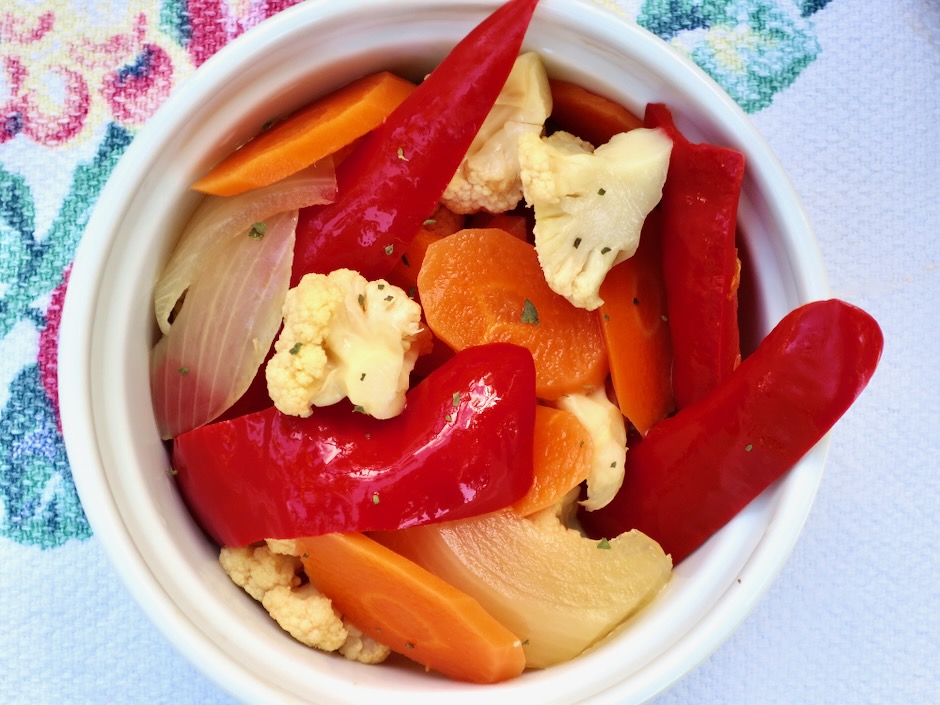
The jars are packed with the vegetable assortment before the brine is added. They are so colorful!

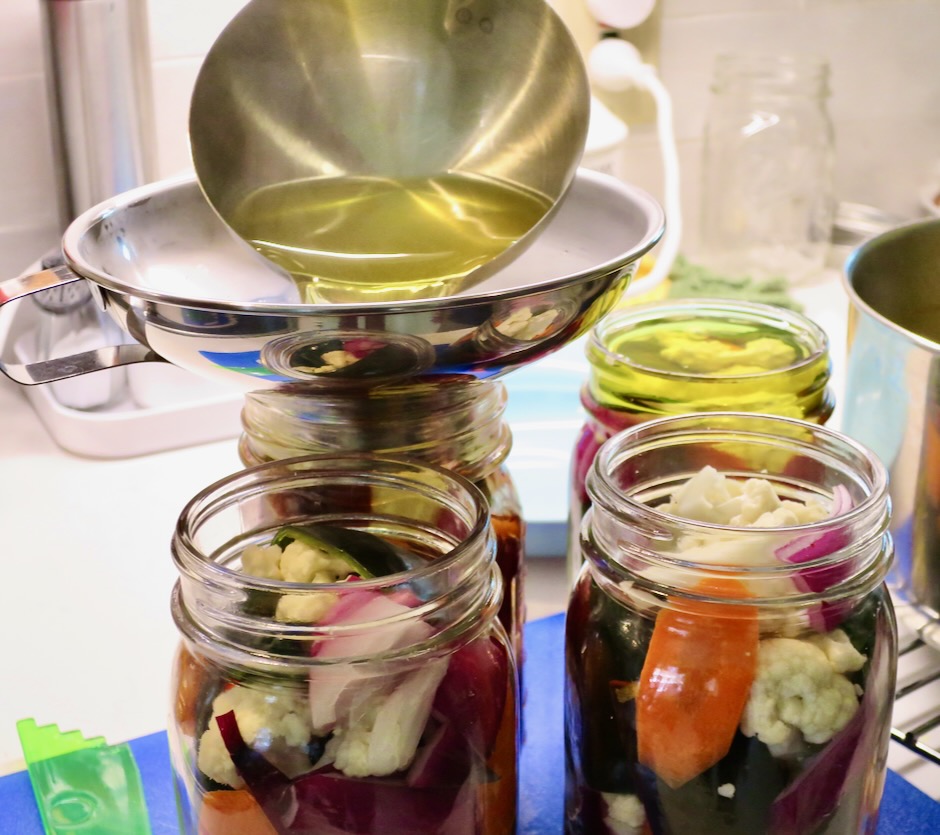
Hot brine is added to the jars before the sous vide process begins.

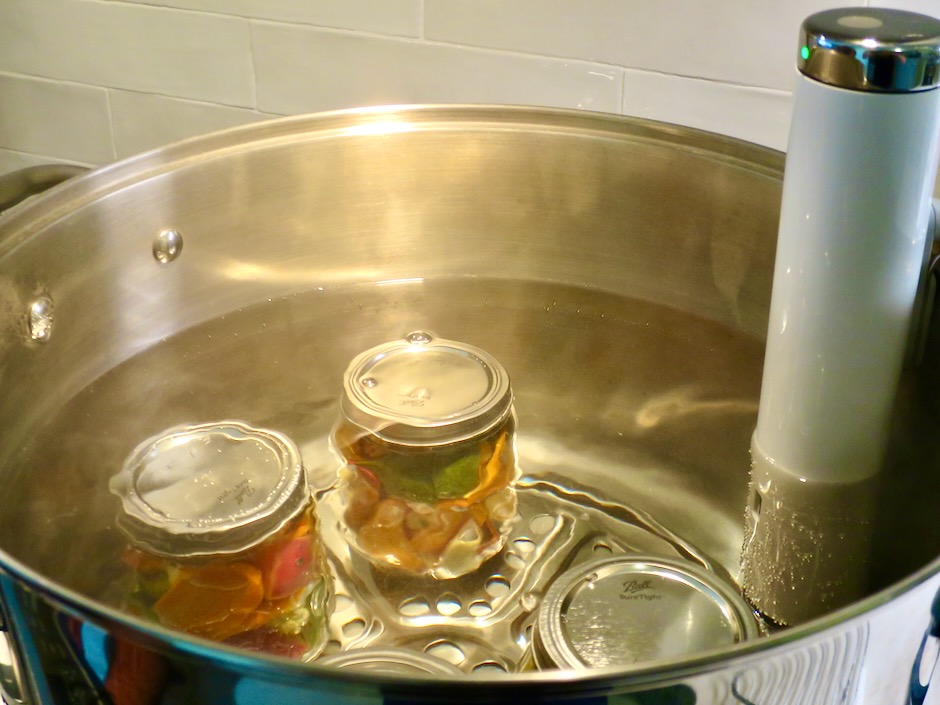
The giardiniera is canned via the sous vide pasteurization process for 30 minutes at 190F.

The finished product turned out to be one of our new favorite snacks. The assortment of vibrant colors and various shapes of the vegetables makes a beautiful jar of homemade pickles.

Sous Vide Giardiniera

Recipe by Kiyo
Servings

4

servings

Special Equipment: Sous Vide Precision Cooker (we use Joule), 4 1-Pint Canning Jars, Canning Pot
Recipe adapted from America’s Test Kitchen

Ingredients

  • Vegetables
  • 1 head cauliflower (about 1 3/4 pounds, 1 pound trimmed) cut into bite-sized pieces

  • 1 large carrot (6 ounces), thinly sliced on the diagonal

  • 1 red onion (10 ounces), peeled and cut into thick wedges

  • 10 ounces poblano or anaheim peppers red and green preferred, cut into short strips (substitute with bell peppers for very mild flavor or jalapeño peppers for spicy version or a combination)

  • Seasonings per jar
  • 1/4 teaspoon black peppercorns

  • 1/4 teaspoon whole coriander seeds

  • 1/4 piece bay leaf (from one whole bay leaf)

  • 1/8 teaspoon dried oregano

  • 1/4 teaspoon chili pepper flakes (optional depending on pepper heat)

  • 1/8 teaspoon calcium chloride (optional but recommended for crispness)

  • 1 medium garlic clove, thinly sliced

  • Brine
  • 2 1/2 cups distilled white vinegar

  • 2 1/2 filtered water

  • 2 tablespoons pickling salt (substitute kosher salt 2 tablespoons + 1 1/2 teaspoons, do not use salt that has additives)

  • 3 tablespoons granulated sugar

  • dash of turmeric

Directions

  • Cut vegetables as described above, set aside.
  • Wash and dry 4 pint sized canning jars. Place seasonings in each jar. Begin adding vegetables into each jar, pressing down firmly leaving 3/4-inch headspace. Set aside.
  • Fill canning pot with hot water to cover jars by at least 1-inch. Place pot on stove and heat to about 190F, checking with a digital thermometer. This is optional but gives you a head start to heating up the large pot of water. Once up to temperature turn off stove burner. Connect sous vide device to the pot and set temperature to 190F.
  • Meanwhile, in a medium saucepan, combine brine ingredients. Bring to a boil over medium-high heat, stirring until salt and sugar has dissolved. Pour the hot brine over the vegetables, leaving 1/2-inch headspace from the rim of the jar. Add lids and screw on rings until finger tight. Do not over tighten. Place jars in canner and set timer for 30 minutes when water temperature is 190F.
  • Once 30 minutes has passed, turn off sous vide device and let jars sit in the water for 5 more minutes. Remove jars to a cooling rack and let sit undisturbed for 24 hours.
  • Remove rings, check seals (unsealed jars should be refrigerated). Jars can be stored in your pantry for 1 year.
Dinner, Fruit, Gardening, Lactose Free, Recipes, Salad, Side Dishes, Vegan, Vegetarian

Avocado Salad with Herbs & Capers

March 26, 2021

Avocado Salad with Herbs & Capers

Now that it’s avocado season, we have been enjoying avocado sandwiches with cheddar, chunky guacamole, avocado toast, and avocado eggs Benedict.  The Green Gold tree in our back yard is a heavy bearer and the avocados are incredibly tasty.  So here we have a new addition to our ever expanding recipe file.  The tart dressing and herby flavors compliment the rich, velvety avocado slices.  This salad is a keeper.

Green Gold Avocados

The Green Gold avocado has to be one of the best varieties to grow in Hawaii (a cultivar developed by the University of Hawaii).  The trees are heavy bearers and produce beautiful fruit that are rich and creamy and known for their high oil content.  If you are thinking of planting an avocado tree I highly recommend seeking out the Green Gold.

Herb Dressing

The dressing is reminiscent of a chimichurri sauce. A good splash of red wine vinegar gives the right acidic touch to the herbs, jalapeño and garlic.

Green Gold Avocado, Green Onions, Jalapeño, Garlic, Cilantro & Parsley

The addition of a jalapeño makes for a nice pop of heat.  Since jalapeños vary in their level of spiciness, test the one you use and add more or less according to your taste.  If you don’t have one, sprinkle in some red chili flakes.  You could even use pickled jalapeños if you have those in your refrigerator.

Avocado Salad with Herbs, Capers & Grilled Sourdough Bread

My favorite way to serve this salad is with good, crusty grilled sourdough bread.  Drizzle some of the dressing onto the grilled bread, or scoop some of the avocado salad onto the bread.  Delicious.

Avocado Salad with Herbs, Capers & Grilled Sourdough Bread

Avocado Salad with Herbs & Capers
 
Adapted from NYT Cooking
Author:
Serves: 2
Ingredients
  • 1 medium bunch cilantro
  • 1 medium bunch Italian parsley
  • 2 scallions, very finely chopped
  • 1 medium garlic clove, finely grated or minced
  • 1 small or ½ medium jalapeño, seeded and very finely chopped
  • ¼ teaspoon fine sea salt
  • 1 tablespoon red wine vinegar
  • ¼ cup extra virgin olive oil
  • 2 medium avocados, peeled, pitted and sliced
  • 2 teaspoons capers, drained
  • Maldon sea salt or other flaky salt
  • freshly ground black pepper
Preparation
  1. Reserve ½ cup of both whole cilantro leaves and parsley leaves. Finely chop the rest of the leaves and transfer to a medium bowl. Add scallions, garlic, jalapeños, salt and vinegar. Stir in oil. Taste and add more salt, vinegar or both if needed.
  2. Scatter the reserved whole cilantro and parsley leaves over two serving plates. Fan the avocado slices over the top, and sprinkle lightly with salt to taste. Spoon herb dressing over the avocado slices, making sure to include the oil in the bowl (you may not use all of the dressing), and top with the capers. Sprinkle with Maldon sea salt and pepper. Serve with crusty grilled sourdough bread brushed with olive oil.


Appetizers, Dinner, French, Fruit, Gardening, Recipes, Side Dishes, Veggies

Tomato Galette

October 11, 2020

Tomato Galette with Thyme

One of the delights of a galette is its free-form crust.  The dough doesn’t require any trimming after being rolled out.  In fact, the ragged edges of the crust are what gives a galette its beautiful, rustic appearance.  Whether you are making a savory or sweet filling, a galette is a gorgeous dish to bring to the table.

Tomatoes & Thyme

This year we grew Katana beefsteak tomatoes (Kitazawa Seed Co.) which turned out to be our new favorite.  They are meaty, juicy, and so flavorful with a gorgeous deep red color.  They are the perfect tomato for this galette and on a side note, they make for an exceptional BLT sandwich.

Katana Beefsteak Tomatoes in the Garden

Sharp Cheddar Sprinkled Over Galette Dough

A sprinkling of sharp cheddar cheese is all you’ll need.  The small amount of cheese is just enough to add a bit of richness allowing the tomatoes to really shine.

Preparing Tomato Galette with Thyme

Choose tomatoes that are meaty and hold up well to slicing.  I prefer to peel the tomatoes (except for the mini ones) because the skin has a different texture than the tomato flesh and it is especially noticeable once tomatoes have been cooked.

Preparing Tomato Galette with Thyme

Fresh thyme and tomatoes are a perfect match.  I included a handful of colorful sweet cherry tomatoes that added a nice contrast with the red beefsteaks.

Tomato Galette with Thyme Ready to Bake

The edges of the dough are folded over the tomatoes to make a rustic crust that will bake up beautifully.

Tomato Galette with Thyme

Tomato Tart
 
Galette dough adapted from Dorie Greenspan's recipe
Author:
Serves: 4
Ingredients
  • For the dough:
  • 1½ cups (204g) all-purpose flour
  • ½ teaspoon sugar
  • ½ teaspoon kosher salt (1/2 teaspoon fine sea salt if using unsalted butter)
  • 1 Earth Balance Buttery Stick (8 tablespoons, 4 ounces, 113g), frozen for 30 minutes, then cut into small cubes
  • ¼ cup ice water
  • 1 tablespoon milk or cream for brushing the crust (optional)
  • For the tomato galette:
  • 1 cup coarsely grated sharp cheddar cheese, not packed
  • 1 pound meaty ripe tomatoes, peeled and sliced into ⅓-inch rounds
  • handful of assorted cherry tomatoes sliced (optional)
  • olive oil for brushing
  • Maldon sea salt or other flaky salt
  • freshly ground black pepper
  • a few fresh thyme sprigs
  • julienned basil (optional)
Preparation
  1. Place flour, sugar and salt in a food processor. Pulse a few times to blend. Add cubes of cold Buttery Sticks and pulse until mixture resembles coarse meal. Add some of the ice water and pulse. Continue to add more water, pulsing each time (about 3 additions). Use longer pulses until dough holds together when you pinch it (dough will not be formed into a ball). Transfer dough to a clean work surface and use the heel of your hand to smear small pieces of dough, which will help to incorporate the Buttery Sticks. Gather the dough and form into a flat disk. Place between 2 sheets of parchment paper. Roll out dough into a 12-inch circle. Place dough with parchment papers onto a sheet pan. Refrigerate for at least 2 hours. Keep refrigerated until you have all other ingredients ready to go.
  2. Preheat oven to 400 degrees ½ hour before you bake the galette. Meanwhile, place sliced tomatoes on paper towels if very juicy. This will help to avoid a soggy crust. Strip thyme leaves from stems and set aside.
  3. Remove galette dough from the refrigerator. Discard top layer of parchment paper. Sprinkle cheese over the dough leaving a 1½-inch border. Place tomatoes over the cheese in a single layer. Brush tomatoes with olive oil. Sprinkle Maldon or other flaky salt over the tomatoes along with a few grinds of black pepper. Sprinkle fresh thyme leaves over the top. Gently fold the pastry over the tomatoes, making pleats as you go. Brush edges with cream or milk (optional). Bake galette for about 35 minutes or until the crust is golden brown. Let galette cool for a few minutes before cutting into wedges. It is best served just warm or at room temperature. Sprinkle with julienned basil if using. The galette makes for a terrific meal served with a crispy green salad.


Breakfast, Dessert, Fruit, Gardening, Lactose Free, Recipes, Vegetarian

Lilikoi Pound Cake

September 12, 2020

Lilikoi Pound Cake

Lilikoi fruit has the most amazing fragrance.  The flowers on the vines are spectacular with delicate tendrils that stand out with their vivid purple centers.  The plants seem to do well in our warm, dry climate here in Kihei.  We grow both the yellow and purple varieties.  If we are not using the puree right away, it goes in our freezer to be used at a later date for lilikoi jelly, tarts, and pound cake.

Lilikoi Blossom

The gorgeous flowers of the lilikoi plant open up in the sunlight.  The bumble bees do their thing flying from flower to flower pollinating as they go.  You may notice the purple lilikoi tucked in the back of the vine.

Fresh Lilikoi from the Garden

The rind of the fruits are unassuming, however, once you cut the fruit in half, you’re in for a wonderful surprise.  The aromatic juicy pulp is a delight. Don’t let the seeds deter you from tasting one. They can be eaten if you don’t mind a bit of “texture” but for jelly, glazes, sauces and such, I leave them out.

Separating Pulp from Seeds

The easiest method for separating the pulp from the seeds is to use a blender on low speed.  I then use a food mill and discard the seeds. You may use a sieve if you do not have a food mill.

Lilikoi glaze

The lilikoi glaze is what takes this pound cake to another level.  It has become my favorite cake to bake these days.

Miyoko's Vegan Butter

Miyoko’s cultured vegan butter is a perfect alternative to real butter if you are lactose intolerant.

Judy & John's Fresh Eggs

Our neighbors Judy and John spoil us with their fresh eggs.  Not only are they superior to store-bought eggs (so much fresher) but they are lovely to look at with their various colors.  A real treat.

Lilikoi Pound Cake Out of the Oven

Preparing Pound Cake for Lilikoi Glaze

Though not particularly attractive at this point, poking holes is the best way to get the lilikoi glaze to seep down into the cake.  Spoon the glaze over the cake, wait for a few seconds for it to be absorbed and then continue with the remainder of the glaze.

Lilikoi Pound Cake

Lilikoi Pound Cake

This cake is tender, moist and not too sweet. Just how a pound cake should be.  Once the glaze sets, it develops into a crisp and light sugar coating over the top of the cake.

Lilikoi Pound Cake

Lilikoi Pound Cake
 
Recipe adapted from King Arthur's Lemon Glazed Pound Cake
Author:
Serves: 2 cakes
Ingredients
  • Cake:
  • ¾ cup + 2 tablespoons (14 tablespoons, 198g) Miyoko's vegan butter (substitute with Earth Balance Buttery Sticks or unsalted butter) at room temperature
  • ⅜ cup (85g) Green Valley lactose free cream cheese (or regular cream cheese), at room temperature
  • ½ teaspoon kosher salt
  • 1½ cups (298g) granulated sugar
  • 1¾ cups (206g) unbleached all-purpose flour (King Arthur recommended)
  • 1 teaspoon baking powder
  • 1 teaspoon vanilla extract
  • 1 tablespoon lilikoi puree
  • 5 large eggs, at room temperature
  • Glaze:
  • ⅓ cup lilikoi puree
  • ¾ cups granulated sugar
Preparation
  1. Preheat oven to 350 degrees. Line the bottoms of two 8½ x 4½-inch loaf pans with parchment paper and grease each pan.
  2. In a medium-sized mixing bowl, beat together the butter and cream cheese with a hand-held mixer until soft and fluffy. Add the salt, sugar, flour, and baking powder. Beat for 4-5 minutes; the batter will be stiff (use a firm spatula).
  3. Add the vanilla, 1 tablespoon lilikoi puree, and 1 egg. Beat well. Continue to add the eggs one at a time, beating well and scraping the sides and bottom of the bowl after each addition. When done, the batter will be very fluffy. Spoon the batter into the prepared pans.
  4. Bake the cakes for 35-40 minutes, or until a toothpick inserted into the center comes out clean.
  5. Remove the cakes from the oven and let cool on a wire rack for 15 minutes. Meanwhile, make the glaze by mixing the lilikoi puree and sugar together in a small bowl. Mix until well combined. The sugar will not have dissolved, but this is what gives the cake a light and crisp topping.
  6. Turn cakes out onto a wire rack (gently turn right side up) with a piece of aluminum foil underneath the rack. Poke holes with a wooden skewer all over the tops of each cake. Slowly spoon glaze over the cakes. Allow time for the cakes to absorb the glaze before adding more glaze. Slice and serve cake once it has cooled for several hours. You may freeze the pound cake for a few months. Wrap cooled cake in foil, place in plastic freezer bag.


Canning, Dinner, Gardening, Italian, Lactose Free, Pasta, Recipes, Sauces, Vegan, Vegetarian

Water Bath Safe Canned Roasted Tomato Sauce

May 24, 2020

Water Bath Canned Roasted Tomato Sauce

Last summer we had an incredibly large tomato harvest from just two Early Girl plants.  The fruit kept coming and soon they were piled high in baskets on our dining table.  Having made fresh sauce and freezing it on many occasions, our freezer was already maxed out with other foods with little room for more.  I was very happy to come across a water bath safe canned tomato sauce recipe.  This recipe is adapted from Jami Boys of An Oregon Cottage.  It is a great recipe and we are so happy to have found it.

Water Bath Safe Canned Roasted Tomato Sauce

Roasting the tomatoes gives the sauce a wonderful flavor and gorgeous color.  And being able to keep the jars shelf stable for 18 months is absolutely the way to go.  We regularly send care packages with homemade jams, peppers and pickles to our children.  We have increased our product selection with this terrific sauce.

Early Girl Tomatoes

Early Girls are amazing tomatoes.  They are juicy, meaty, and have a particularly deep red color.

Katana Beefsteak Tomatoes

This time we also harvested and used these beautiful Katana beefsteak tomatoes.

Katana Beefsteak Tomatoes in the Garden

Olive Oil, Balsamic Vinegar, Onion, Garlic & Dried Herbs

The halved and seeded tomatoes are placed in a pan with a bit of olive oil, dash of balsamic vinegar, onions, garlic, dried herbs and seasoning (salt & pepper) and roasted for about 40 minutes.

Halved and Seeded Tomatoes

I recommend using meaty tomatoes for a luscious, thick sauce.  If the tomatoes are more on the watery side, you may end up with mostly tomato skins once they have roasted.

Roasted Tomatoes

Roasted Tomatoes

The onions and herbs smell divine as the tomatoes roast.

Food Milling Tomatoes

The fastest and easiest way to remove the tomato skins is with a food mill.  Place a large pot under the food mill and process the tomatoes in batches.  If you don’t have a food mill, pinch off the skins then pulse the tomatoes a few times in a food processor.  Try to keep the sauce a little on the chunky side.  If you process the tomatoes too much, you will end up having to reduce the sauce quite a bit as it will be much thinner.

Water Bath Safe Canned Roasted Tomato Sauce

Water Bath Canned Roasted Tomato Sauce

Water Bath Safe Canned Roasted Tomato Sauce
 
Adapted from Jami Boys recipe
Author:
Serves: About 10 cups
Ingredients
  • 10 pounds meaty tomatoes (I used what we had growing in our garden; Early Girl and Katana)
  • 1½ cups diced onions
  • 2 - 3 large garlic cloves, finely chopped
  • 2 tablespoons extra virgin olive oil
  • 1 - 2 teaspoons balsamic vinegar (optional)
  • 3 teaspoons canning salt (or fine sea salt)
  • 2½ teaspoons dried oregano
  • 2 teaspoons dried basil
  • 1 teaspoon dried marjoram
  • ½ teaspoon freshly ground black pepper
  • citric acid (essential for canning safety): ¼ teaspoon per 16 ounce (pint) jar, ⅛ teaspoon per 8 ounce (1/2 pint) jar
Preparation
  1. Special equipment: Water bath canner, pint and/or half pint jars, lids and rings, 2 large roasting pans 14x10-inches, food mill for removing tomato skins, food processor or immersion blender.
  2. Preheat the oven to 425 degrees. Have 2 large 14x10-inch baking pans ready.
  3. Halving all ingredients to work in two batches, divide olive oil, balsamic vinegar, onions, garlic, dry herbs, salt and pepper between the two pans.
  4. Wash tomatoes and remove the cores. Cut each tomato in half, or if very large, cut into fourths. Gently squeeze the tomatoes to remove as many of the seeds as possible. Place seeded tomatoes cut side down on top of the ingredients in the prepared pans.
  5. Roast for 35-40 minutes, until most of the skins are a bit puffed and browned. Remove pans from the oven and let cool a bit. Transfer the tomatoes in batches to your food mill with a large pot underneath collecting the tomatoes and their juices. Using the large hole disk, process the tomatoes so the skins are left behind. Continue with all of the roasted tomatoes. Be sure to add all of the remaining pan juices and solids as well.
  6. You may keep the sauce chunky or pulse a few times with a food processor or an immersion blender to get to your desired consistency. If you do not have a food mill, pinch off the skins once the tomatoes are cool enough and pulse tomatoes in a food processor (just a few times for a nice thick sauce). Taste and adjust seasonings, adding more dried herbs or salt if needed. If the sauce is very thick, you may not need to reduce it. If you prefer a thicker sauce, bring sauce to a boil over medium-high heat, then lower the heat and simmer until sauce thickens. This could take anywhere from 20 - 45 minutes depending upon the type of tomatoes used. The tomato sauce must be hot before ladling into the jars.
  7. Prepare a water bath canner, wash jars and lids. Place clean jars into canner and bring to a simmer. Important safety step: Once jars are hot, remove all jars from the canner and add citric acid to each jar before continuing. Ladle hot tomato sauce into the hot jars one at a time, leaving ½-inch headspace.
  8. Wipe rims, attach lids and secure rings just finger tight. Place all jars back into the canner. Cover and bring to a boil. Once water is boiling process for 35 minutes. At the end of 35 minutes, turn off heat and let jars sit for 5 more minutes. Then remove jars to a cooling rack or towel-lined surface and let cool for 24 hours. Remove rings, check seals, label and store for 18 months. (The newer version of lids are good for 18 months). ***Do not replace dried herbs with fresh herbs. Using fresh herbs will change the pH (acidity)


Bread, Dinner, Fruit, Gardening, Italian, Lactose Free, Pasta, Recipes, Vegan, Vegetarian

Summer Tomatoes on Capellini & Sourdough Bread

April 23, 2019

This year we planted two Early Girl tomato seedlings in the garden and were they ever a great surprise.  They produced more than 100 pounds of gorgeous, sweet fruit.  Though the plants are looking rather scraggly after several months, they are still bearing fruit.  These tomatoes are deep red in color, meaty, have very few seeds and a tiny stem that’s not woody when you cut into the fruit. They are the perfect tomato.  Unlike the Big Beef tomatoes that we usually grow, the Early Girls are small in size.  My friend Hano and her sister Charlotte eat them as if they were apples!

With all of these tomatoes ripening faster than we knew what to do with them, I wanted to whip up something delicious that would show off their exceptional flavor.  This was the perfect recipe. It is a raw sauce so there’s no cooking involved and everything goes into one bowl.  This really is the way to showcase your homegrown tomatoes.  The original recipe that I wrote down nearly 10 years ago comes from Deborah Mele. It’s one of my favorite summer meals.

Homegrown Early Girl Tomatoes

This dish requires the best tomatoes you can find.  If you don’t grow your own, check out your local farmer’s markets.  The tomatoes that are sold at supermarket chains in our area just won’t do.  Heirloom tomatoes would work if you can find them.

Kalamata & Castelvetrano Olives

You may use kalamata olives or a mix of olives.  I added a few castelvetrano olives along with the kalamatas.

Summer Tomato Sauce

I love that this recipe can be thrown together in 20 minutes.  All you need is a good, sharp knife to chop up all the ingredients.

Summer Tomatoes on Toasted Sourdough Bread

My favorite way to serve the tomato sauce is on thin capellini noodles or on toasted sourdough bread.

Summer Tomatoes on Toasted Sourdough Bread

Toast the bread until it’s nice and crisp.  Then spoon the tomatoes over the top and let it sit for a minute so that it soaks up all of that delicious sauce.

Summer Tomatoes on Capellini

Summer Tomatoes on Capellini & Sourdough Bread
 
Adapted from Deborah Mele's recipe
Author:
Serves: 6
Ingredients
  • 2 pounds ripe tomatoes, coarsely chopped
  • 2 tablespoons finely diced sweet onion
  • 12 seedless kalamata olives, or a mix of olives, diced
  • 1½ tablespoons drained capers
  • 2 medium garlic cloves, minced
  • 1 tablespoon chopped Italian parsley
  • ½ teaspoon finely chopped oregano
  • ¼ cup finely chopped fresh basil
  • ¼ teaspoon red pepper flakes (optional)
  • 2 tablespoons red wine vinegar
  • ⅓ cup extra virgin olive oil
  • freshly ground black pepper and salt to taste
  • capellini or sourdough bread
  • grated parmesan (optional)
Preparation
  1. Combine tomatoes, onion, olives, capers, garlic, parsley, oregano, basil and red pepper flakes if using. Stir in red wine vinegar and olive oil. I normally don't add any salt since the olives and capers are salty. Add a few grinds of black pepper and salt to taste.
  2. Mix well, cover with plastic wrap and let sit at room temperature for a few hours. Serve over capellini pasta or thinly sliced and toasted sourdough bread. Scatter grated parmesan cheese over the top. Leftovers keep well in the refrigerator for another day.


Follow

Get every new post delivered to your Inbox

Join other followers: