Browsing Category

Eggs

Dinner, Eggs, Japanese, Kimchi, Korean, Recipes, Vegetarian

Cheesy Kimchi Noodles

January 23, 2022

Cheesy Kimchi Noodles

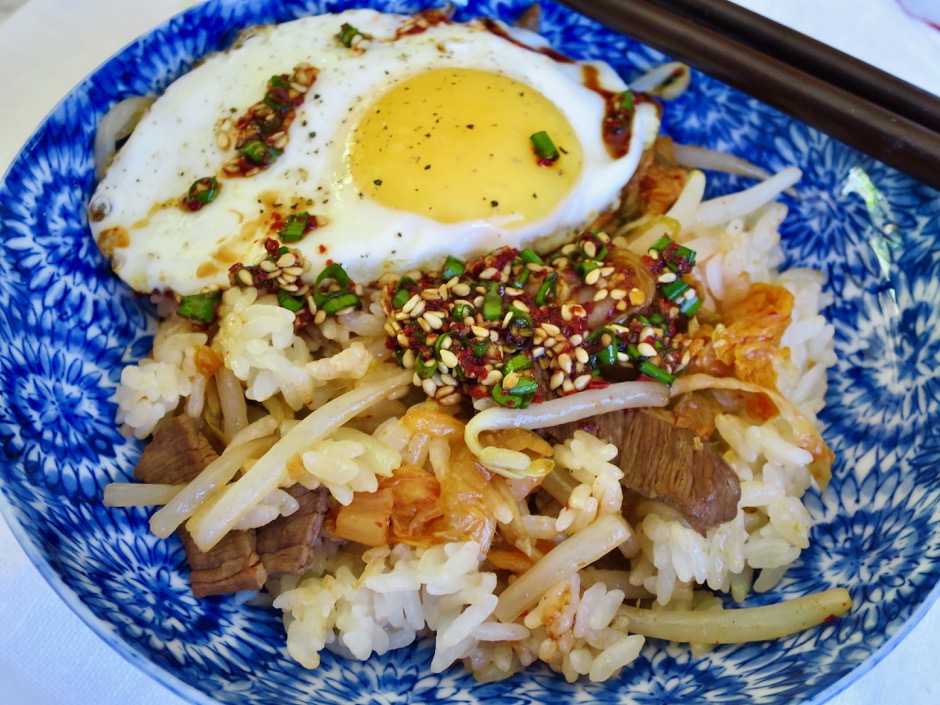
Recently I started making homemade kimchi and have been in love with it ever since.  I’ve always enjoyed kimchi but the store-bought brands available here are not particularly exciting.  Homemade kimchi tastes so fresh and has the perfect spiciness level that I crave.  Kimchi is wonderful as a side dish that compliments many meals.  A regular bowl of rice, kimchi and a fried egg suits me just fine.  So this recipe from NY Times Cooking just hits the spot.  The surprise ingredient (grated cheddar) makes this dish “out of this world” delicious.  Add a sunny side up egg and you will have a truly satisfying meal.  Even though you may not make kimchi at home, a good kimchi with a nice level of spiciness will work well.

Homemade Kimchi

I love the gorgeous color and flavor of the Korean gochugaru pepper flakes.  It adds a subtle heat and a slightly smoky flavor to dishes and is the star of kimchi and other Korean dishes.Kimchi, Cheddar Cheese, Green Onions, Sesame Seeds, Ramen

This is a relatively simple recipe with very inexpensive ingredients (= the bomb!).  We use our homemade sriracha in the sauce but the popular Huy Fong sriracha will work well too.

Sautéing Kimchi, Green Onions, Garlic & Sesame Seeds

Kimchi, scallions, garlic and sesame seeds are quickly sautéed before adding the sauce and the cooked ramen.  

Ramen Added to Kimchi

Using dried instant ramen noodles is very appealing as they are readily available, shelf stable, and cheap.  For this recipe you will want cook the ramen for half the time instructed on the package.  This will ensure they are not overcooked for the final dish.

Grated Cheddar Added to Kimchi Noodles

Homemade Kimchi

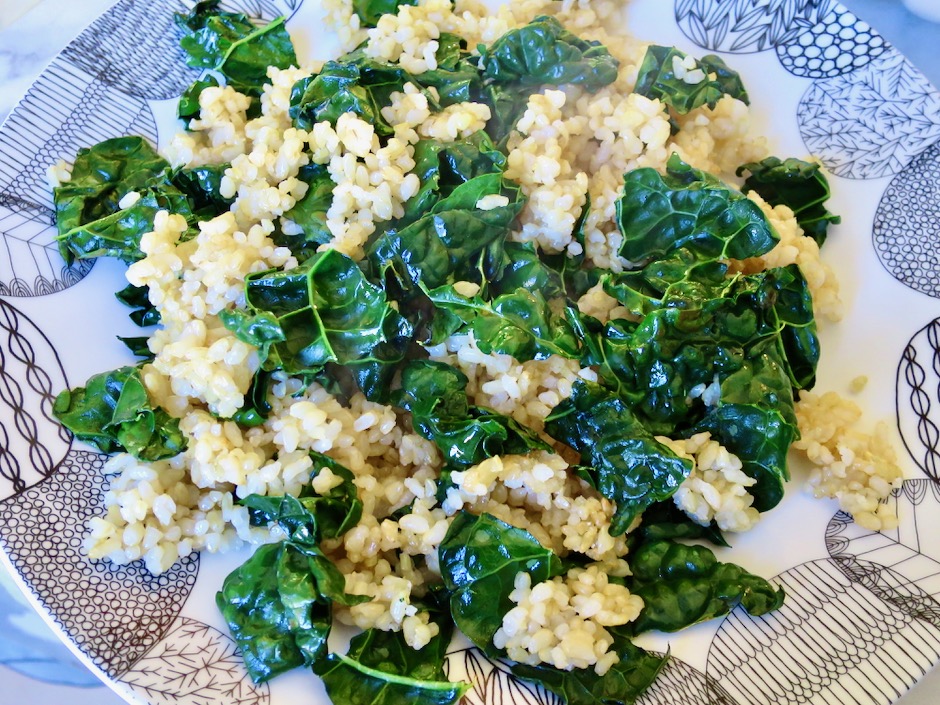
Yum! Homemade kimchi will keep well in the refrigerator for months.  

Cheesy Kimchi Noodles

Cheesy Kimchi Noodles
 
Adapted from NY Times Cooking
Author:
Serves: 2
Ingredients
  • Noodles: 7 ounces dried instant noodles such as Sapporo Ichiban instant ramen (2 packets, 3.5 ounce each, discard seasoning packets)
  • 1½ tablespoons canola oil
  • 2 eggs
  • 5 green onions, thinly sliced on the diagonal (reserve 1 tablespoon for garnish)
  • ½ cup packed kimchi, sliced into thin strips or chopped
  • 1 large garlic clove, peeled and finely chopped
  • 1 tablespoon black or white roasted sesame seeds, plus more for serving
  • ½ cup finely grated cheddar cheese
  • Sauce: 1 tablespoon sriracha (more if you prefer extra spicy and if kimchi is not very spicy)
  • 2 tablespoons low sodium soy sauce
  • 1 tablespoon sesame oil
  • 1 tablespoon water
  • 1 tablespoon medium dry sherry or shaoxing wine
Preparation
  1. Bring a medium saucepan of water to a boil over high heat. Add the noodles and cook until tender but springy. I cooked the Sapporo Ichiban noodles for 1½ minutes instead of 3 minutes. Drain and rinse under cold water right away to stop the cooking. You may toss the noodles with a splash of canola oil to prevent sticking, or just give them a quick rinse to loosen the noodles before adding back to the pan.
  2. Meanwhile, prepare the sauce: In a small bowl whisk the sriracha, soy sauce, sesame oil, water and sherry or shaoxing wine. Set aside
  3. Set a medium nonstick skillet over medium-high heat. Add ½ tablespoon canola oil and, once shimmering, crack in the eggs. Reduce heat to medium or medium low and cook until the whites are done and the edges are browned, 2 to 3 minutes. You can cover the pan for 30 seconds or so to help the whites set but only for a short time or the yolks will become cloudy and loose their beautiful bright yellow color. Transfer eggs to a plate.
  4. In the same skillet, heat the remaining 1 tablespoon canola oil over medium heat. Add the green onions, kimchi, garlic and sesame seeds and cook for 1 minute stirring frequently. Turn heat up to medium-high and add the drained noodles and most of the sauce. Toss to combine using tongs, for 30 seconds (any longer and the noodles will become too soft). Add more sauce if needed. Stir in the grated cheese until it melts. This will take just a few seconds. Turn off heat. Transfer noodles to serving bowls, top with fried eggs (salt and pepper eggs) and garnish with reserved green onions and extra sesame seeds. Serve immediately.
Bread, Dinner, Eggs, Fish, Italian, Lactose Free, Recipes, Sandwiches

Italian-Style Tuna Sandwich

August 29, 2021

Italian-Style Tuna Sandwich

We love all types of sandwiches but tuna is one of our favorites.  Whether it is tuna salad with mayonnaise, celery, onion and a dash of dried dill, or tuna in olive oil on John’s toasted sourdough, we enjoy all of them.  This particular version is a real treat.  A salsa verde made with Italian parsley, rich olives, briny capers and anchovy fillets plus zesty lemon and olive oil make this sandwich very special.  The salsa verde is refreshing and pairs well with the tuna and hard-boiled eggs.  This is truly a sandwich “to die for.”

Italian-Style Tuna Sandwich

Tuna in Olive Oil Selection

We buy all sorts of tuna in olive oil.  One of my favorites is As do Mar.  You can find this brand on line or in specialty stores, but I have never seen it in Hawaii markets.  Genova tuna is available at Costco for a very fair price.  Ortiz is another high-end tuna.  The small cans are perfect for two.  We used Ortiz tuna in the jar, above right, for this sandwich.  Beautiful thin tuna steaks are delicious.  You can find this item at Whole Foods in Kahului.  You will pay a dear price for this luxury item, but think of it as a treat that you deserve now and then.  

Italian Parsley from the Garden

We always have Italian parsley growing in the garden.  It is the herb I use most.  It’s great to be able to snip a few sprigs off the plant when you need them.  

Anchovies, Garlic, Lemon Zest, Olives & Capers

Ortiz tuna is top notch and so are their anchovies.  There is no comparison to the ones you might find at the grocery stores.  You can find Ortiz anchovies in the    R. Fields section at Foodland Farms in Wailuku.

Salsa Verde

The salsa verde is delicious and gorgeous.  If you have leftovers, mix it up with pasta shells to make a delicious salad.  Toss some good feta into the salad and you’re all set.

Italian-Style Tuna Sandwich

Be sure to serve the sandwich on good bread.

Italian-Style Tuna Sandwich

Italian-Style Tuna Sandwich
 
Adapted from NYT Cooking
Author:
Serves: 2
Ingredients
  • Salsa Verde: 1 cup lightly packed Italian parsley leaves, washed and dried
  • ½ cup extra-virgin olive oil
  • 1 medium-large garlic clove, minced
  • 2 tablespoons roughly chopped green olives
  • 2 large anchovy fillets, finely chopped
  • 1 tablespoon capers, drained
  • zest of 1 lemon
  • pinch of crushed red pepper
  • freshly ground black pepper
  • Sandwiches: 2 ciabatta rolls or 1 small baguette
  • lettuce leaves or arugula
  • 6 ounces best quality tuna in olive oil, drained
  • 2 hard boiled eggs, halved
Preparation
  1. Whiz parsley leaves and ½ cup olive oil in a food processor or blender to a pesto-like consistency, then transfer to a small bowl. Add garlic, chopped olives, anchovies, capers, lemon zest and red pepper to parsley mixture. Stir well. Season with freshly ground black pepper to taste. The olives, anchovies and capers are quite salty on their own so additional salt may not be needed.
  2. Split ciabatta rolls or baguette with a serrated knife. Spread cut sides with salsa verde. Put a few lettuce leaves on the bottom piece of the bread and arrange tuna evenly over the lettuce. Top with sliced hard-boiled eggs (salt and pepper each piece). Drizzle with more salsa verde then press sandwich closed. Cut baguette into two even portions and serve.


Dinner, Eggs, Japanese, Lactose Free, Pasta, Recipes, Vegetarian

Life Changing Udon

July 10, 2021

Life-Changing Udon with Soft Boiled Egg and Fresno Pepper

In the May issue of Food & Wine magazine, Hetty McKinnon (cookbook and food writer) tells the story of her visit to Tokyo and how a simple bowl of udon became life-changing.  The noodles were toothsome, served with a perfectly cooked jammy egg, green onions and a bit of flavorful broth.  It was served with a generous amount of freshly ground black pepper scattered over the top which paired perfectly with the udon.  After reading the article, I was determined to prepare this noodle dish.  Now, more than a month has gone by and I’ve made it at least three times, and every bowl has been as delightful as the last.  

Life-Changing Udon with Soft Boiled Egg

Fresh Udon

Sun Noodle sells fresh udon at Island Grocery market in Kahului.  I will go out of my way to pick up a package of their excellent udon and ramen even if they are the only items I’ll buy that day.

Fresh Eggs

I just love eggs, especially ones with soft yolks.  The eggs I made for this dish are boiled for exactly six minutes and 50 seconds.  They are quickly transferred to an ice bath to stop the cooking.  You can use them as is, or make soy sauce eggs if you have extra time. Either way, the egg turns out perfectly with jammy centers and fully cooked whites.

Green Onions & Soy Sauce Eggs

It’s such a simple recipe with easy to find ingredients.  The baby bok choy adds color and crunch, but it is optional.  Don’t skip the green onions, egg, and pepper. Sometimes I will sprinkle shichimi togarashi pepper over the noodles to add a bit of spice to the dish.  This recipe does not have a lot of broth.  If you prefer more, increase that part of the recipe. However, I find that there is just enough to keep the udon hot, and the soup gets slurped up when the bowl is empty of noodles.  

Life-Changing Udon with Soft Boiled Eggs

Life Changing Udon
 
Adapted from Hetty McKinnon's recipe
Author:
Serves: 4
Ingredients
  • 4 large eggs
  • 2 cups vegetable stock
  • 3 tablespoons less sodium soy sauce
  • 2 teaspoons mirin
  • 1½ pounds (24 ounces) fresh udon noodles
  • 4 tablespoons Buttery Sticks, divided (or regular unsalted butter)
  • ½ cup finely sliced green onions, green and white tender stems
  • freshly ground black pepper
  • 1 tablespoon sesame oil
  • flaky sea salt for the eggs
  • shichimi togarashi Japanese pepper, optional
Preparation
  1. Fill a small saucepan with water; bring to a boil over high heat. Gently lower eggs into boiling water. Set timer for 6 minutes and 50 seconds. Once water returns to boiling, lower the heat slightly to maintain a gentle boil. Meanwhile, fill a medium bowl with ice water. Once the eggs have cooked, transfer to the ice water bath immediately. Let cool for a few minutes before peeling.
  2. Bring a large saucepan of water to a boil over high heat. Meanwhile, stir together the vegetable stock, soy sauce, and mirin in a small saucepan. Cook over low, stirring occasionally, until hot, about 6 minutes. Add noodles to boiling water and cook according to package directions for al dente. Drain noodles, and divide evenly among 4 bowls.
  3. Pour hot soy sauce broth over each bowl of noodles. Add a tablespoon of butter to each bowl and allow to melt into the noodles and broth. Halve the eggs and top each bowl with 2 egg halves. Sprinkle a bit of flaky sea salt and black pepper over the eggs. Add the green onions and scatter a generous amount of freshly ground black pepper over the noodles. Finish with a drizzle of sesame oil before serving. Serve with shichimi togarashi pepper (optional).


Dinner, Eggs, Lactose Free, Pasta, Recipes

TikTok Ramen

April 15, 2021

TikTok Ramen

This tasty ramen recipe comes from TikTok, the wildly popular social app that lets users create and share a diverse assortment of short videos.  Since the videos are quick, anywhere from 15 seconds to a minute or so, you have to move fast.  That’s what is so cool about this recipe.  Besides cooking the noodles in a pot, the rest of the dish is made in just one pan which is music to my ears.

TikTok Ramen Ingredients

Not only is this a fast recipe, it is inexpensive to boot.  And adding Everything Bagel seasoning is ingenious!

Instant Ramen

Instant Ramen

Instant ramen is one of the most inexpensive items you will find in the Asian section of your grocery store.  When on sale, they cost a mere 50¢ or less per package.  I always keep a stash of them in my cupboard.  They also star in this crunchy cabbage salad.

Butter, Garlic & Red Pepper Flakes

Butter (lactose free for me) along with garlic and red pepper flakes are stirred together in a pan until the garlic softens a bit.  Soy sauce and brown sugar are added to make a sauce full of our “5th taste,” umami.

TikTok Ramen Sauce

TikTok Ramen

The cooked ramen gets tossed with the sauce before two eggs are added to the pan.

TikTok Ramen with Scrambled Eggs

And as mentioned earlier, this is a one-pan meal.  There’s no need to whisk the eggs in a separate bowl, just add to the pan and scramble alongside the ramen.  

TikTok Ramen with Scrambled Eggs

TikTok Ramen

This ramen dish reminds me of Sam Sato’s dry mein which is similar in that there is no broth, just a very delicious sauce coating the noodles.  Leftovers are still tasty and fresh if you want to save some for a snack later.

TikTok Ramen

TikTok Ramen
 
Adapted from TikTok Ramen
Author:
Serves: 2
Ingredients
  • 2 packages instant ramen (discard seasoning packets)
  • 2 tablespoons vegan butter (or regular butter)
  • 1 teaspoon minced garlic
  • ½ teaspoon red pepper flakes
  • 2 teaspoons brown sugar
  • 2 tablespoons Kikkoman Less Sodium soy sauce
  • 2 large eggs
  • Everything bagel seasoning (you can make your own version with sesame seeds, poppy seeds, dried minced garlic and onion, flaky sea salt)
  • 2 green onions, thinly sliced
Preparation
  1. Cook the ramen 1 minute less than package directions. Drain immediately in a colander and rinse under cool water to stop the cooking. Drain again and set aside.
  2. In a medium pan, heat the butter over medium heat. Add garlic and red pepper flakes. Stir until garlic has softened, about 3 minutes, adjusting heat as needed so the garlic does not burn. Stir in the brown sugar and soy sauce. Add drained noodles to the pan and using tongs toss the noodles with the sauce.
  3. Push the noodles to one side of the pan and turn the heat up a bit. Add the eggs to the pan, opposite of the noodles. Gently scramble the eggs until just set. Toss eggs with noodles. Remove from heat and divide noodles between two bowls. Sprinkle everything bagel seasoning over the noodles along with the sliced green onions. Serve right away.


Breakfast, Dinner, Eggs, Lactose Free, Recipes, Rice Dishes, Side Dishes, Veggies

Kale Fried Rice

March 8, 2021

Kale Fried Rice

There are countless versions of fried rice.  It can be a stand-alone meal or a splendid side dish. Some of my favorites are ramen fried rice and kimchi and Spam fried rice.  Quick and inexpensive, this particular version couldn’t be easier to make.  Leftover brown rice with wilted kale makes for a healthy meal.  I make it regularly and I don’t think I’ll ever tire of it.

Kale, Brown Rice, Turmeric, Eggs, Lime, Garlic, Ginger, Green Onions

Don’t skip the turmeric.  It’s what gives this dish a slightly earthy flavor and a gorgeous color.

Sliced Garlic, Kale, Light Green Onions, Ginger, Green Onions

Once the rice is warmed and crisped, handfuls of kale get tossed into the pan until wilted.  If your pan is hot enough, some of the kale will get a bit charred.  This adds another level of flavor to the fried rice.

Garlic, Green Onions, Ginger

The garlic is cut into thin slices then lightly browned until the edges are crisp.  Fresh ginger and green onions are stir-fried with the garlic before adding the turmeric and eggs.

Kale Fried Rice

You’ll end up with a gorgeous pan of fried rice that is healthy and delicious.  

Kale Fried Rice

Kale Fried Rice

I like to serve the fried rice with sriracha sauce which adds the perfect kick to this meal.  Sprinkle sliced green onions and squeeze fresh lime juice over the rice just before serving.

Kale Fried Rice
 
Adapted from Bon Appetit
Author:
Serves: 2
Ingredients
  • 6 green onions, thinly sliced (set aside a tablespoon for serving)
  • 2 tablespoons grapeseed oil, divided (or another mild flavored oil such as canola)
  • 2 cups cooked short grain brown rice (day old is best)
  • 1 small bunch Tuscan kale, ribs and stems removed, leaves torn (about 2-3 ounces)
  • 2 small garlic cloves, thinly sliced
  • 1 tablespoon finely chopped peeled ginger
  • ¾ teaspoon ground turmeric
  • 2 large eggs
  • lime wedges for serving
Preparation
  1. Heat 1 tablespoon of oil in a large nonstick skillet over medium heat. Add rice, breaking up any lumps. Pat down into an even layer and cook, undisturbed until beginning to crisp, about 3 minutes. Toss and continue to cook, adding kale by the handfuls and letting wilt slightly before adding more. Toss occasionally, until rice is heated through and all the kale is wilted, about 3 minutes. Season with salt and transfer to a plate.
  2. Heat remaining 1 tablespoon oil in same skillet over medium-low heat. Add garlic, ginger, and green onions, stirring often until garlic is lightly browned (careful not to burn) around the edges, about 1-2 minutes. Turn heat up to medium sprinkle turmeric over, then stir in eggs. Using a pair of chopsticks or a heatproof spatula, blend whites and yolks with garlic, ginger, and green onions until the eggs are barely set. Return rice and kale to the skillet, tossing occasionally until hot, adjusting heat as necessary. Divide fried rice between two plates and top with reserved green onions. Serve with sriracha sauce.


Beef, Dinner, Eggs, Korean, Lactose Free, Recipes, Rice Dishes, Veggies

Korean Soybean Sprouts Rice Bowl

September 26, 2020

Soybean Sprouts Rice Bowl with Sunny-Side Up Egg

To say that I love rice would be an understatement, so making this umami filled rice bowl was an easy decision.  Once you do a little prep work, everything goes into a rice cooker.  It’s a suitable meal for lunch or dinner.

Soybean Sprouts & Kimchi

Even thought the sprouts are cooked with the rice and other ingredients, they still retain a nice texture.  The kimchi adds such a wonderful flavor to the rice, with just a bit of heat.

Soybean Sprouts

Soybean Sprouts, Kimchi & Filet Mignon over Rice

The original recipe from Korean Bapsang calls for adding a bit of seasoned beef or pork to the rice dish as an option. However, you can omit this for a vegetarian version. I have cooked this dish with and without meat and both are equally delicious.  All ingredients are added on top of the rice (pictured above) then cooked together.

Cooked Soybean Sprouts, Kimchi & Filet Mignon over Rice

Once your rice timer goes off, you are ready to serve your meal.

Rice Bowl Sauce

The sauce is drizzled over the rice bowl.  I couldn’t resist adding a sunny-side up egg to mine.

Soybean Sprouts Rice Bowl with Sunny-Side Up Egg

Soybean Rice Bowl
 
Adapted from Korean Bapsang blog
Author:
Serves: 2
Ingredients
  • 1 cup (measuring cup for rice cooker) short grain white rice
  • Vegetables & Meat:
  • 8 ounces soy bean sprouts, rinsed and drained well
  • 3 ounces filet mignon, thinly sliced (omit meat and next 4 ingredients for vegetarian version)
  • ½ teaspoon minced garlic
  • 2 teaspoons soy sauce
  • 1 teaspoon mirin
  • 1 teaspoon sesame oil
  • ½ cup kimchi, thinly sliced
  • 1 tablespoon kimchi juice
  • Sauce:
  • 2 tablespoons soy sauce
  • 1 teaspoon sesame oil
  • ½ teaspoon gochugaru (Korean red pepper flakes)
  • 1 teaspoon roasted sesame seeds
  • ½ teaspoon garlic, minced
  • ½ teaspoon sugar
  • 2 green onions, finely chopped
  • 2 sunny-side up eggs (optional)
Preparation
  1. Rinse rice and drain well. Place in rice cooker. Add water to 1 cup line minus 1 tablespoon.
  2. Marinate meat (if using) with garlic, soy sauce, mirin and sesame oil. Meanwhile, heat a small skillet with a 1½ teaspoons of canola oil over medium high heat. Stir fry kimchi for 2 minutes, adding some juice from the kimchi to intensify the flavor. Remove to a small plate. Add meat (if using) to the same pan and stir fry for a minute or two, just until barely cooked through.
  3. Spread soy bean sprouts over the the rice, followed by the kimchi, and meat. Start the rice cooker (do not use quick cooking option).
  4. While the rice is cooking, mix all of the sauce ingredients together in a small bowl. When the rice is nearly done, cook your sunny-side up eggs. When the rice timer goes off, gently fluff the rice distributing the bean sprouts, kimchi and meat. Serve in bowls with sauce drizzled over the rice and top with sunny-side up eggs.


Follow

Get every new post delivered to your Inbox

Join other followers: